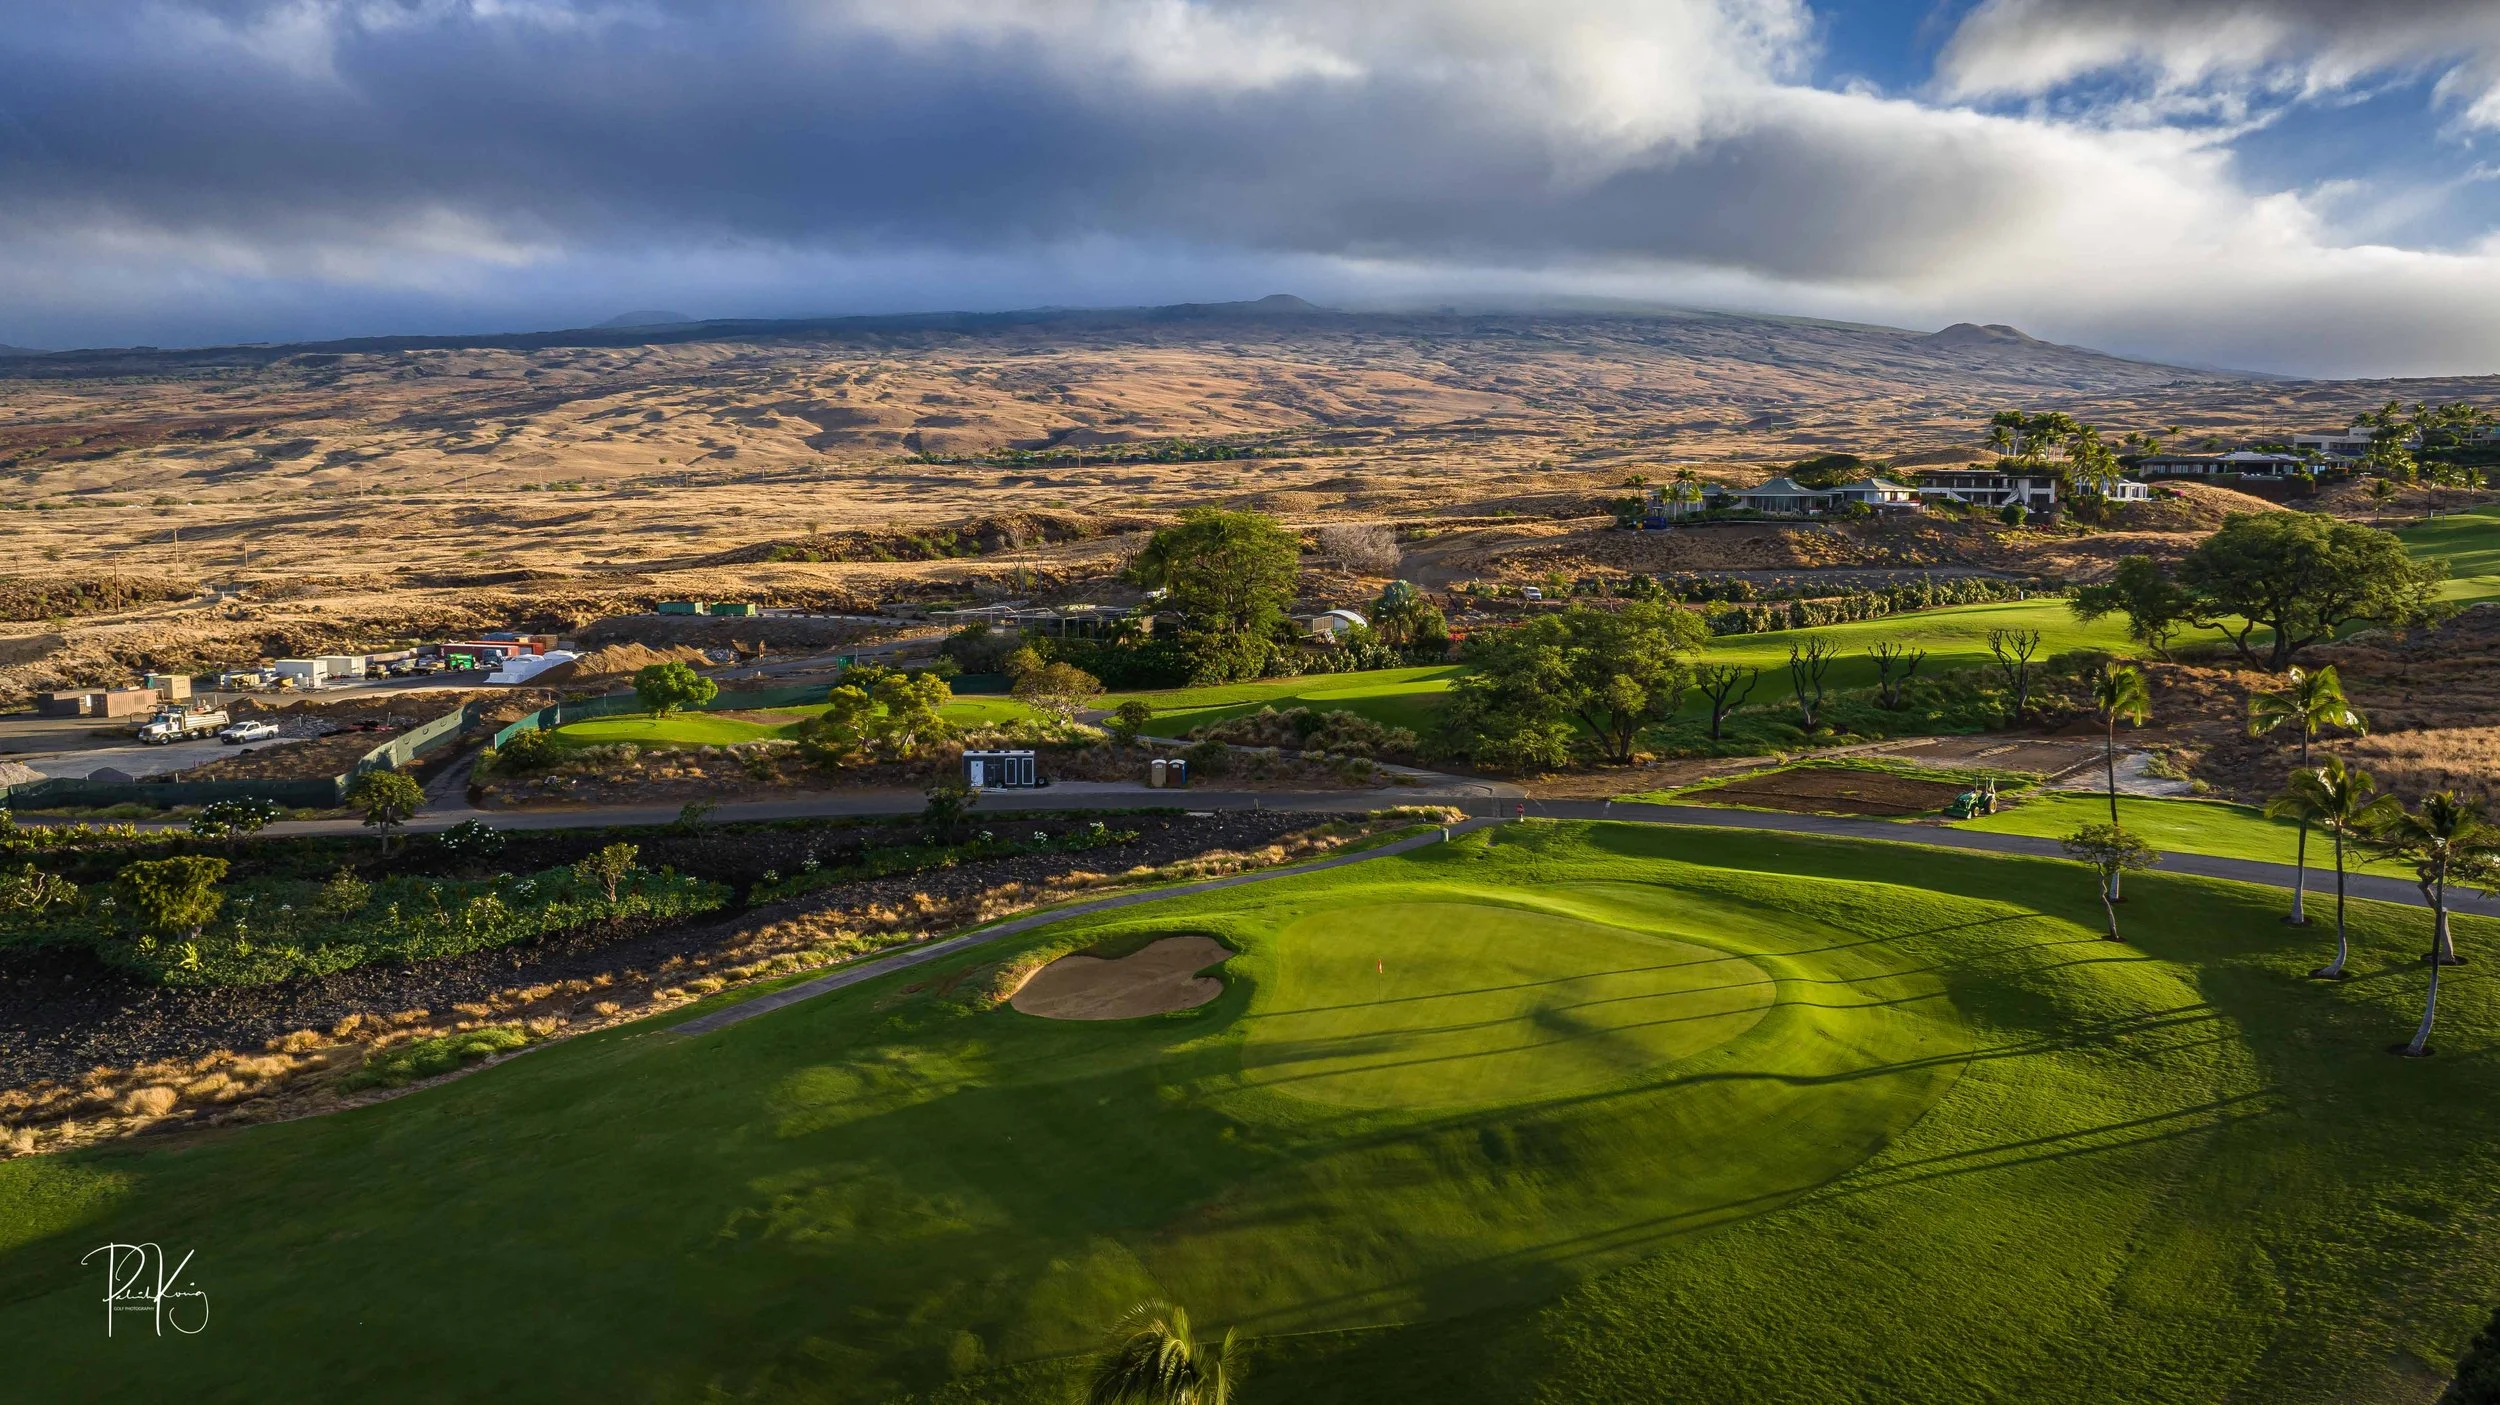
When it comes to the very best public golf courses in Hawaii, Mauna Kea Golf Course is at the very top of the list with the Plantation Course on Maui. While the Plantation Course benefits from its pedigree as a PGA Tour stop and a Coore & Crenshaw design, Mauna Kea Golf Course is forced to rely on the strength of its design in the face of declining merit from Robert Trent Jones Jr & Sr. Even with this disadvantage, Mauna Kea Golf Course holds its own.
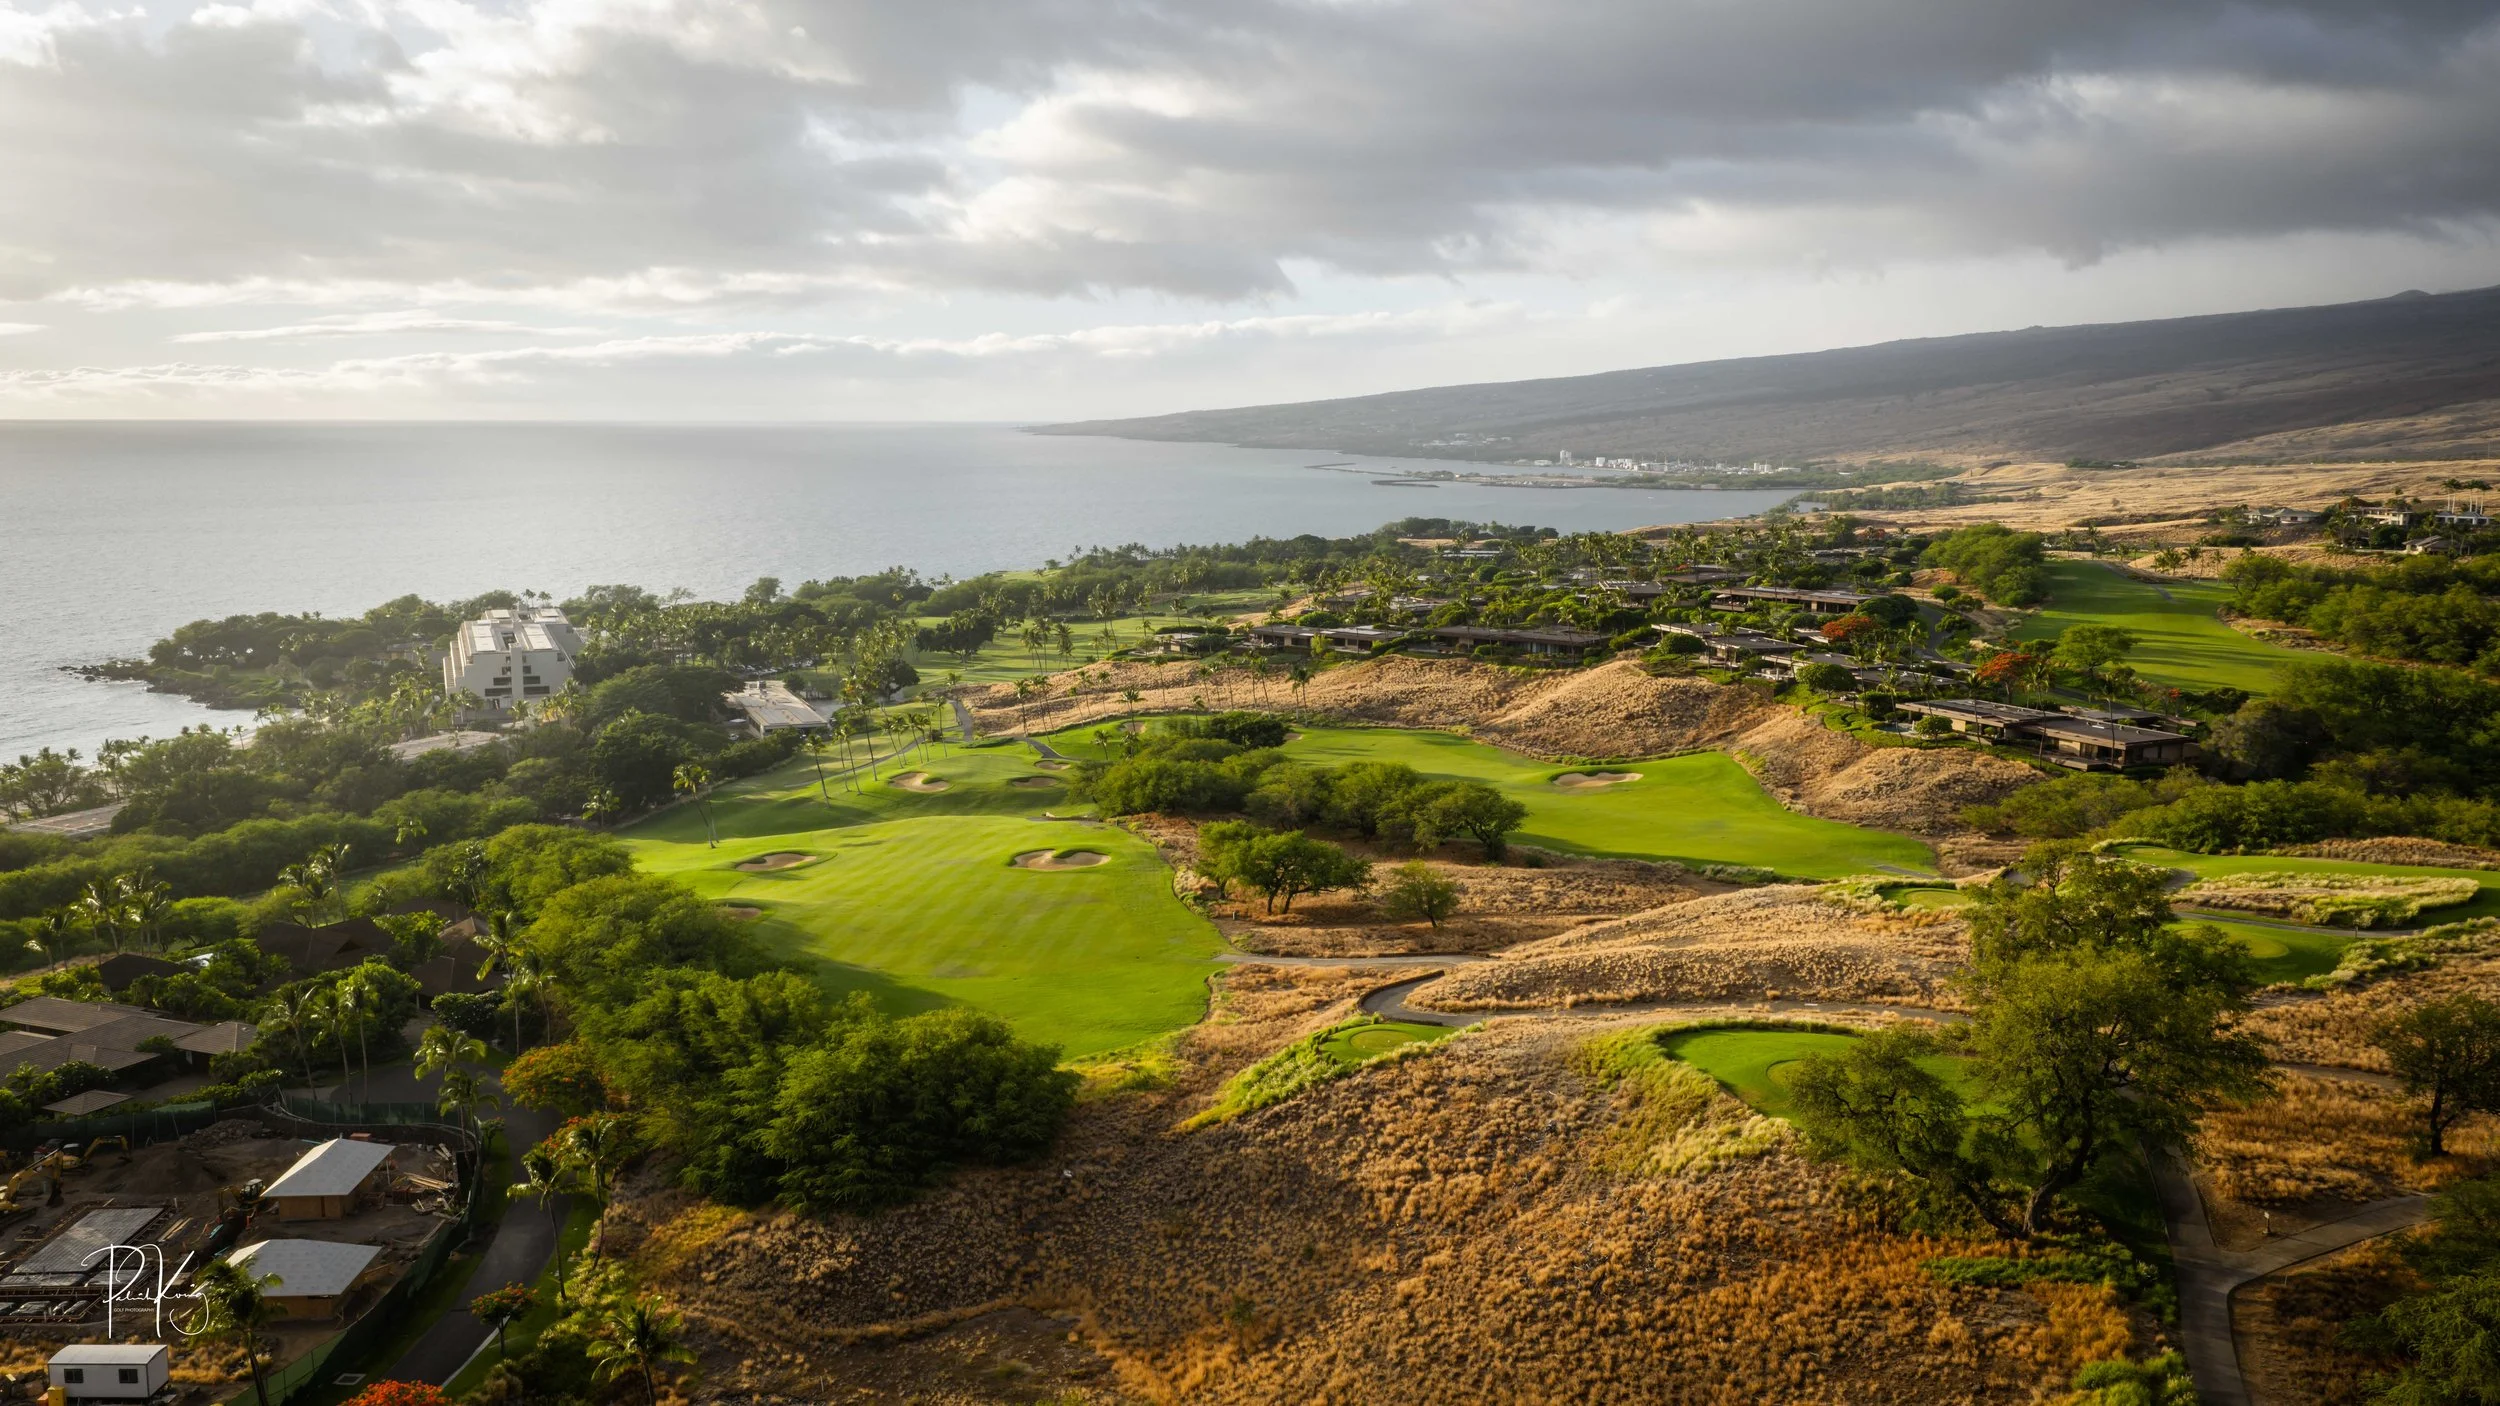
Despite your opinions on what the finest public golf course in Hawaii is, Mauna Kea is worth a visit and a photograph here is certainly worth 1000 words. Please enjoy a walk… and flight around one of the Aloha State’s finest. All yardages listed are from the championship tees and at 7370 yards, this golf course has some serious monsters.
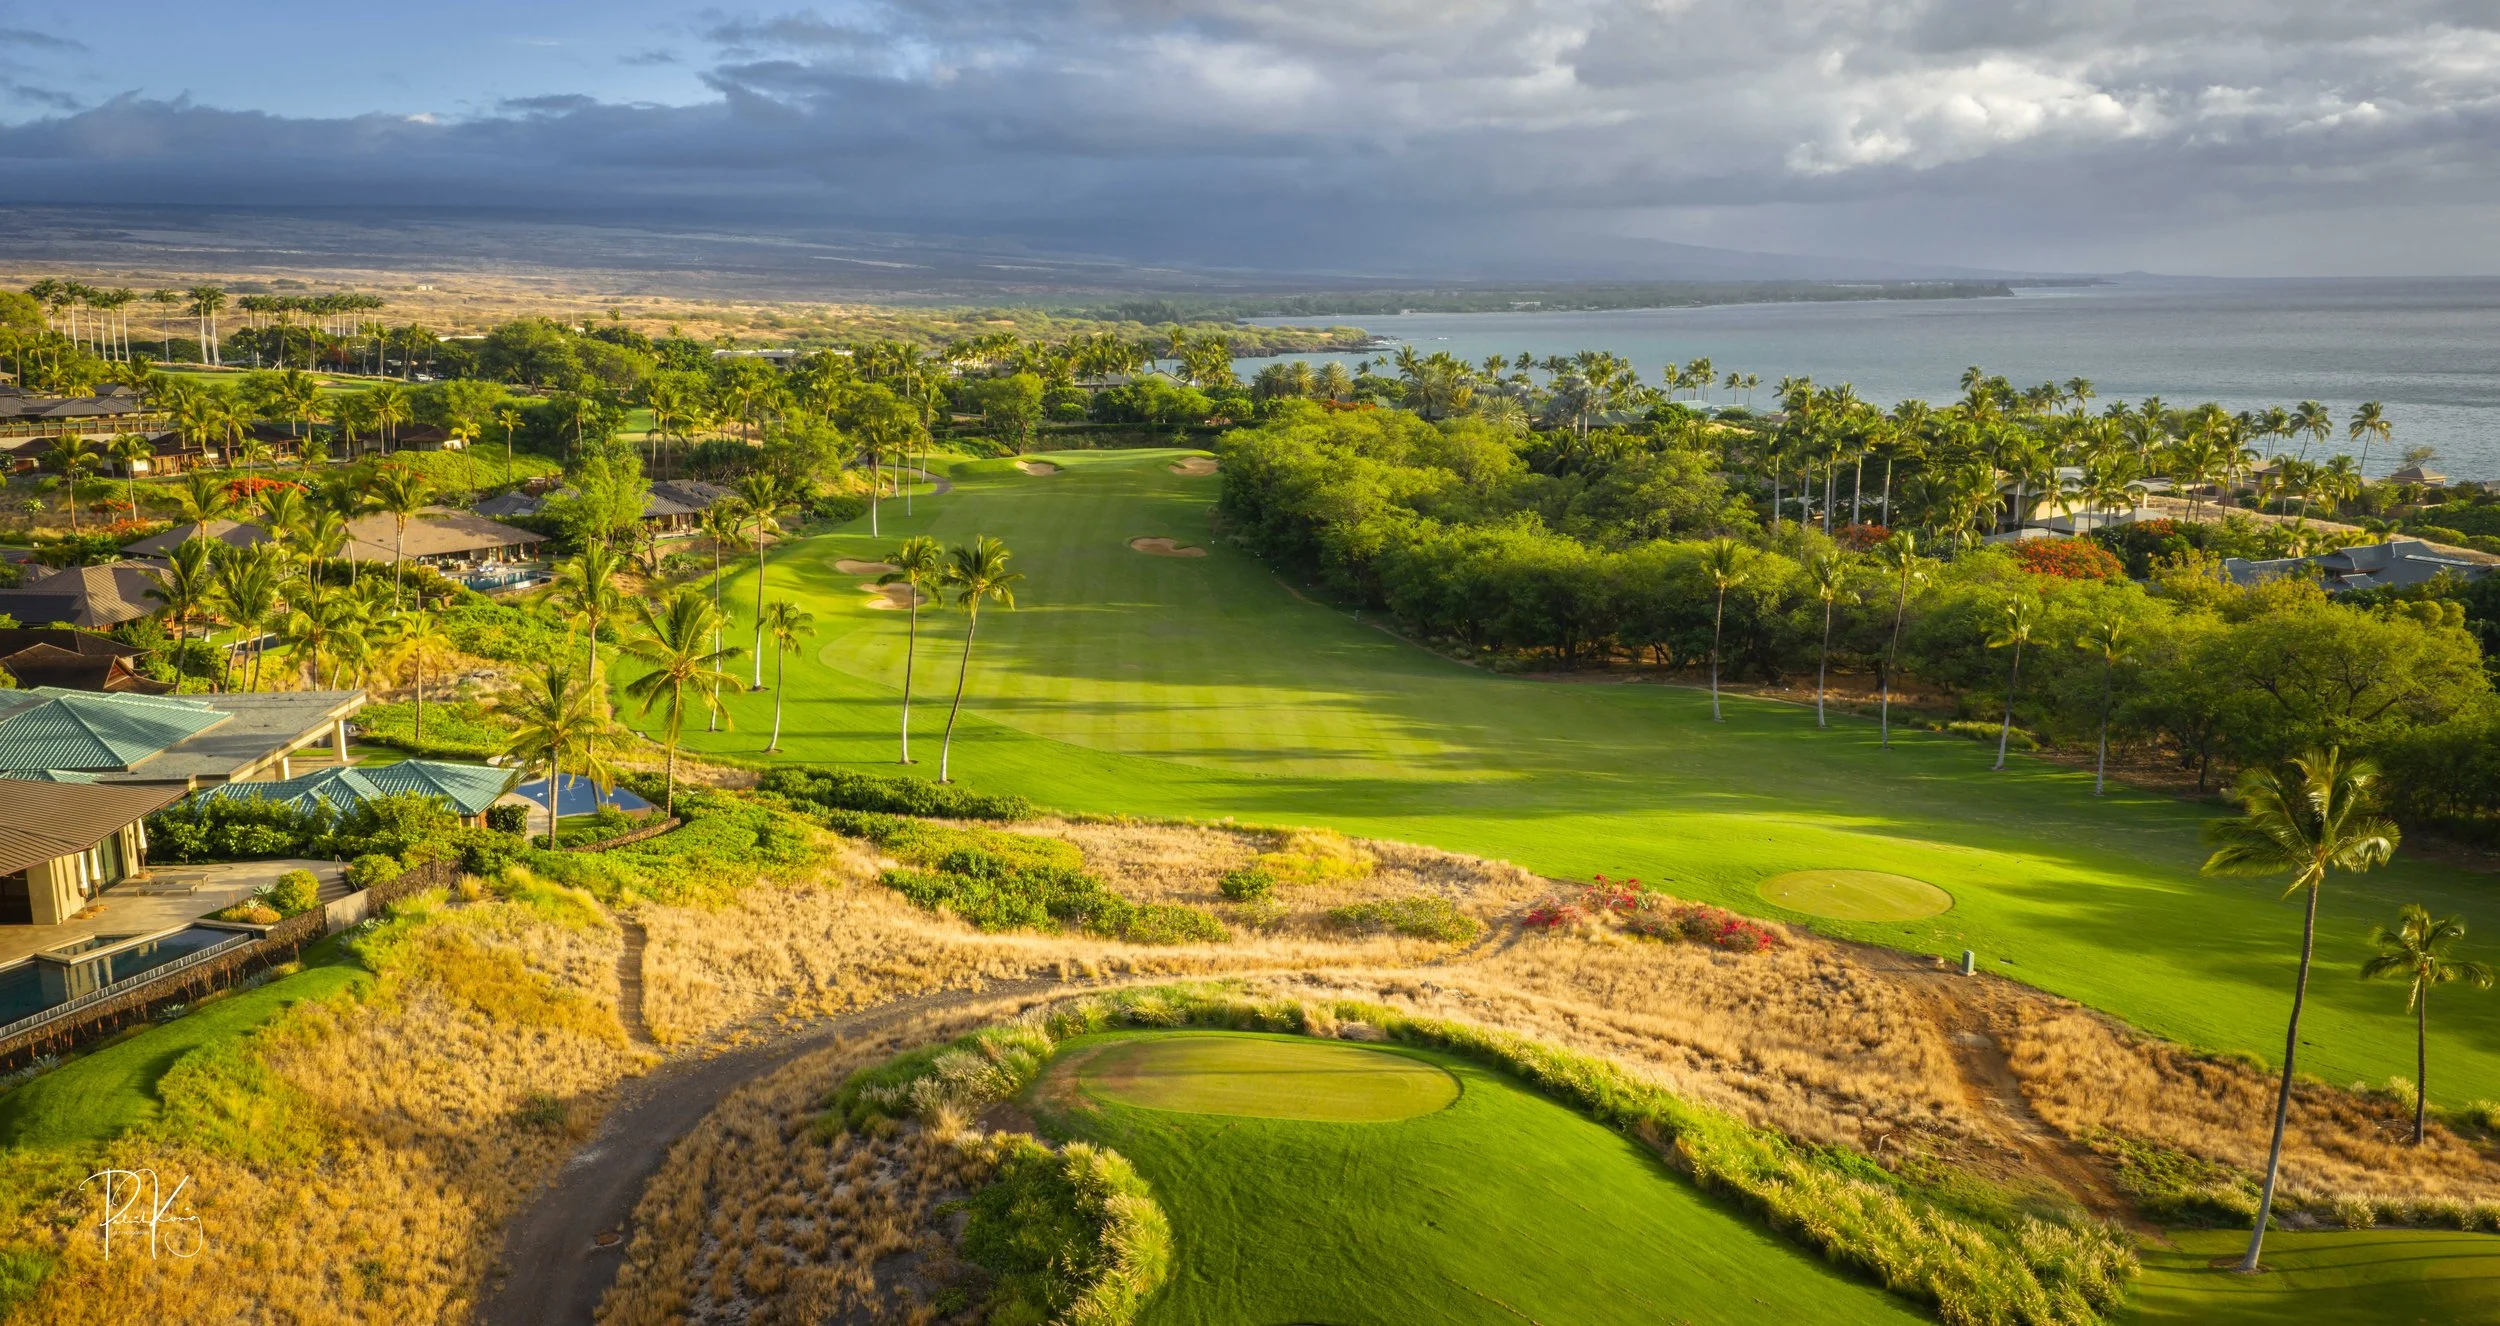
Hole #1 - Par 4 - 374 yards
Mauna Kea starts off with an unassuming dogleg right. Some moderate accuracy from the tee with a measured tee shot will set up a short iron into the green which is perched on top of a slope. 3 bunkers guard the front of the green, and a multi tiered putting surface will test your readiness with the flat stick.
Hole #2 - Par 4 - 380 yards
The second hole is a flip flopped version of the 1st hole that plays back down towards the ocean. Another accurate drive on this dogleg left will set up a short iron and hopefully another look at birdie. The second hole at Mauna Kea might lull you into thinking that your round of golf is going to be much easier than it is. These first two golf holes simply ease you into the round before you cross the resort entrance road and feel the ocean breeze in your face.
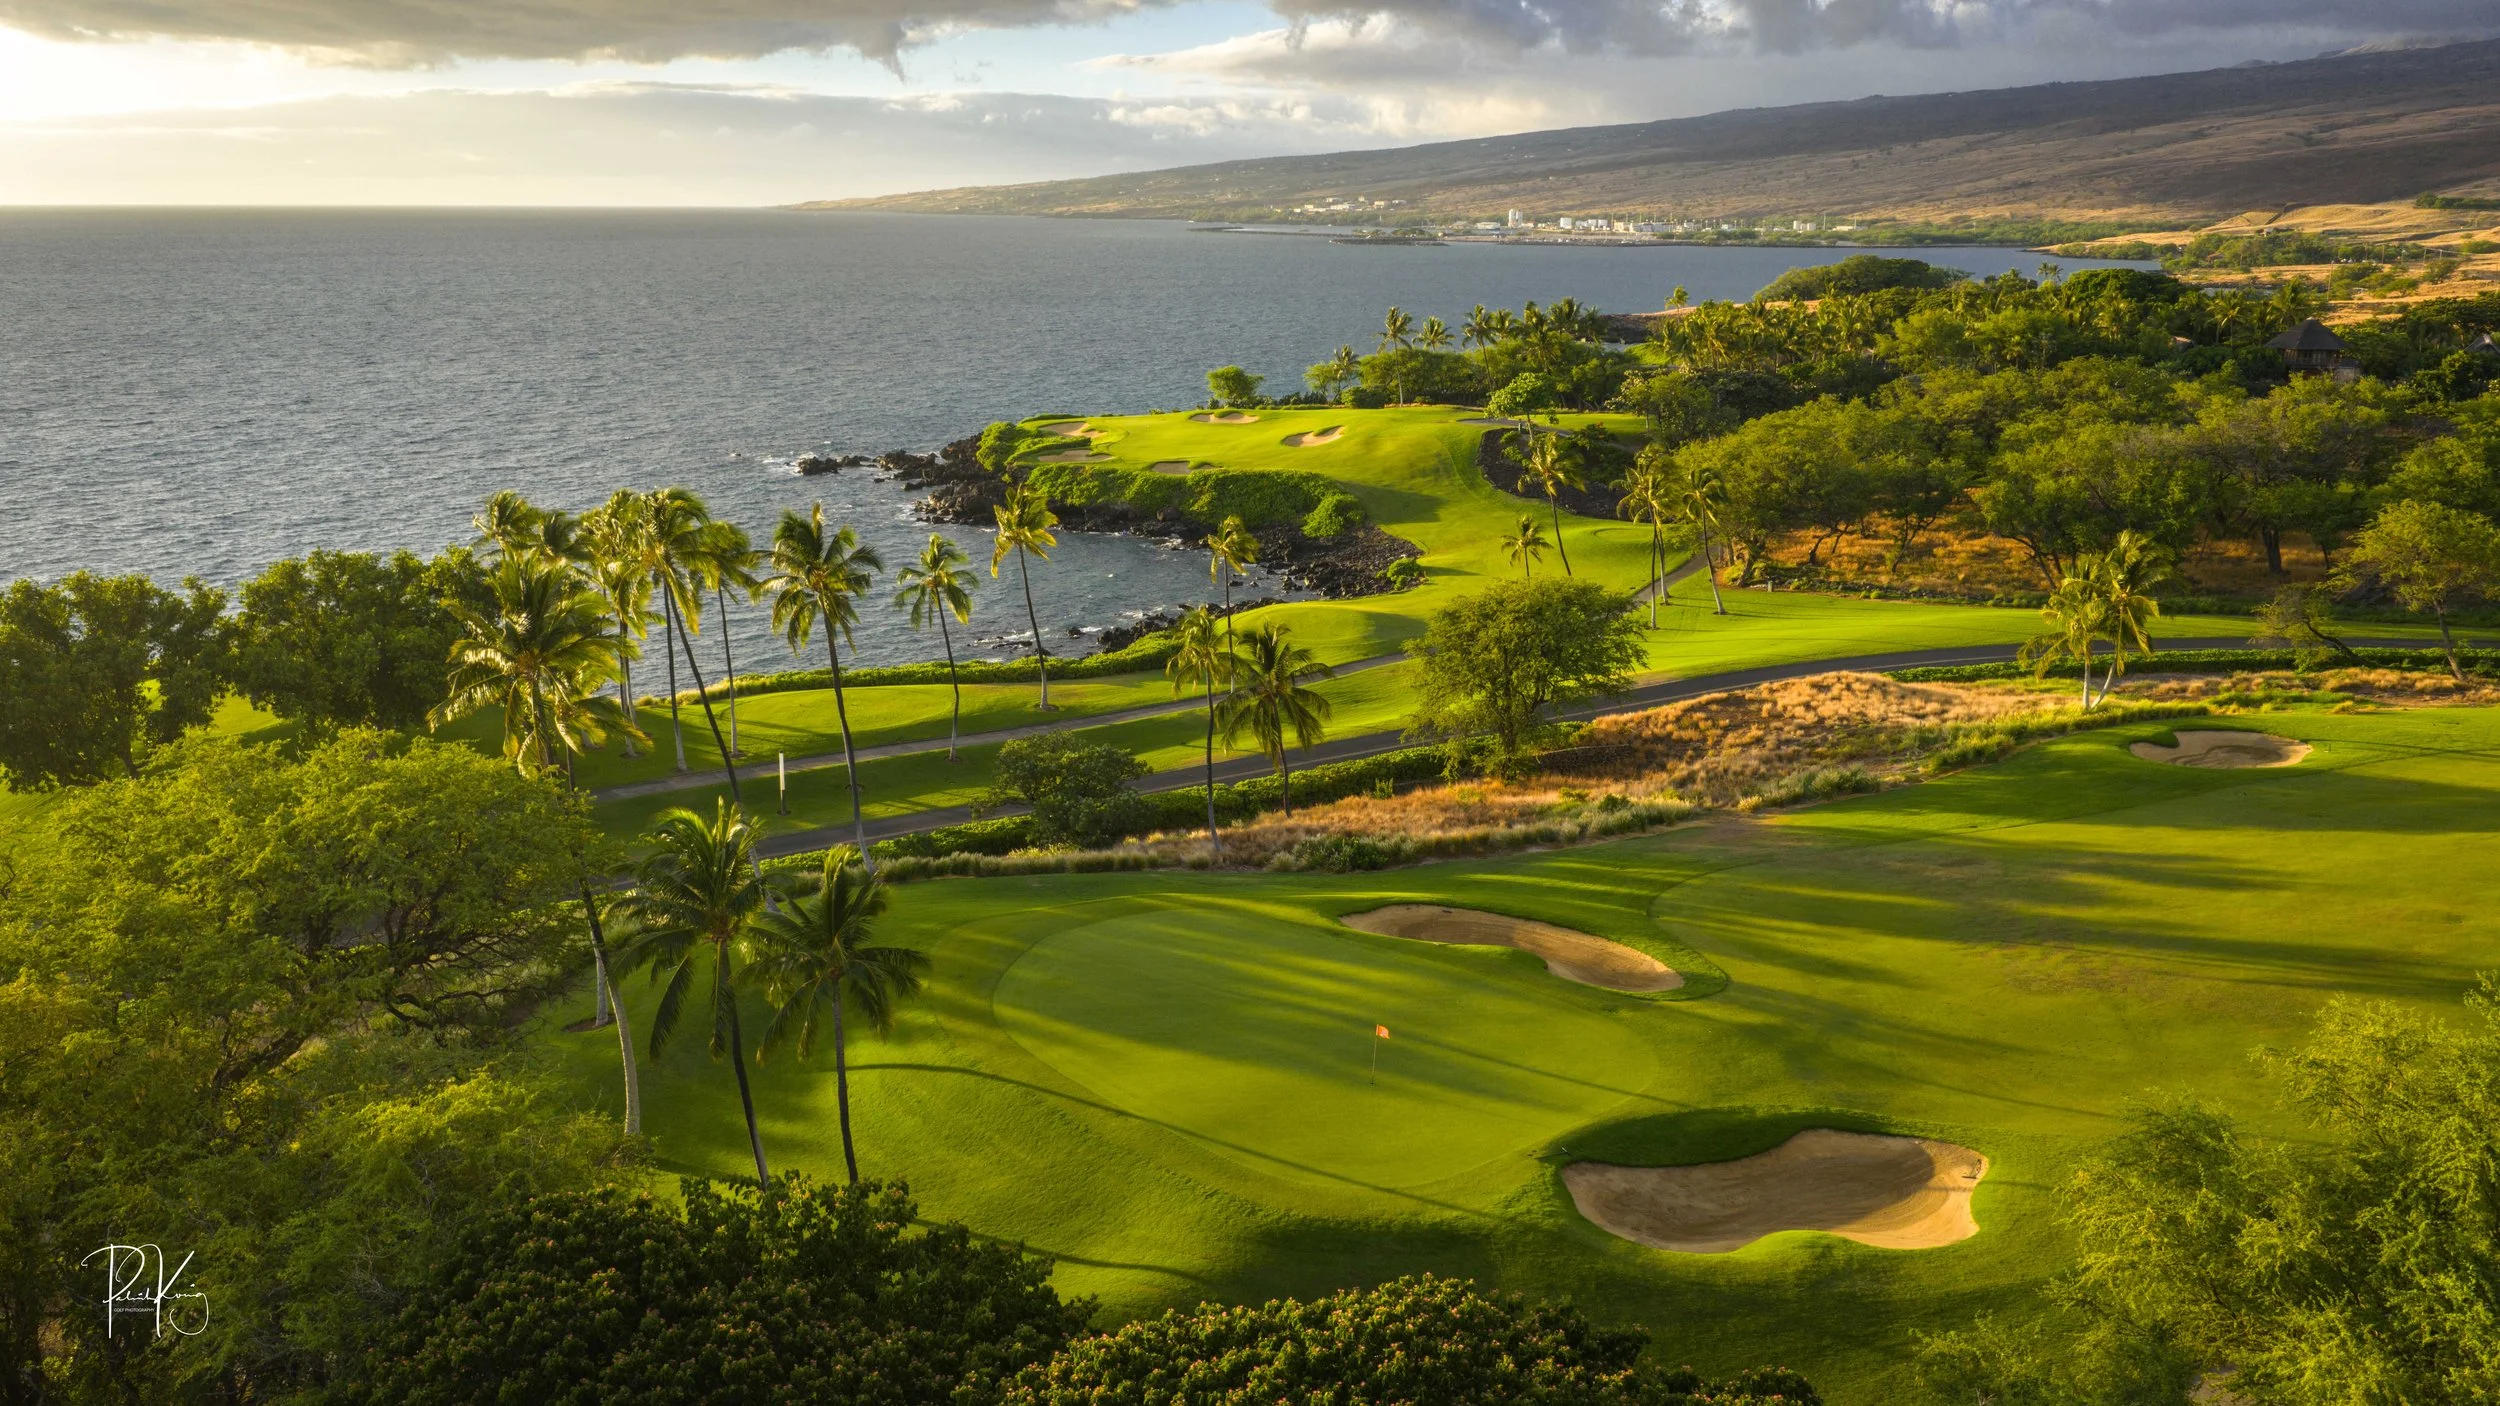
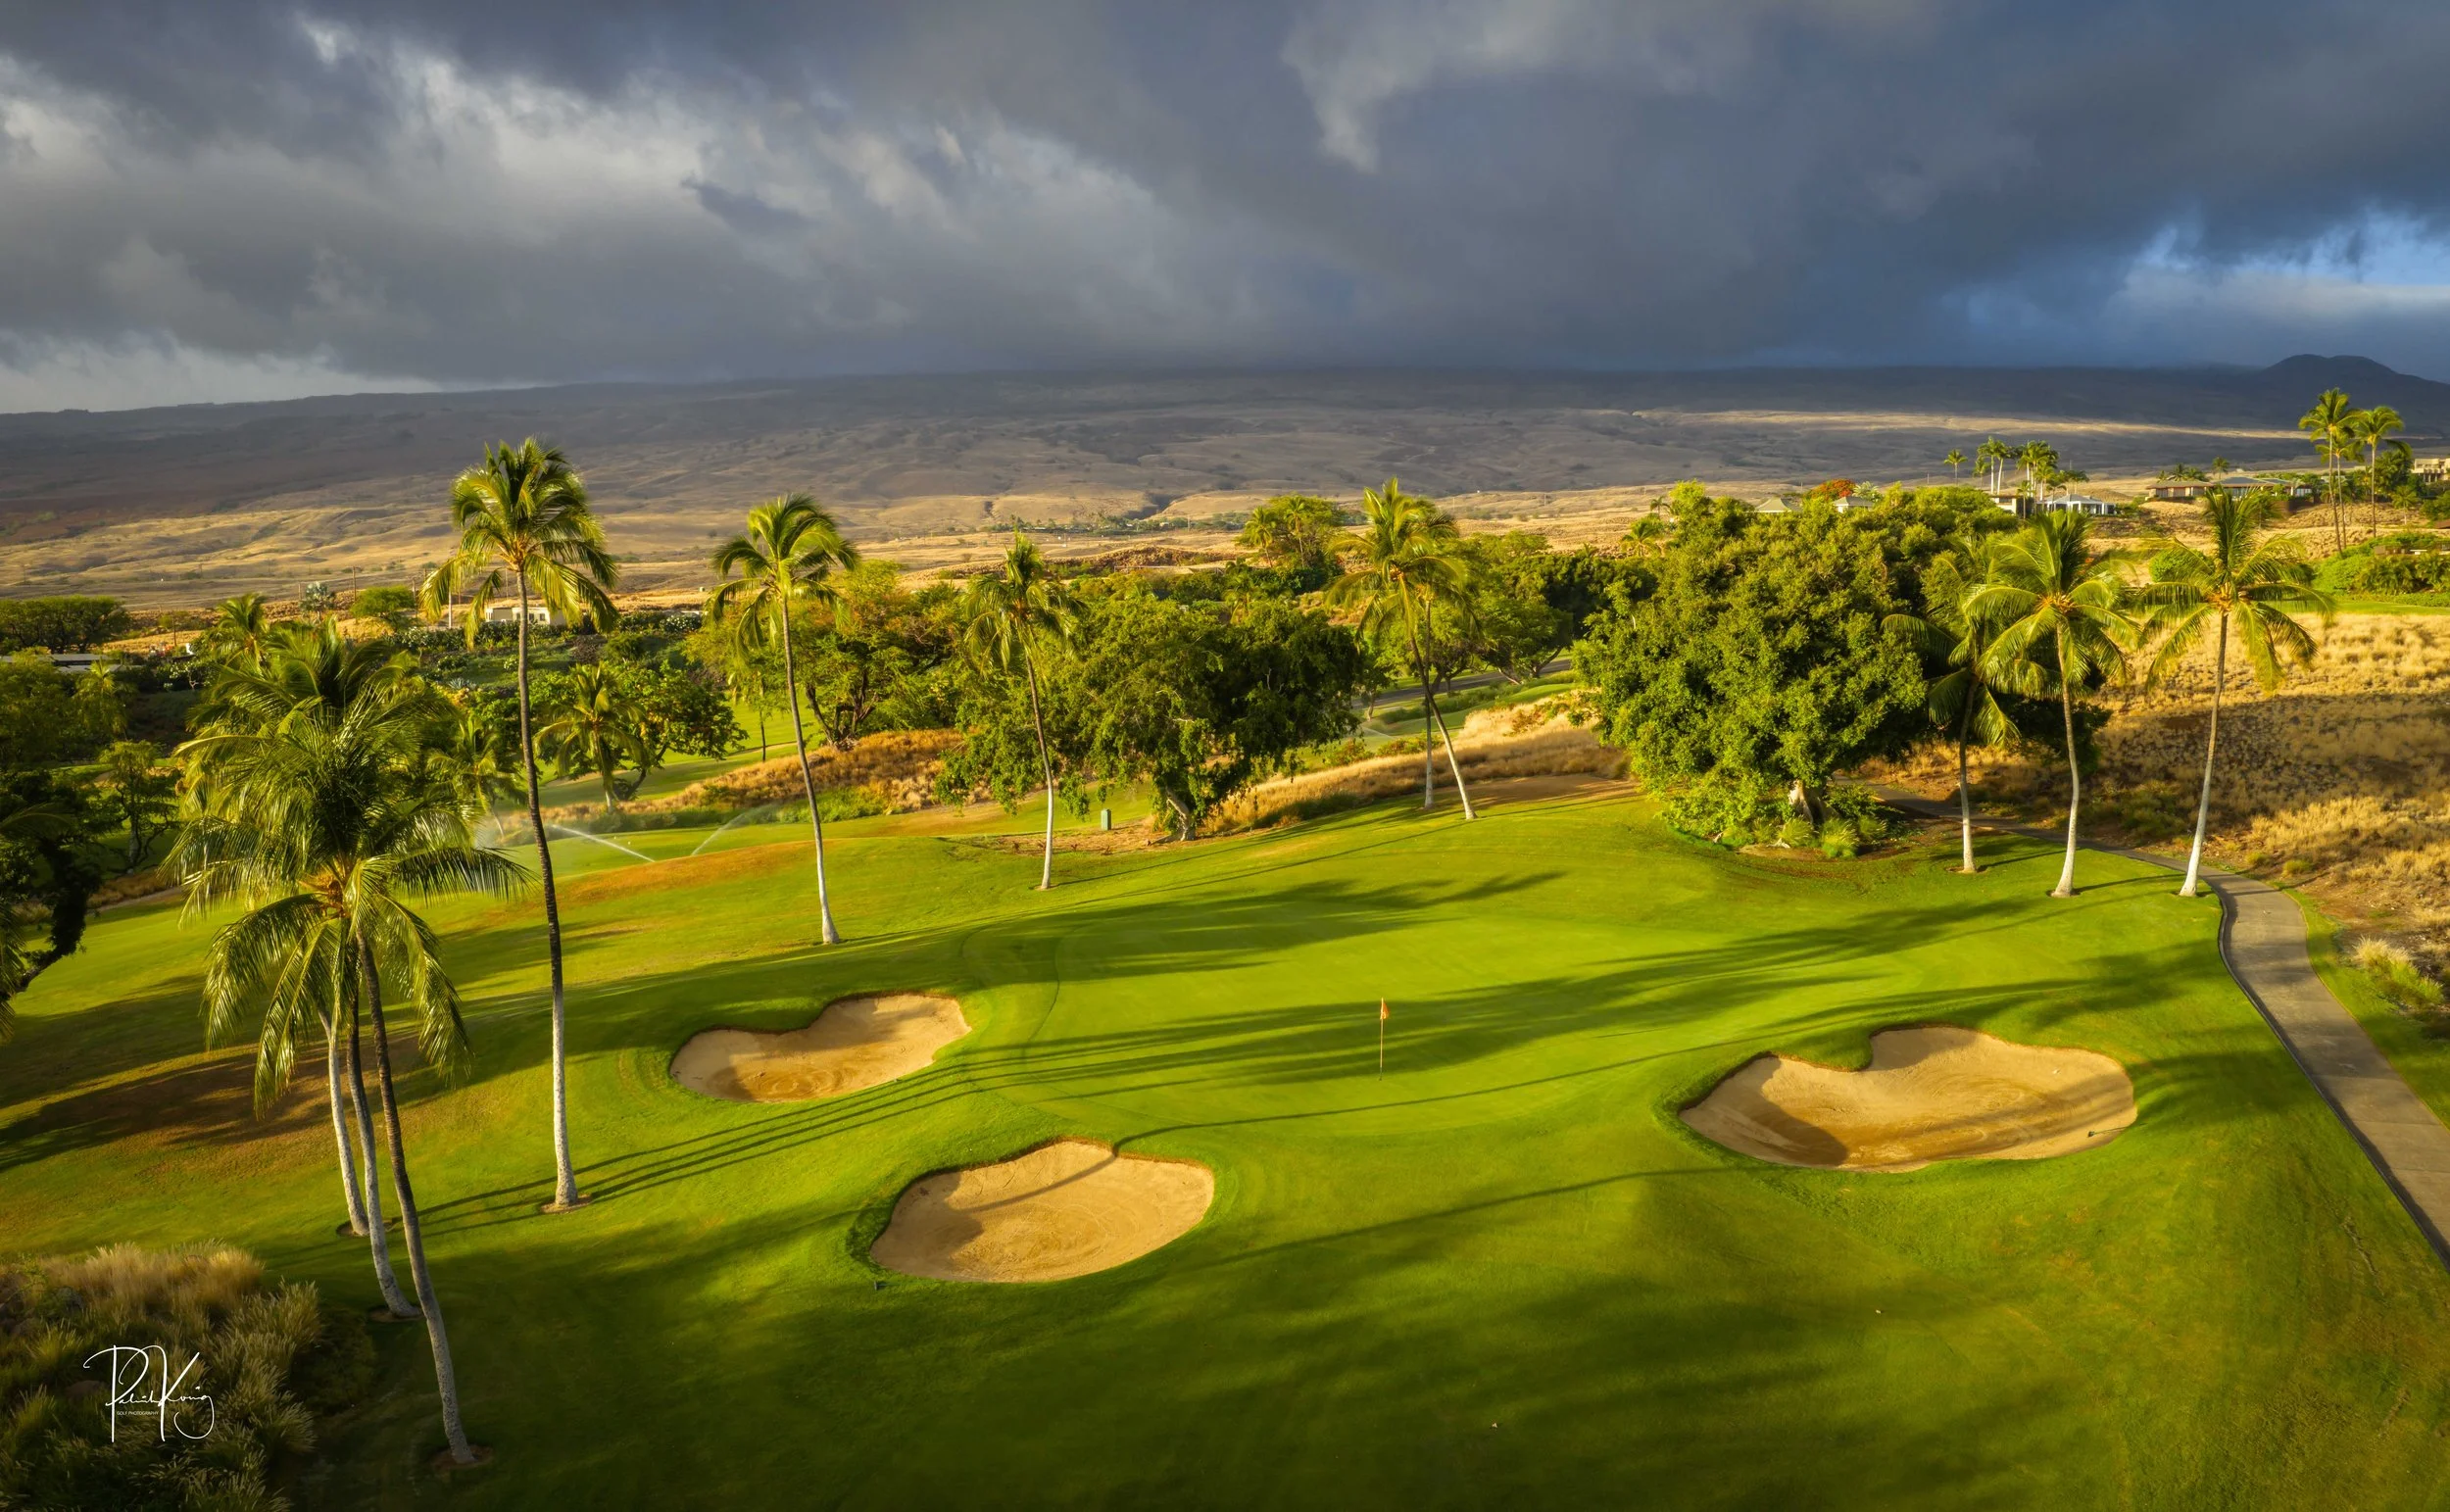
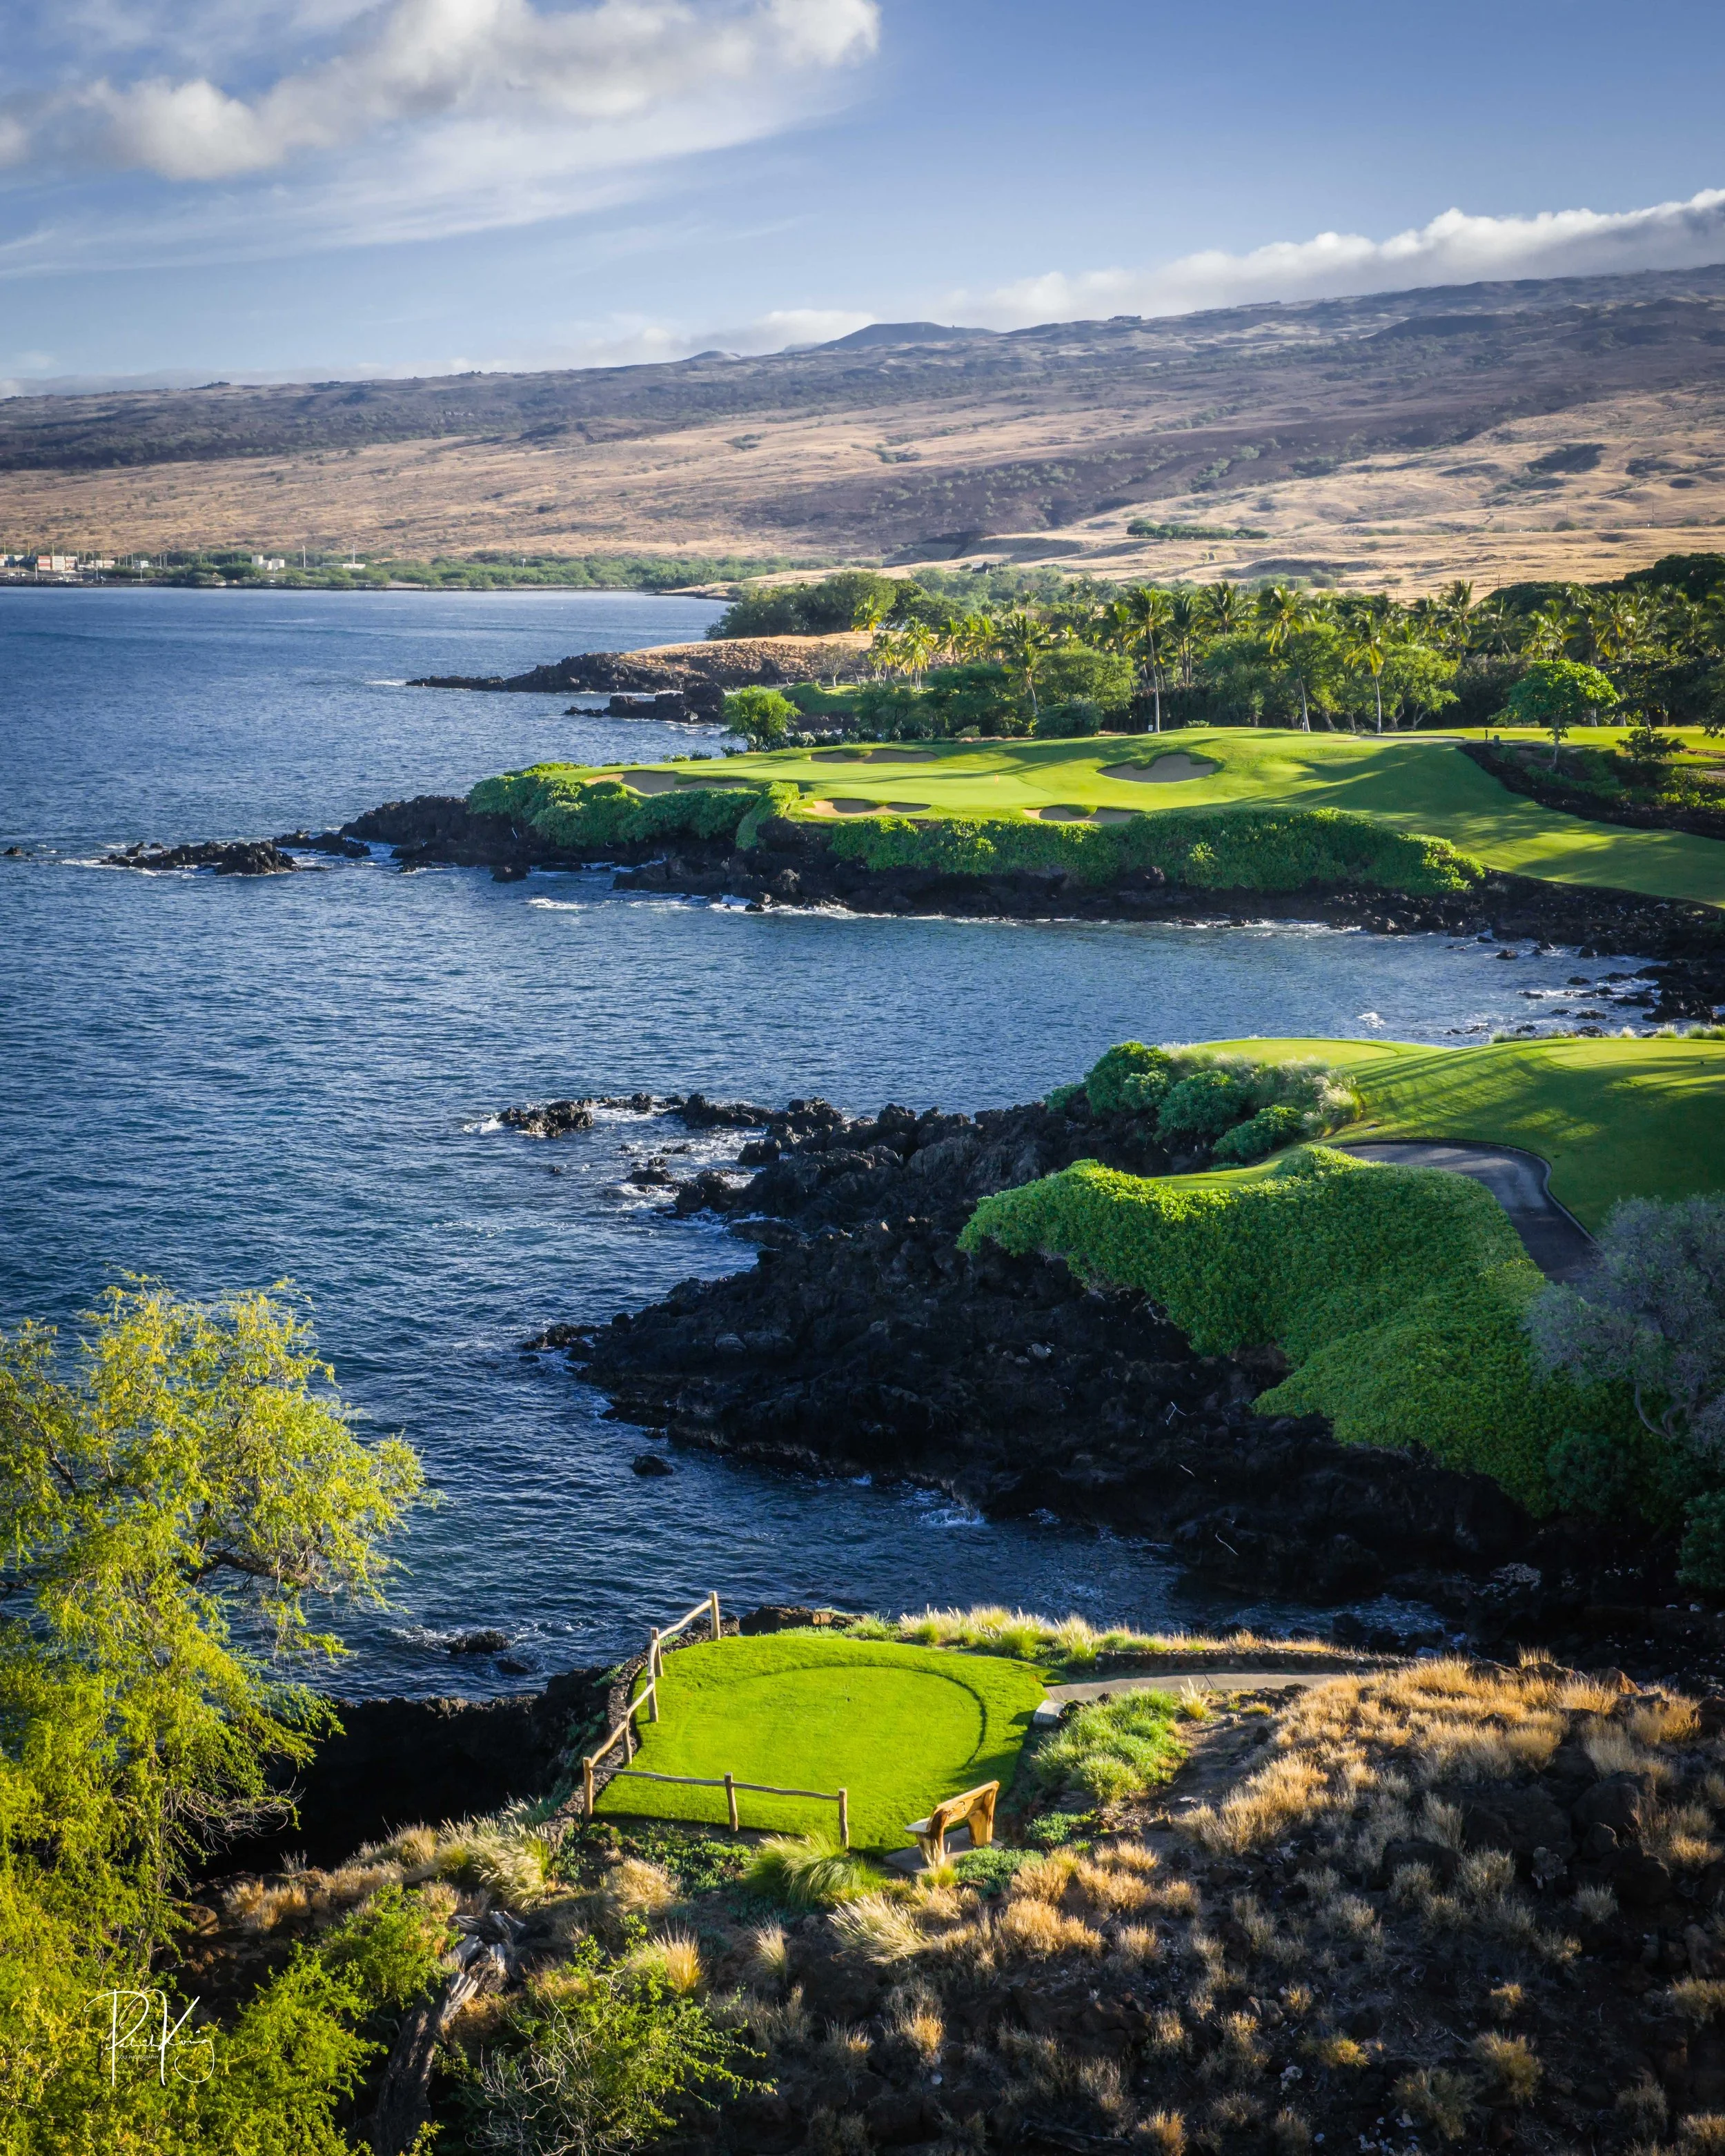
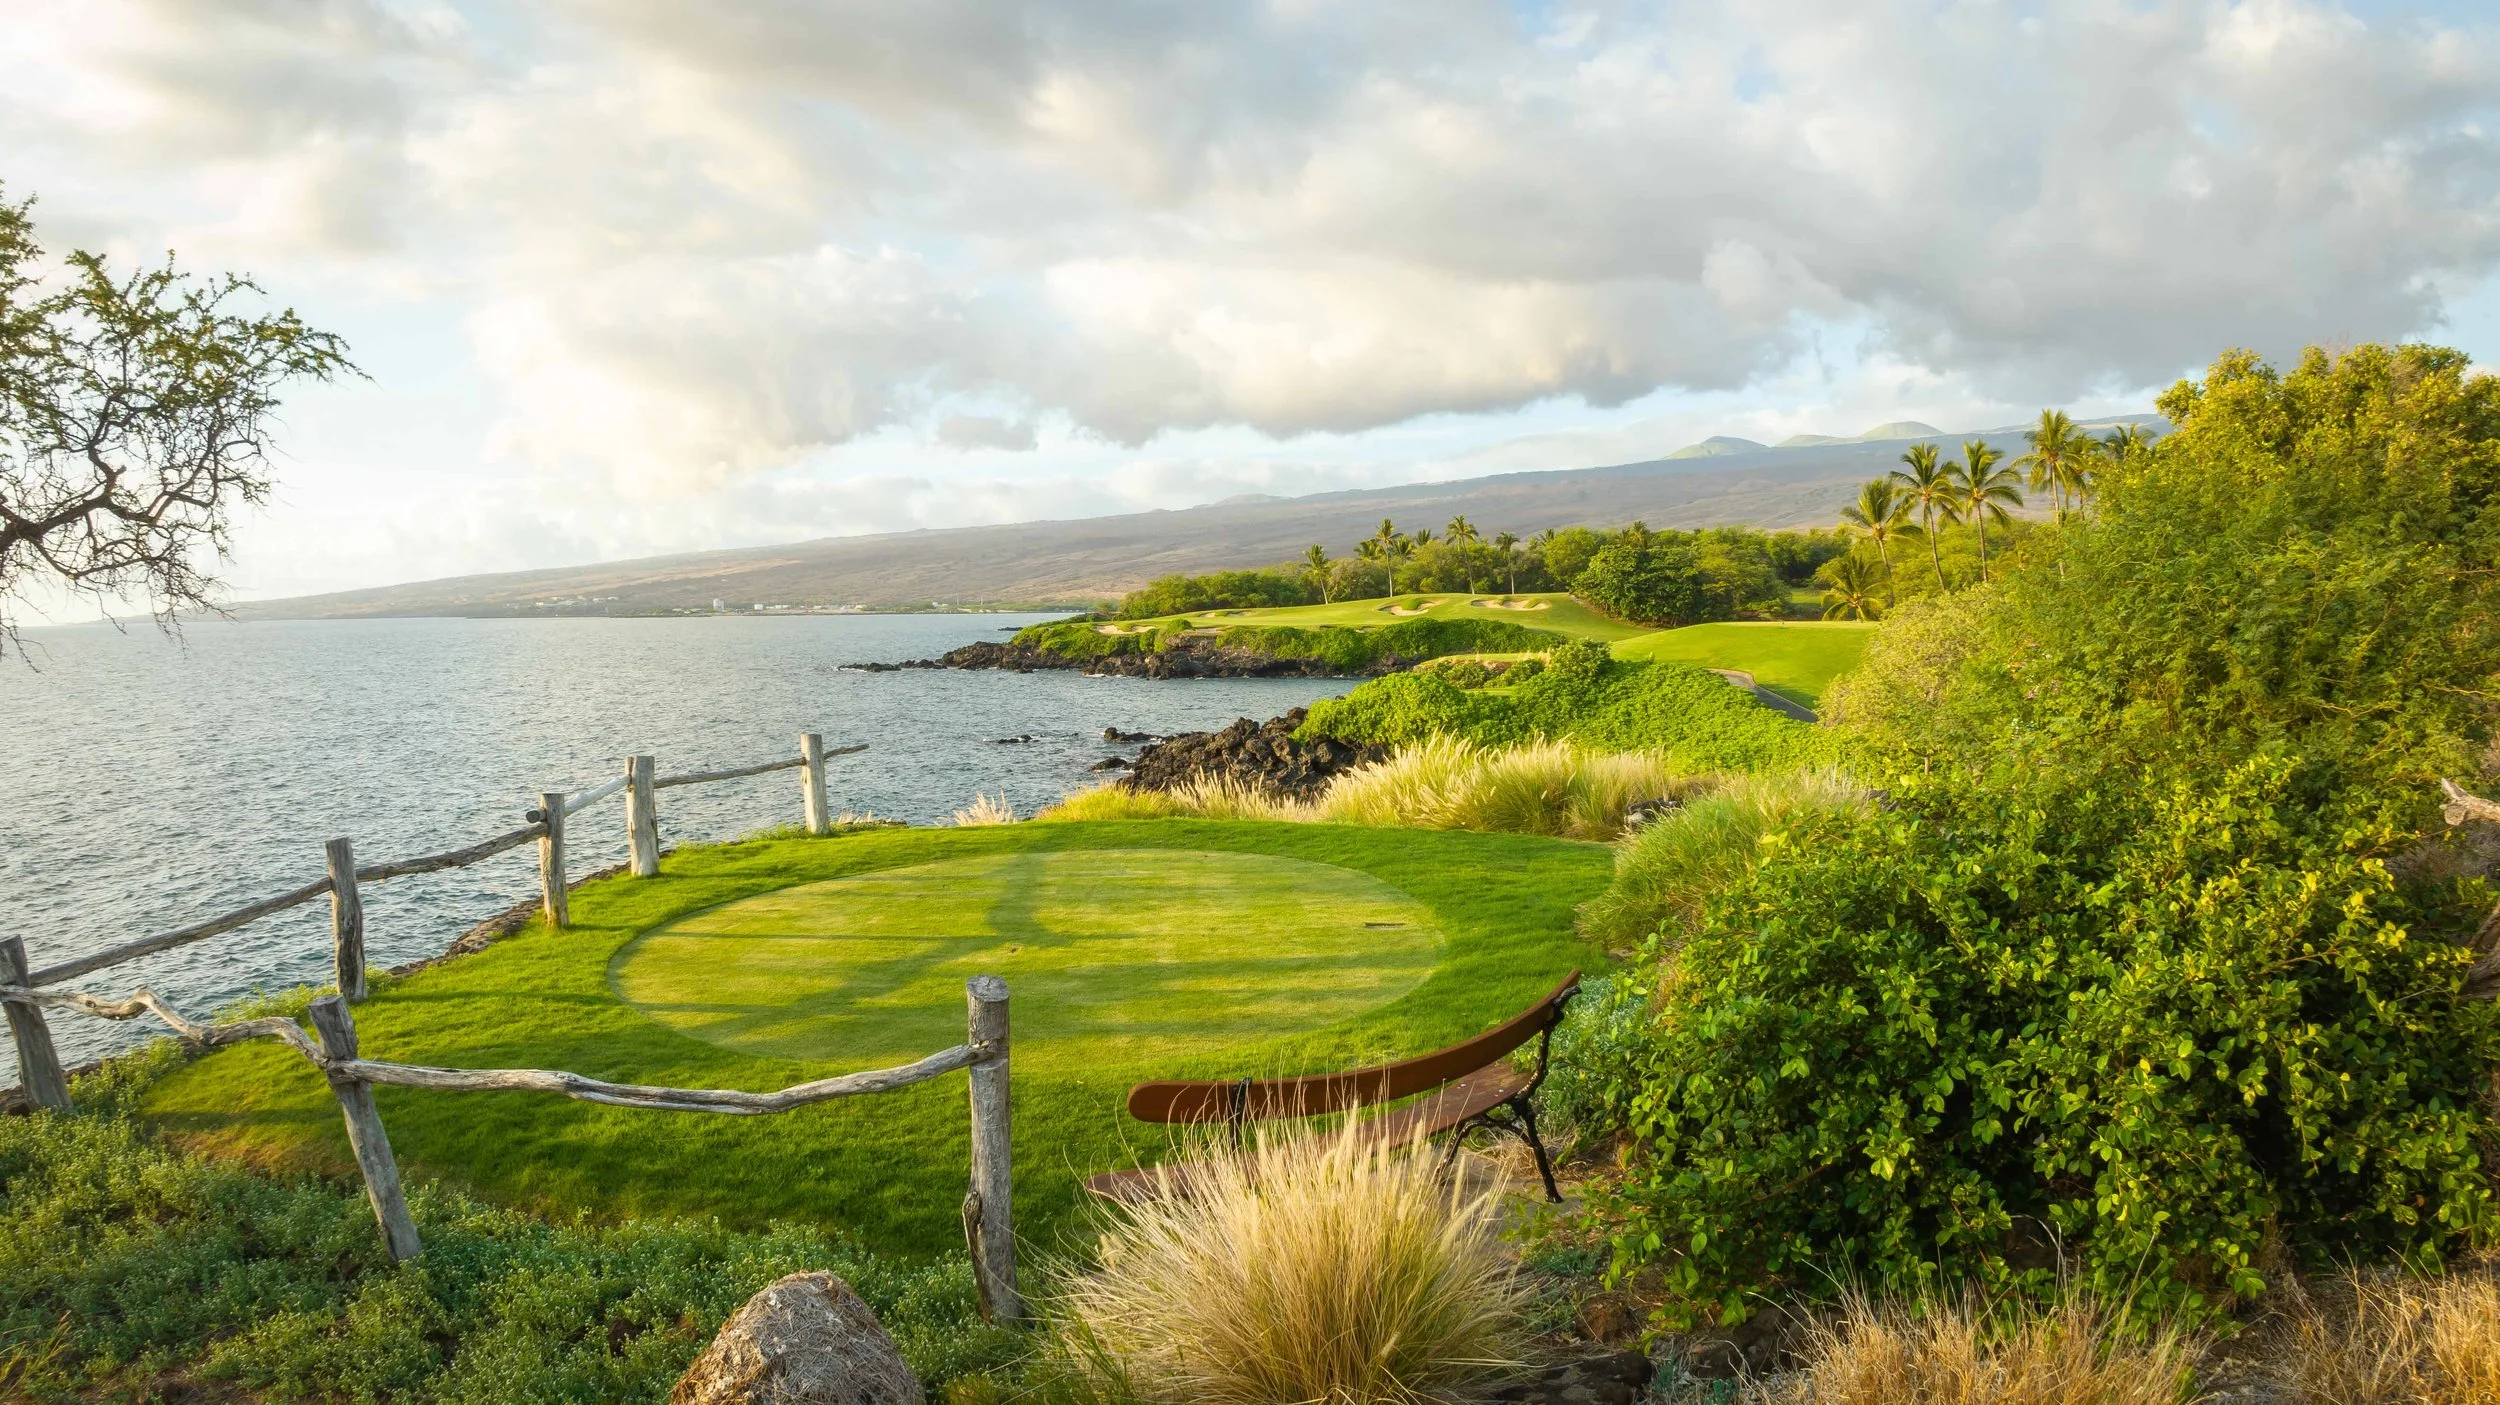
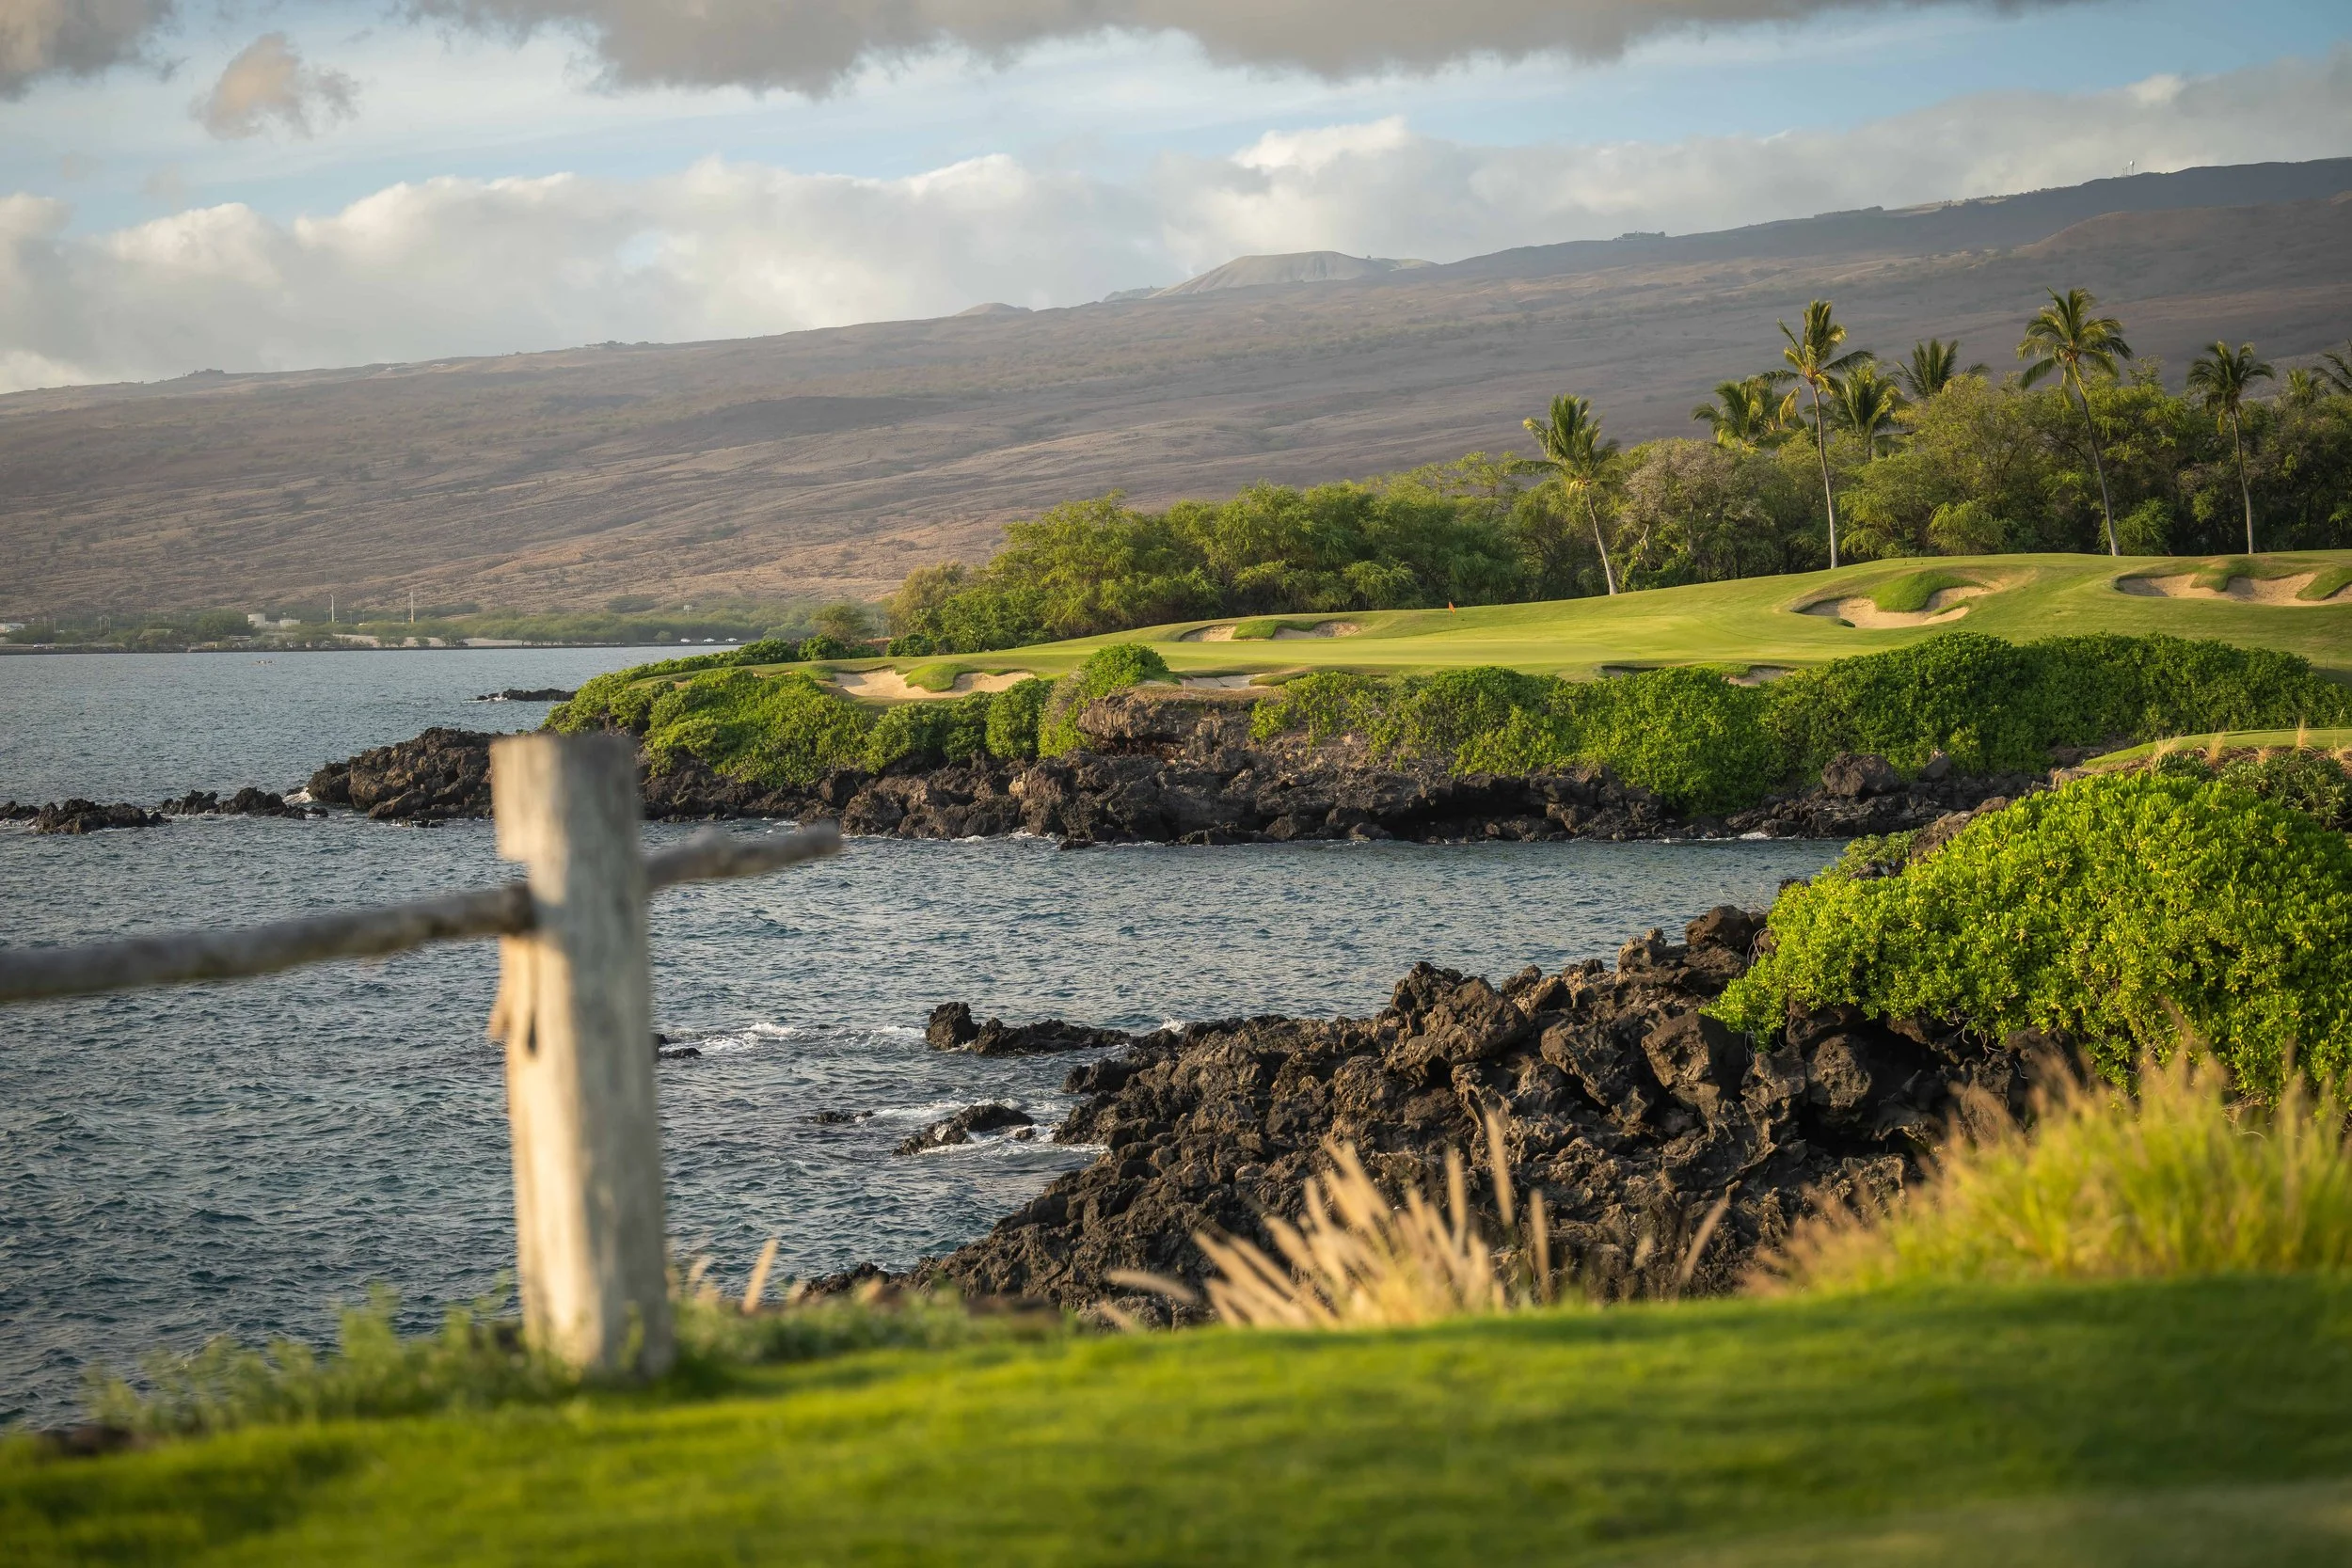
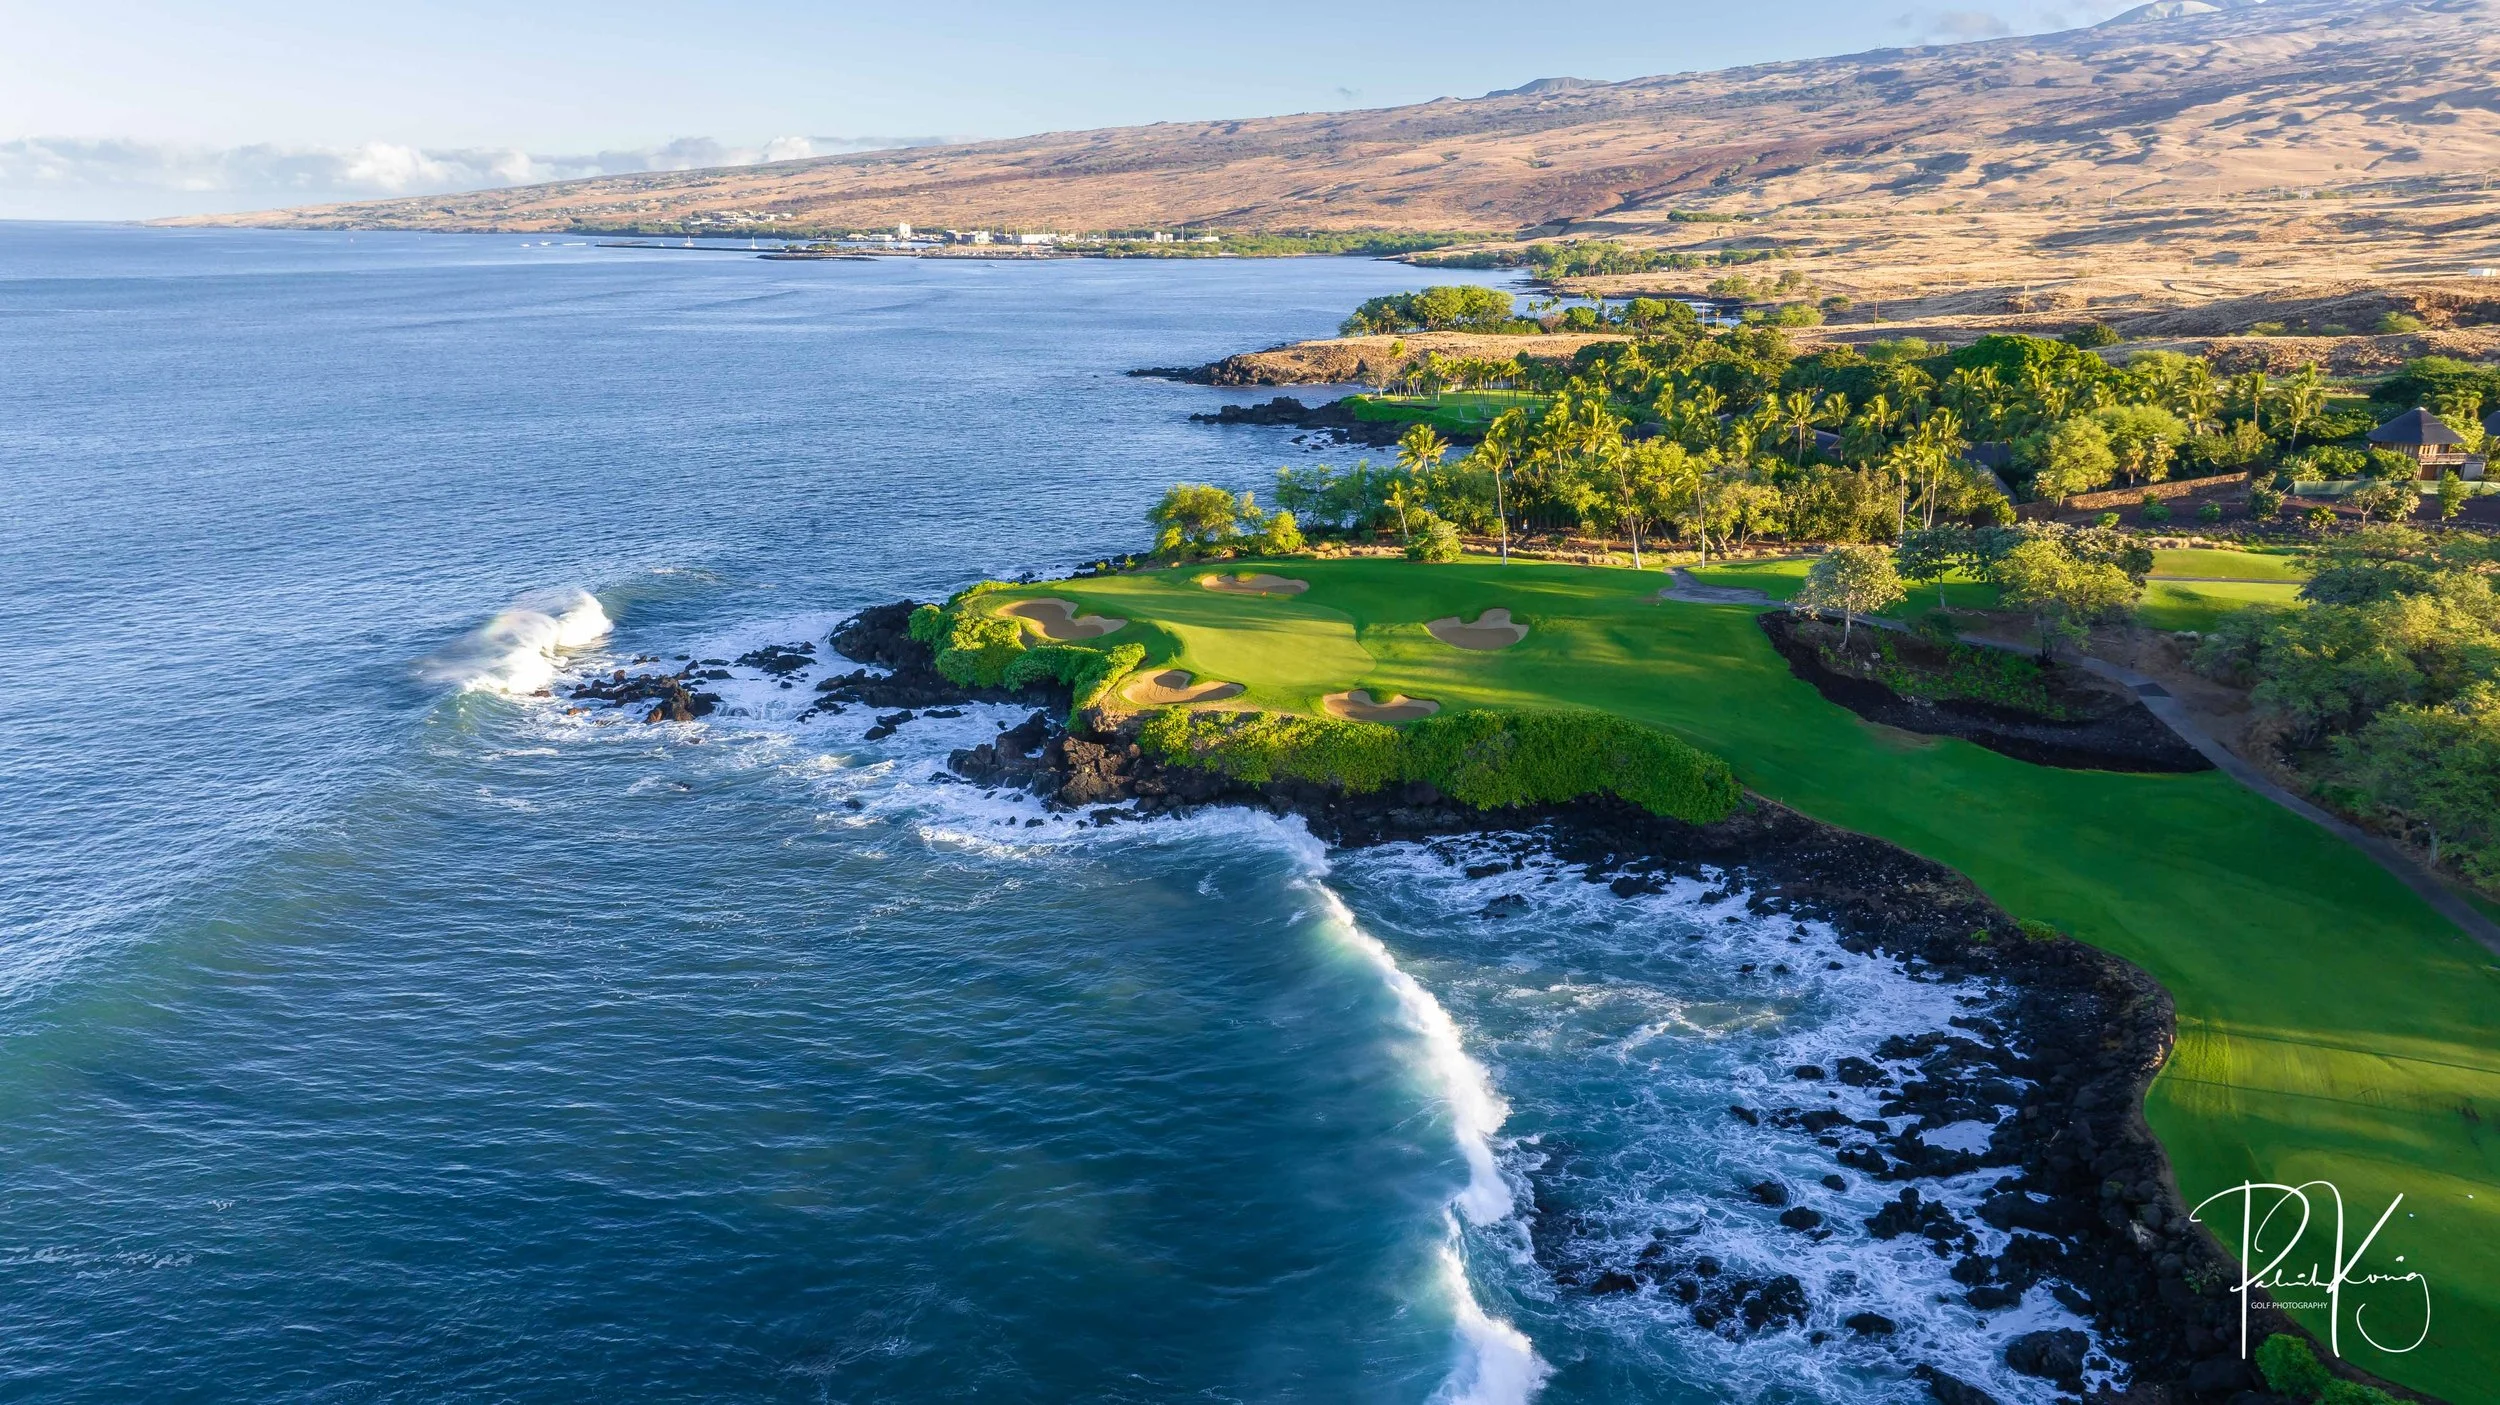
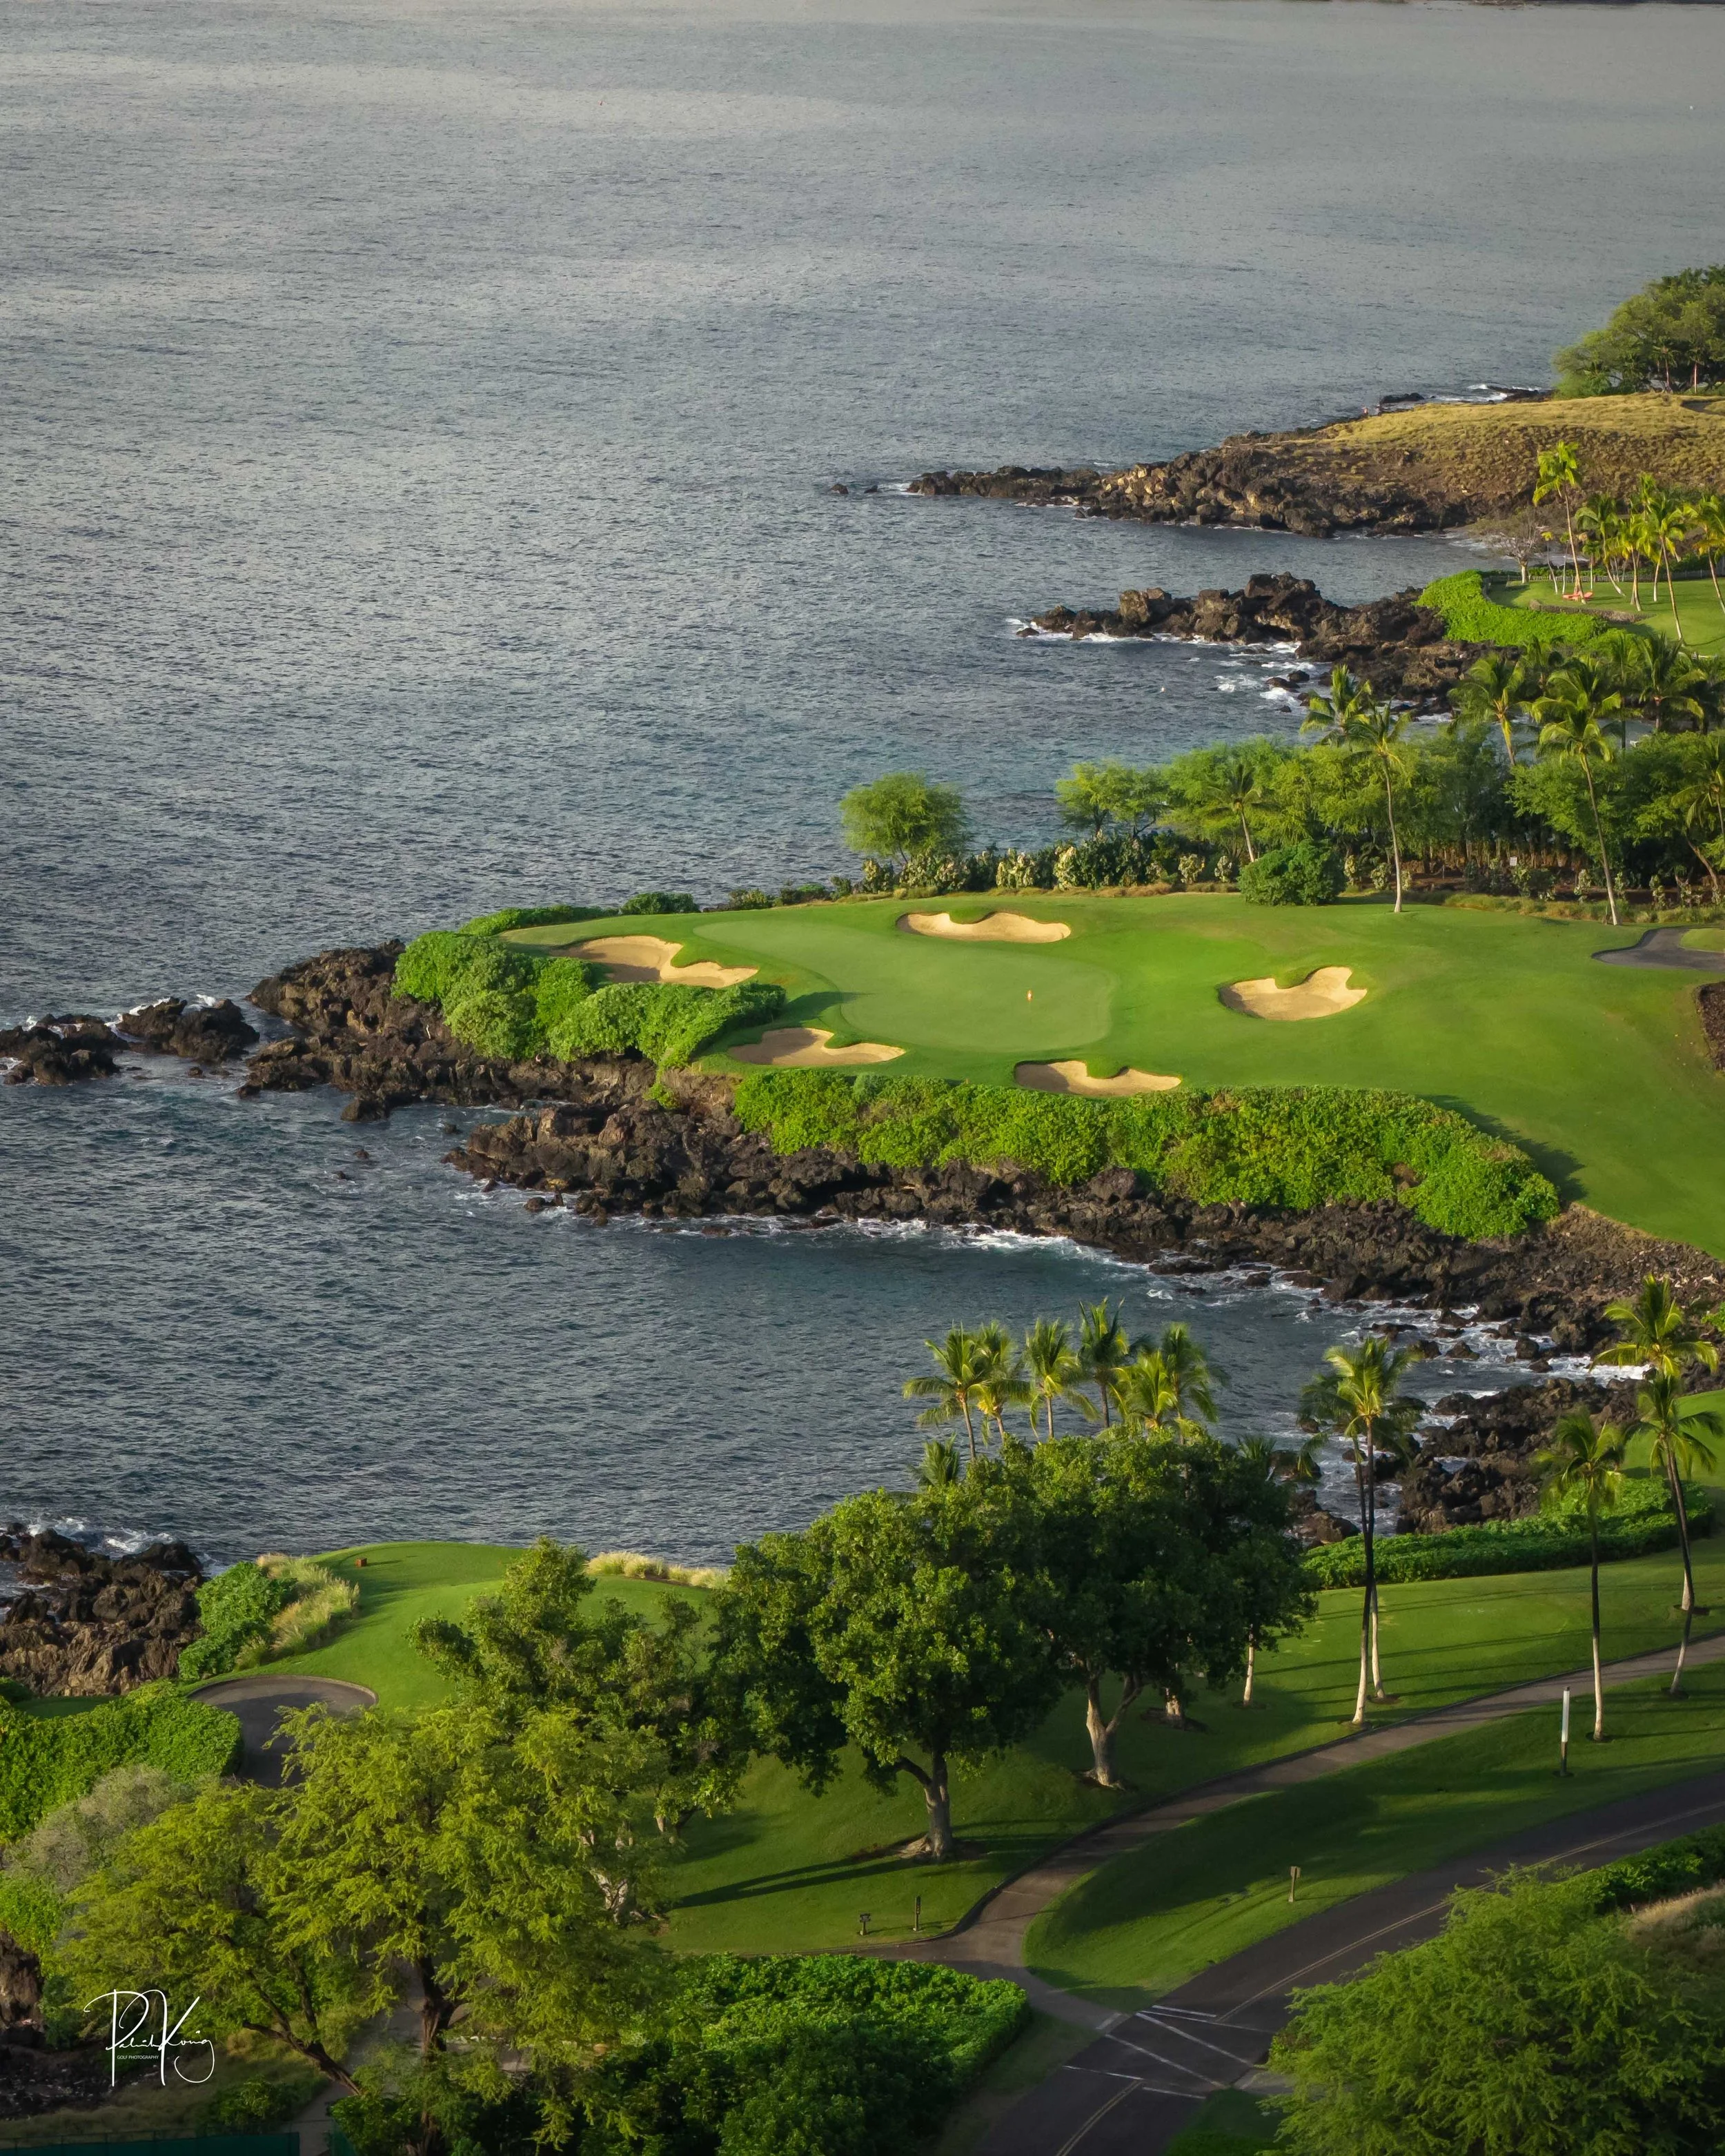
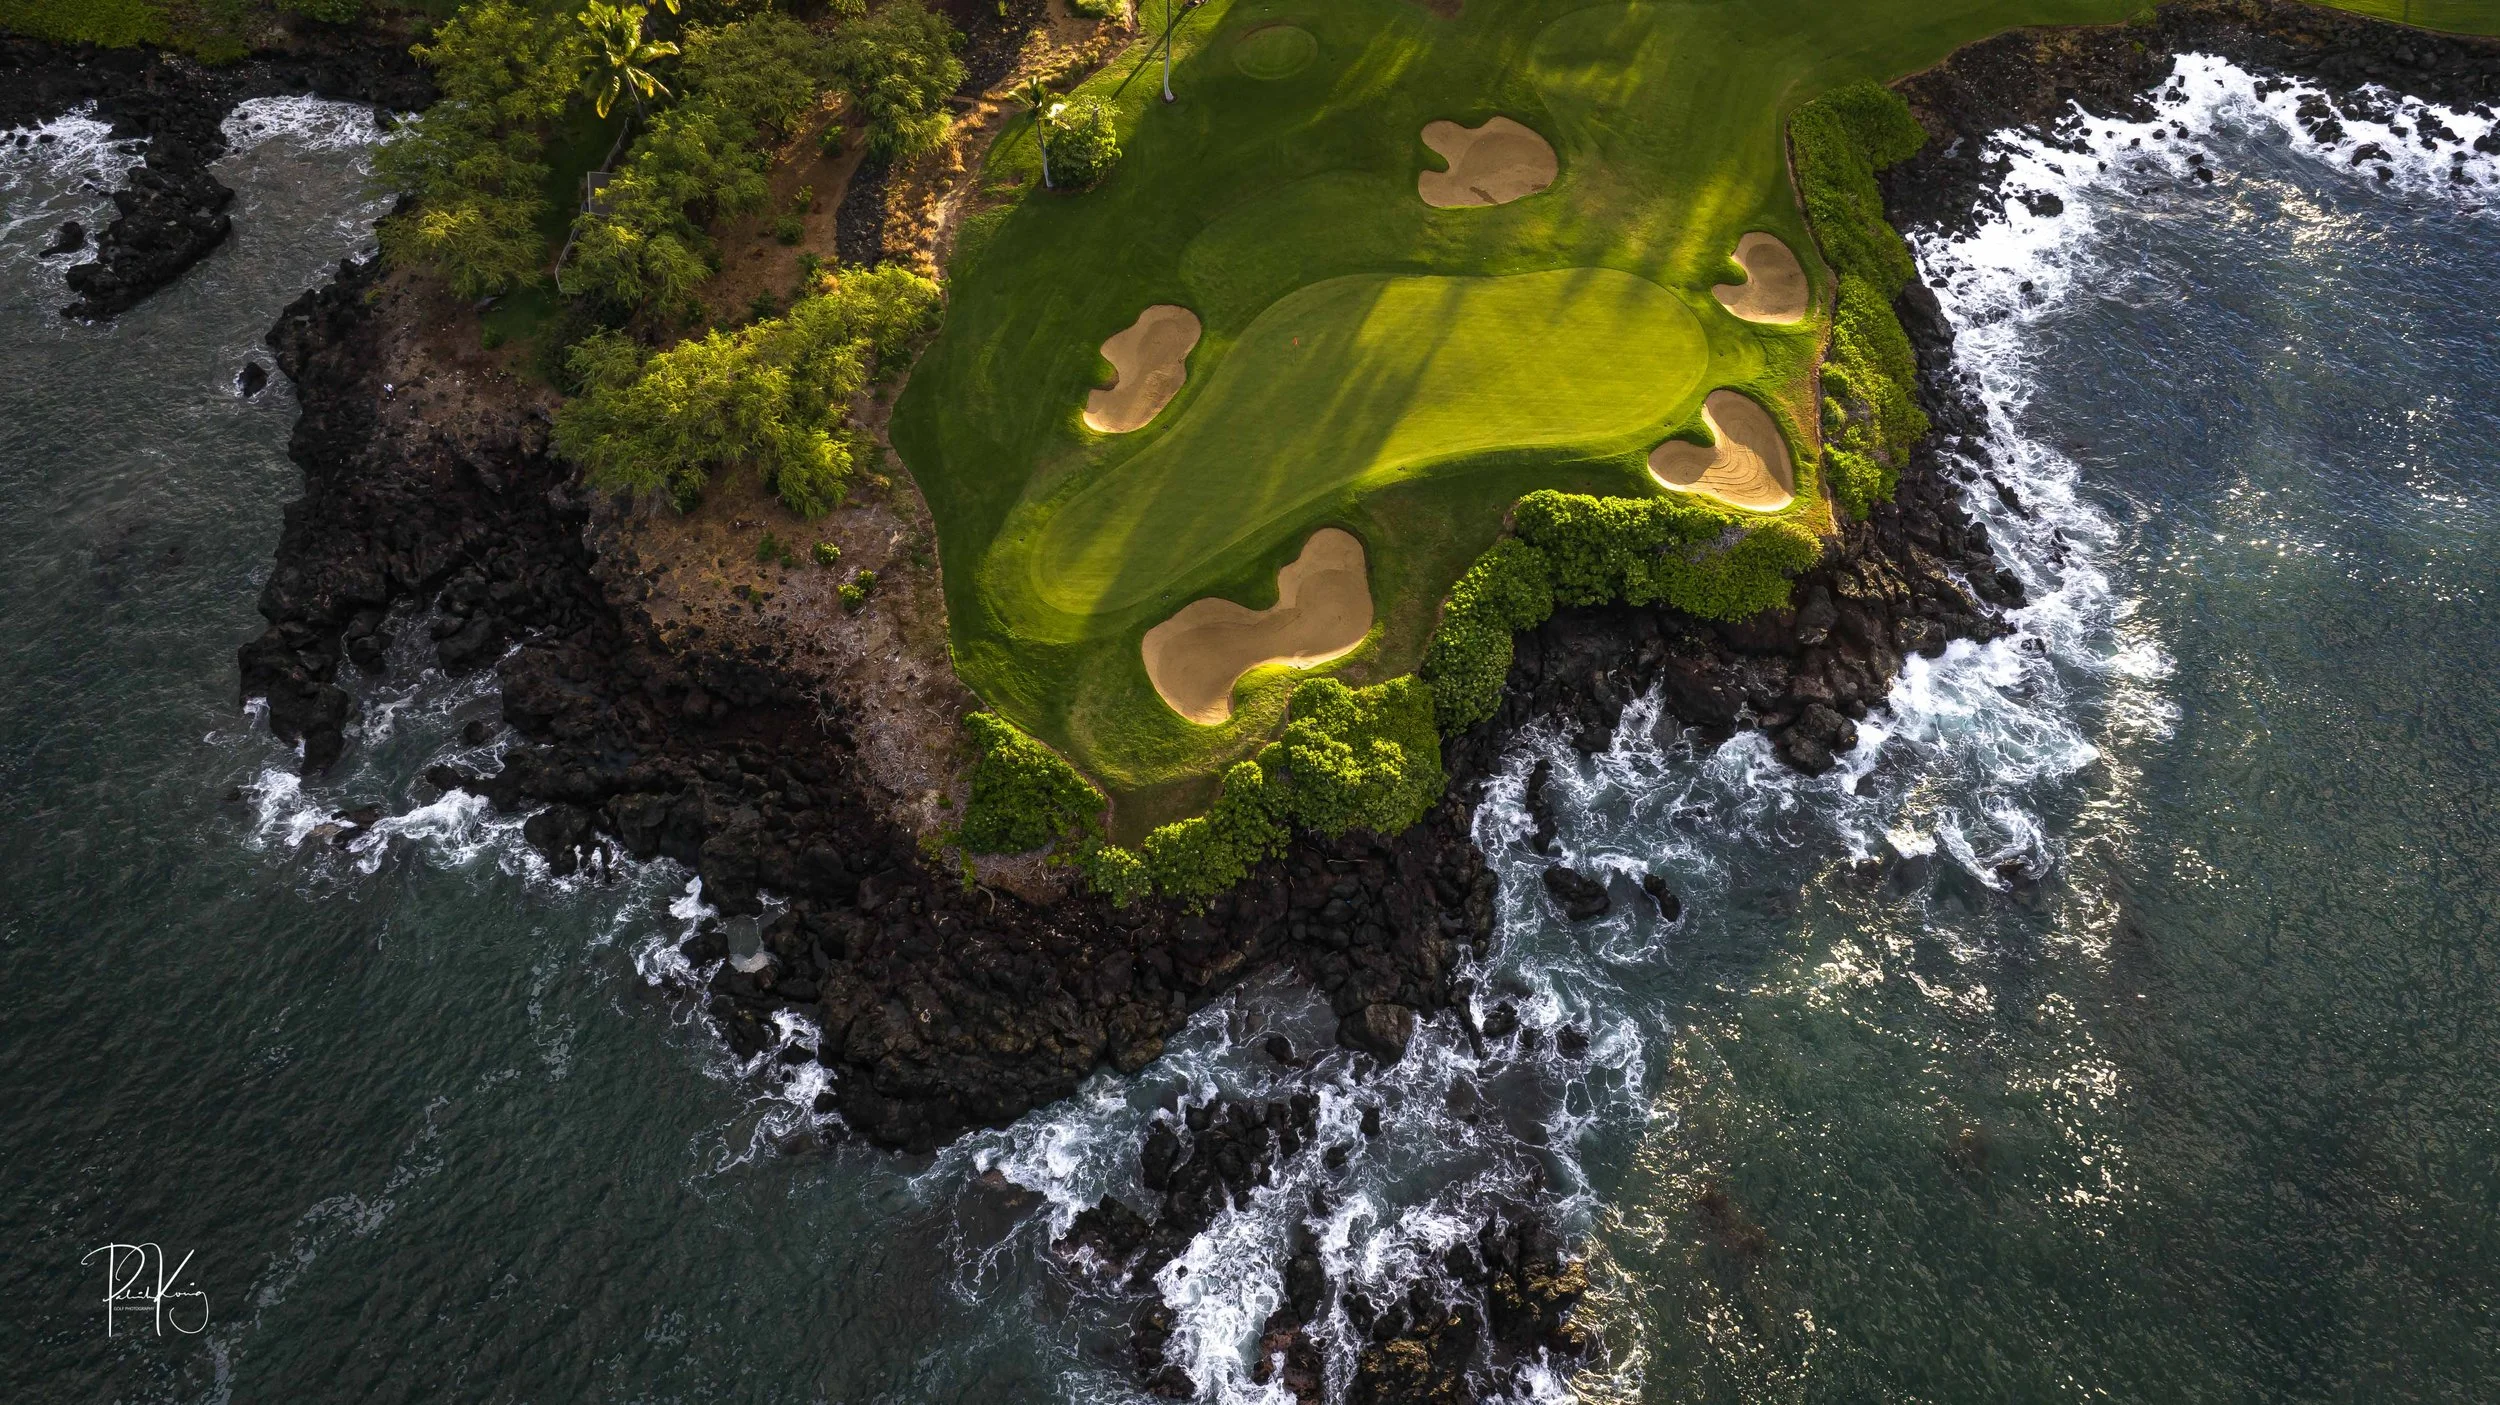
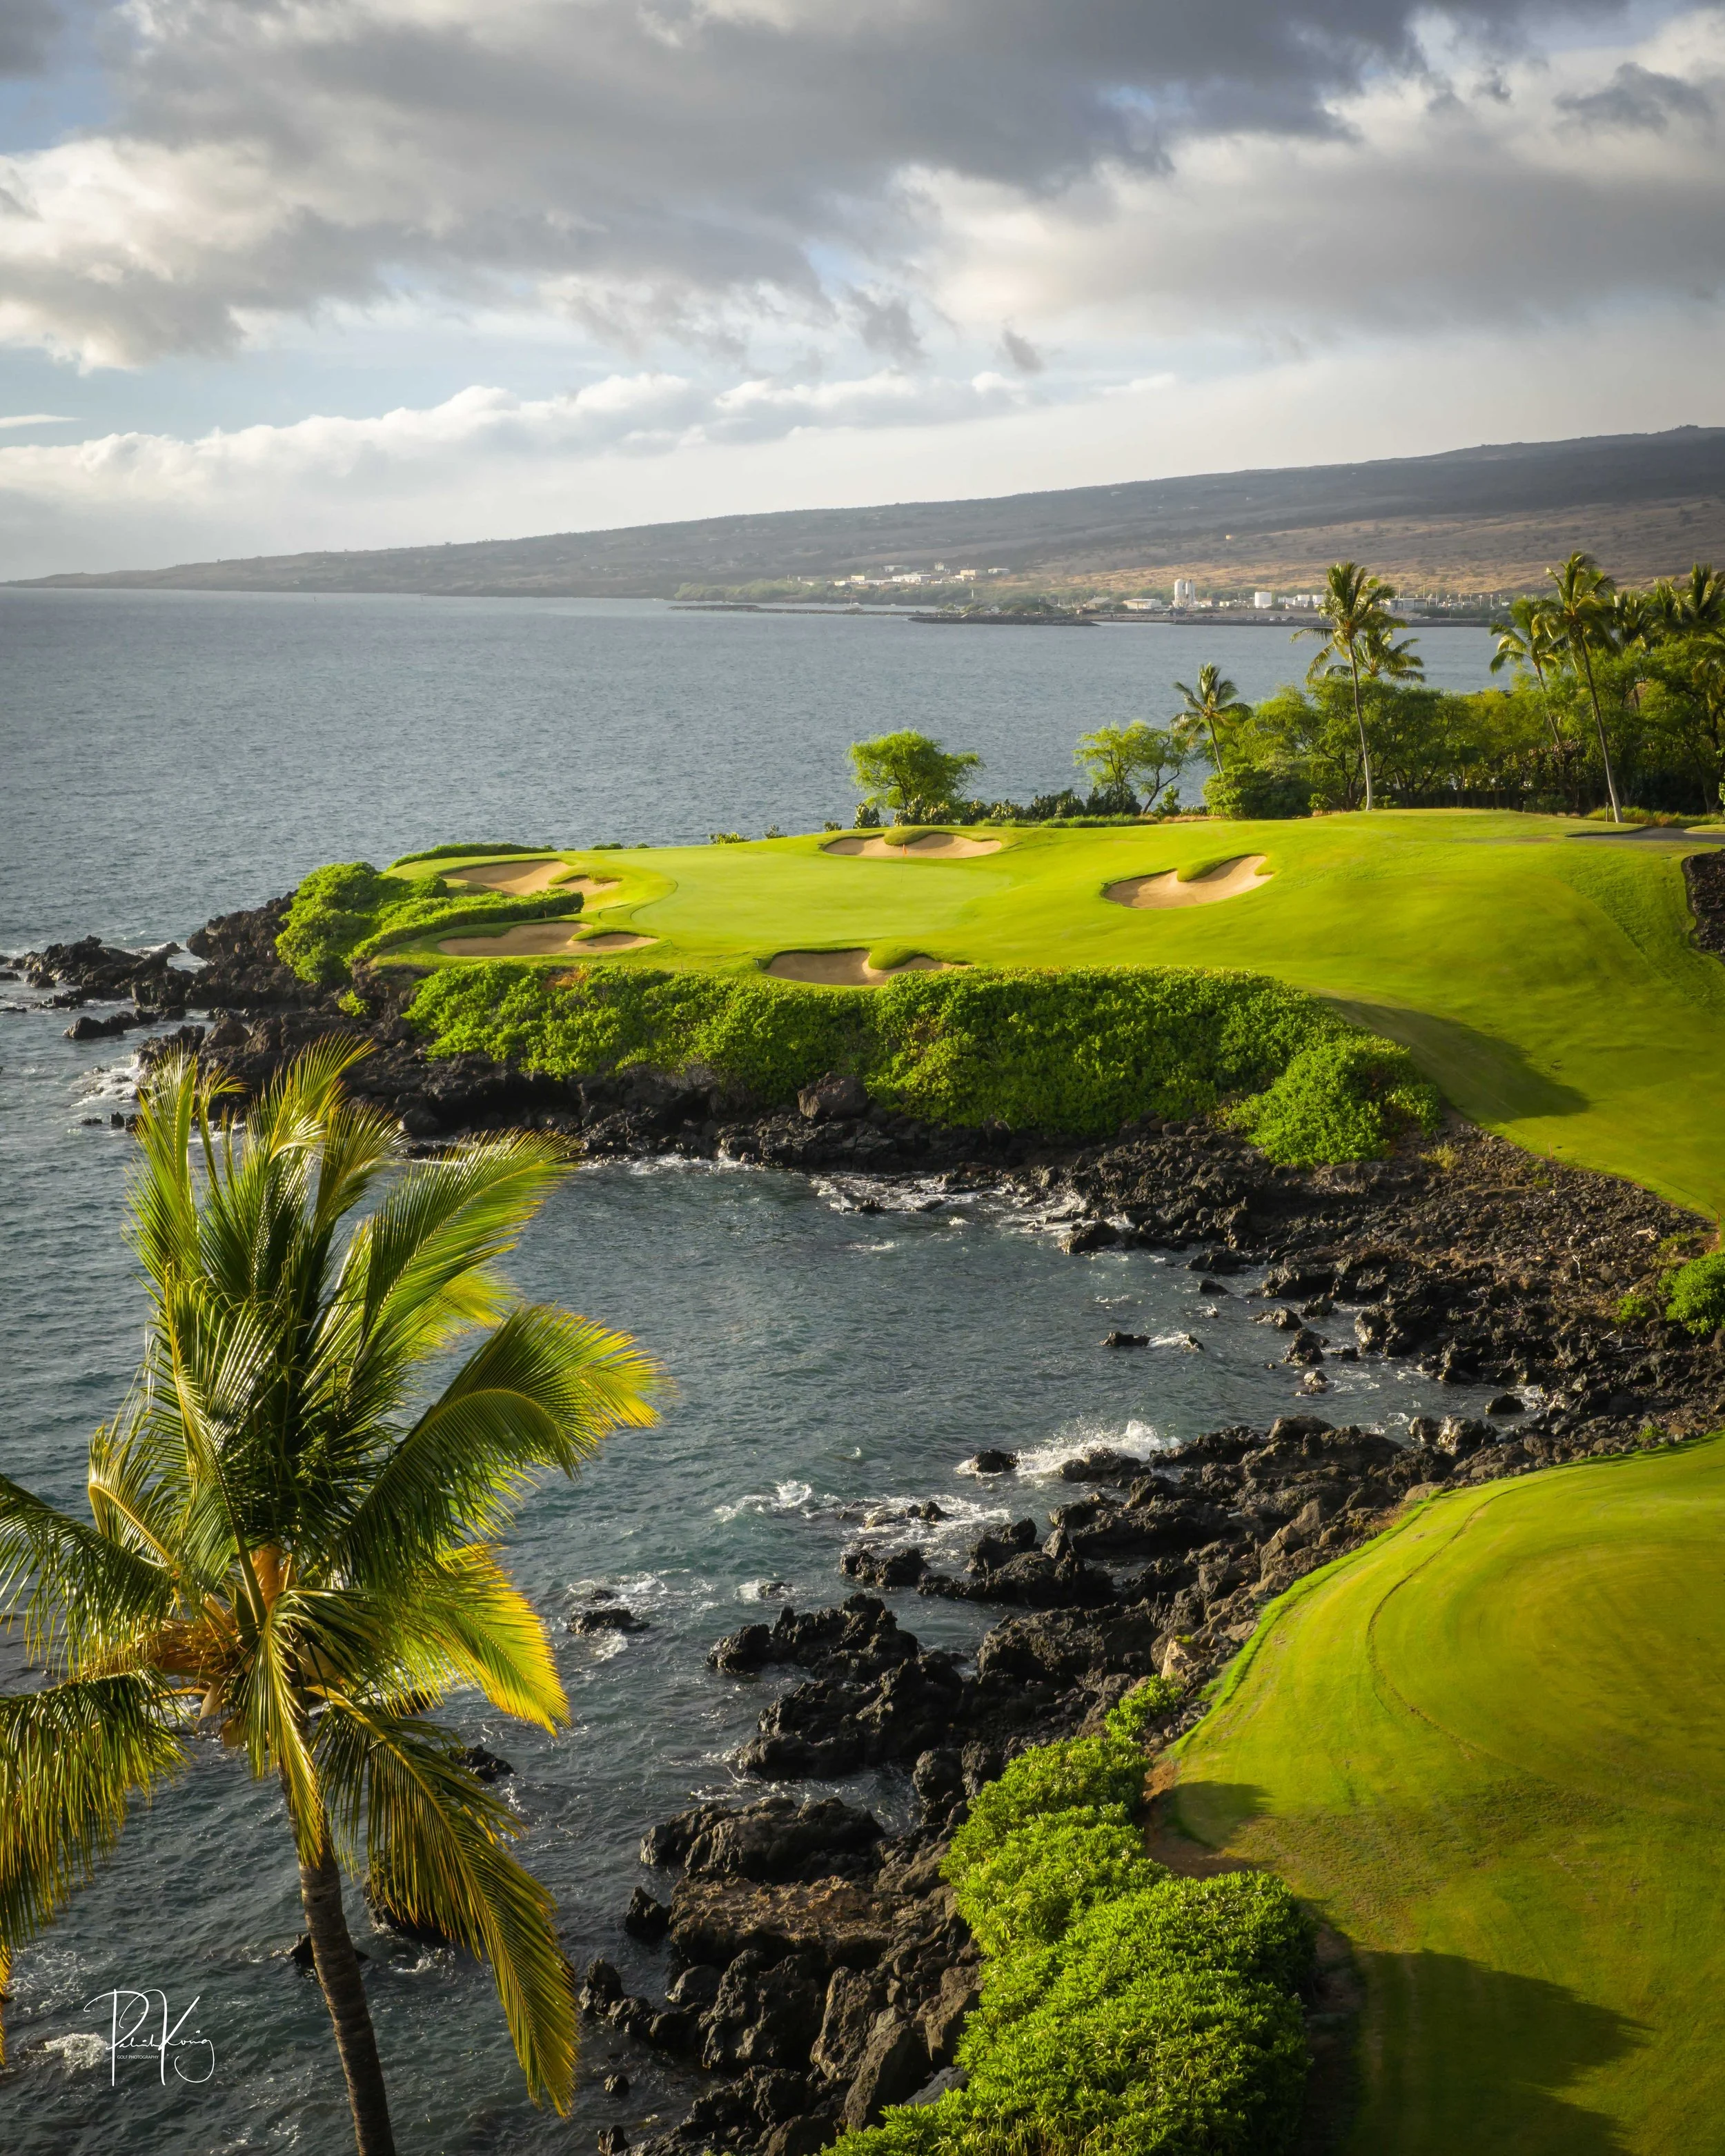
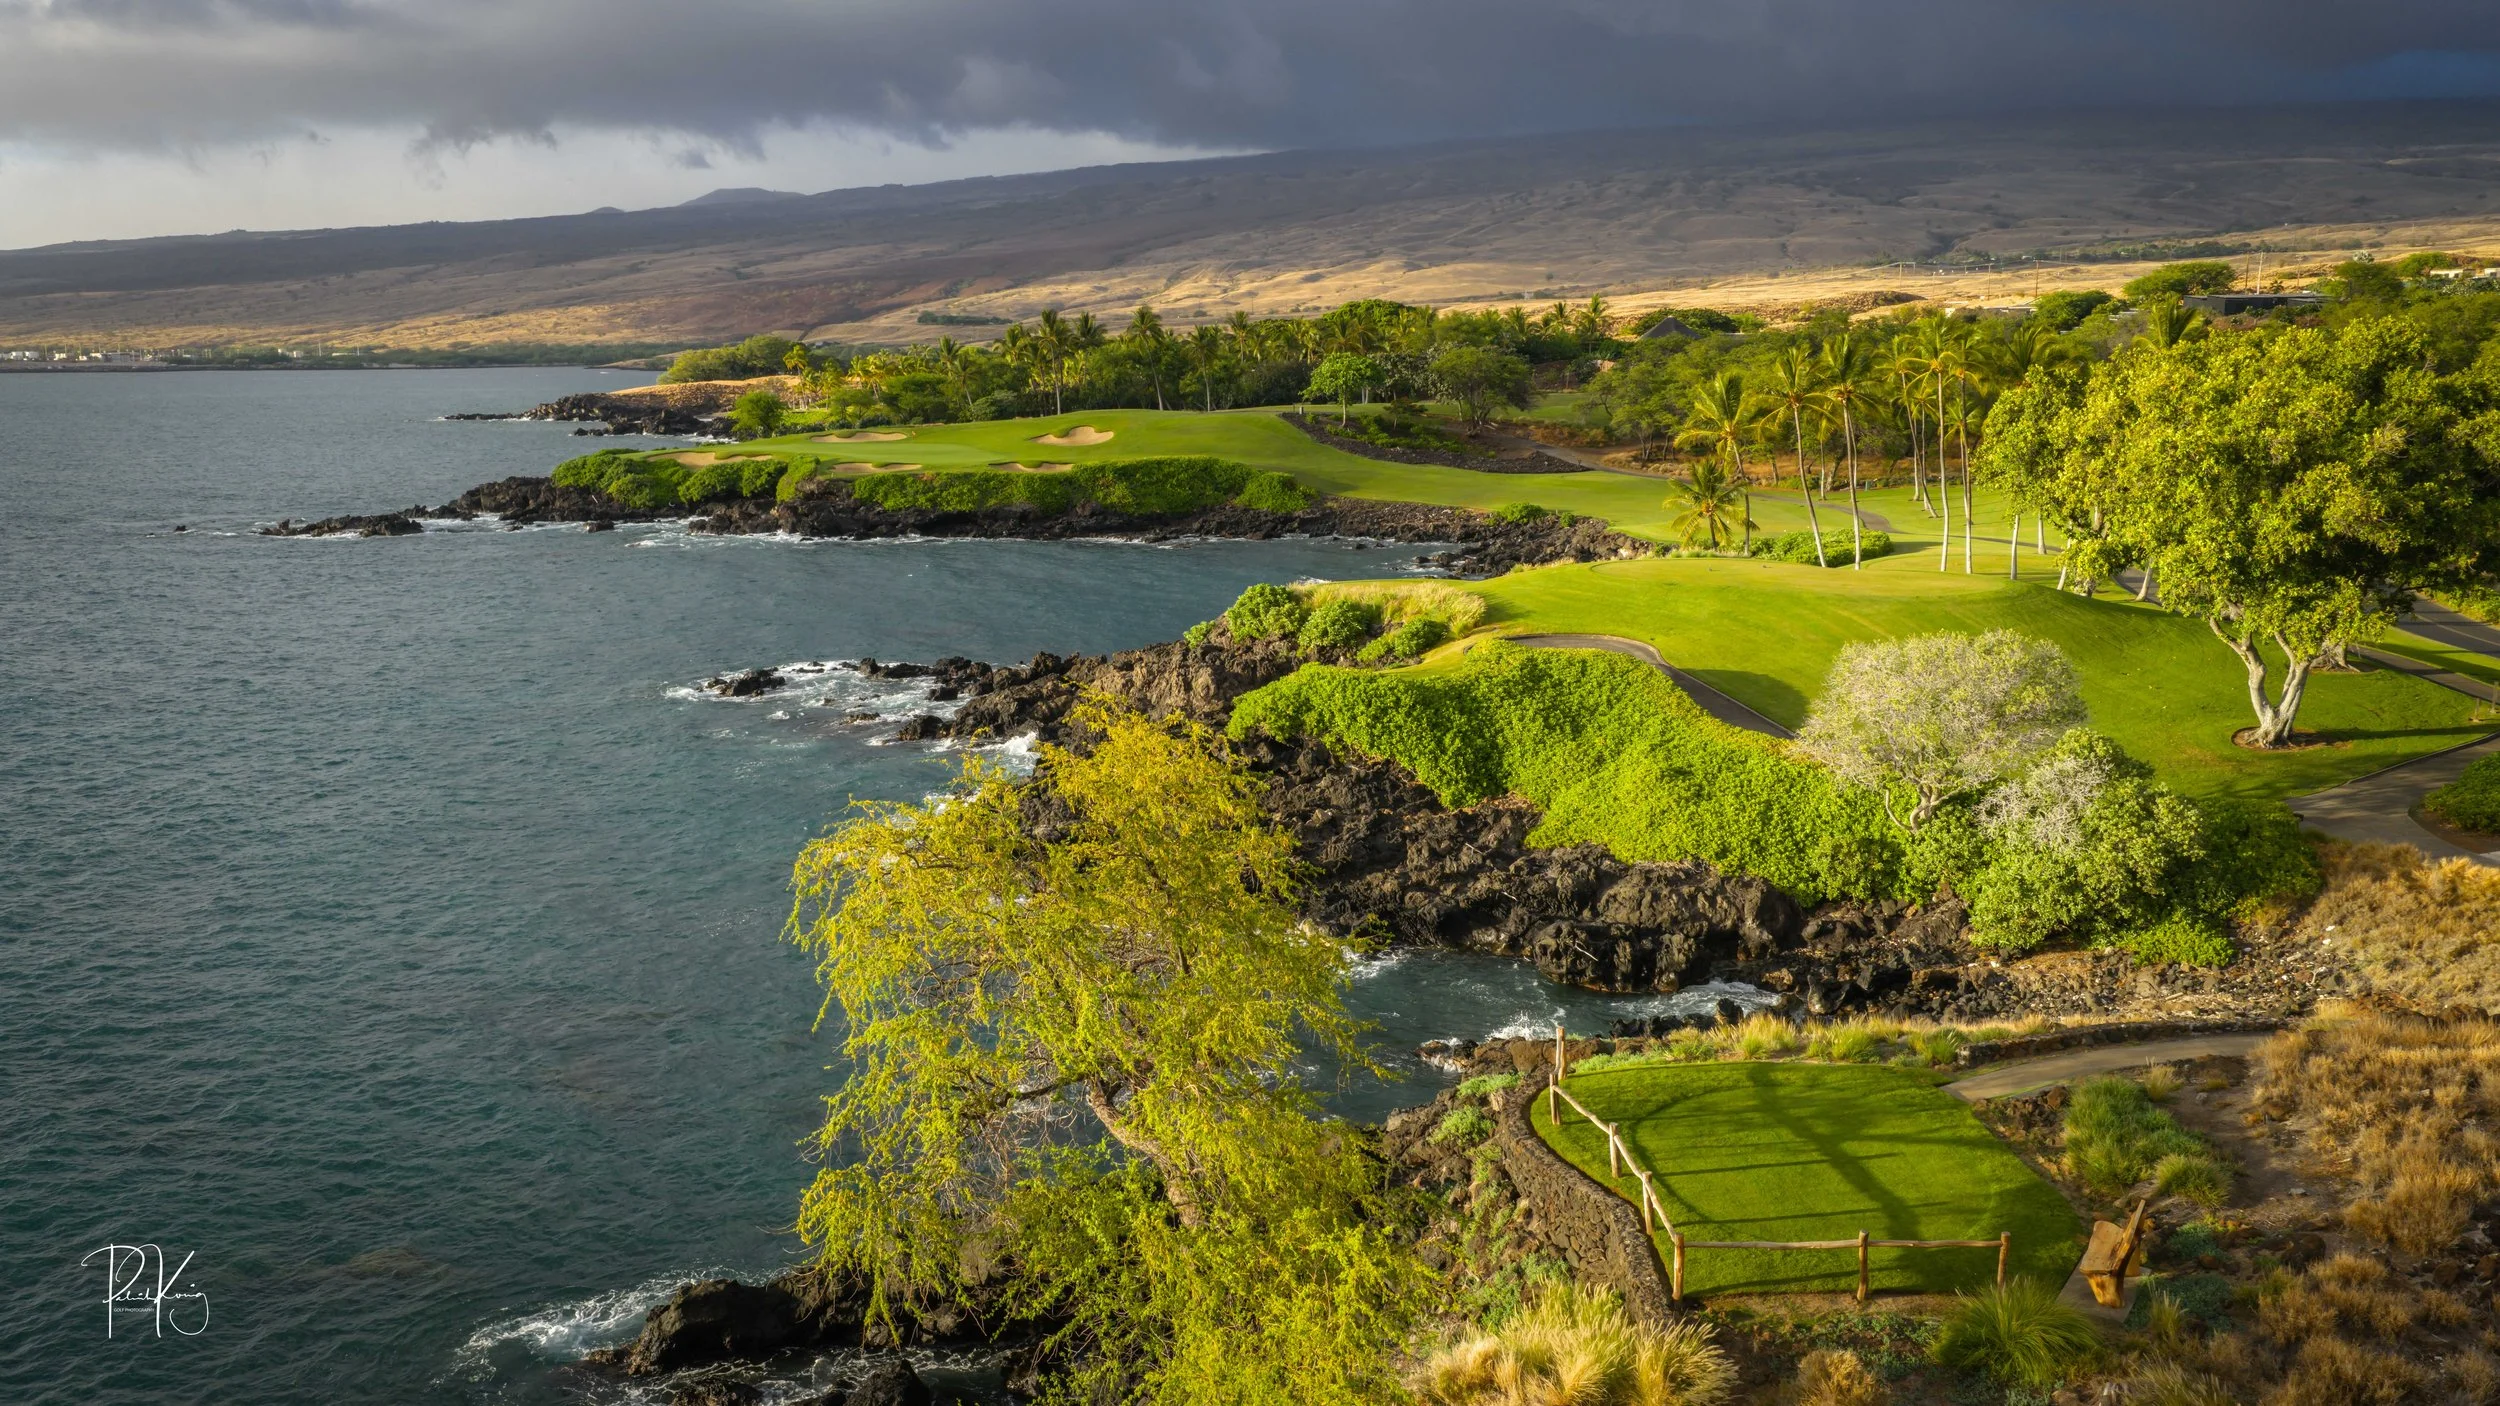
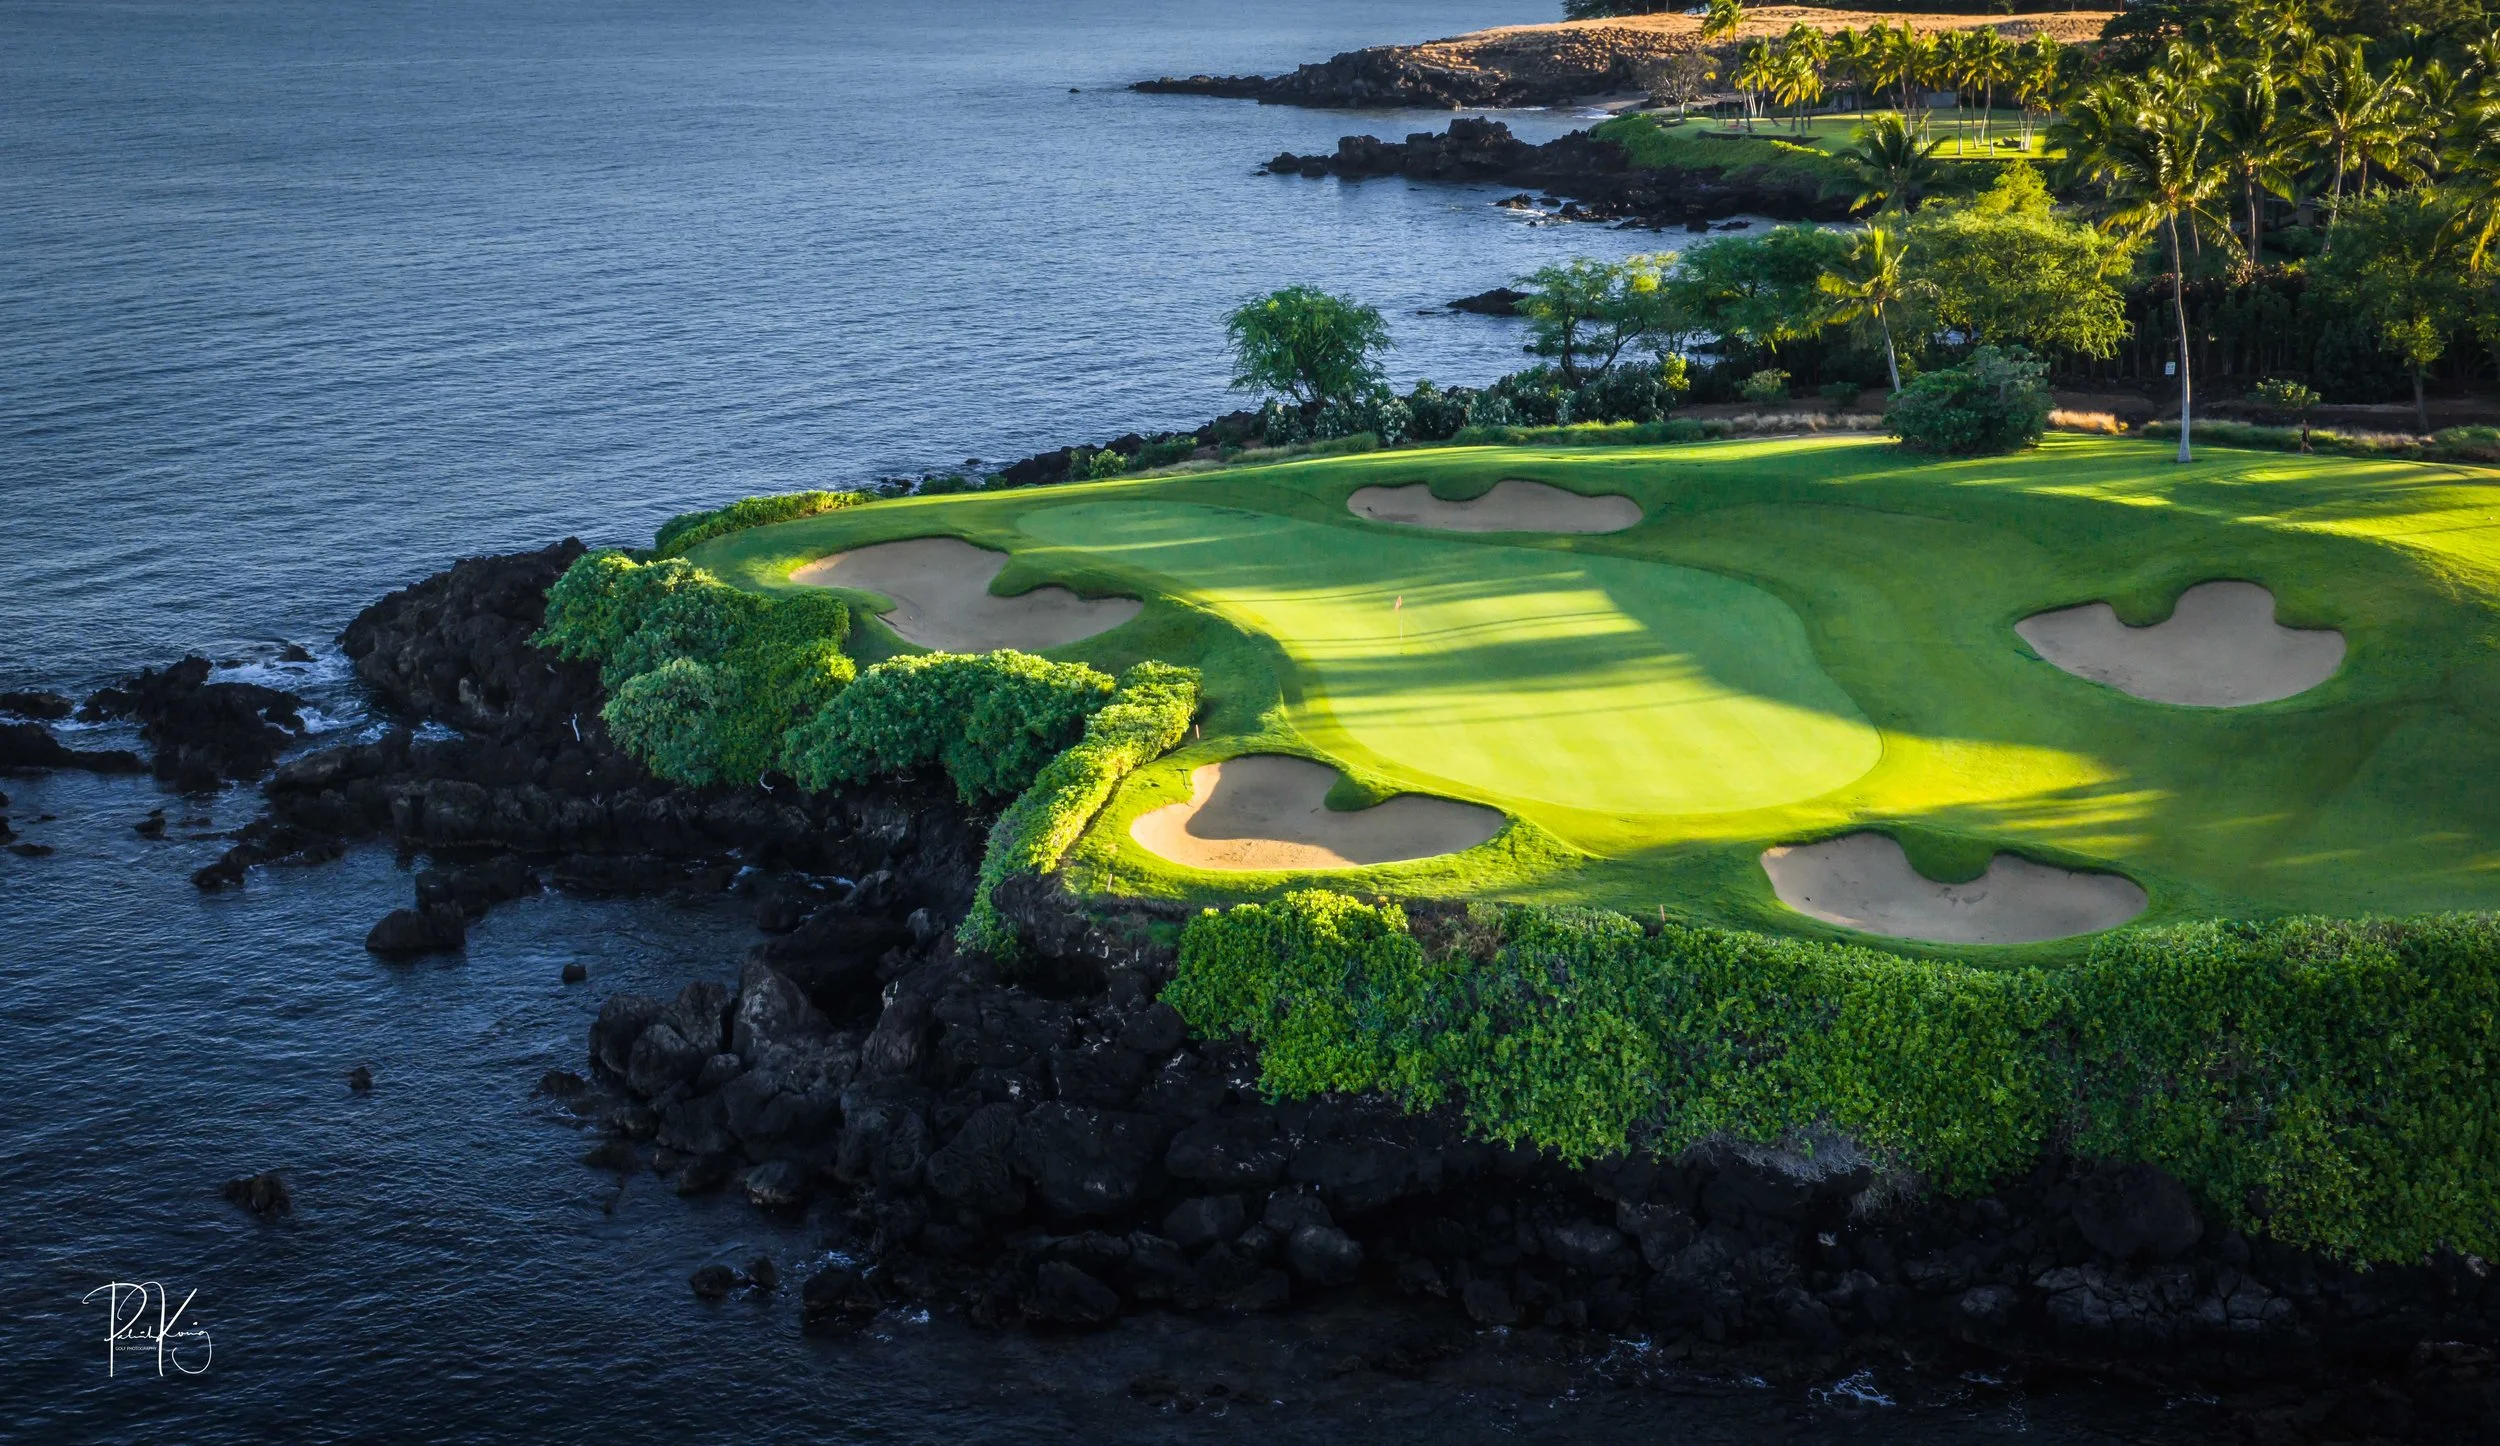
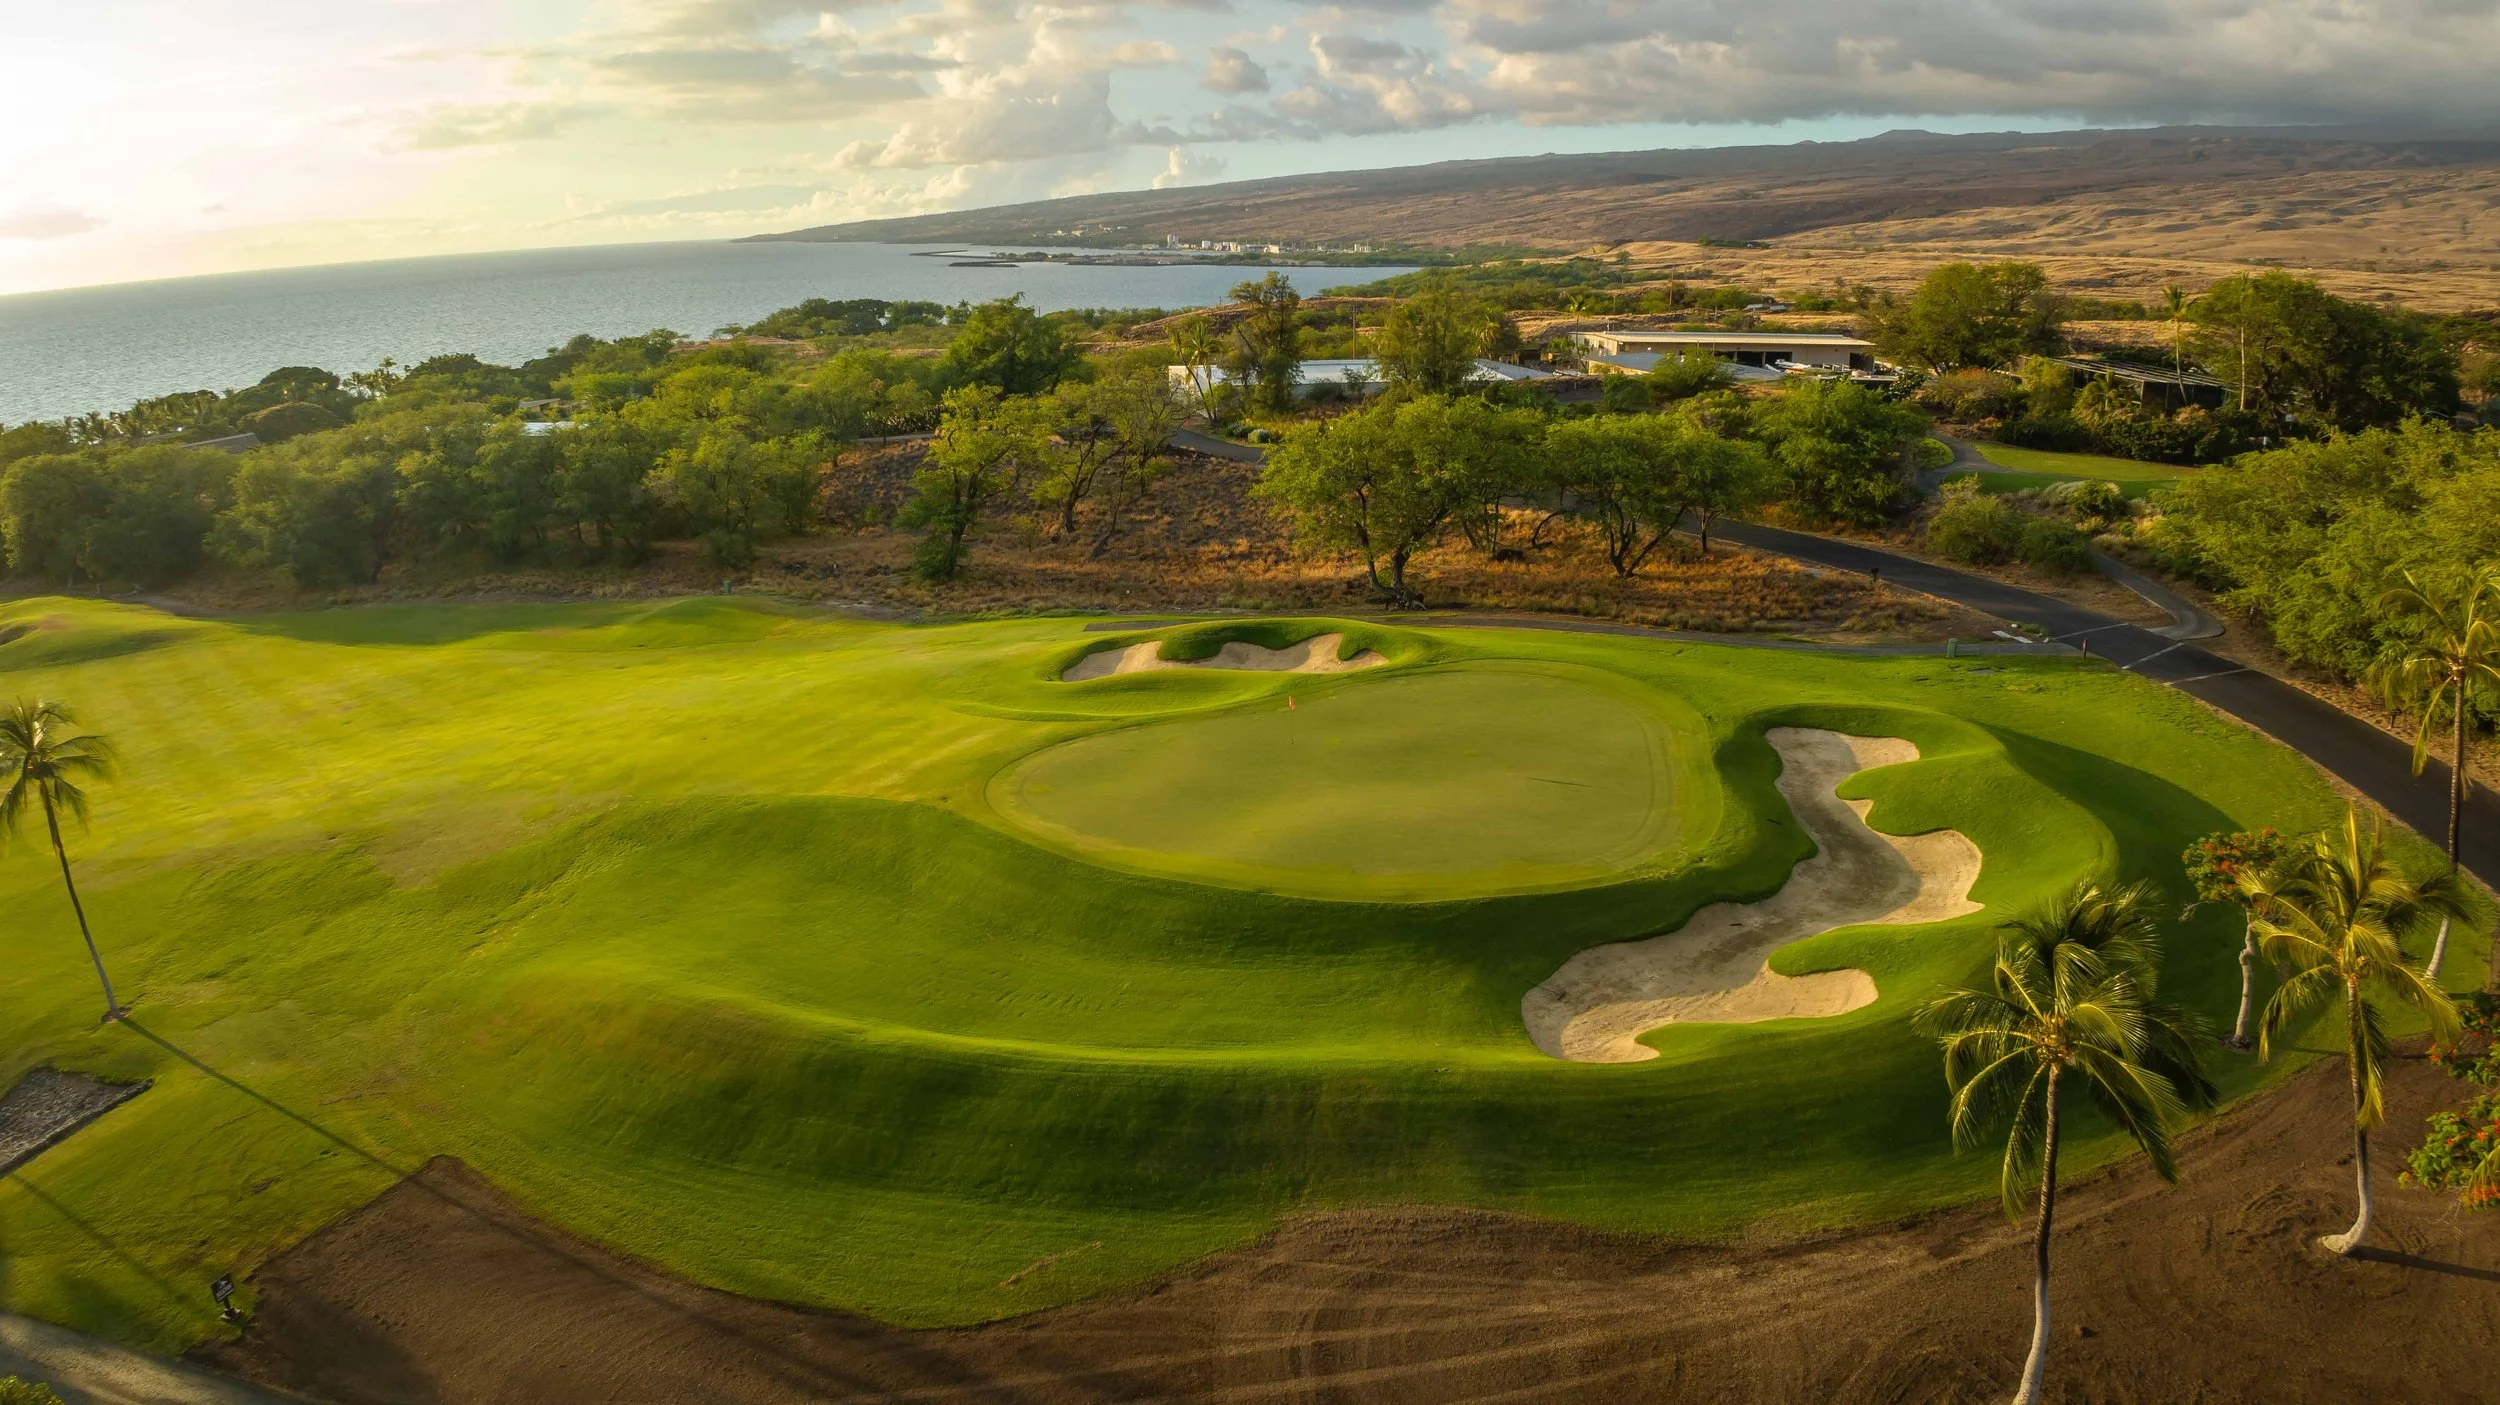
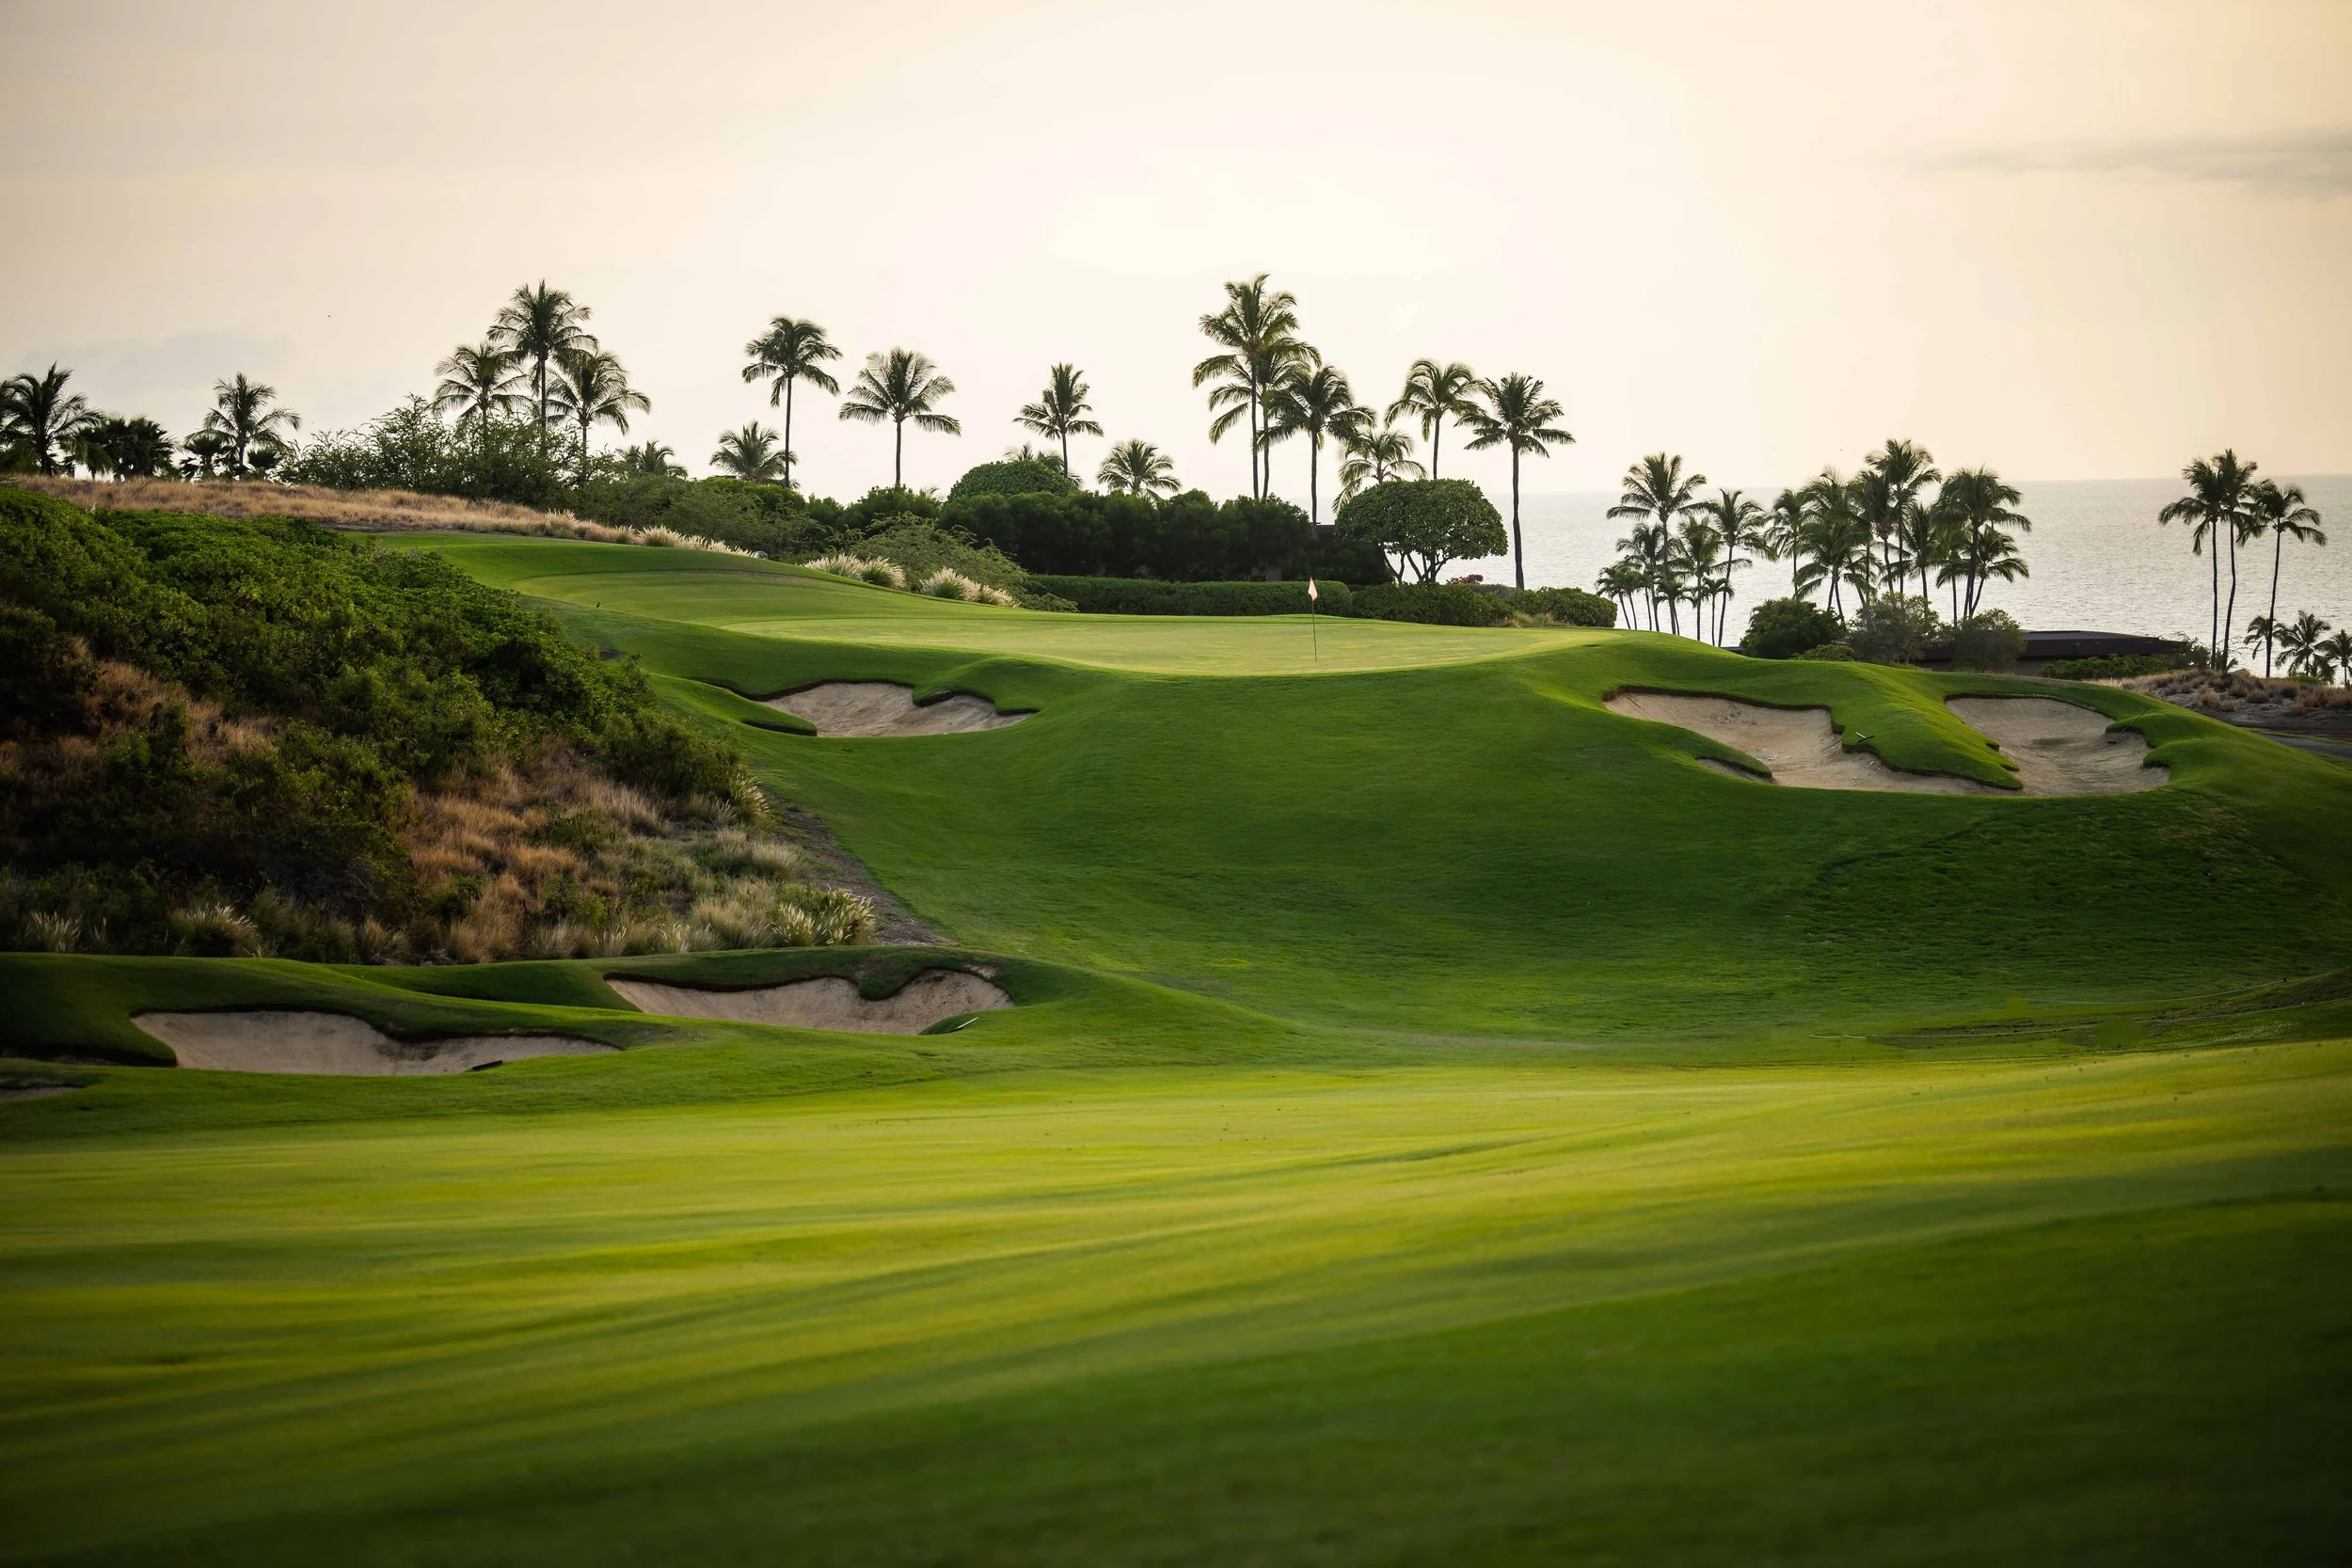
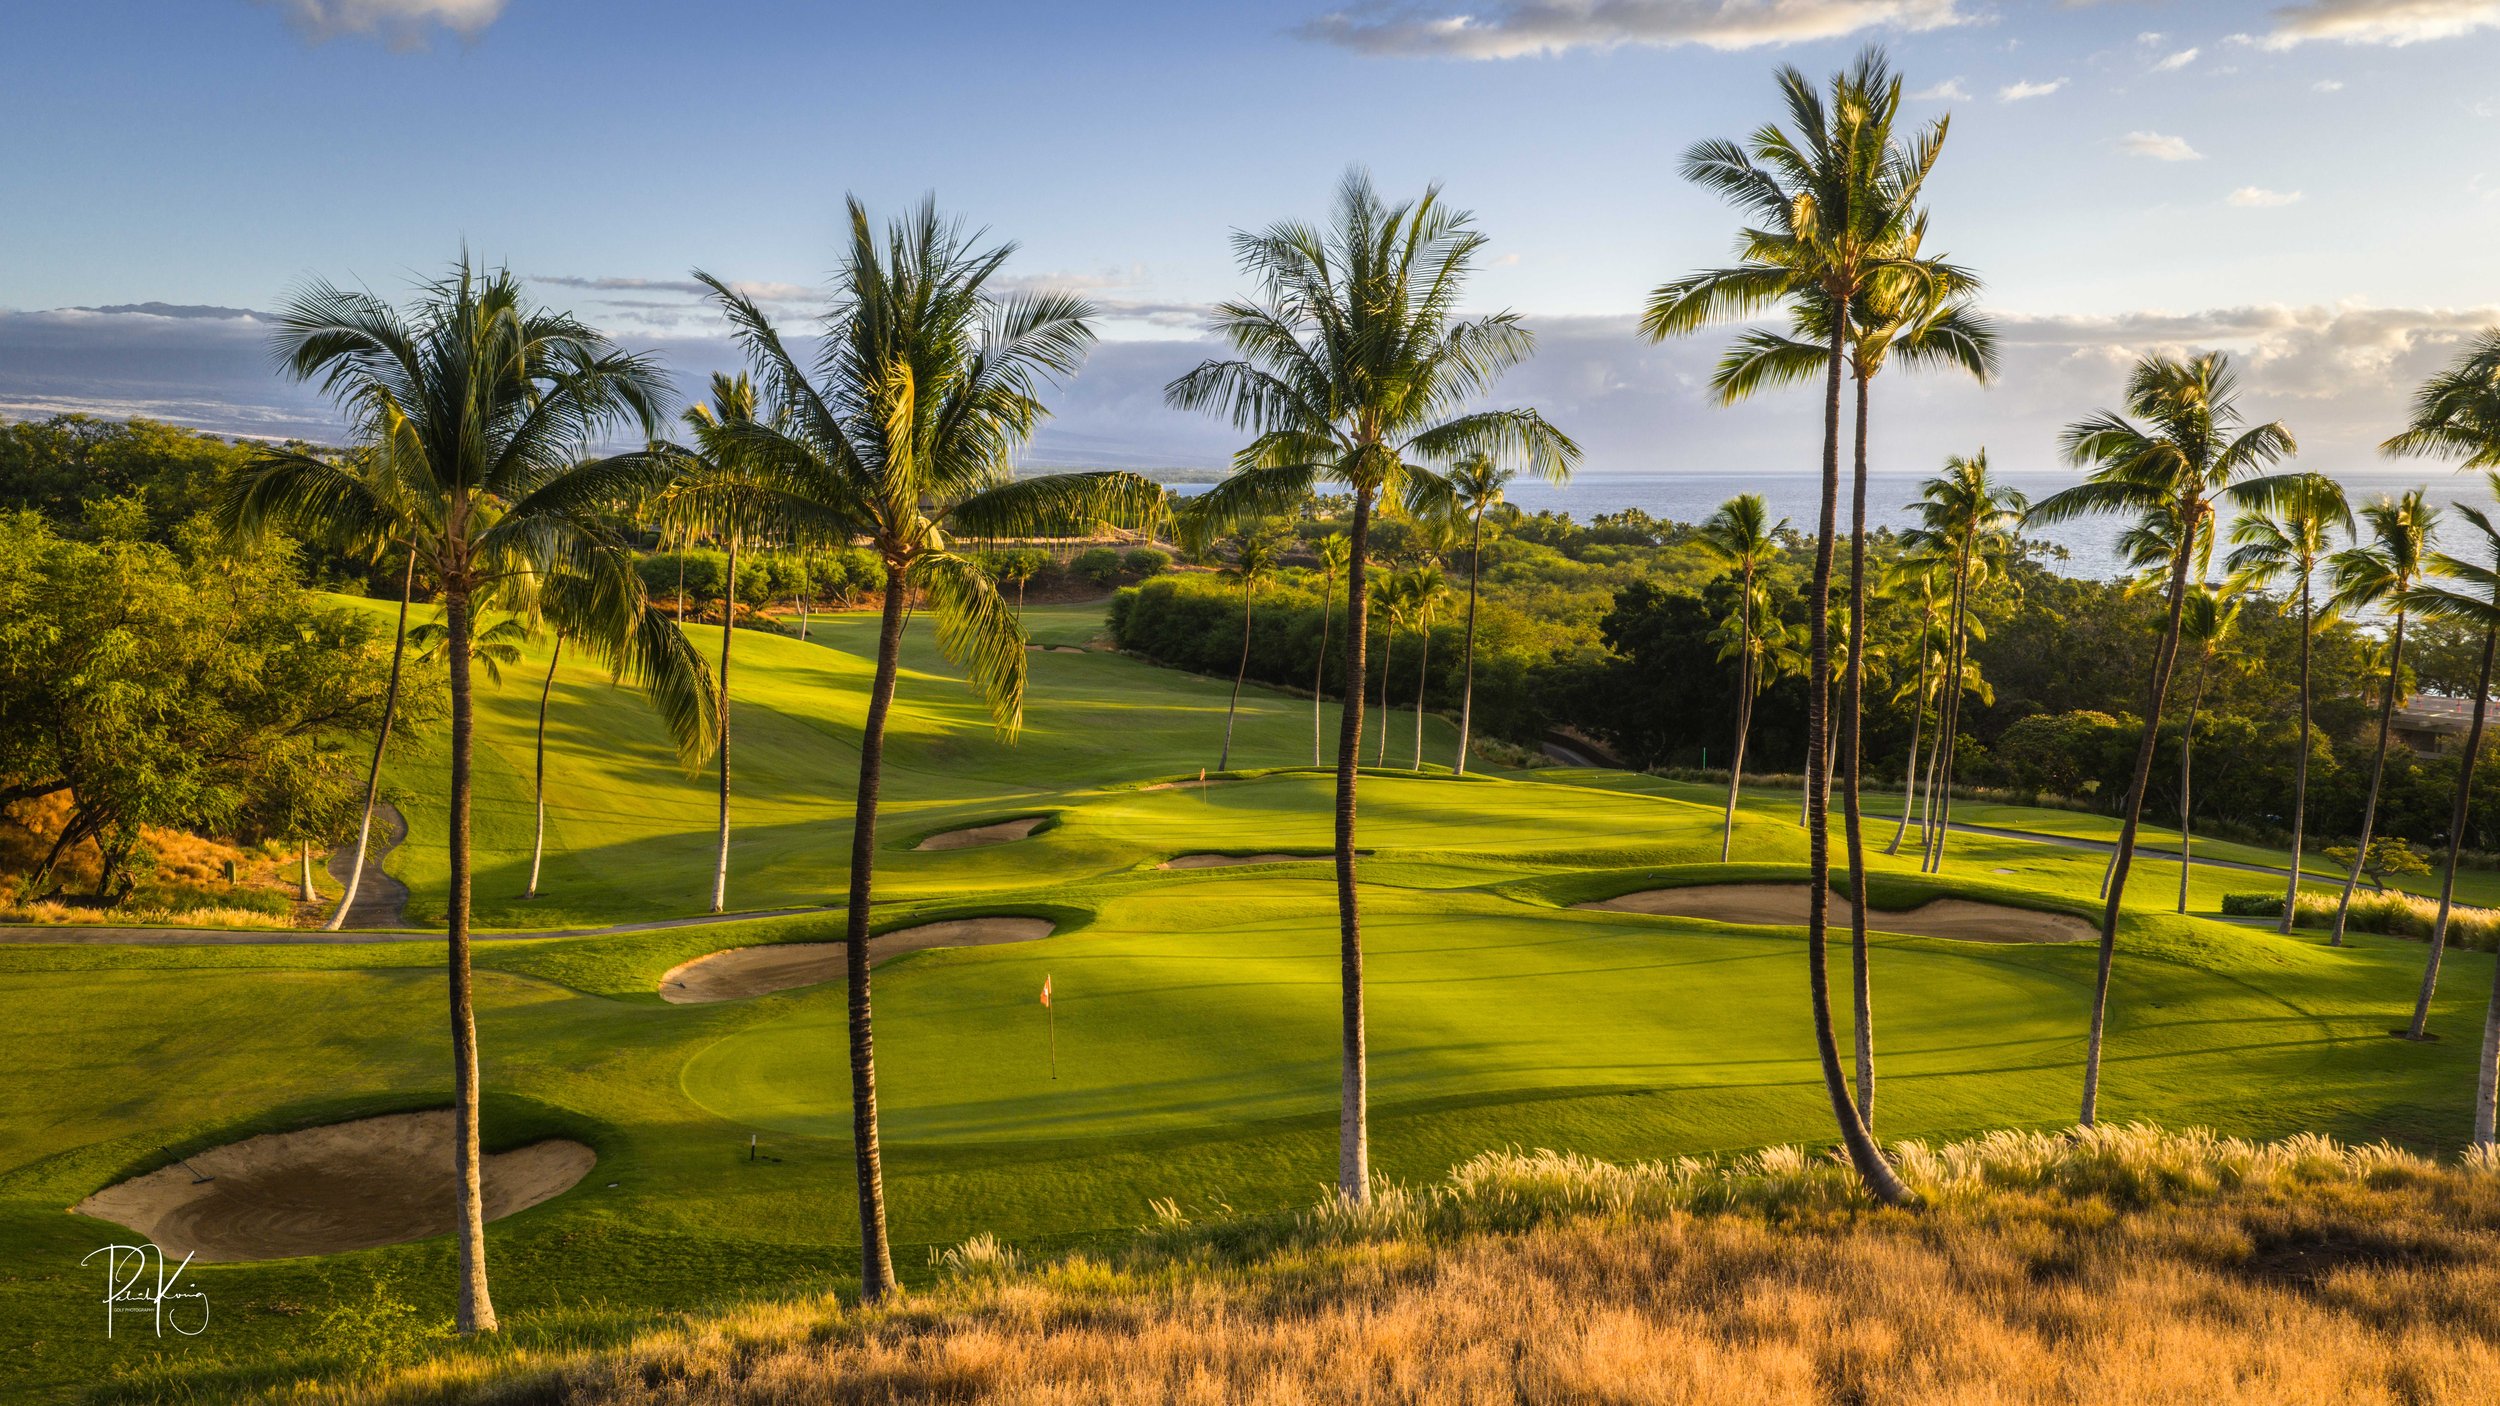
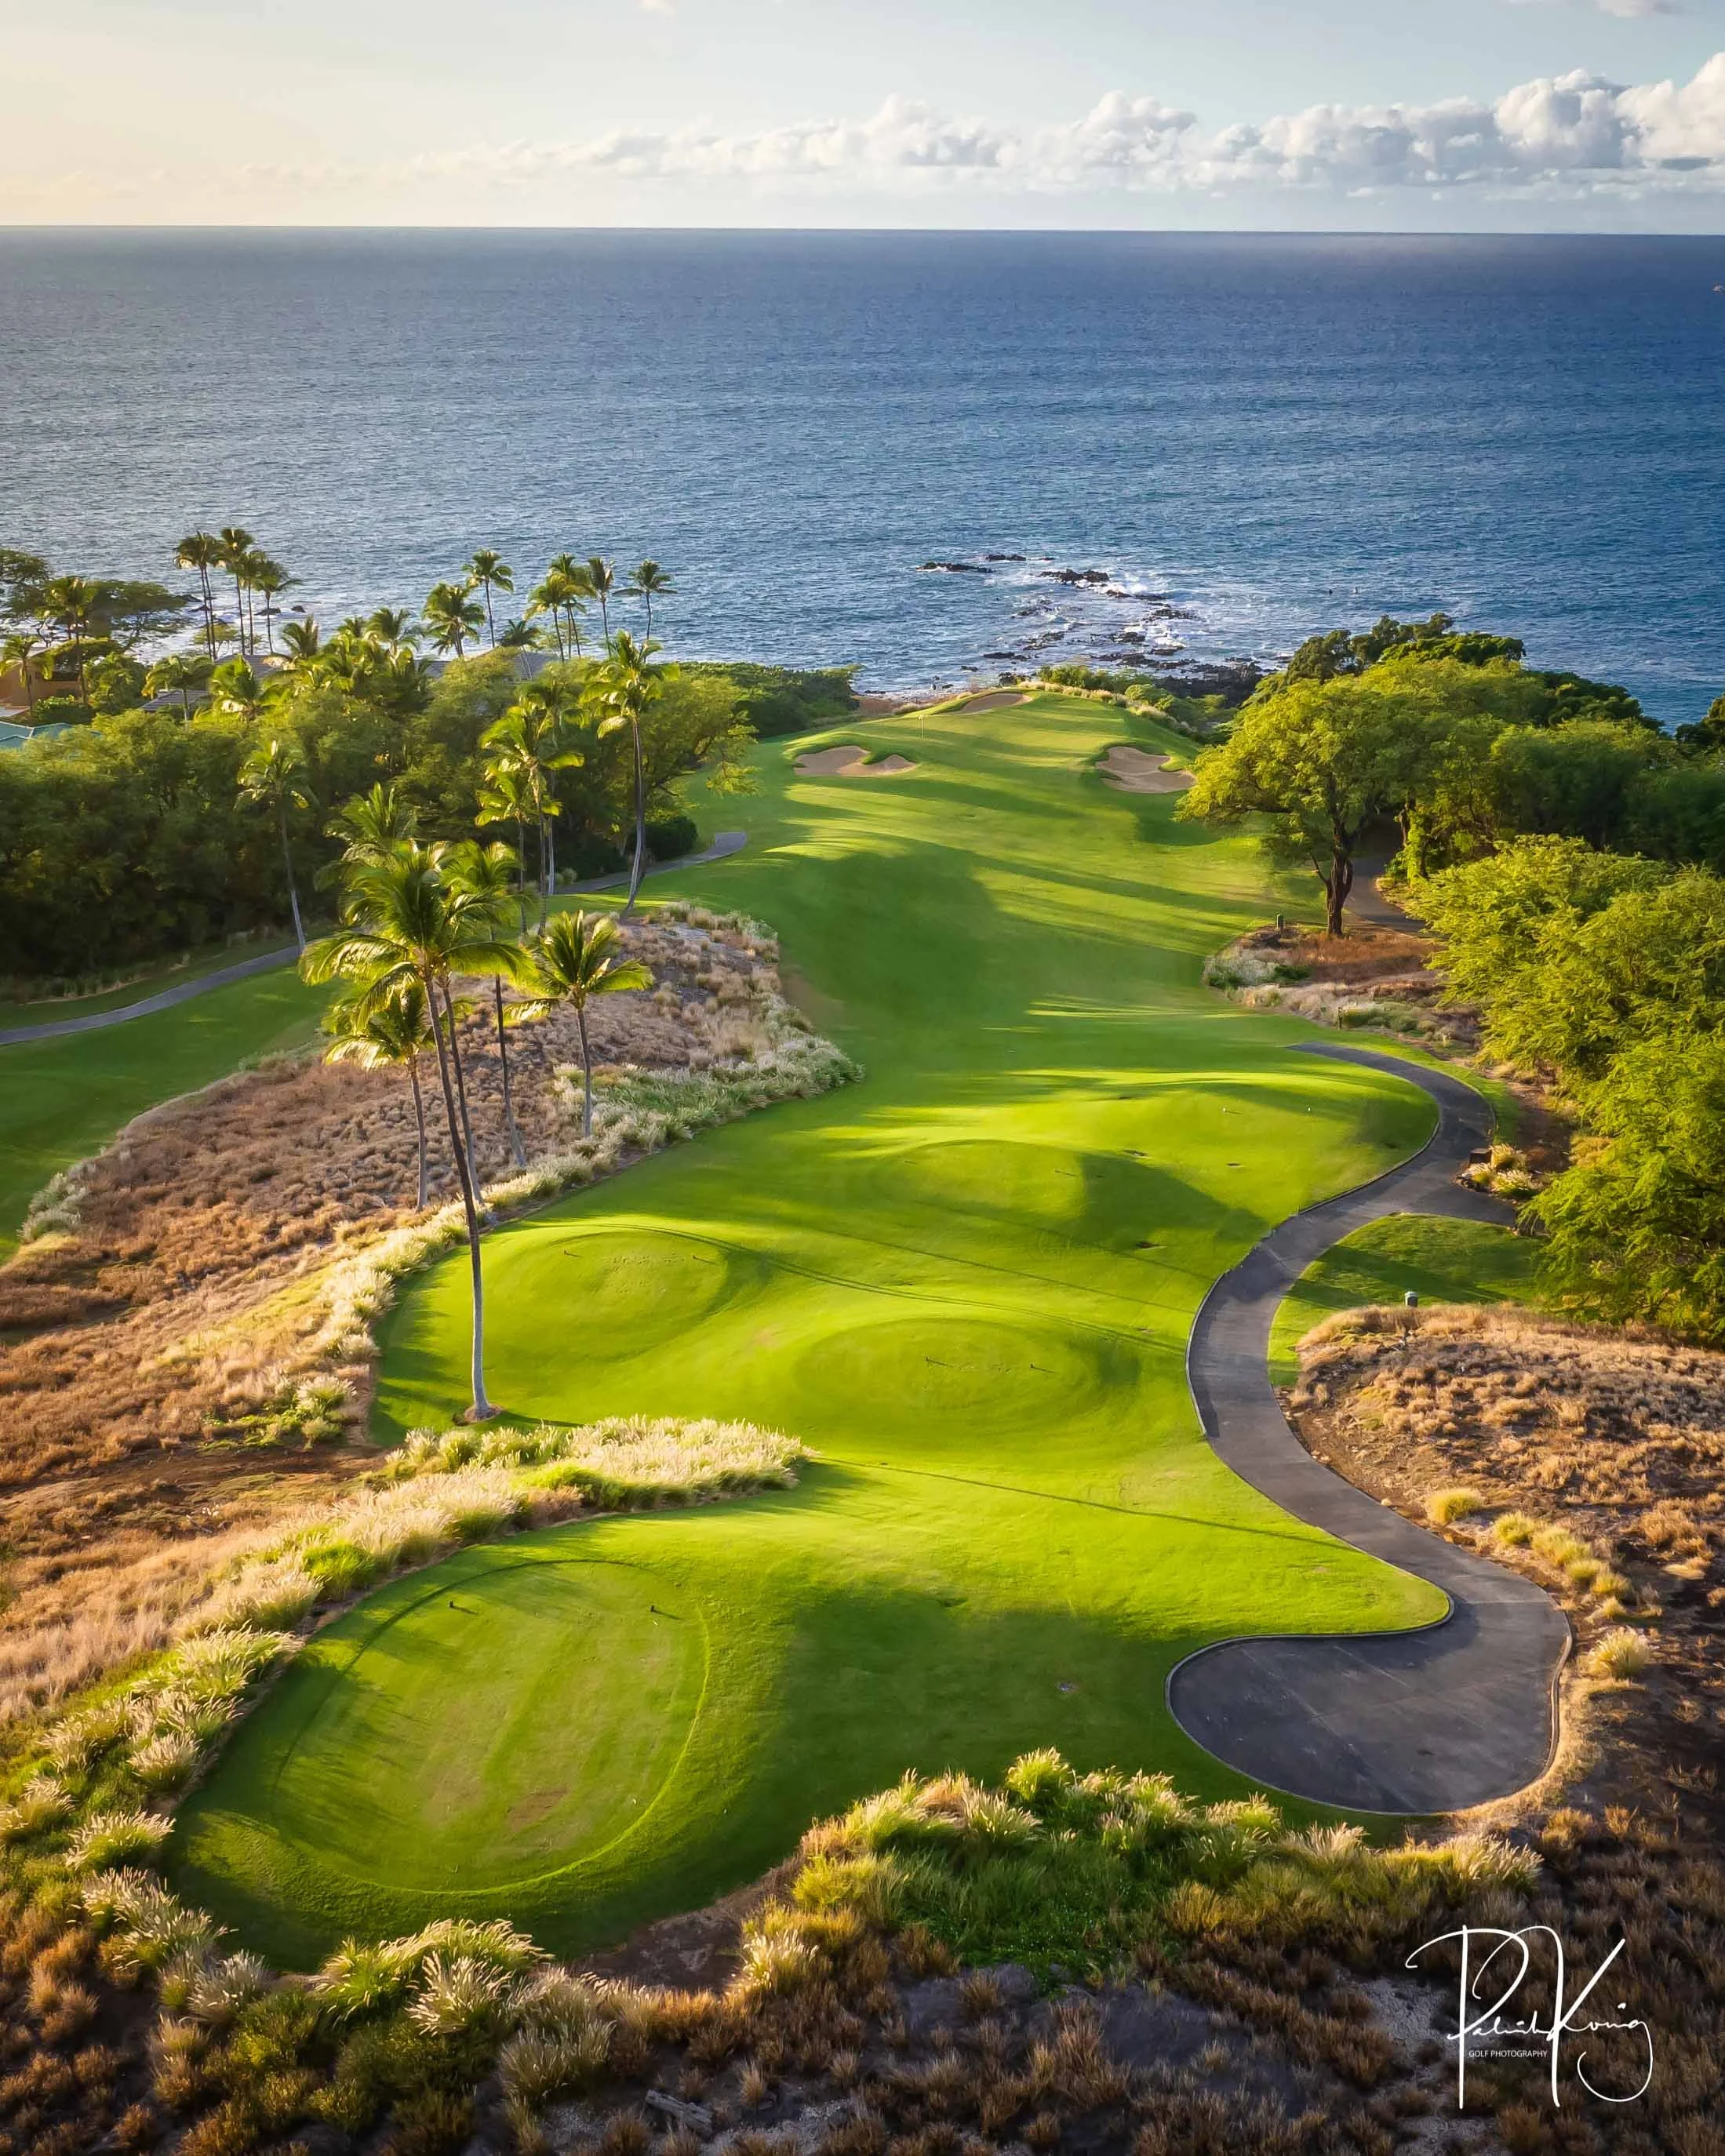
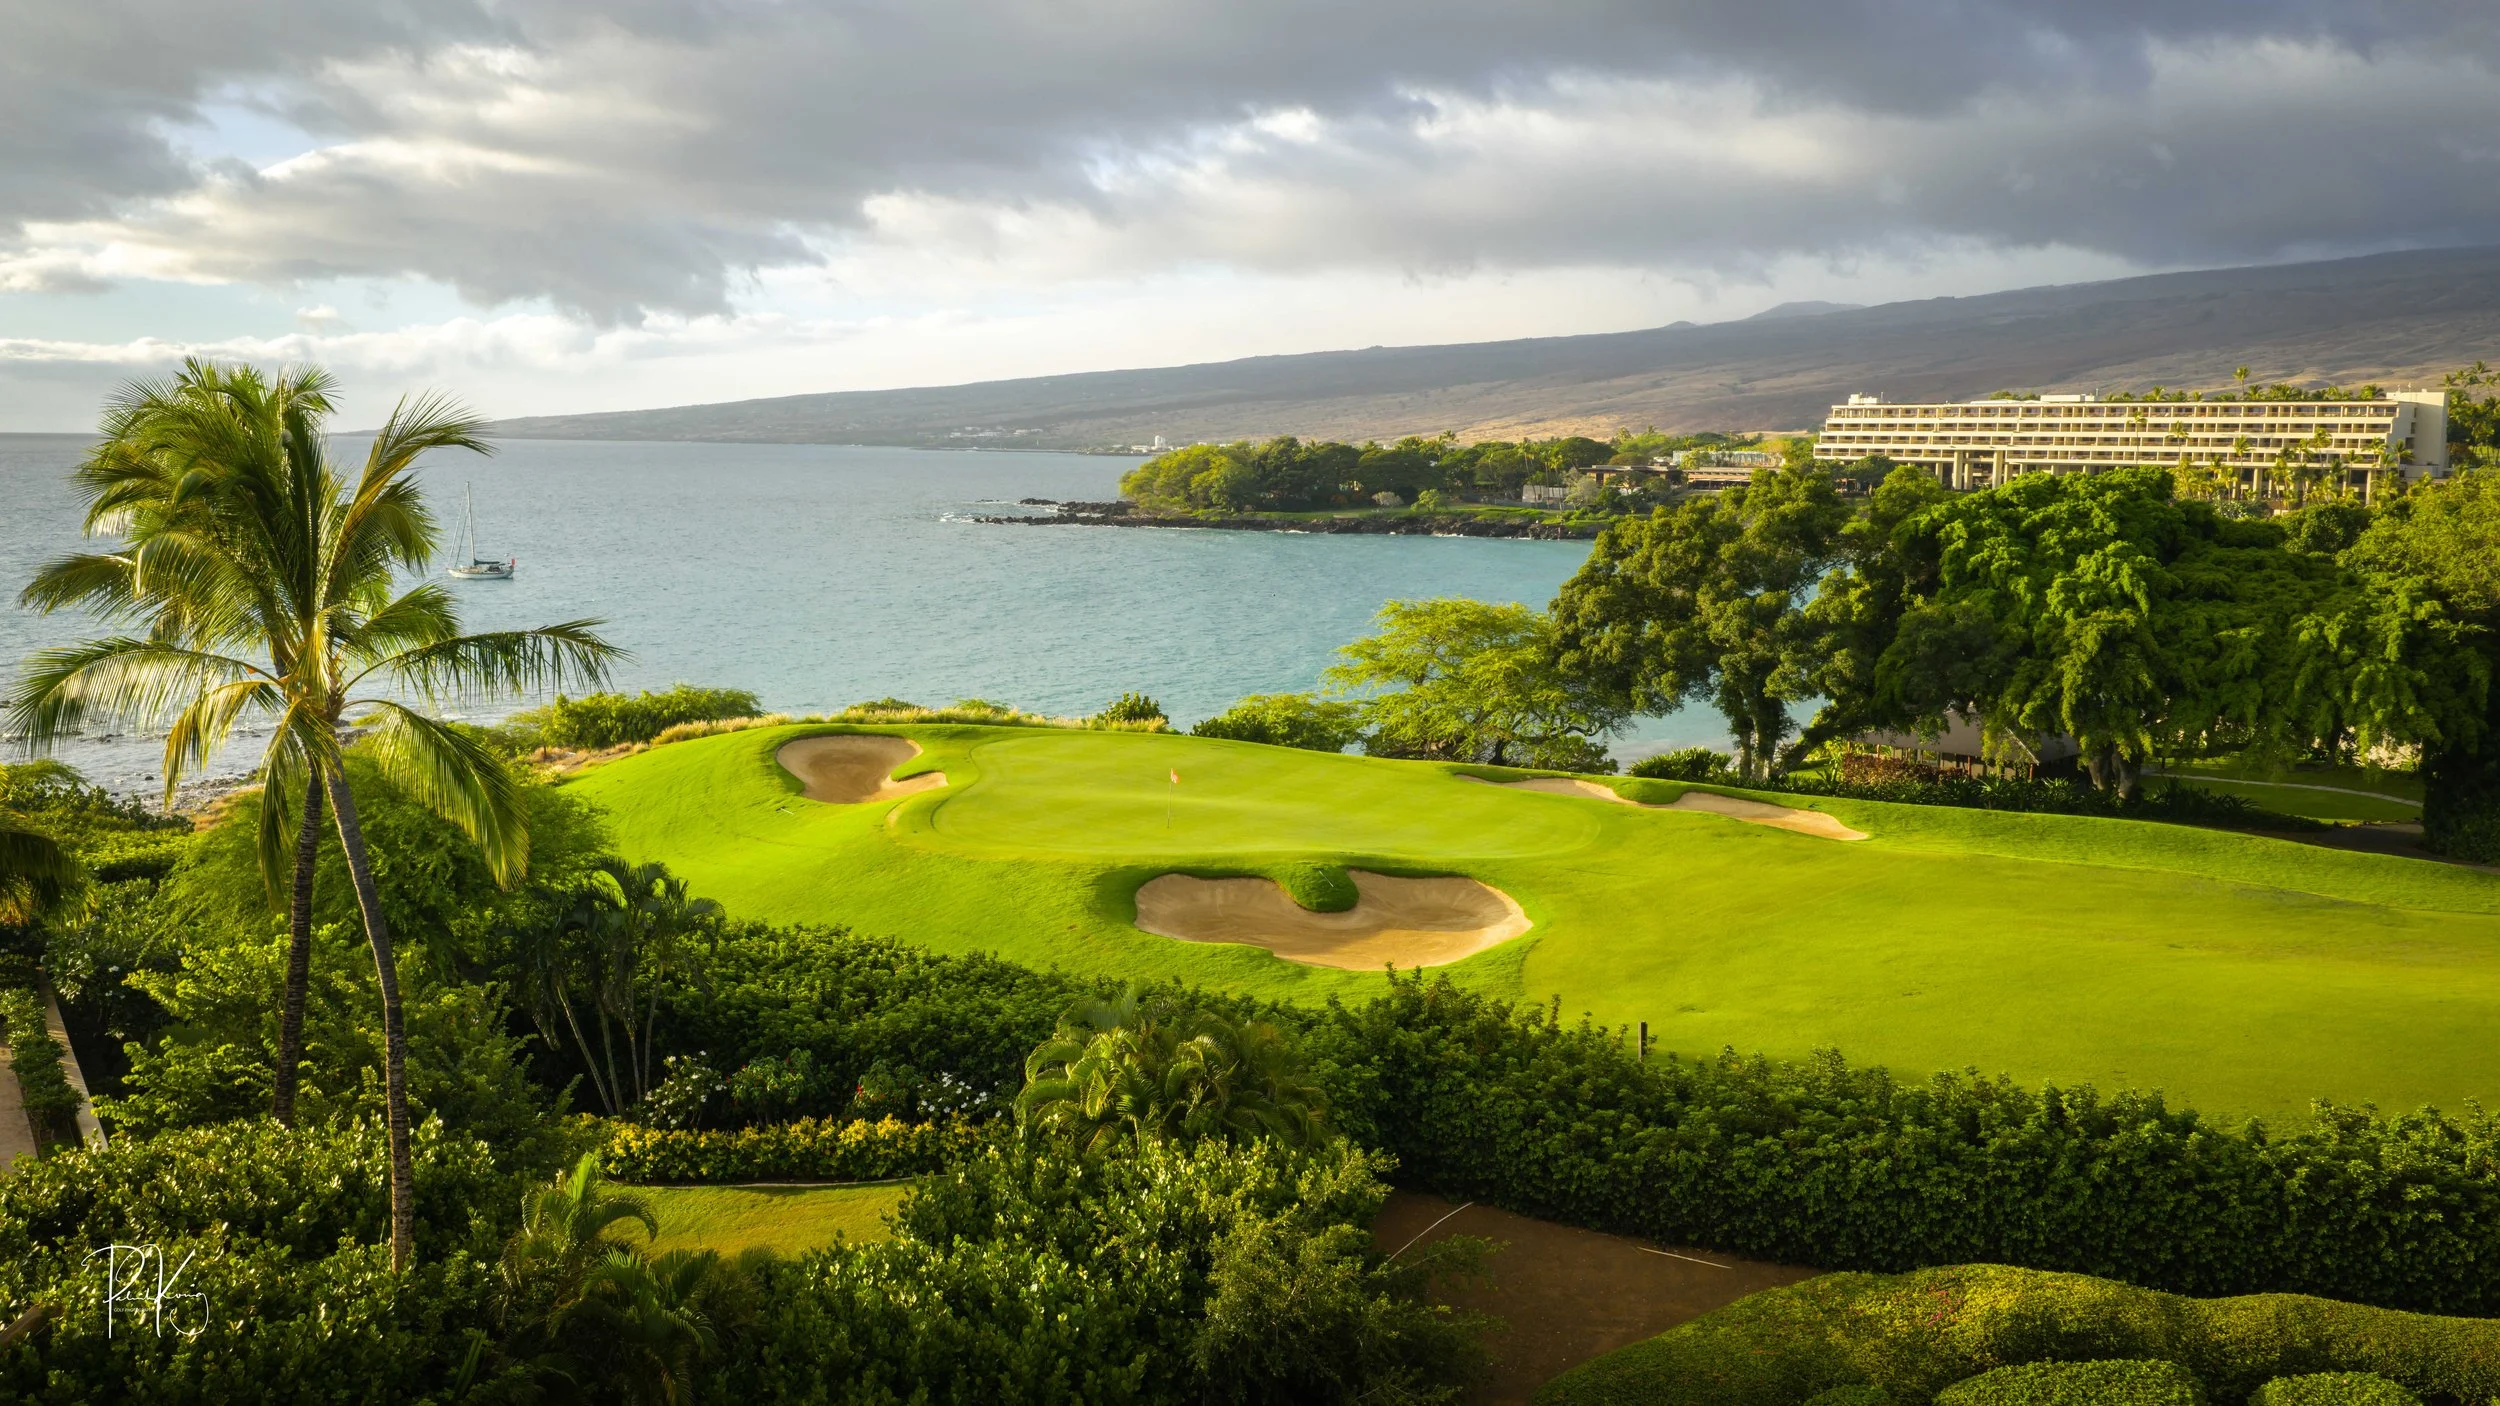
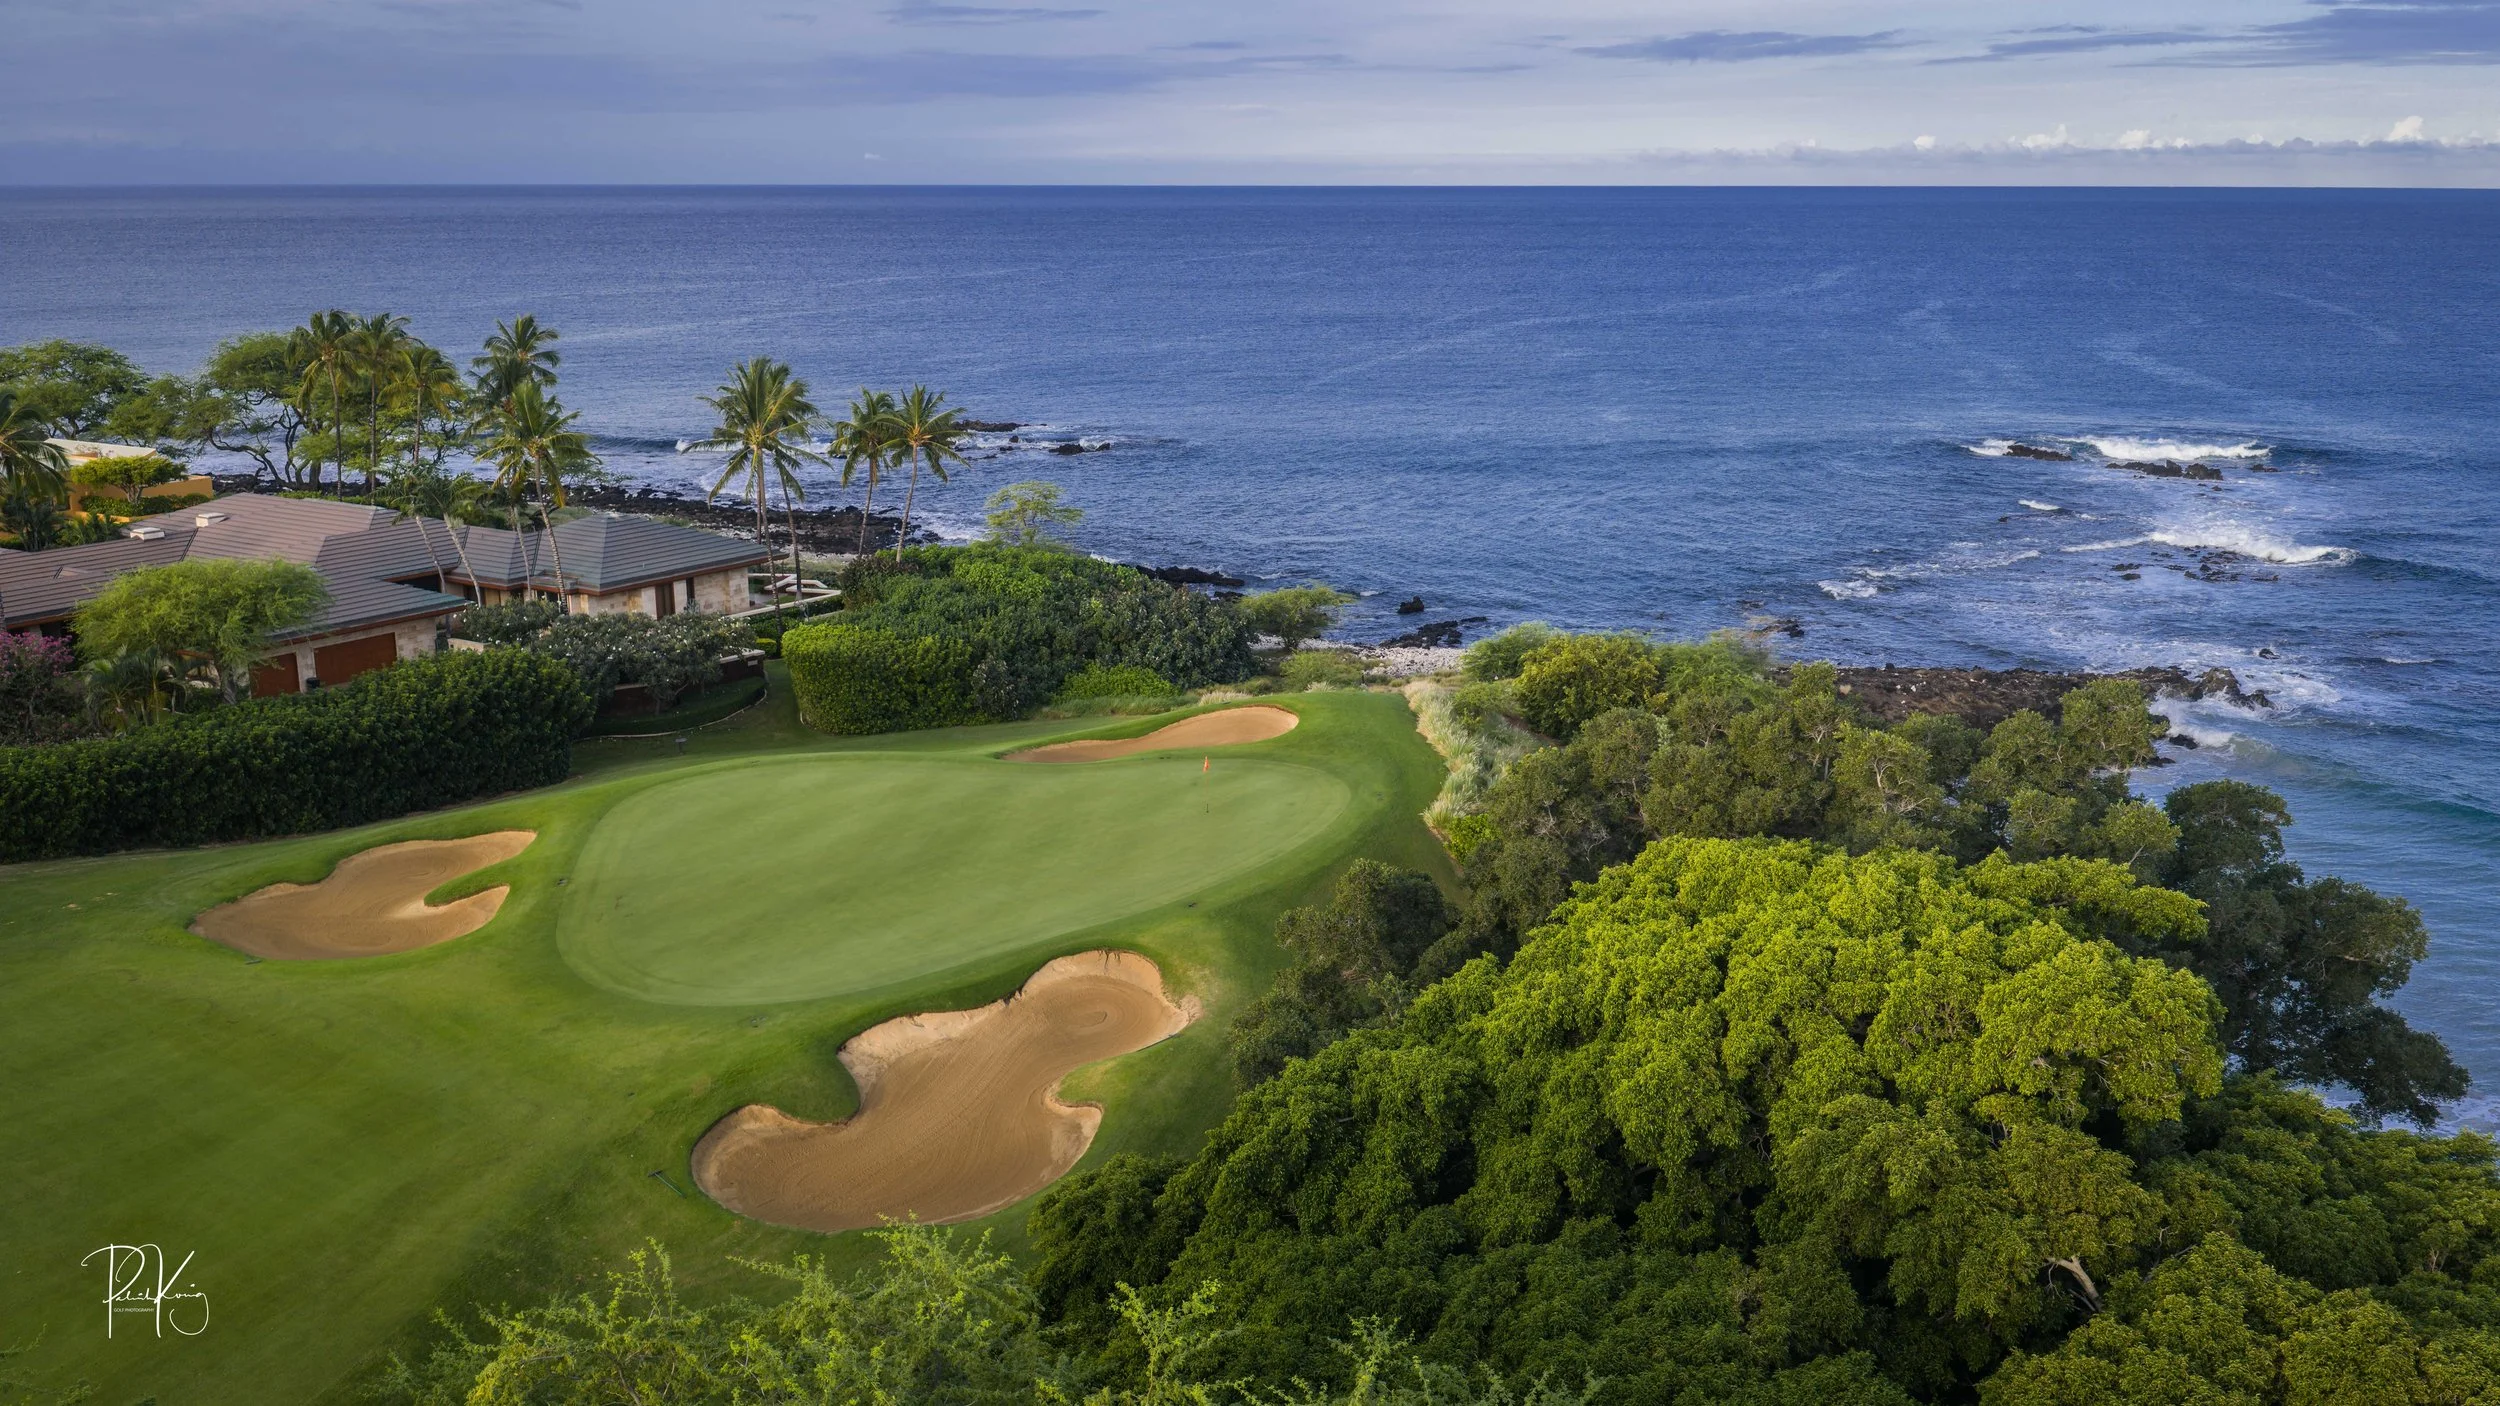
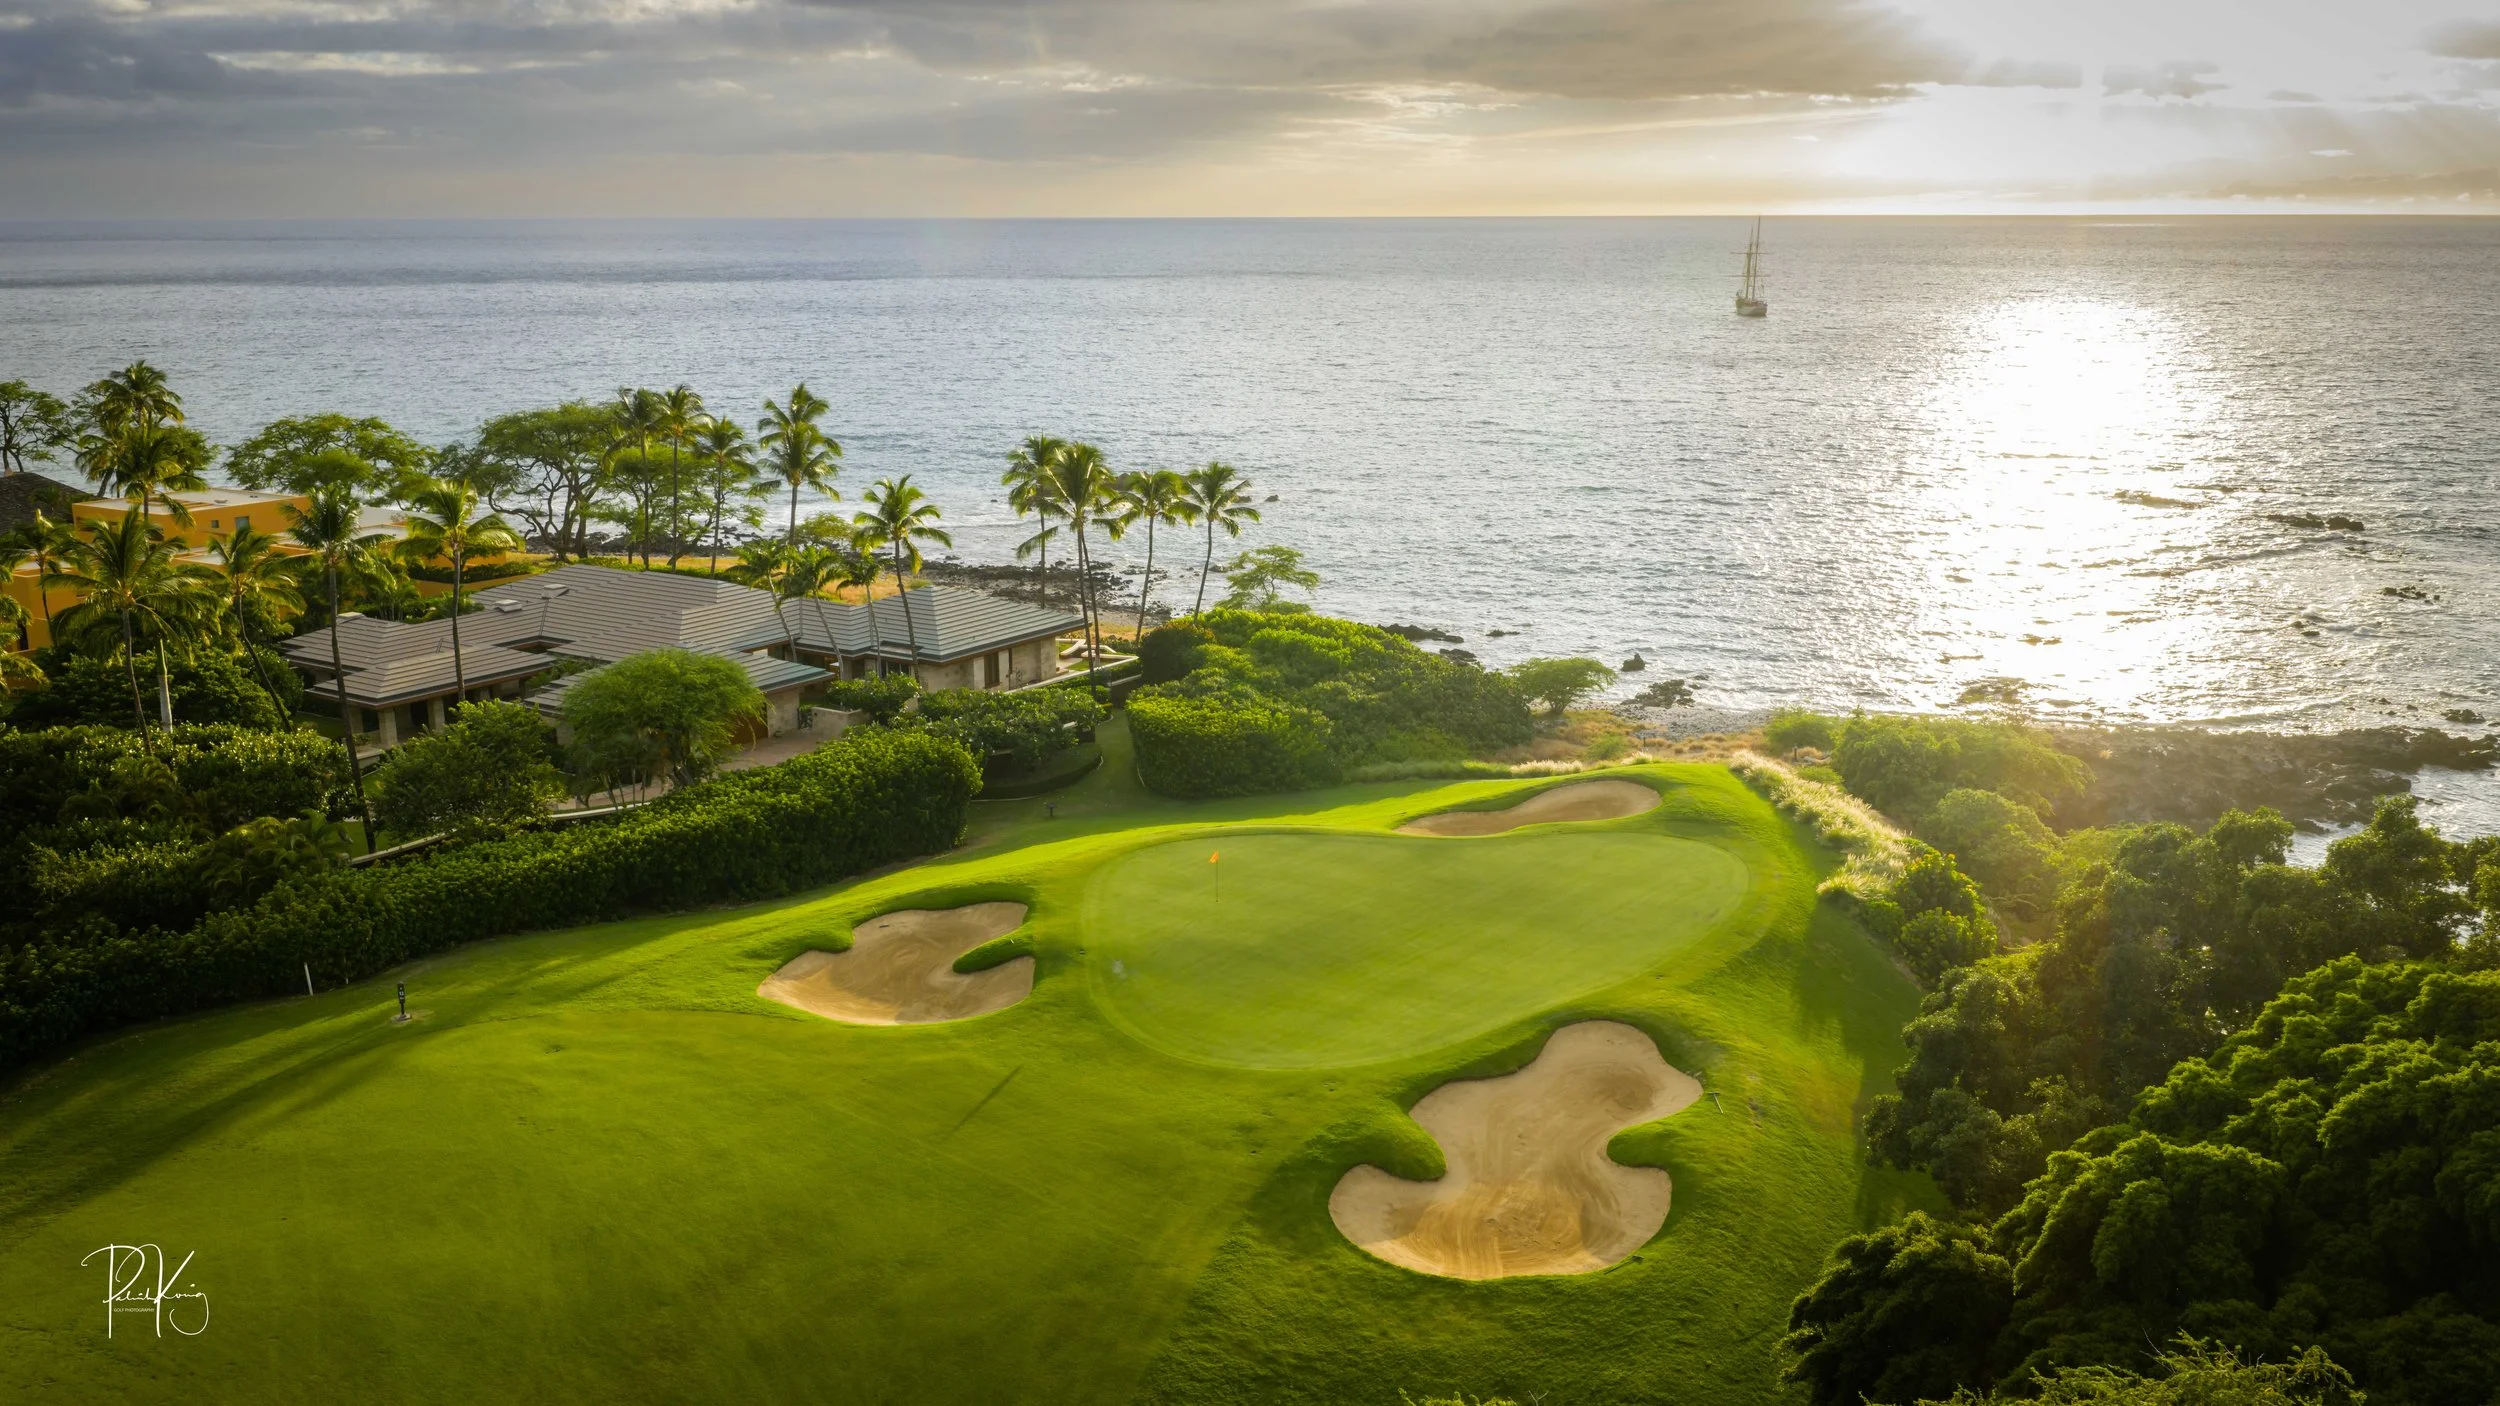
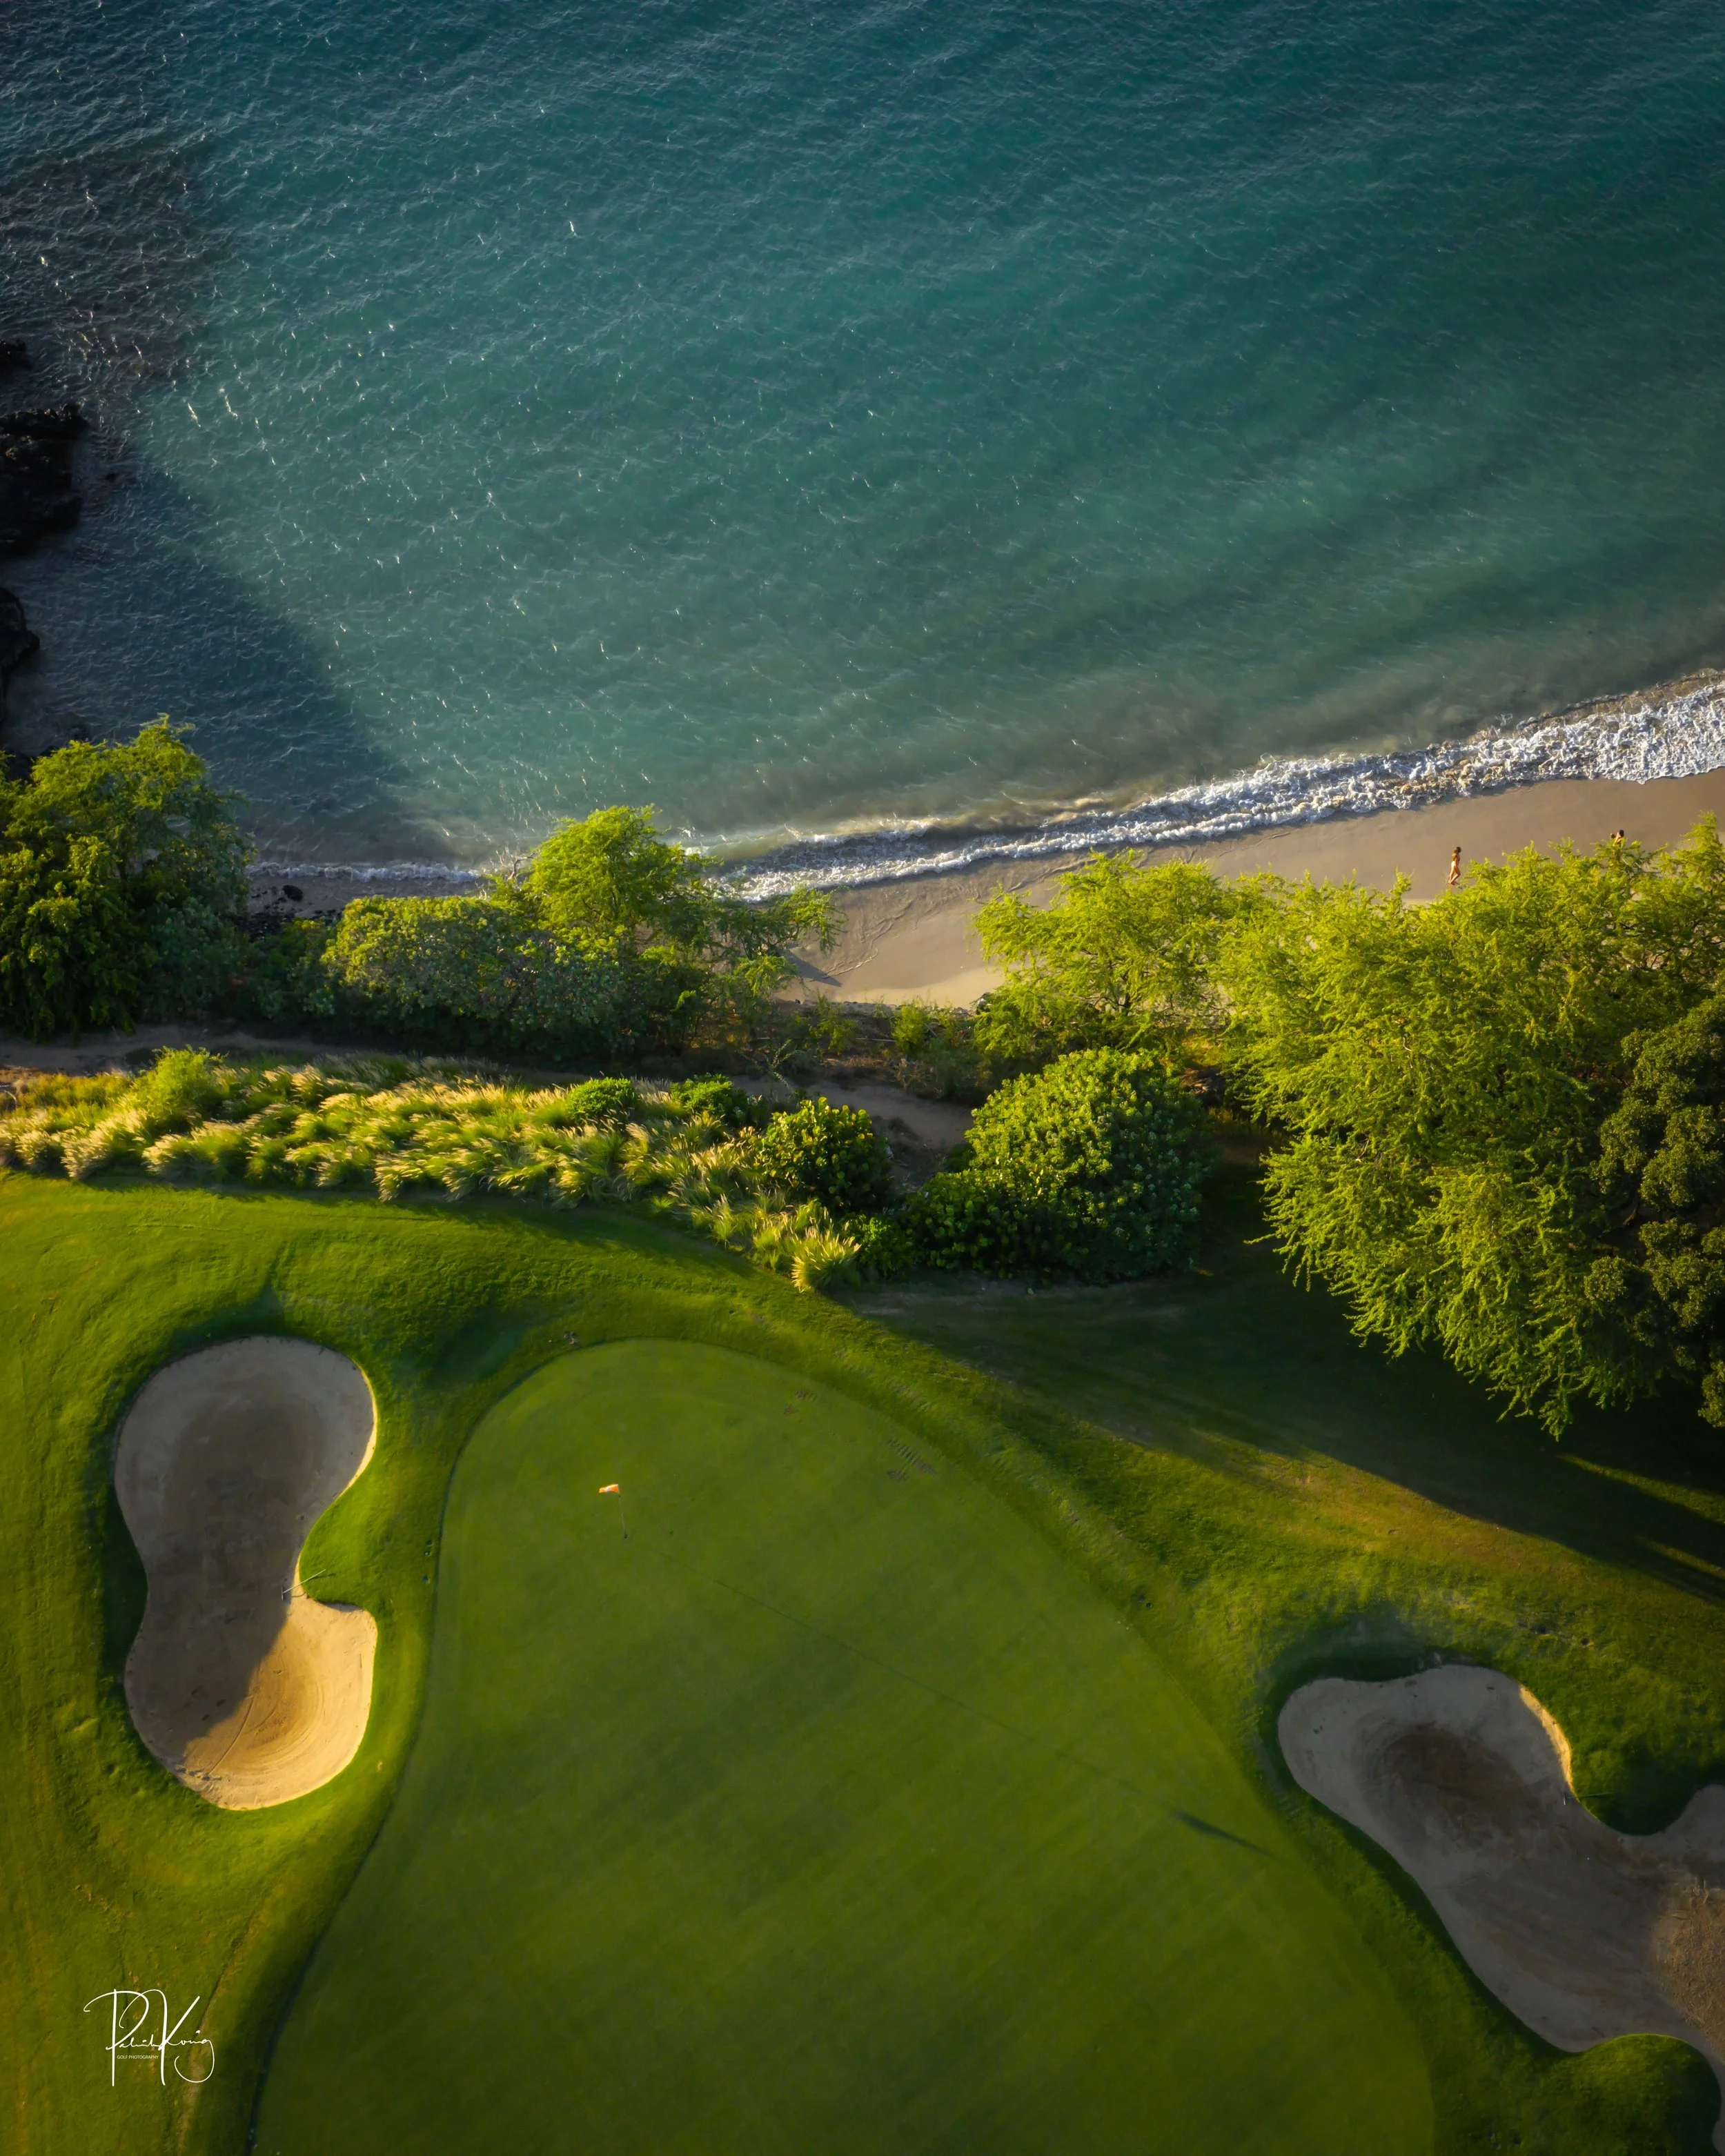
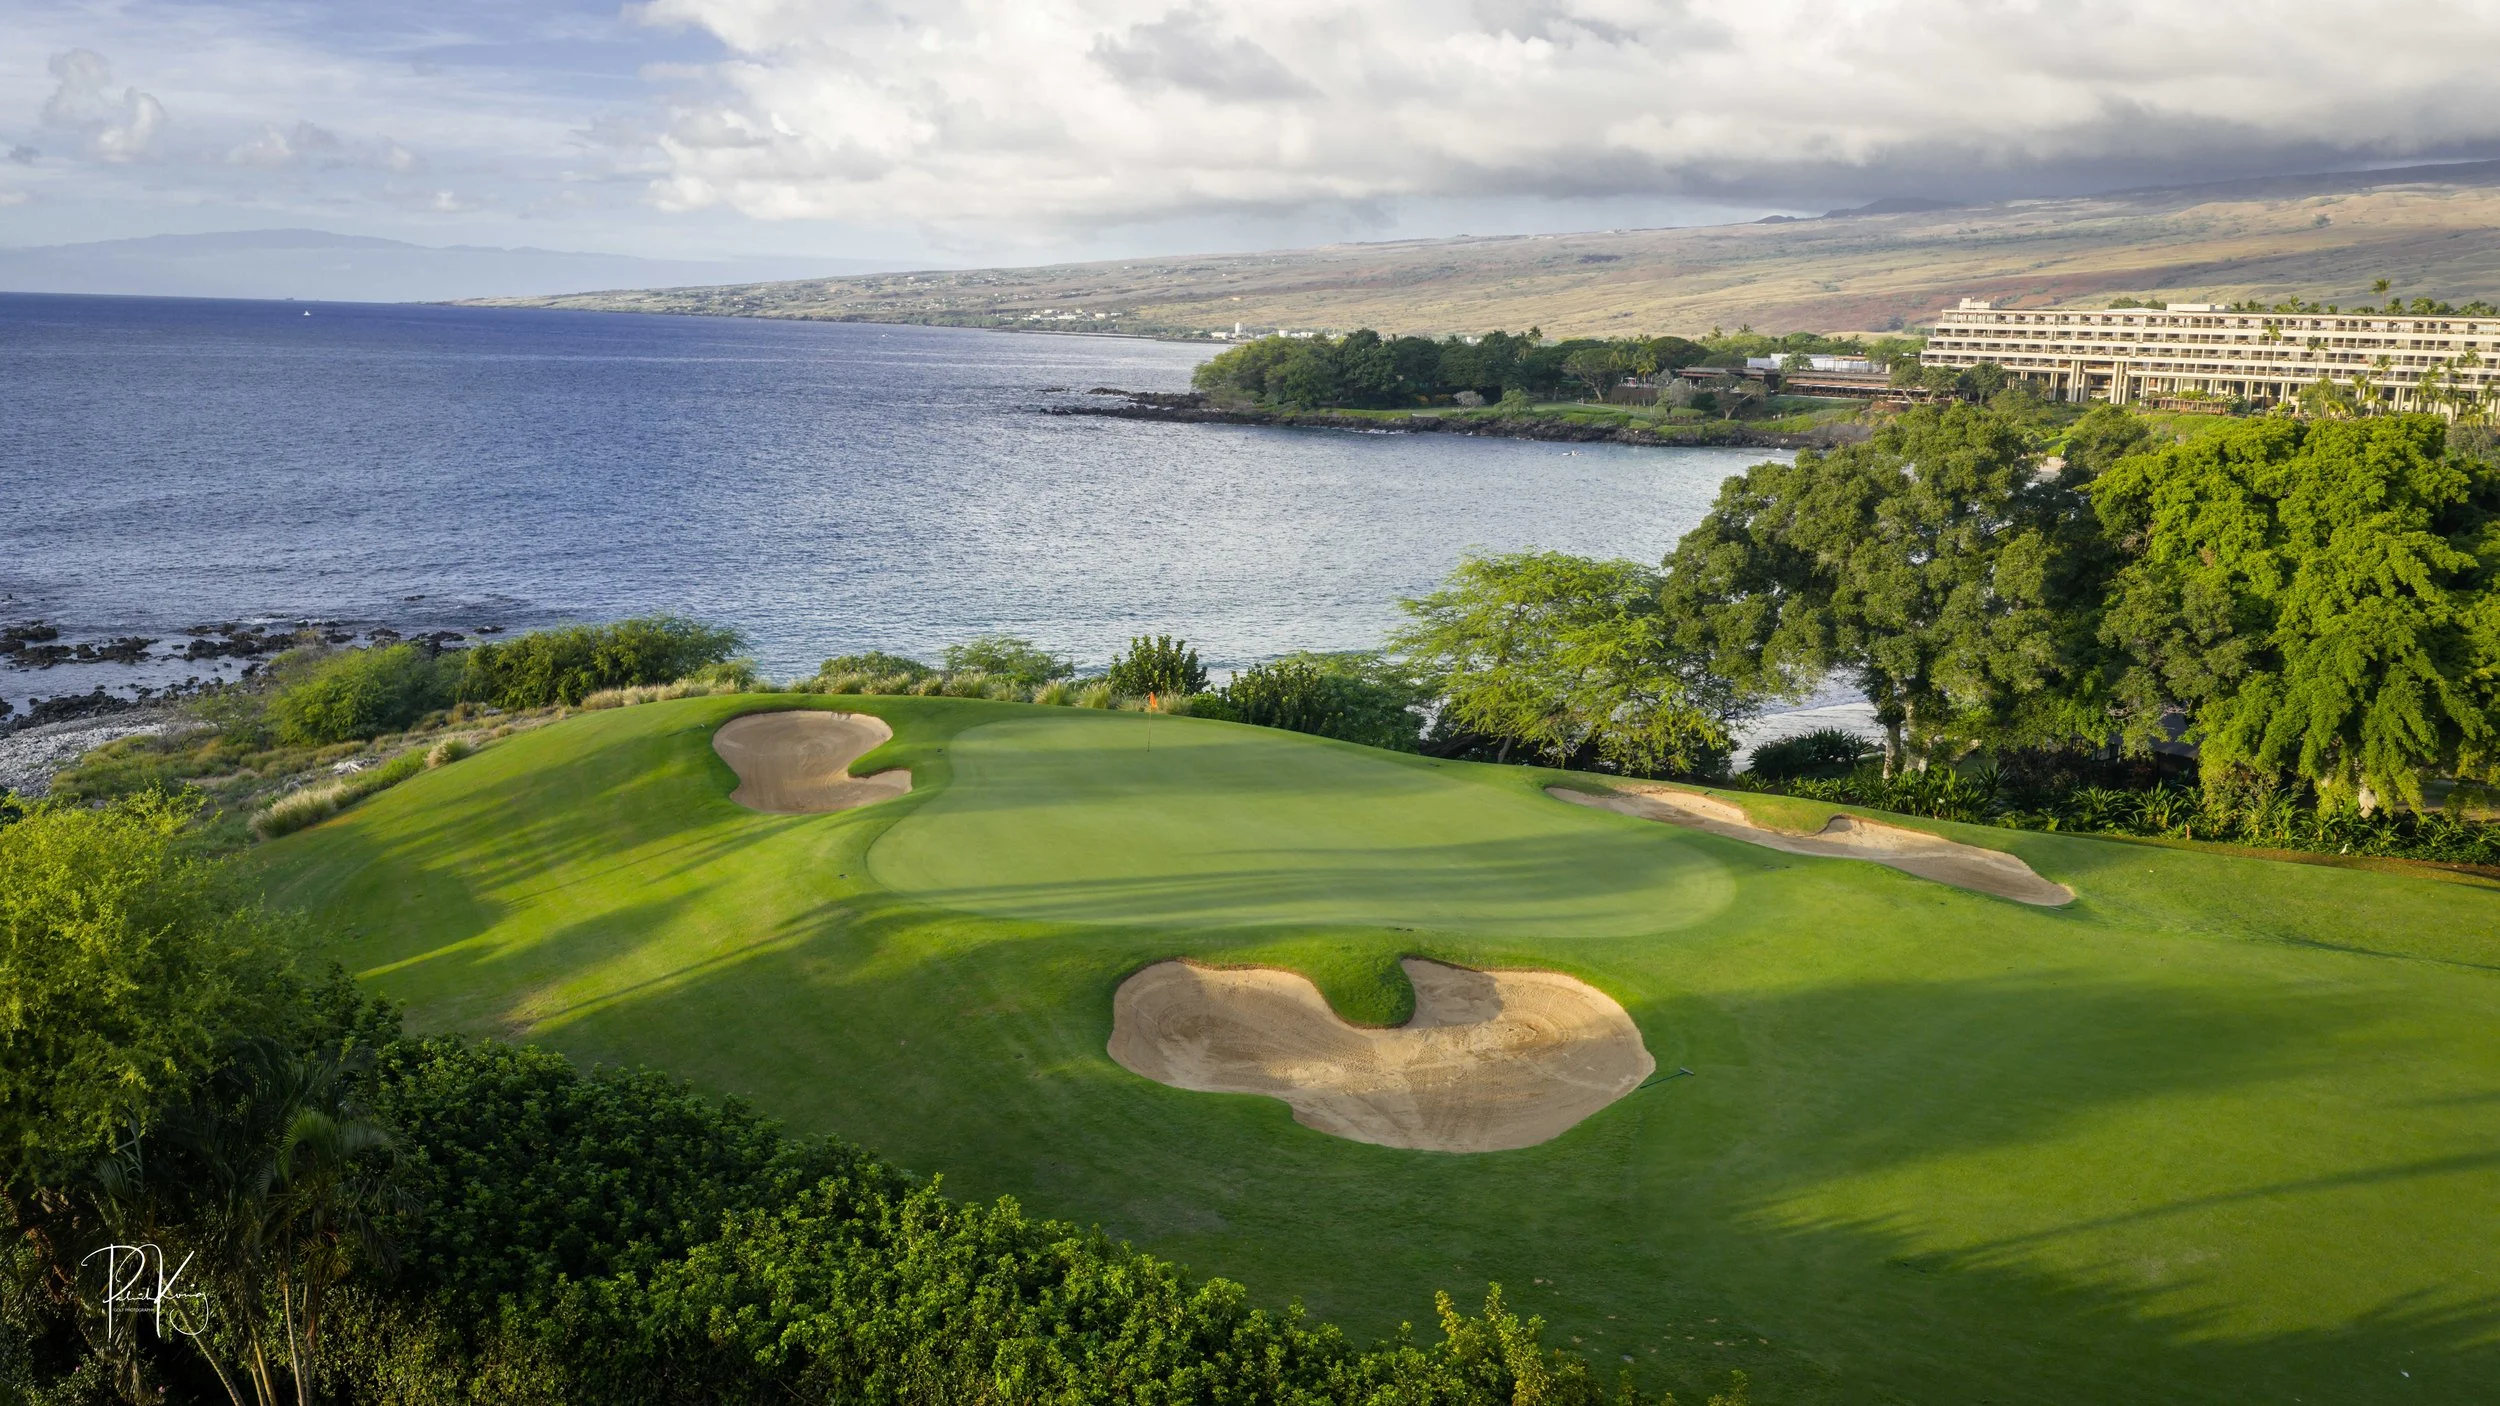
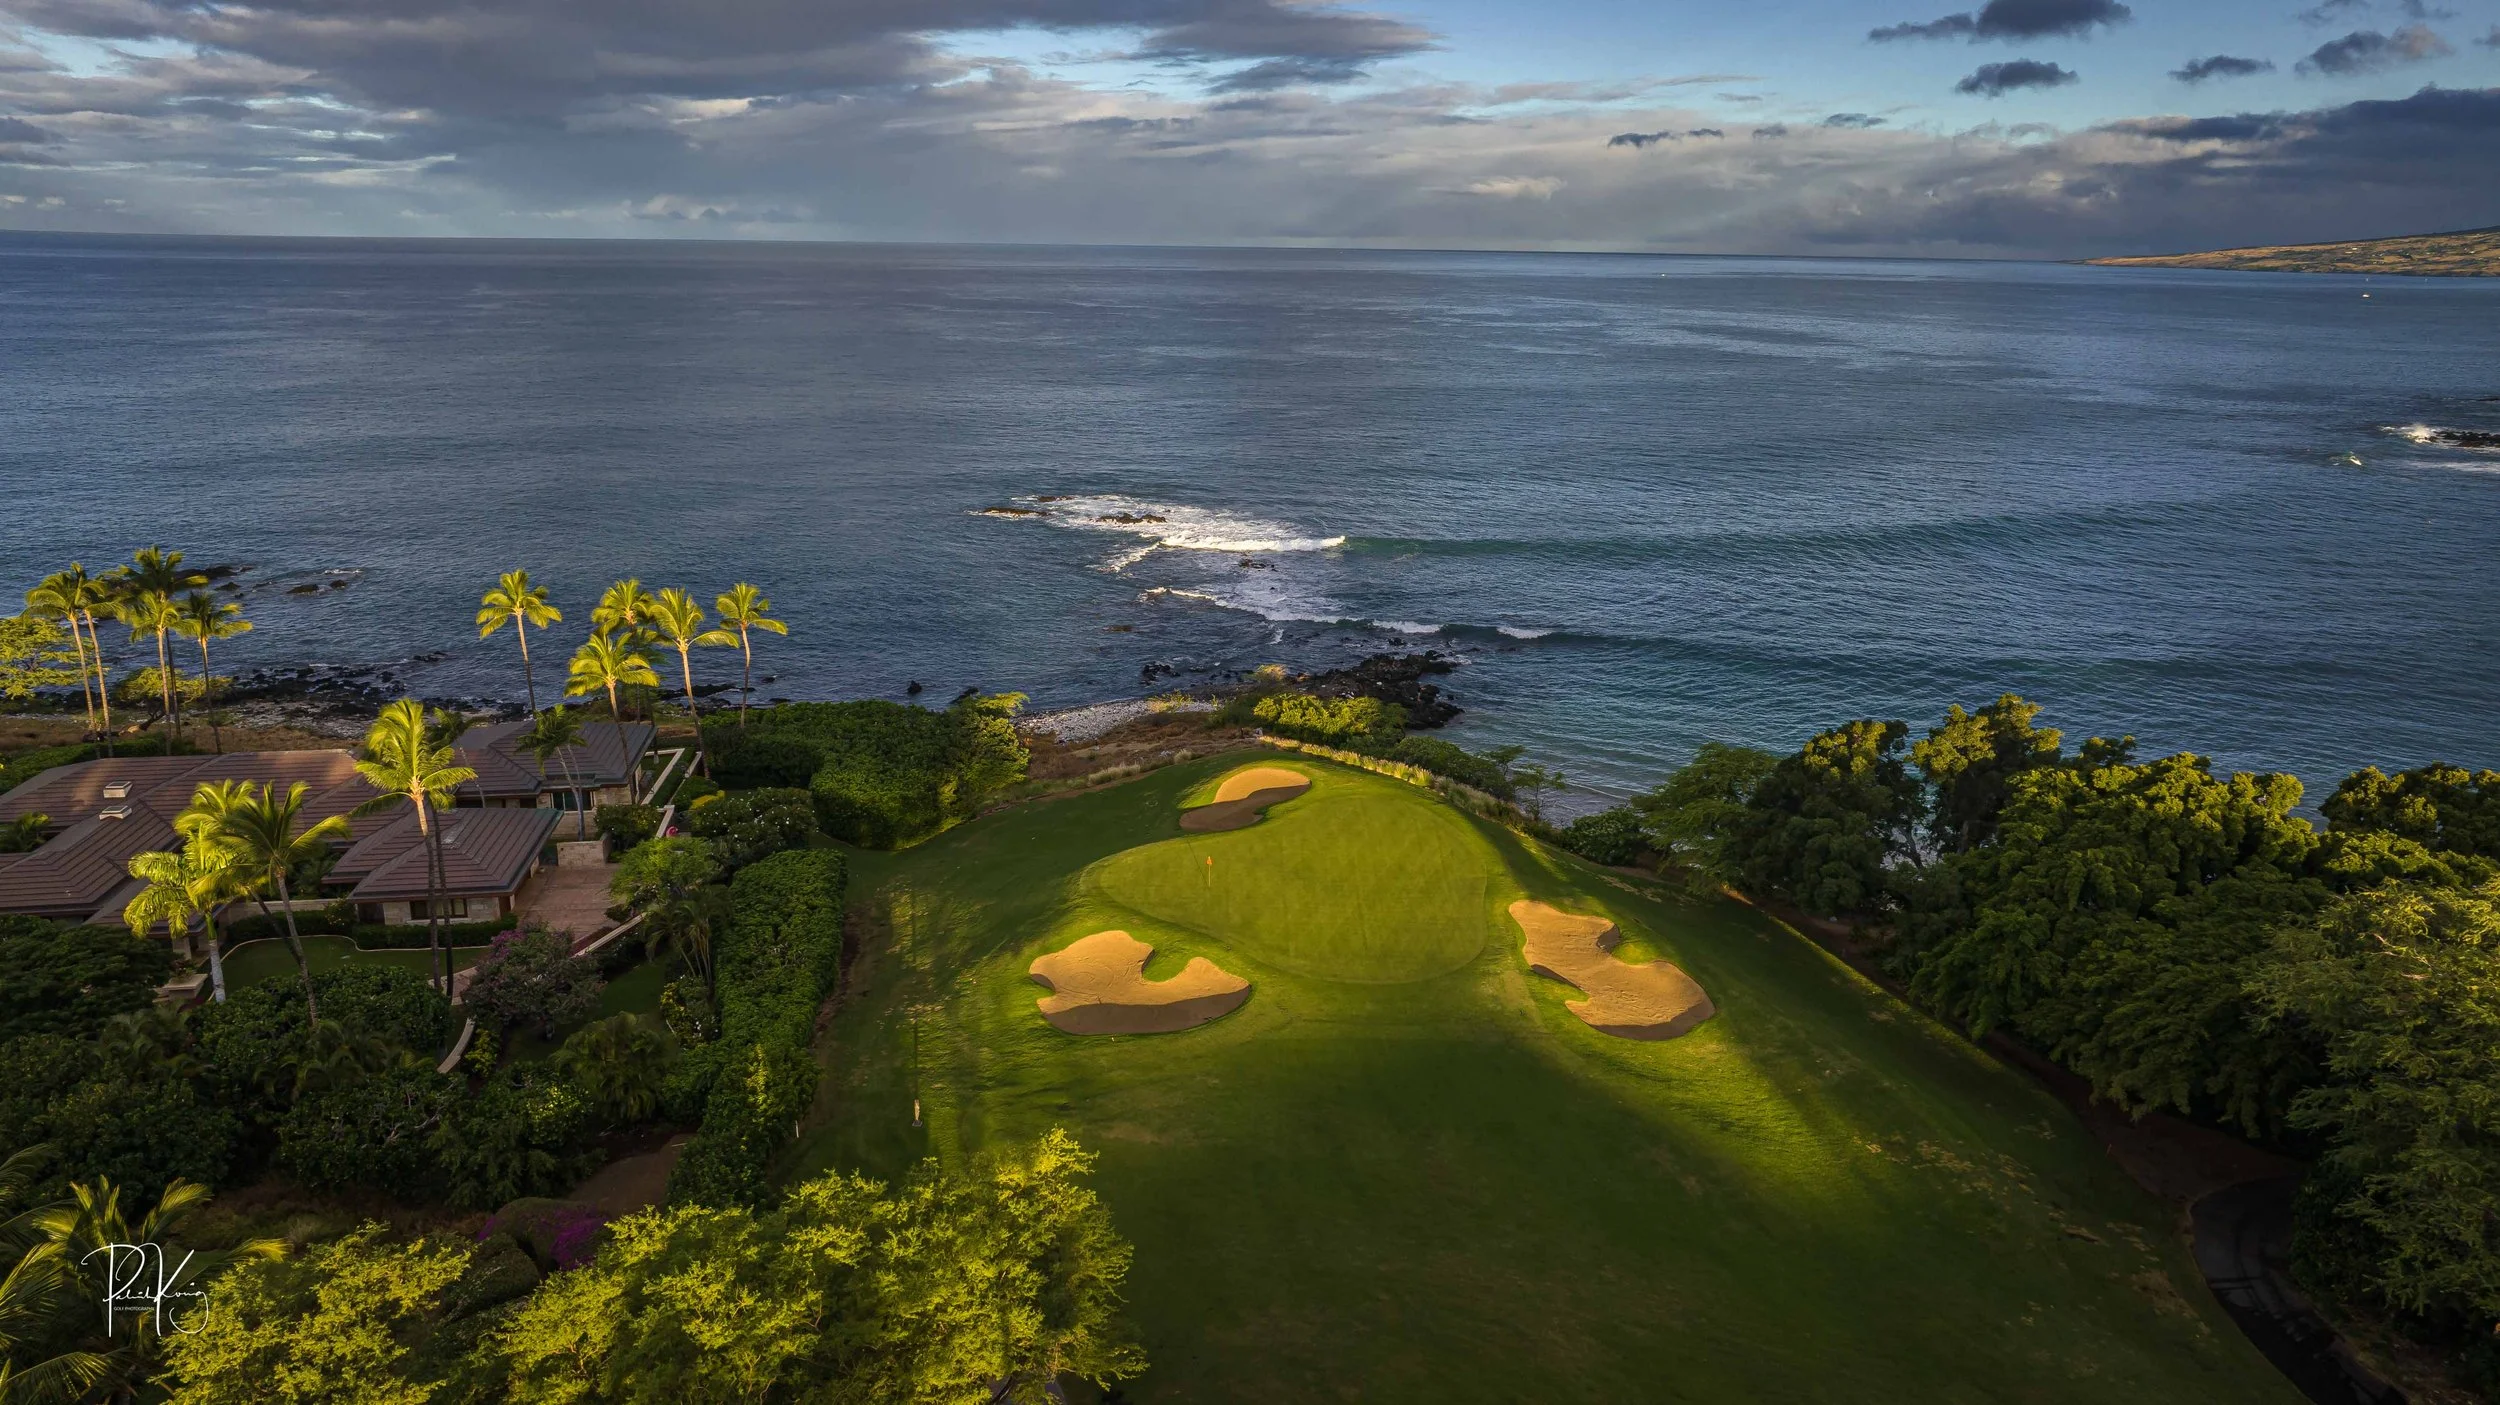
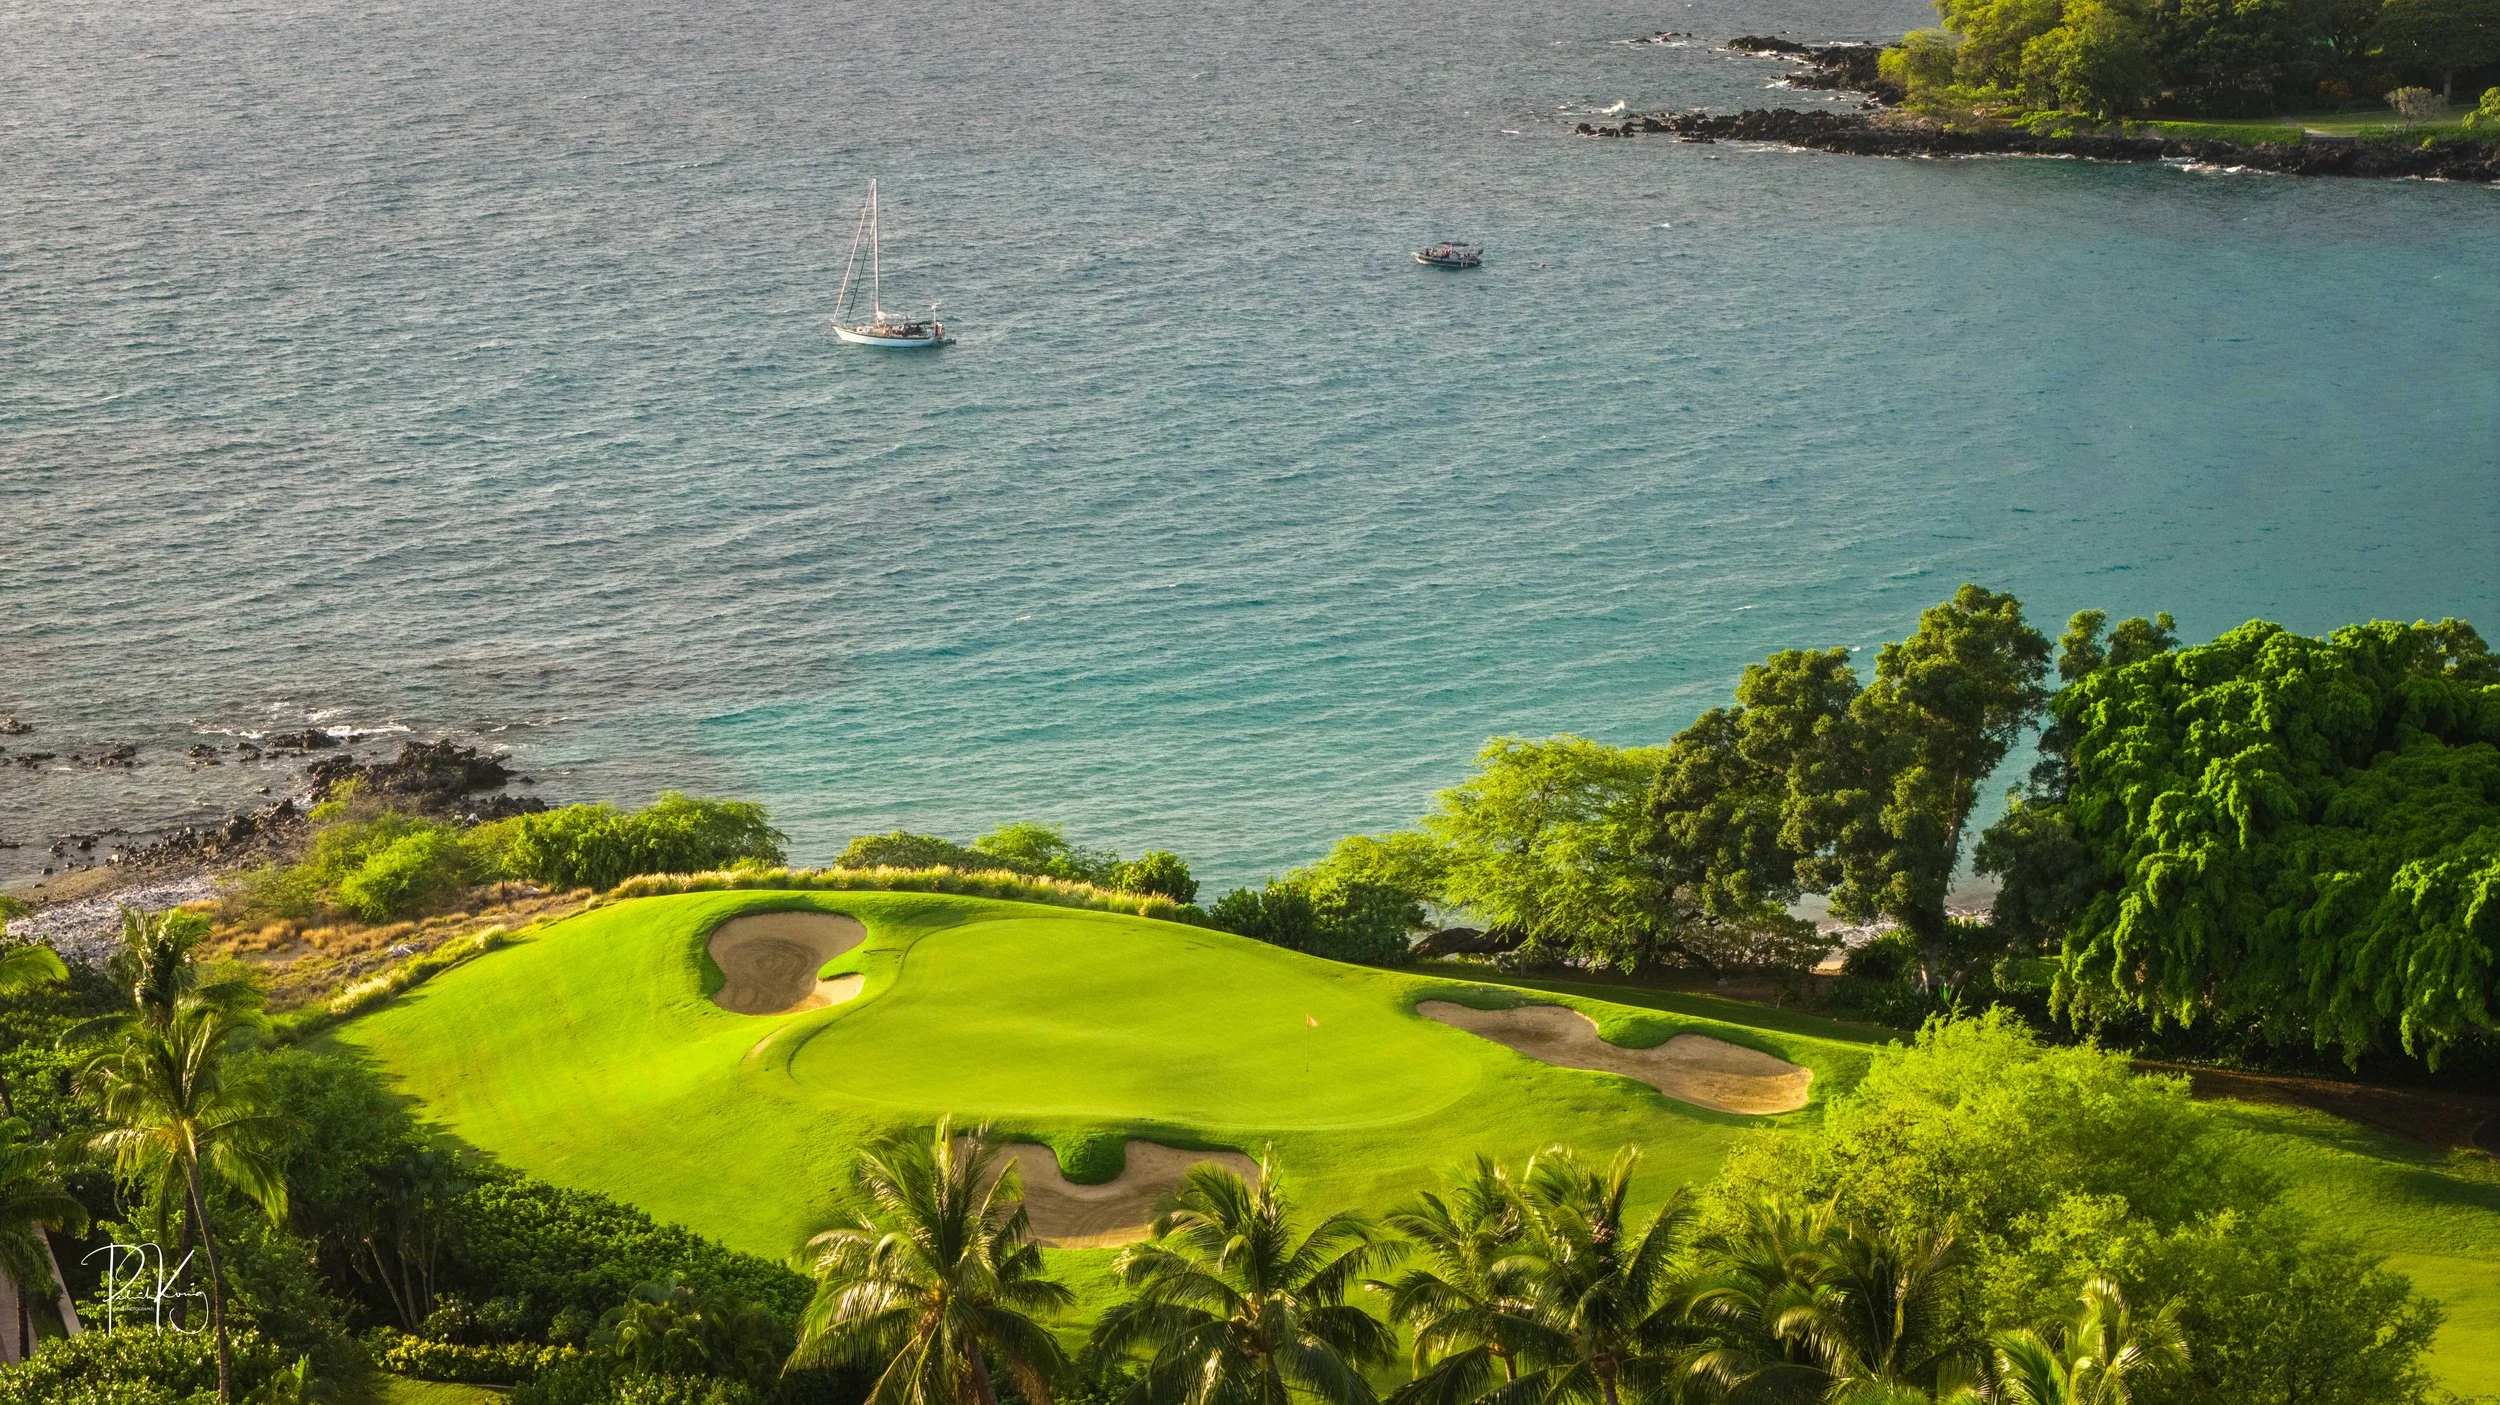
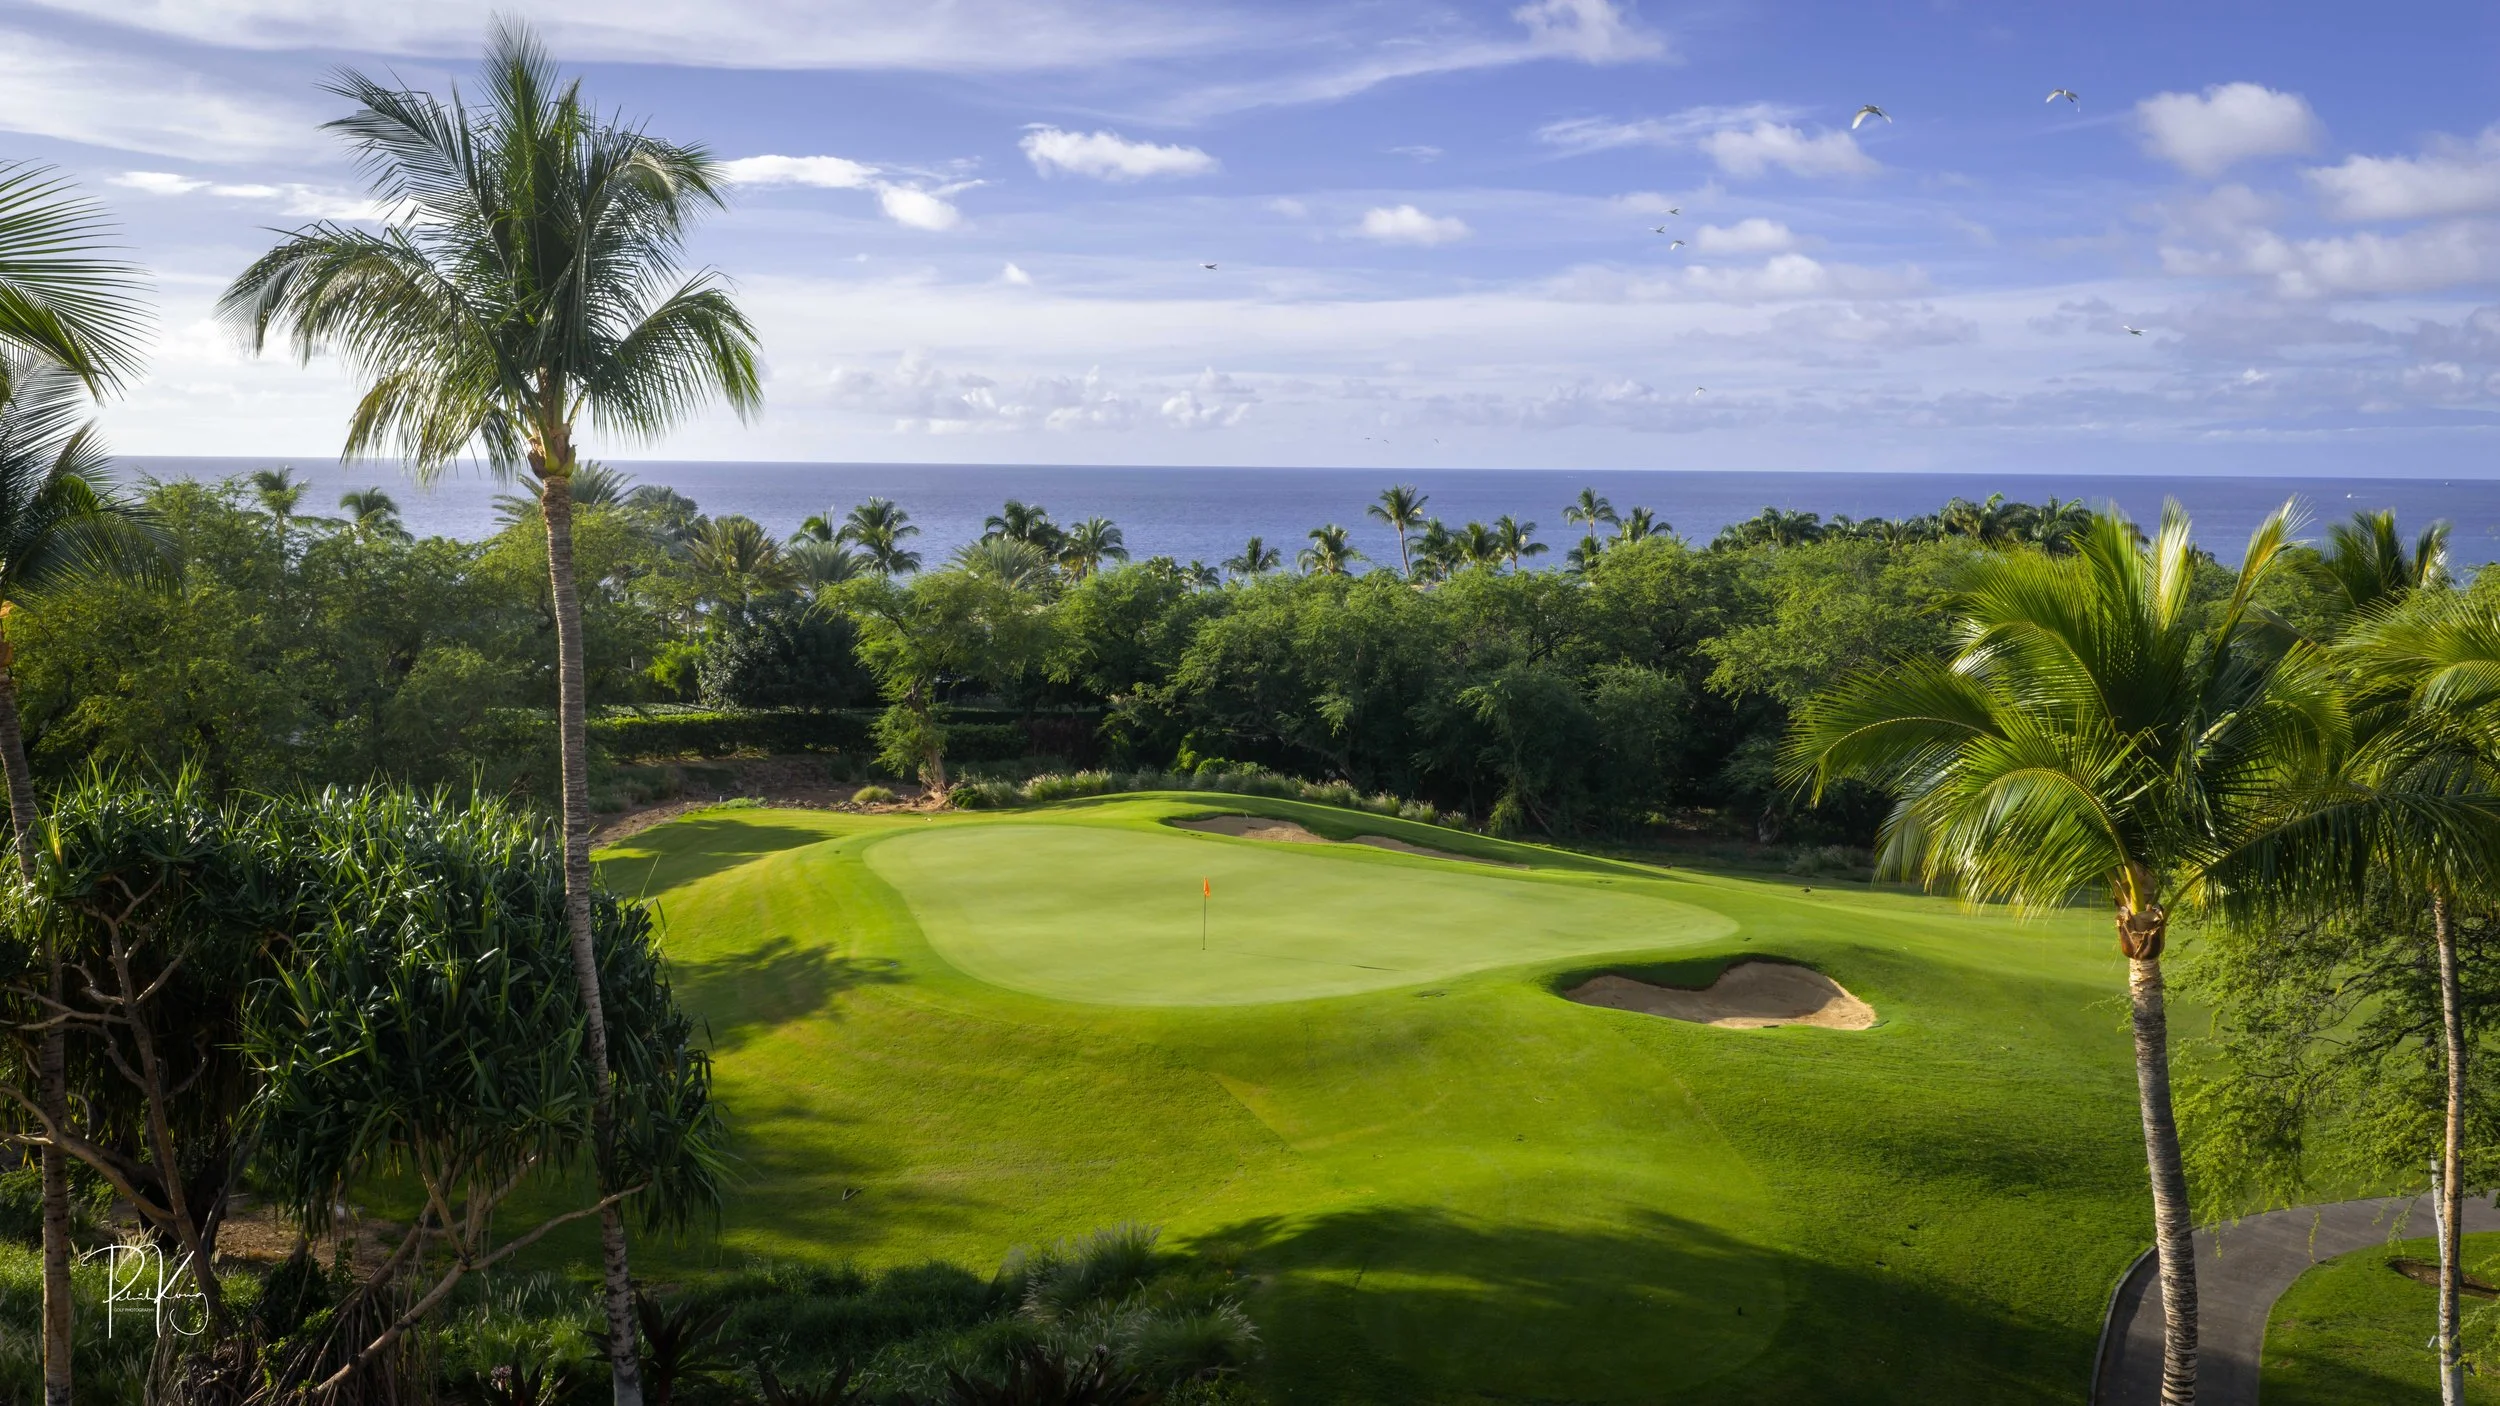
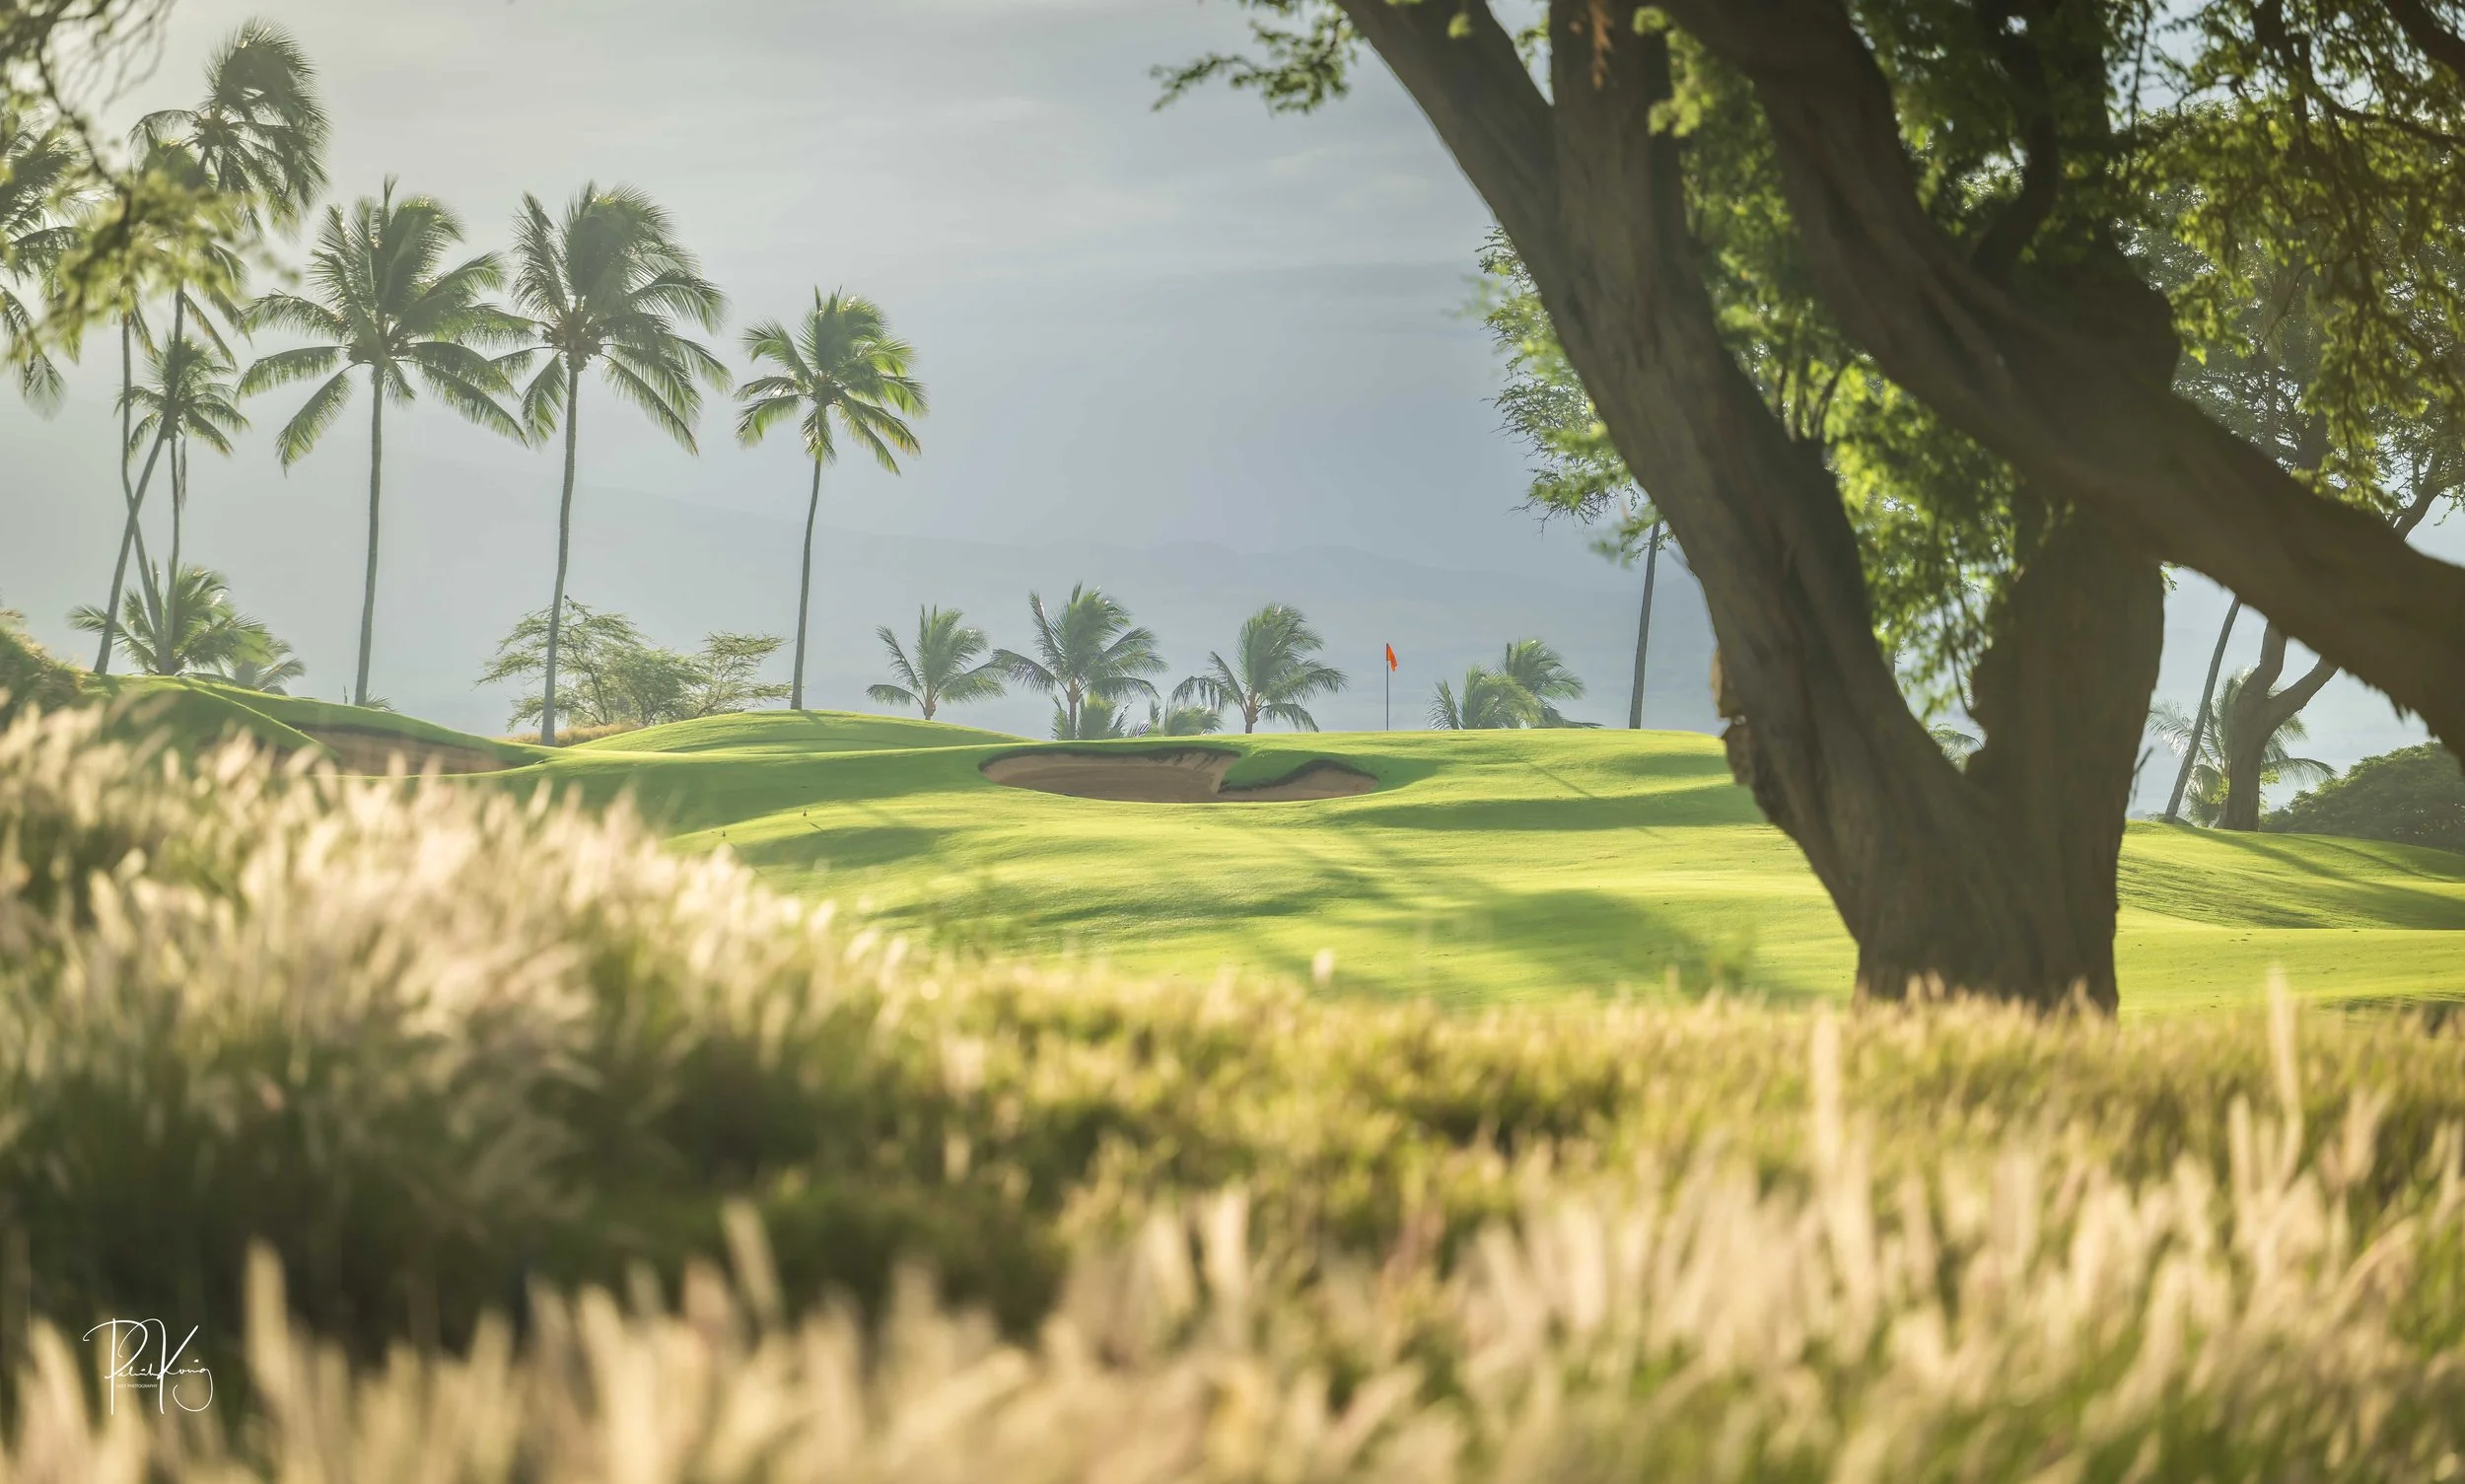
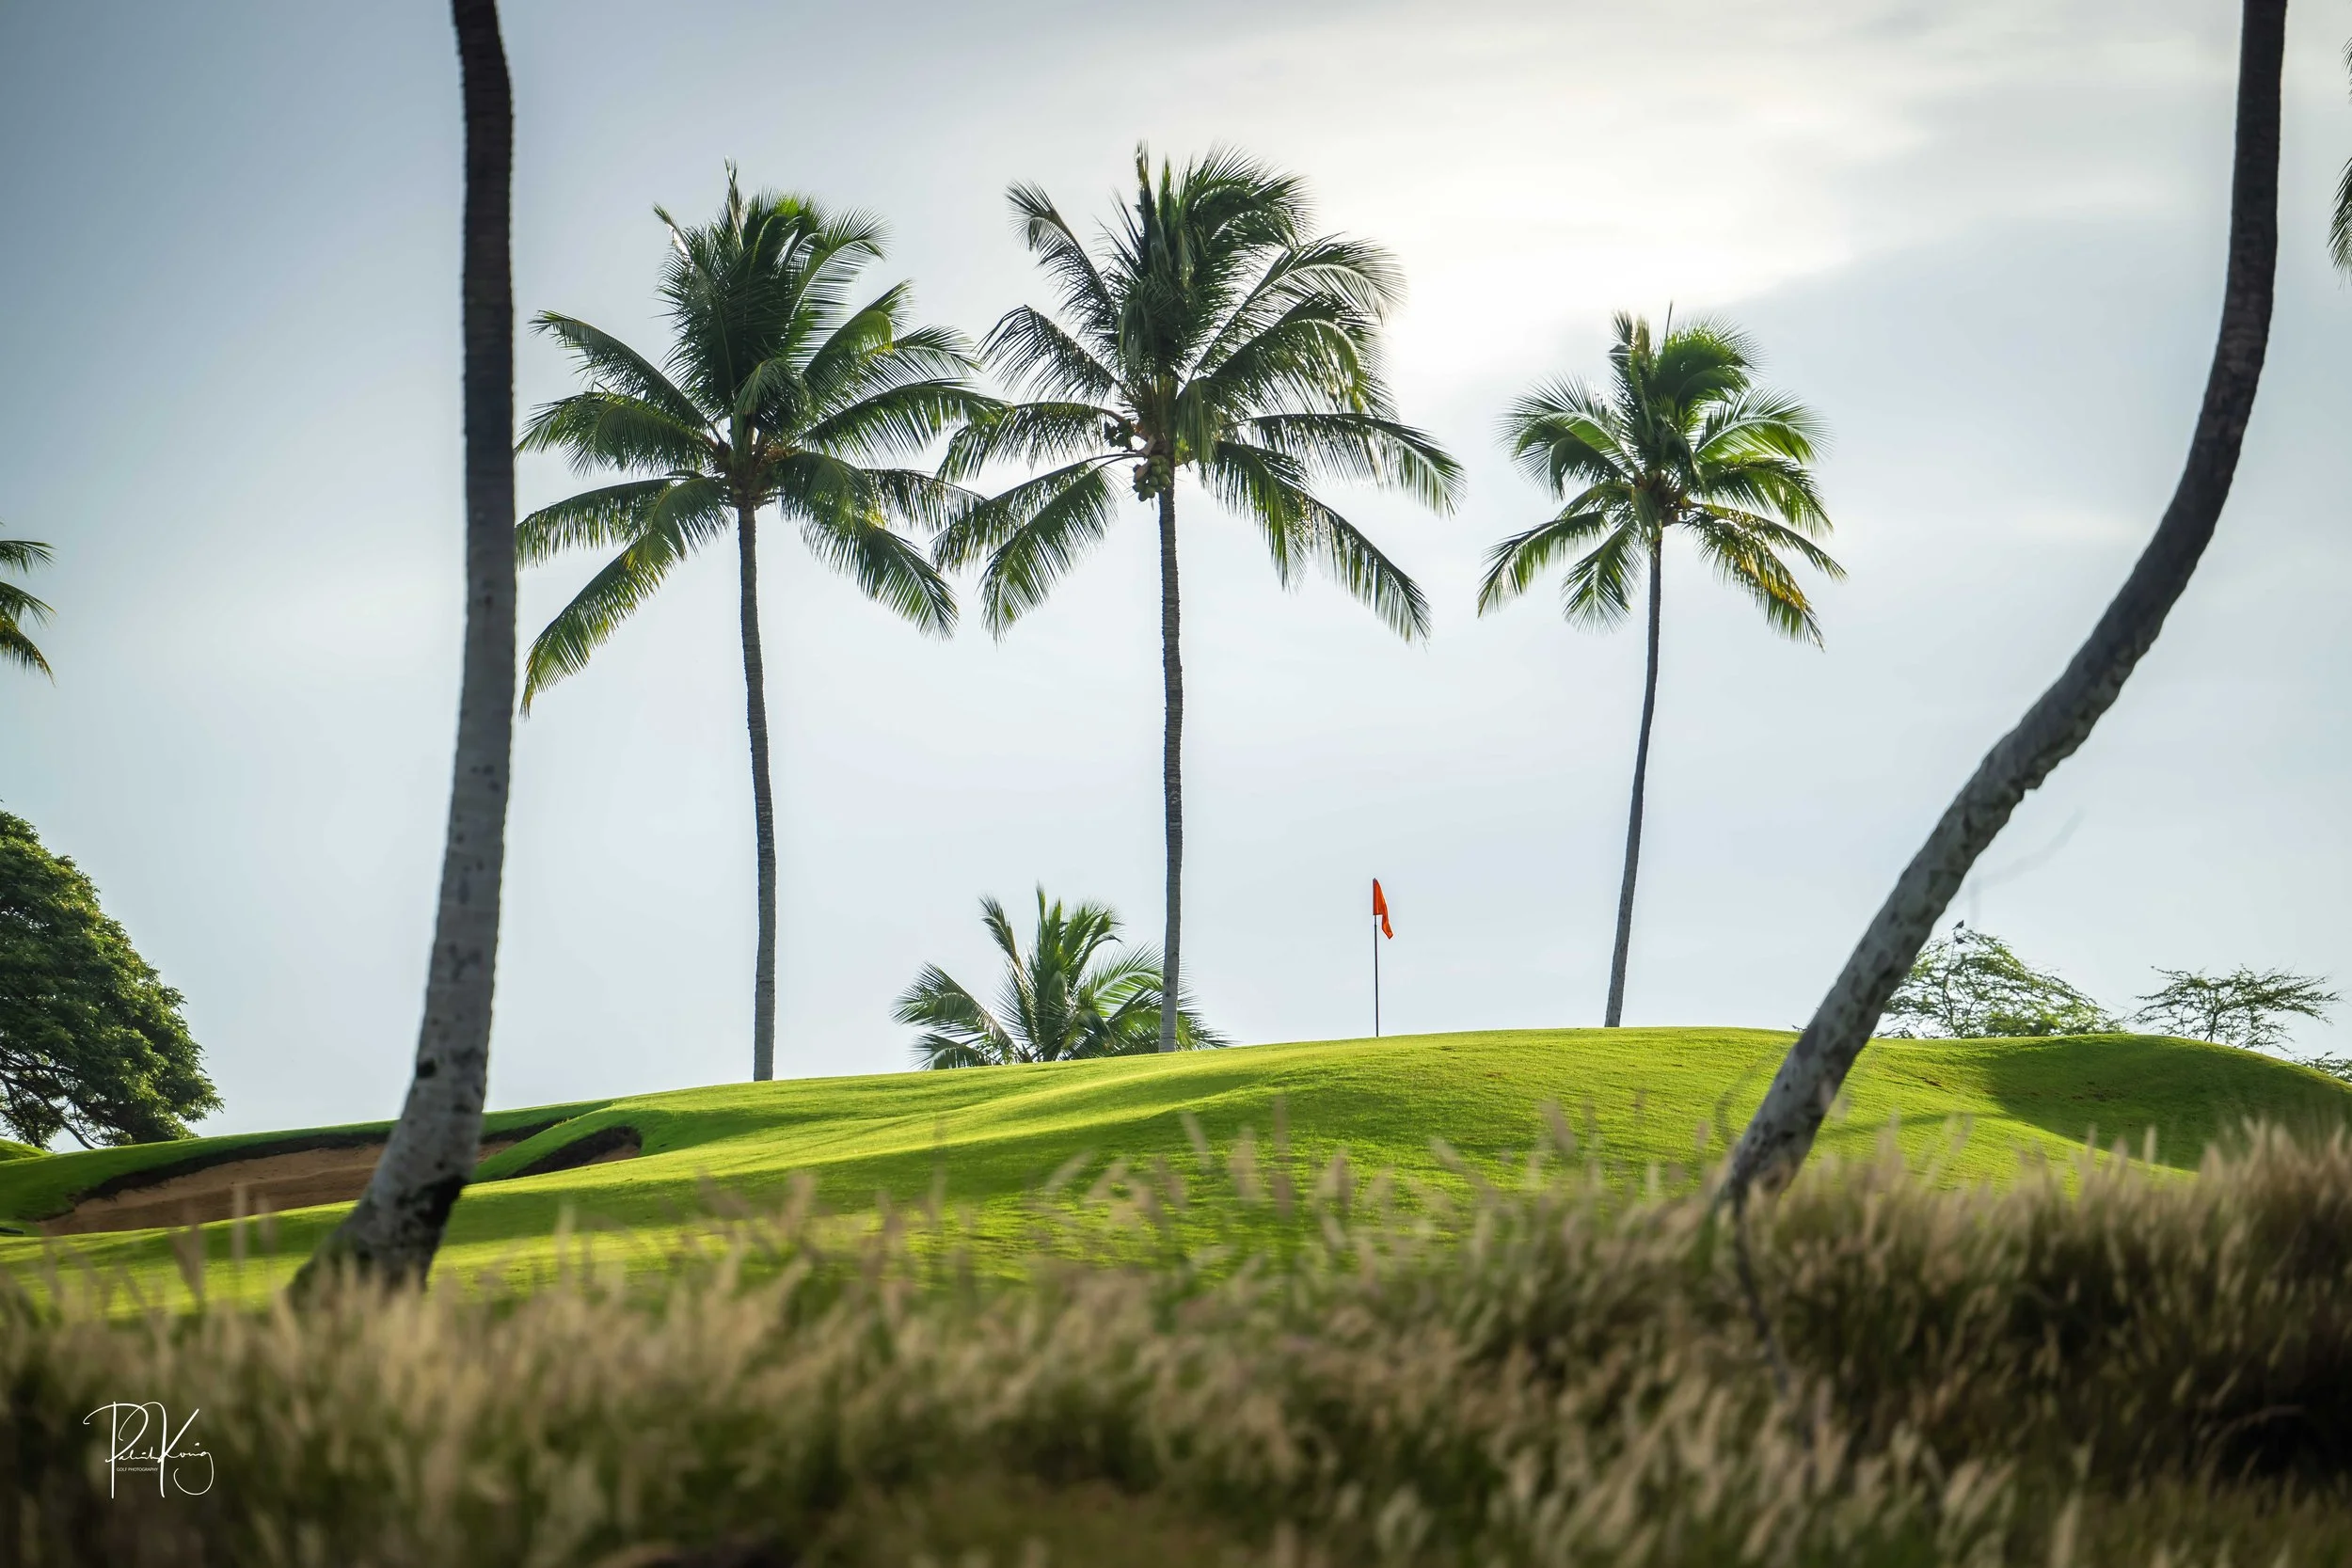
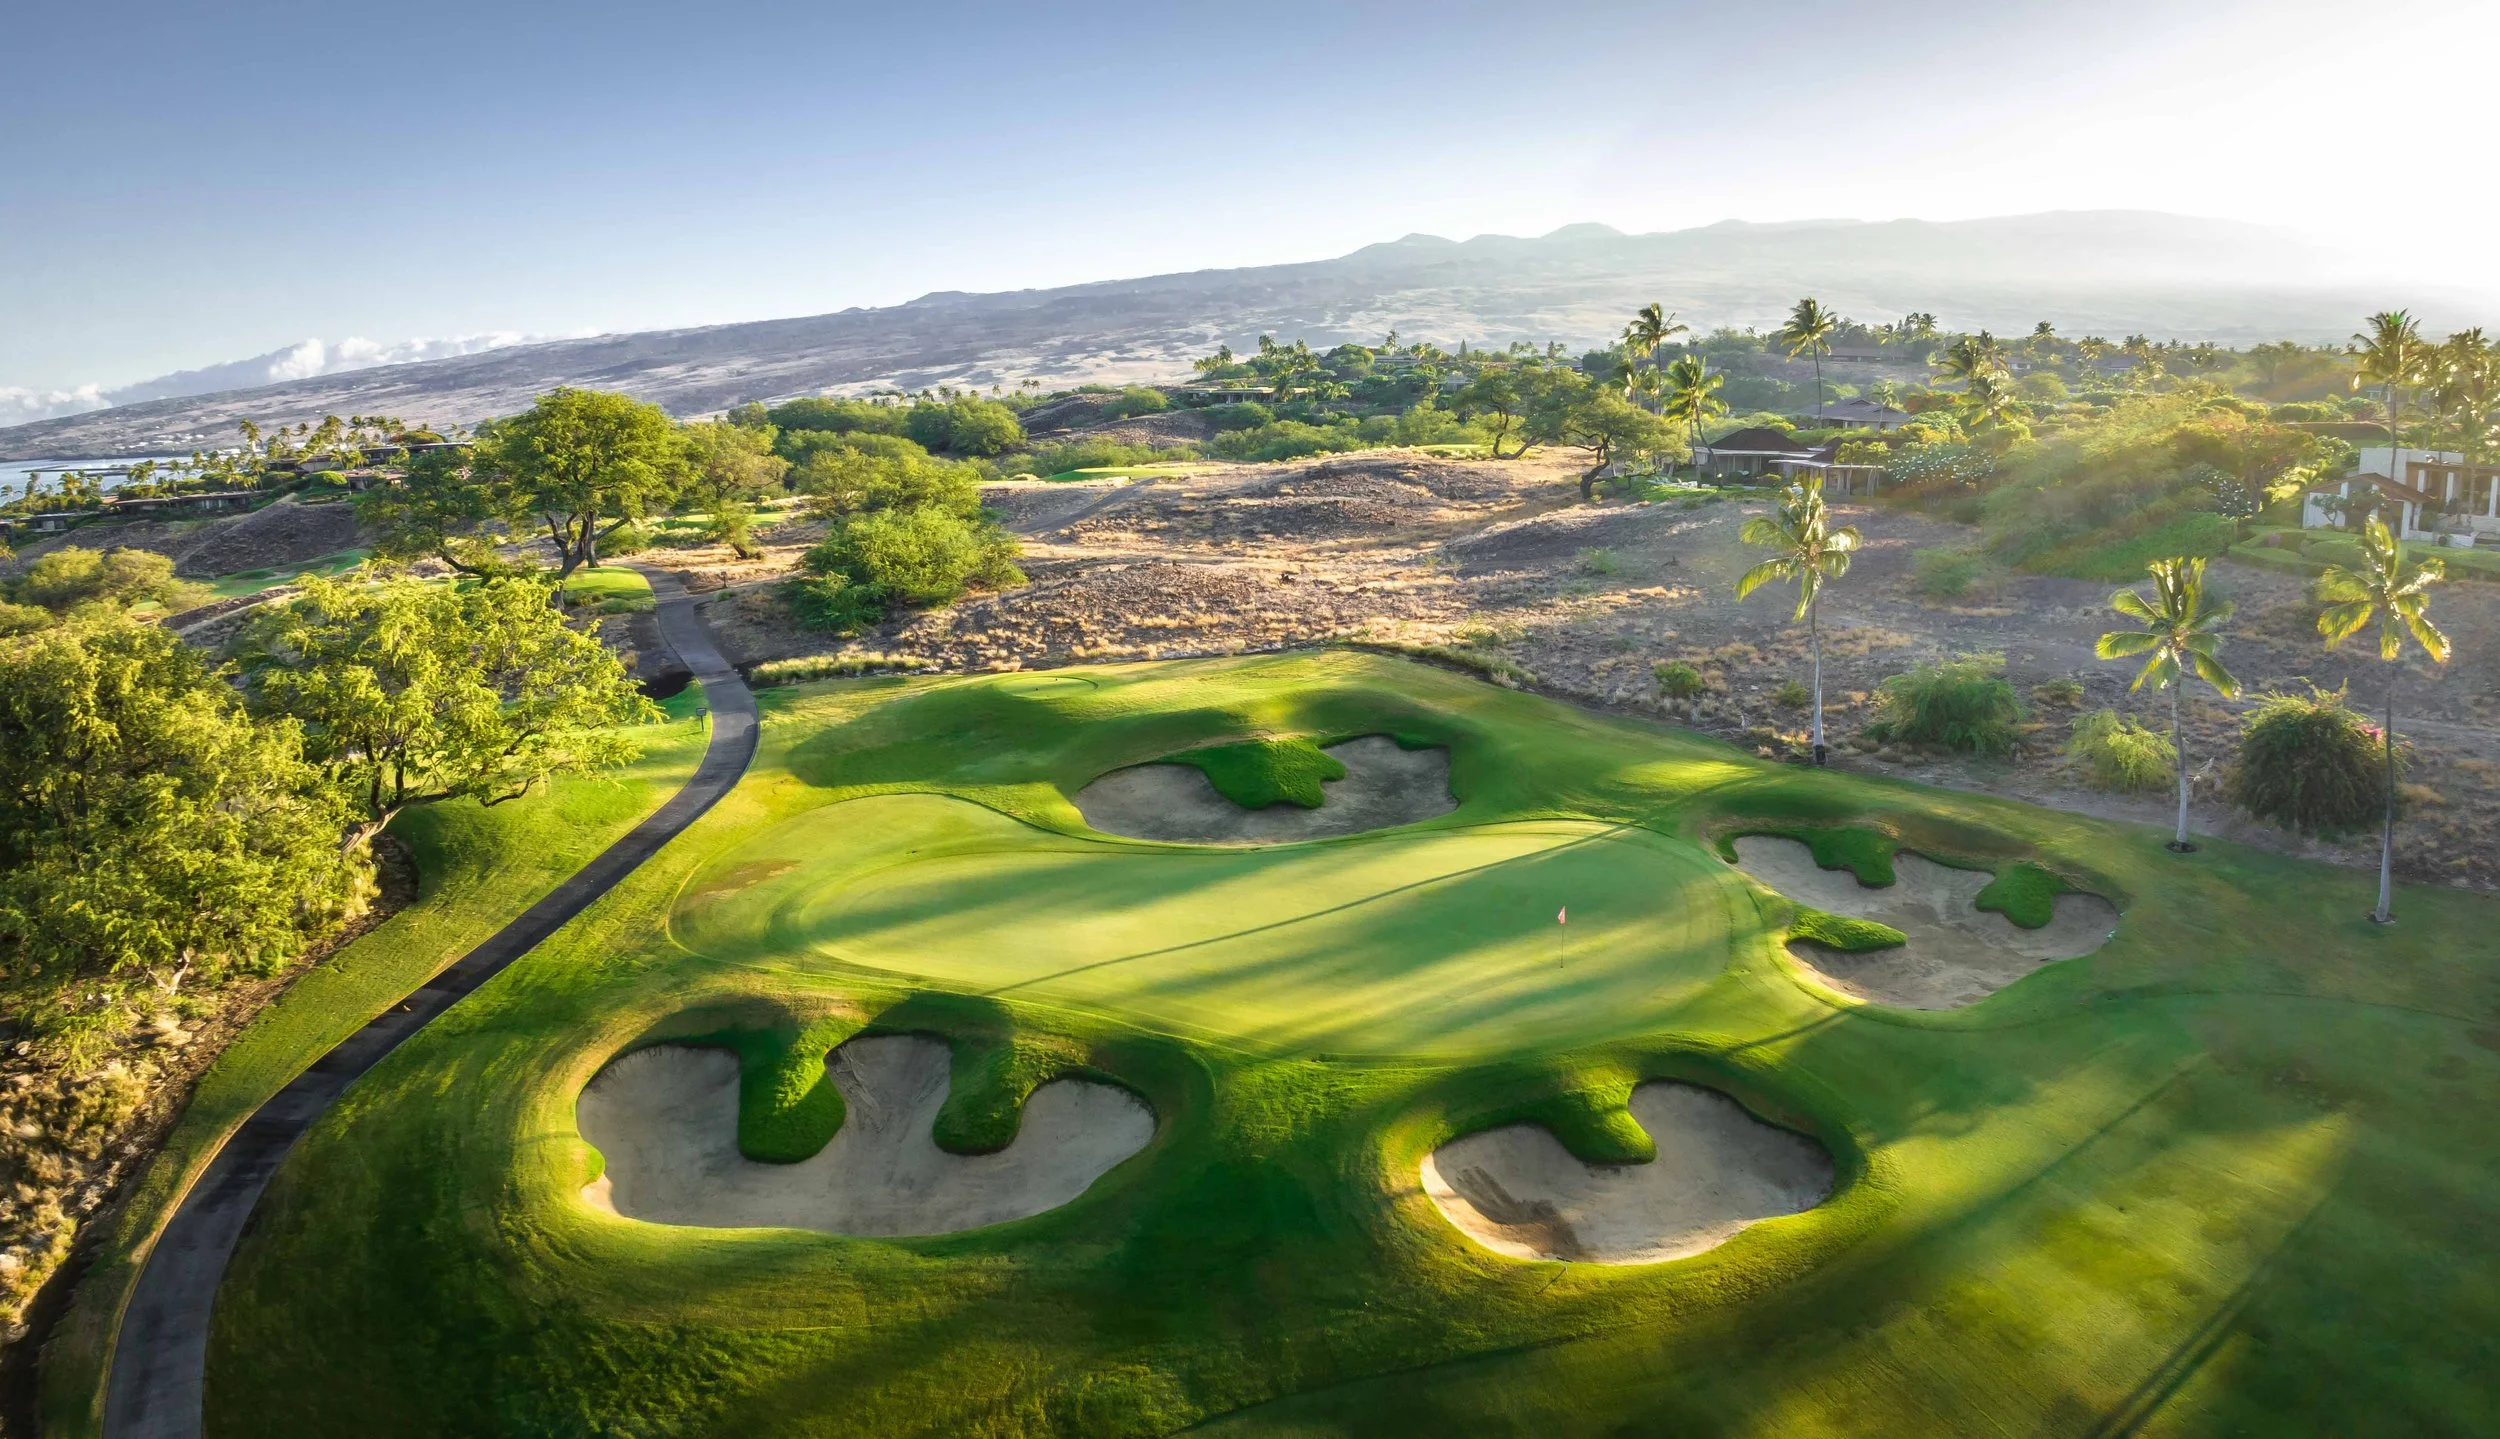
Hole #3 - Par 3 - 272 yards
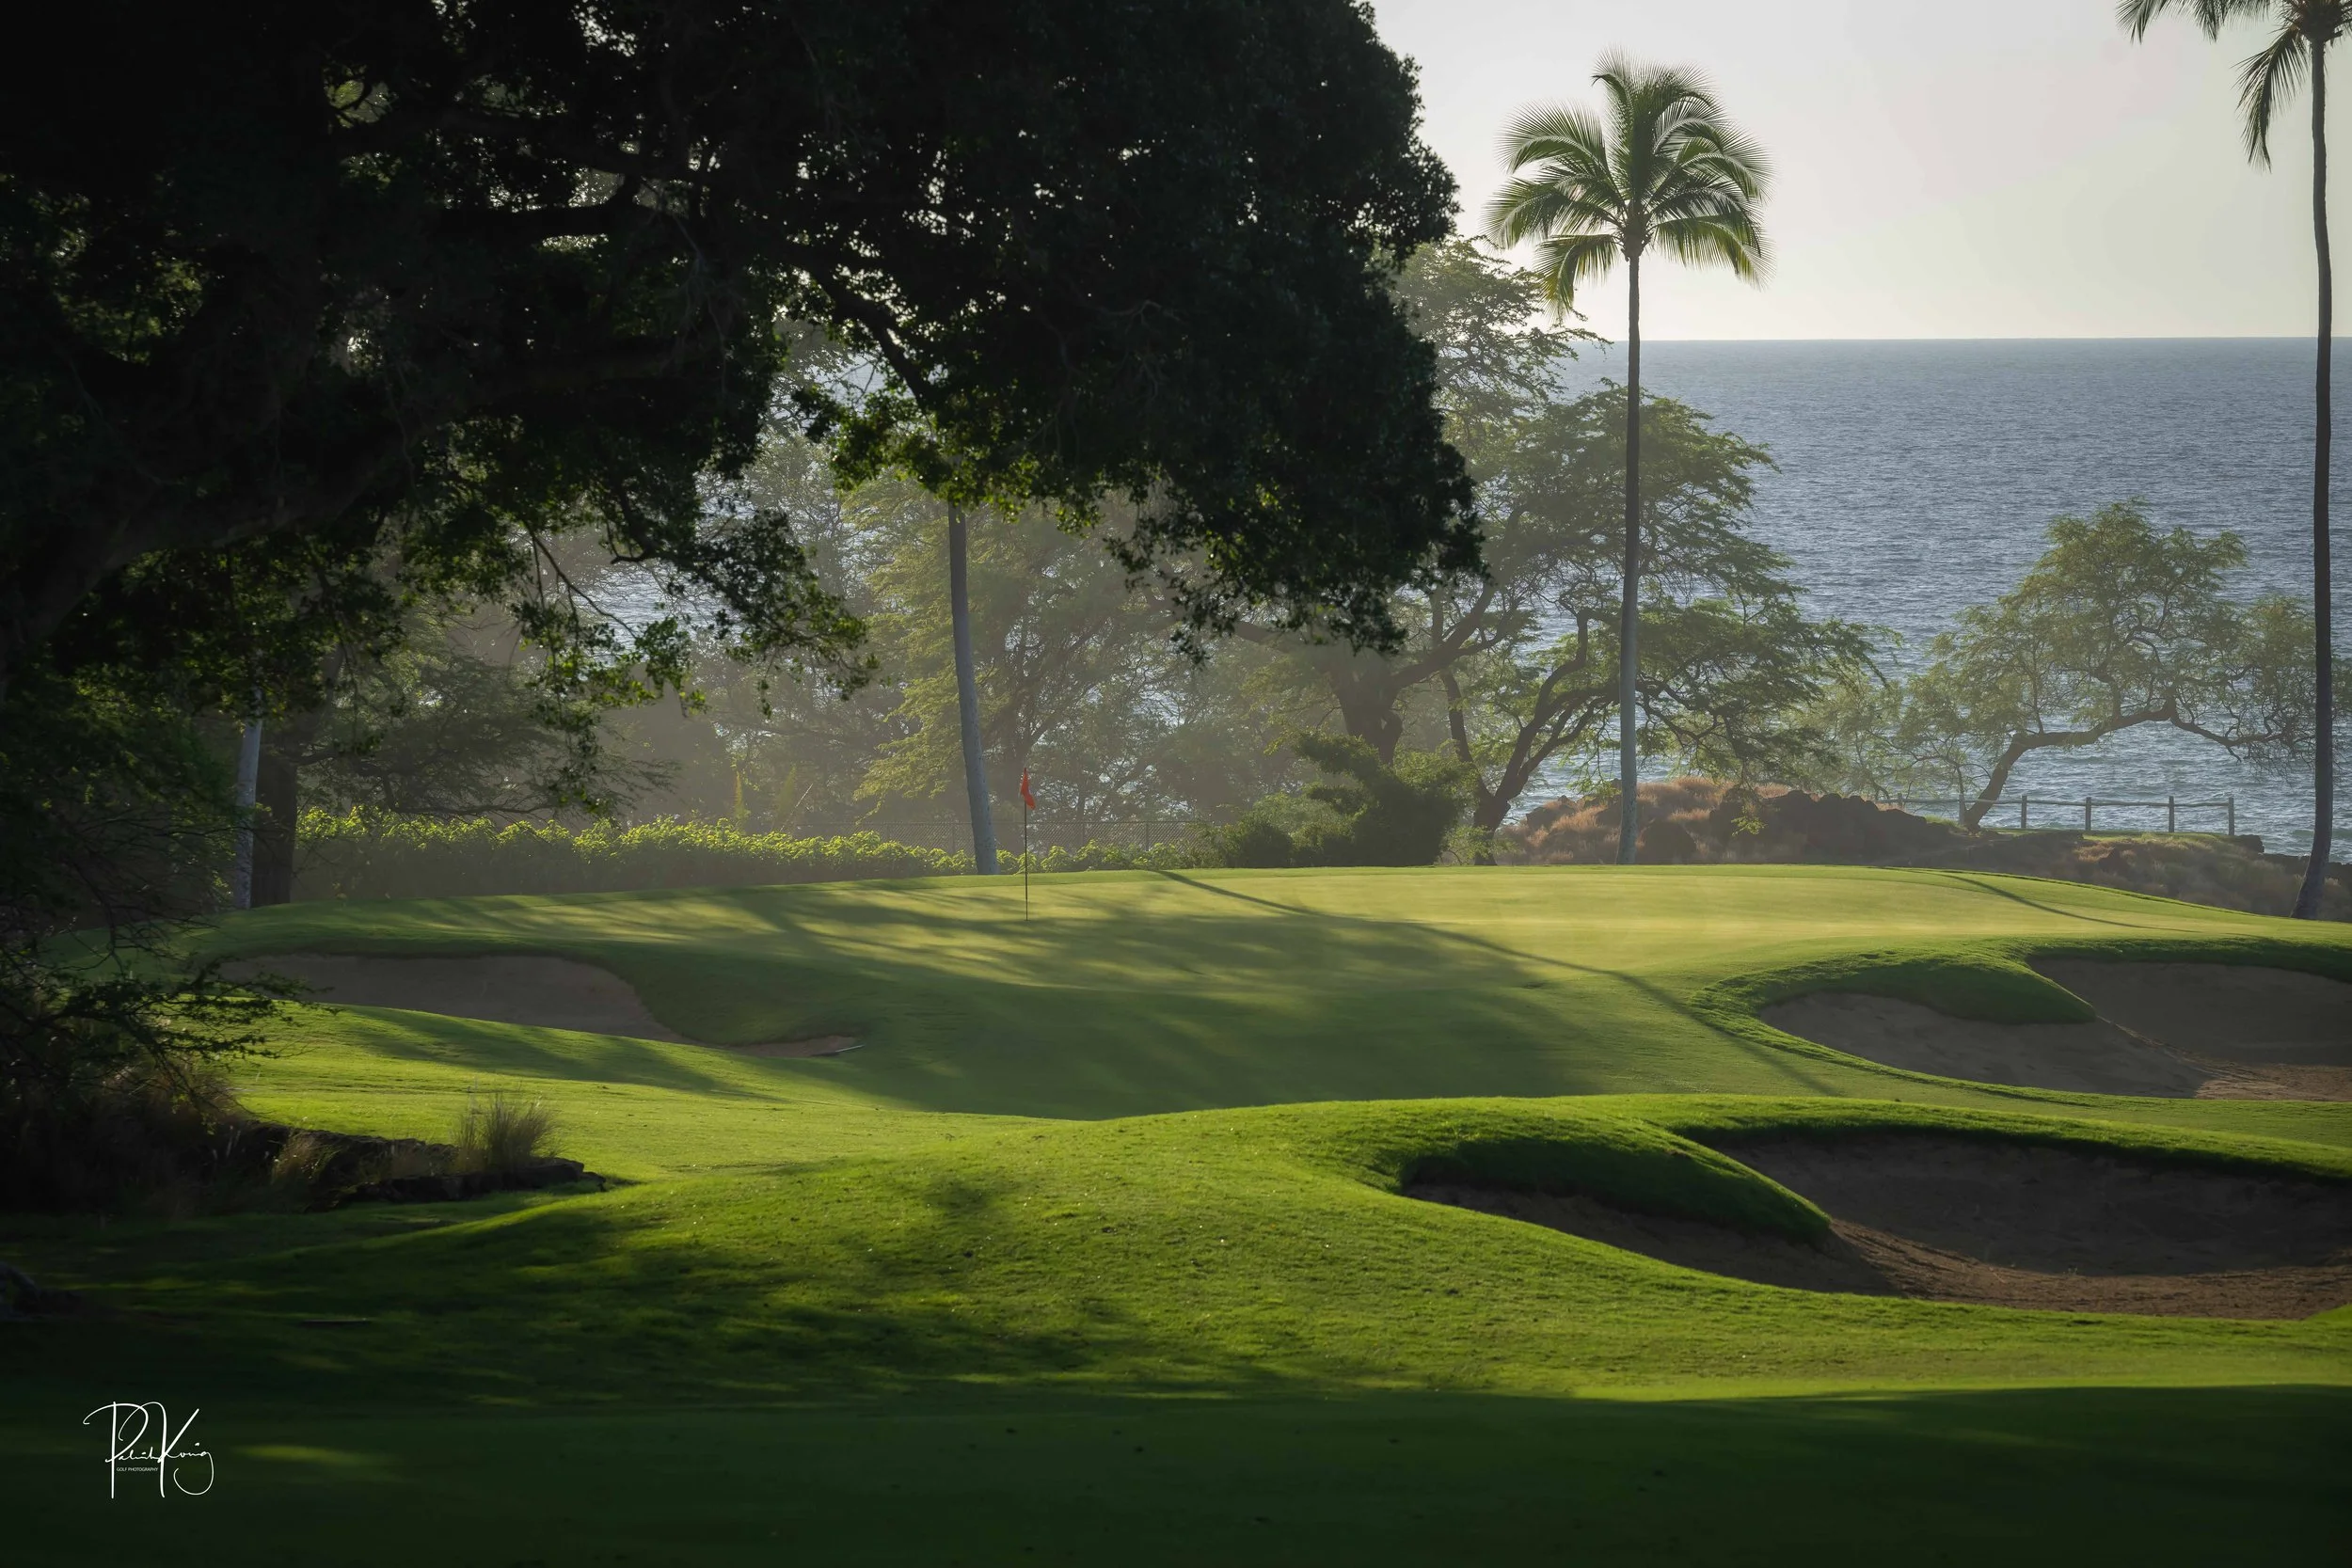
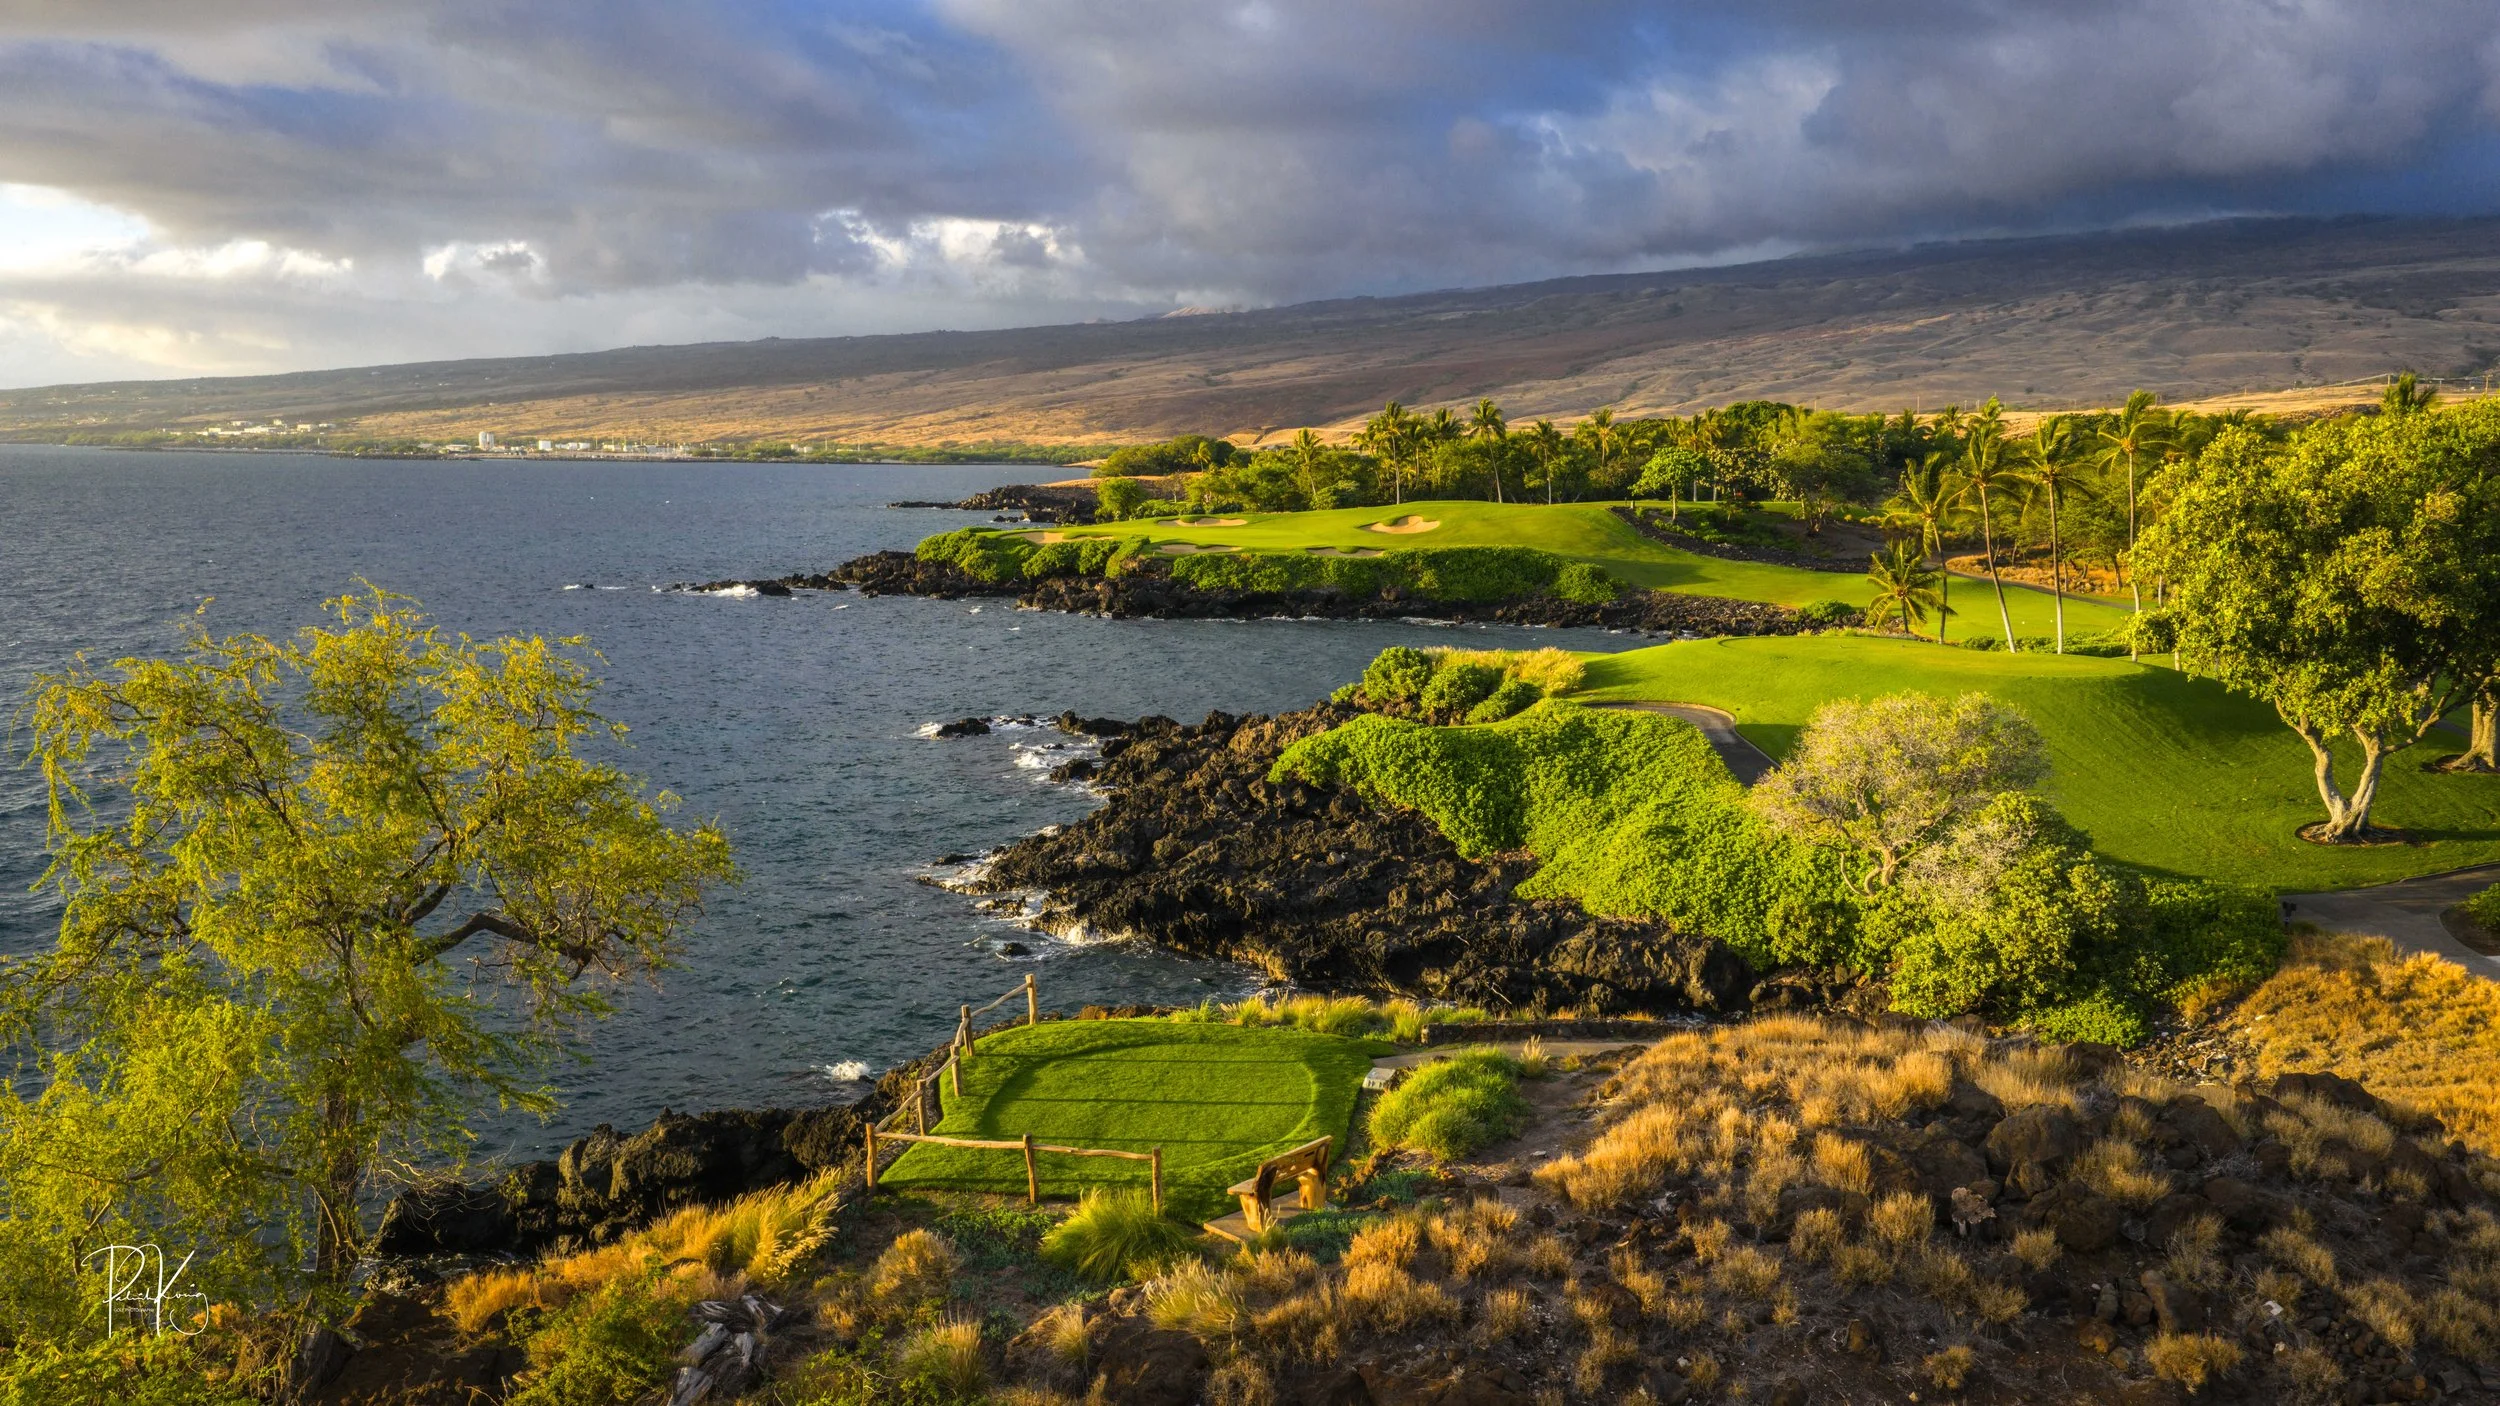
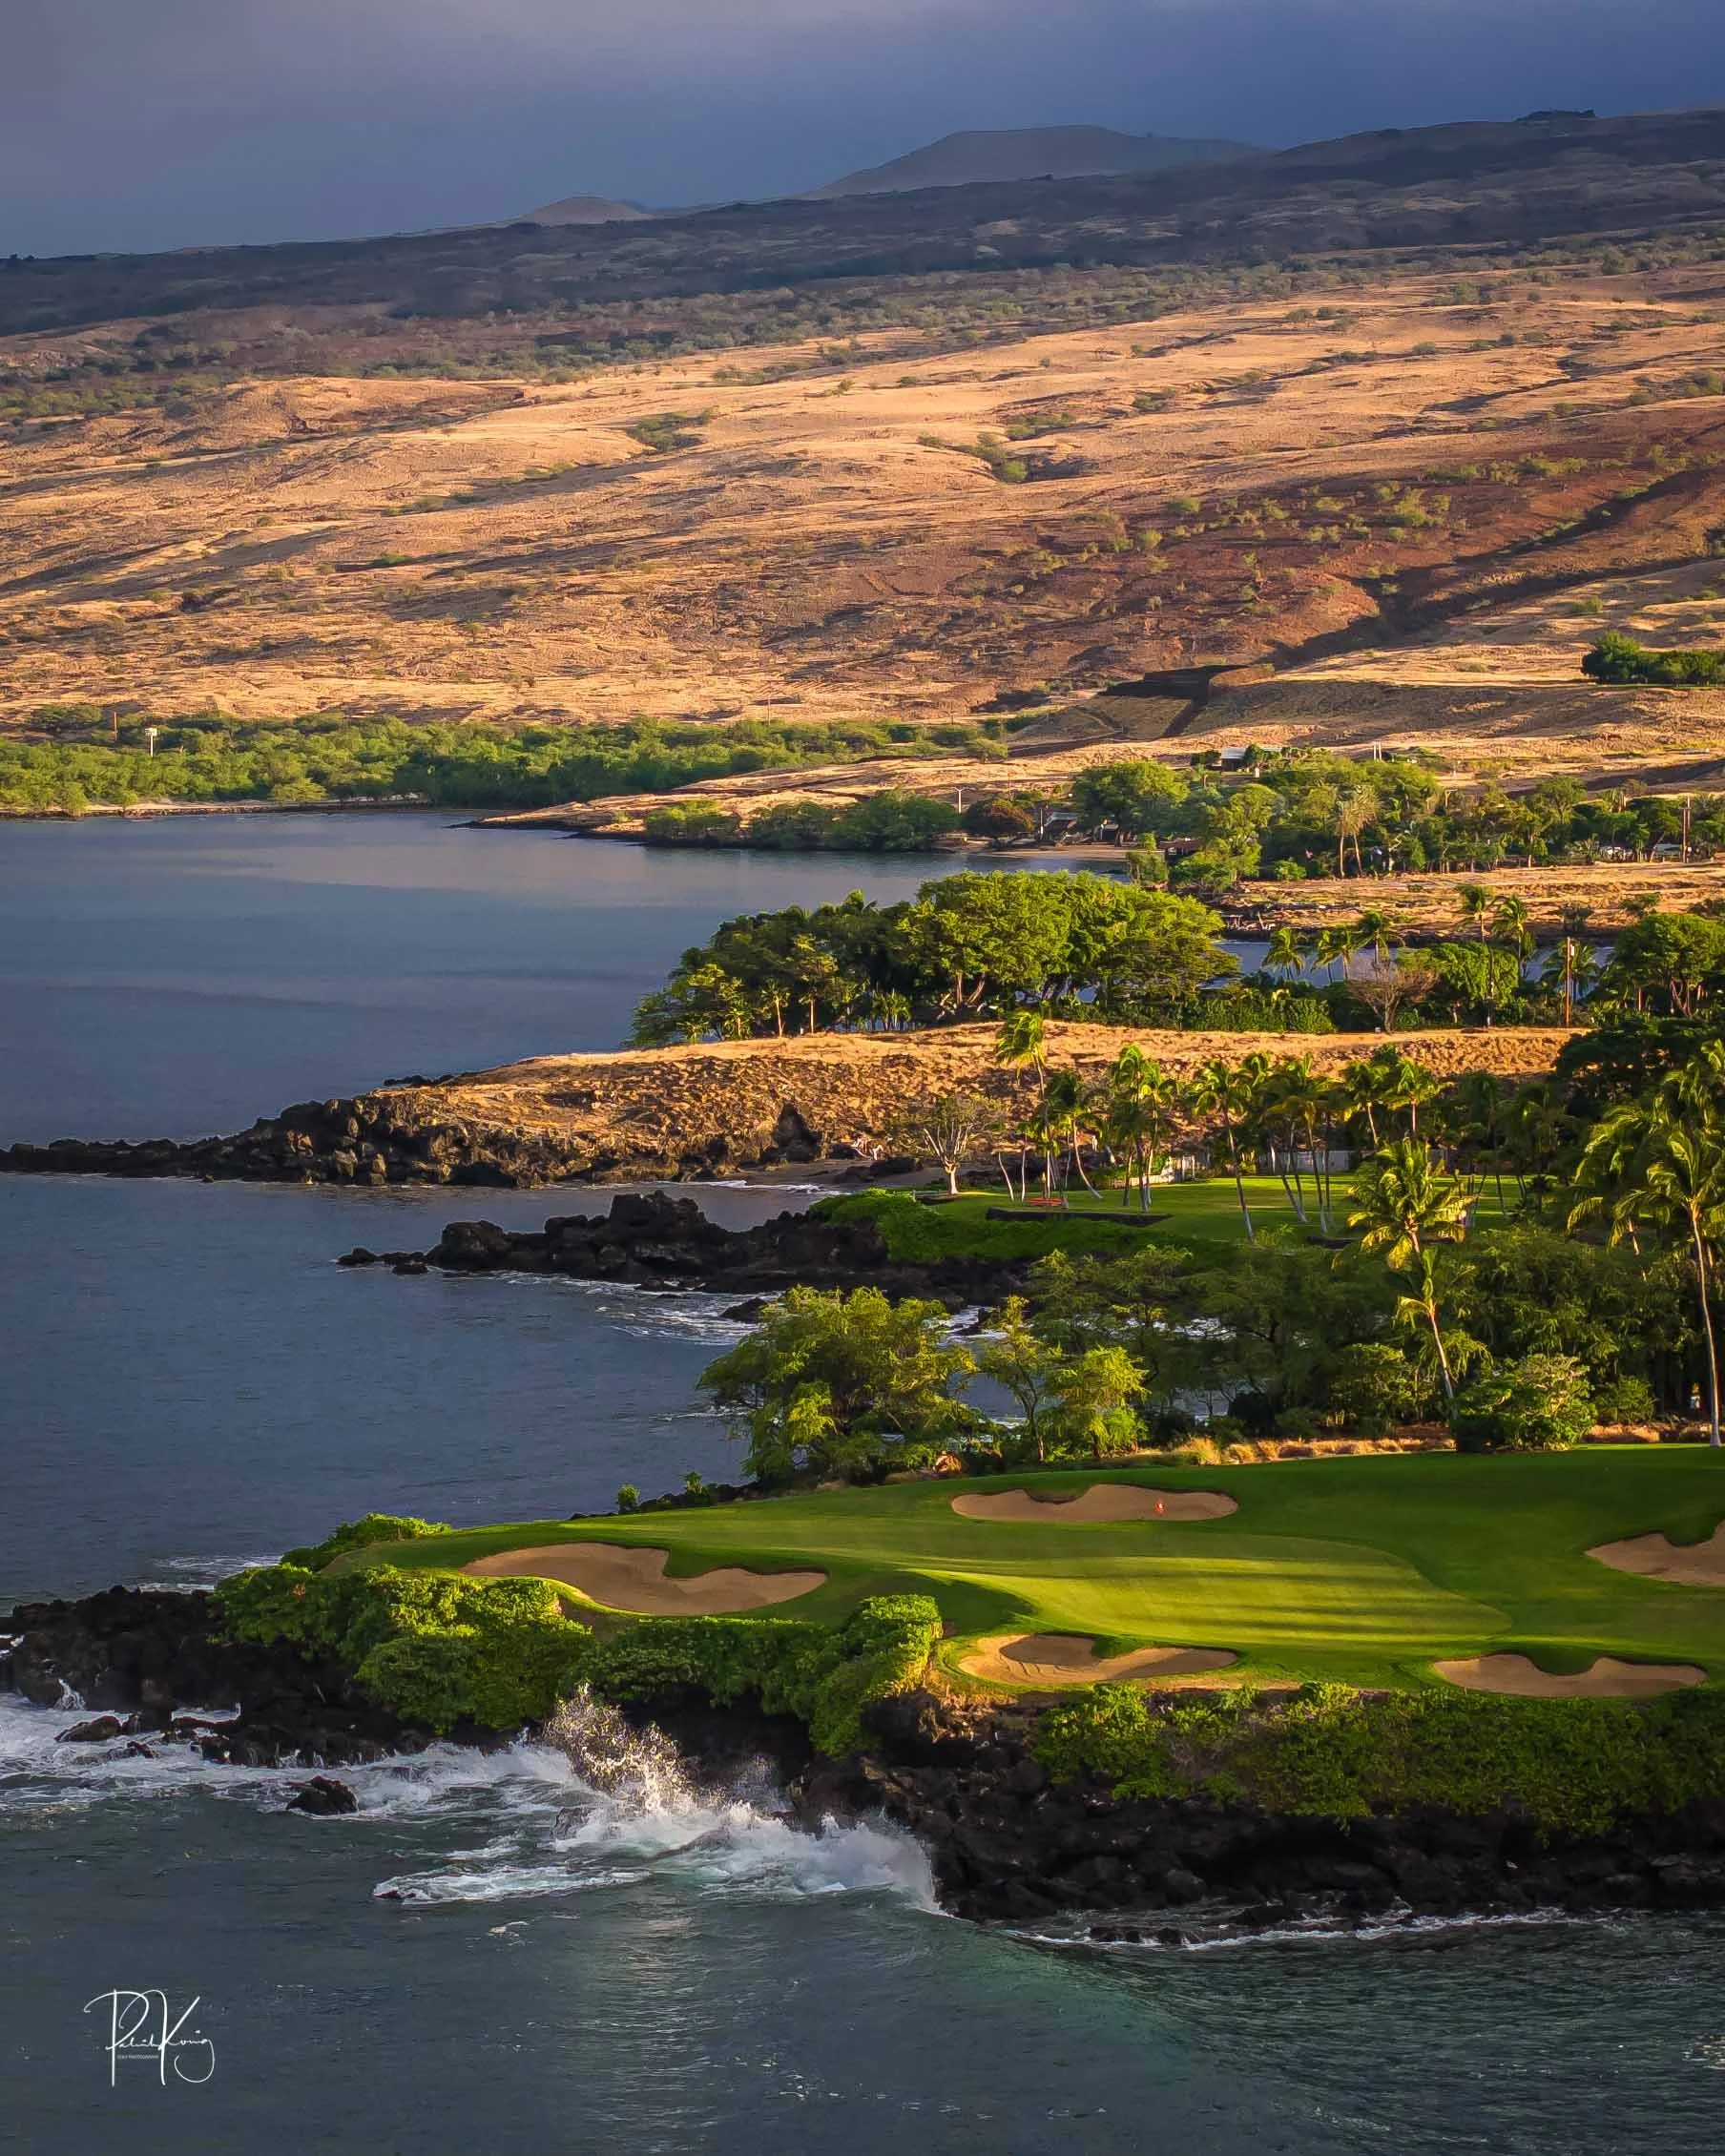
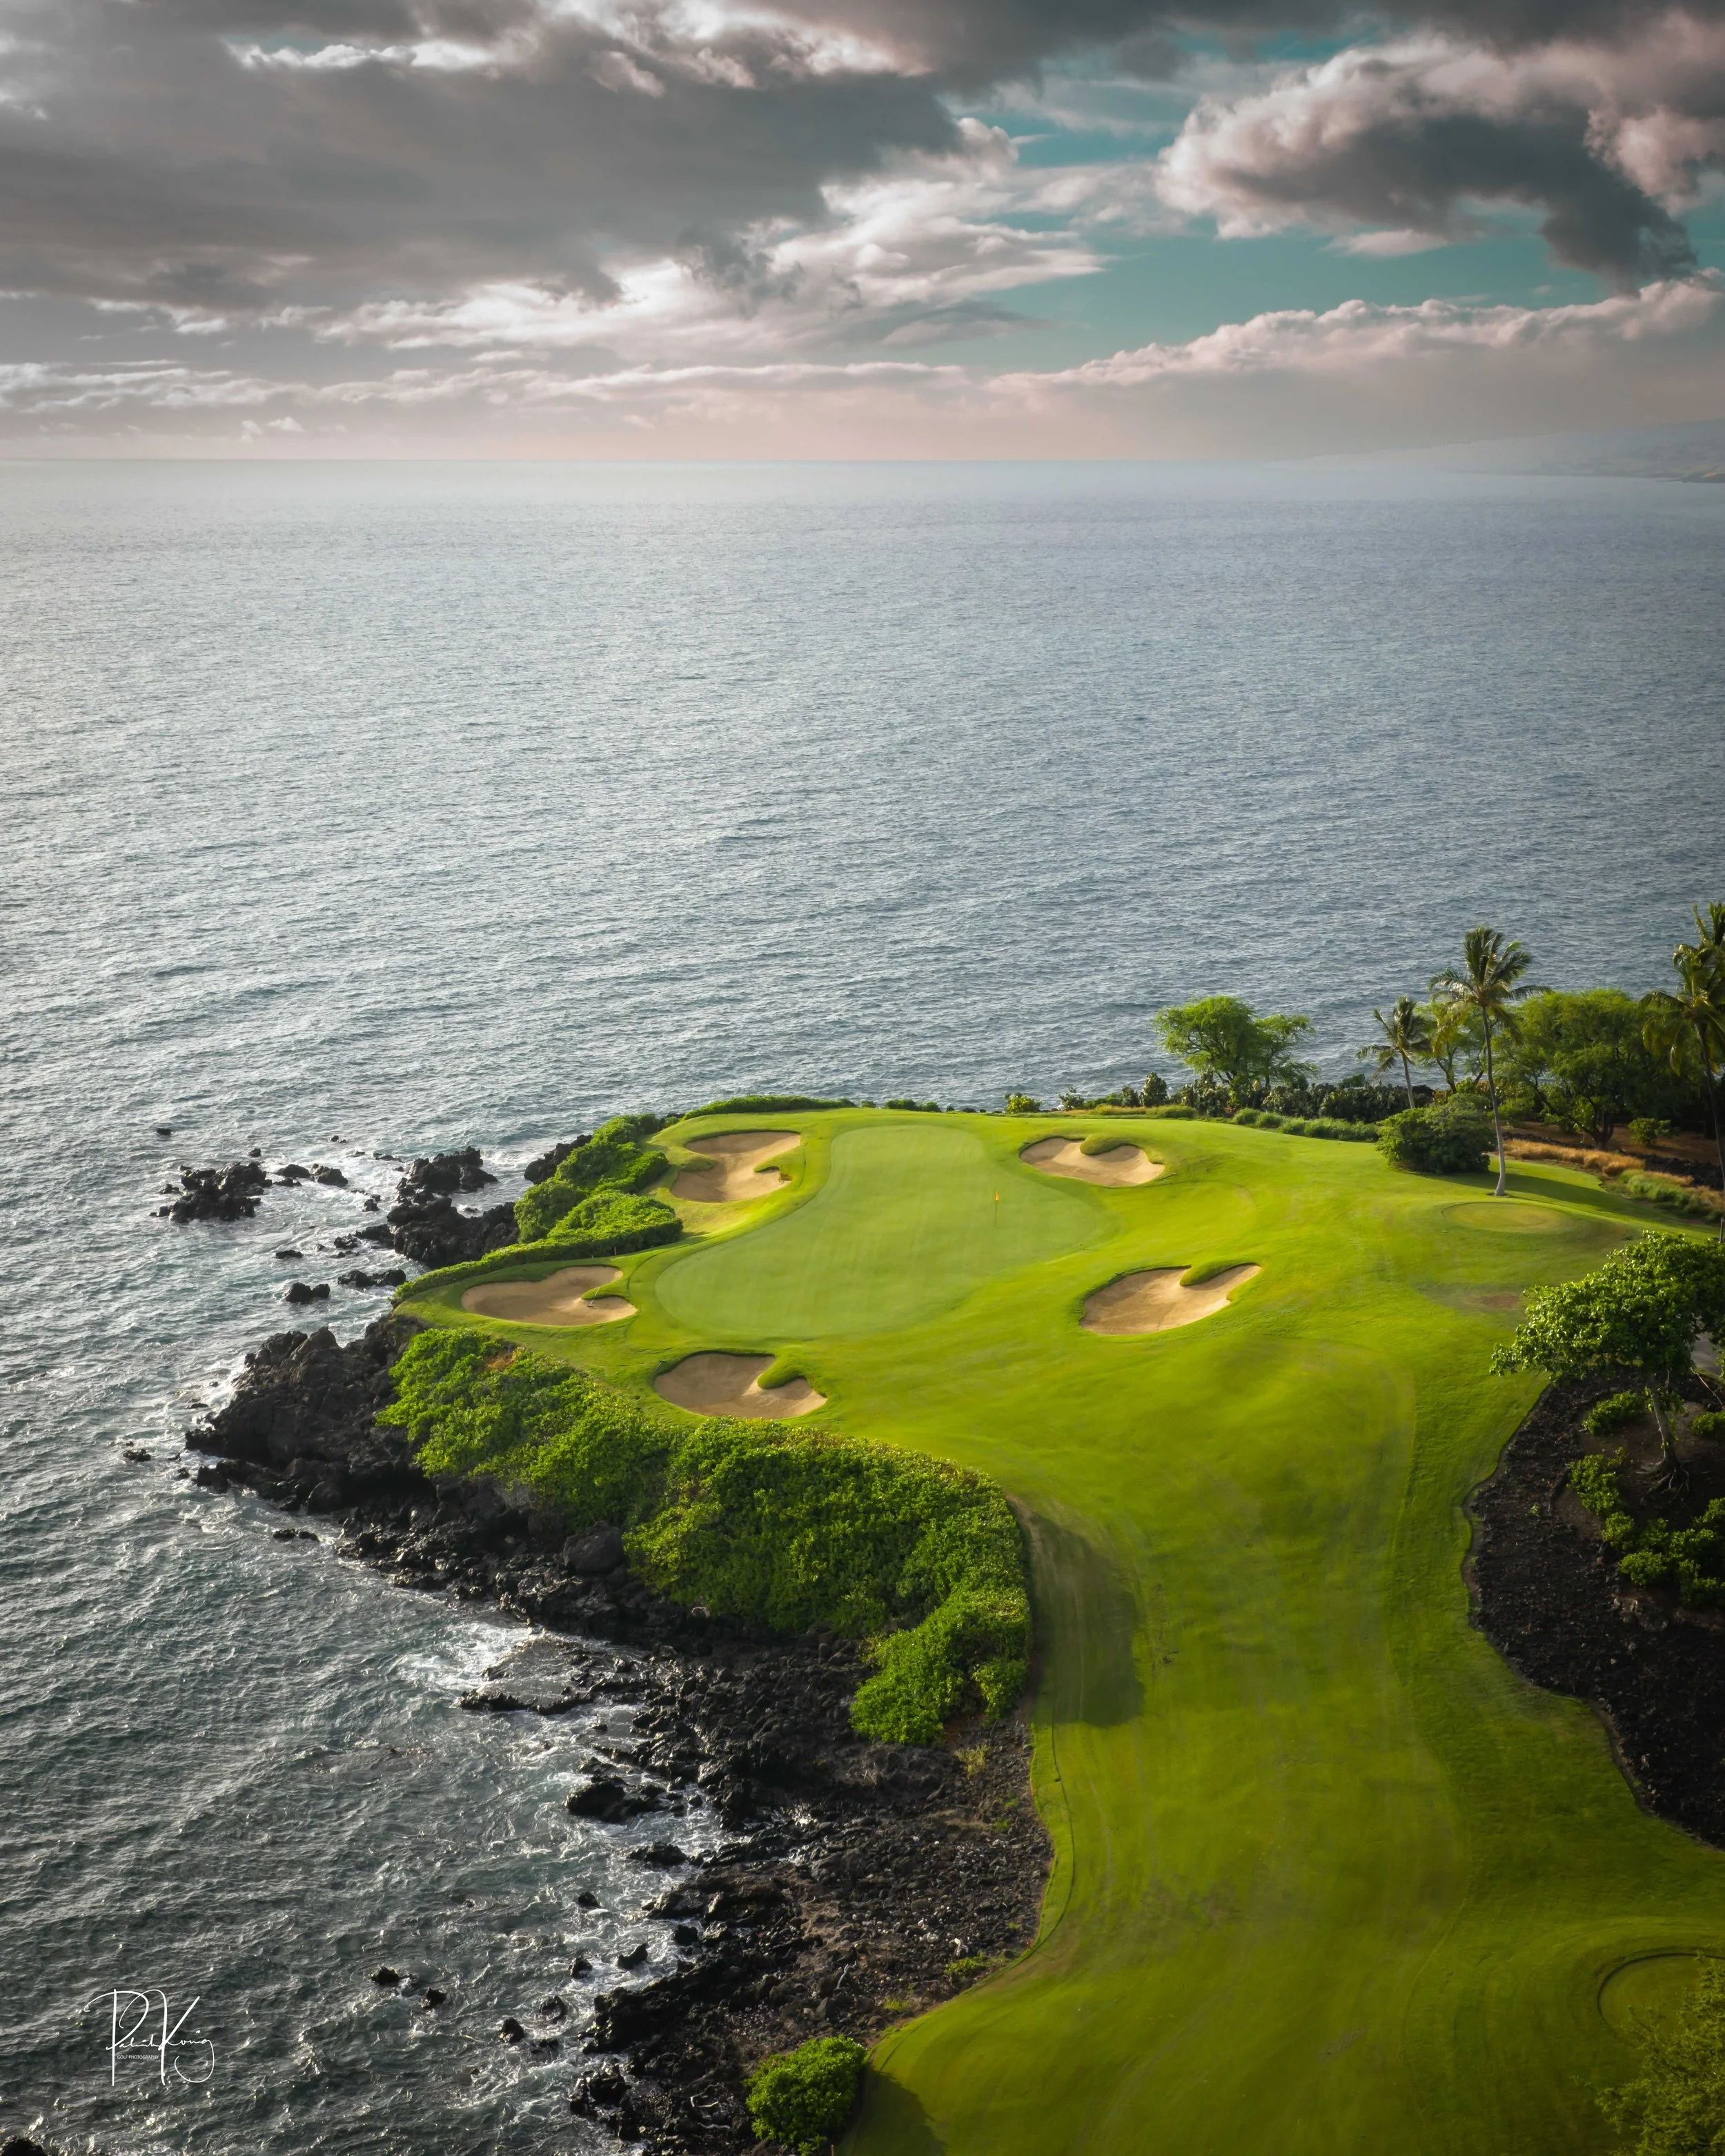
The 3rd hole is the signature hole at Mauna Kea and one of the grandest ocean side par 3’s in Hawaii. At 272 from the championship tees, the 3rd hole is also one of the longest carries over the ocean in golf. Almost no one plays the back tees unless you want to ensure a donation to the sea serpents. Most golfers will play 180 yards over the ocean to a large green. Finding the green here always feels like a grand sense of accomplishment. As this is one of the most scenic golf holes in Hawaii, I am including an unprecedented 16 images of this golf hole. This hole is a stunner.
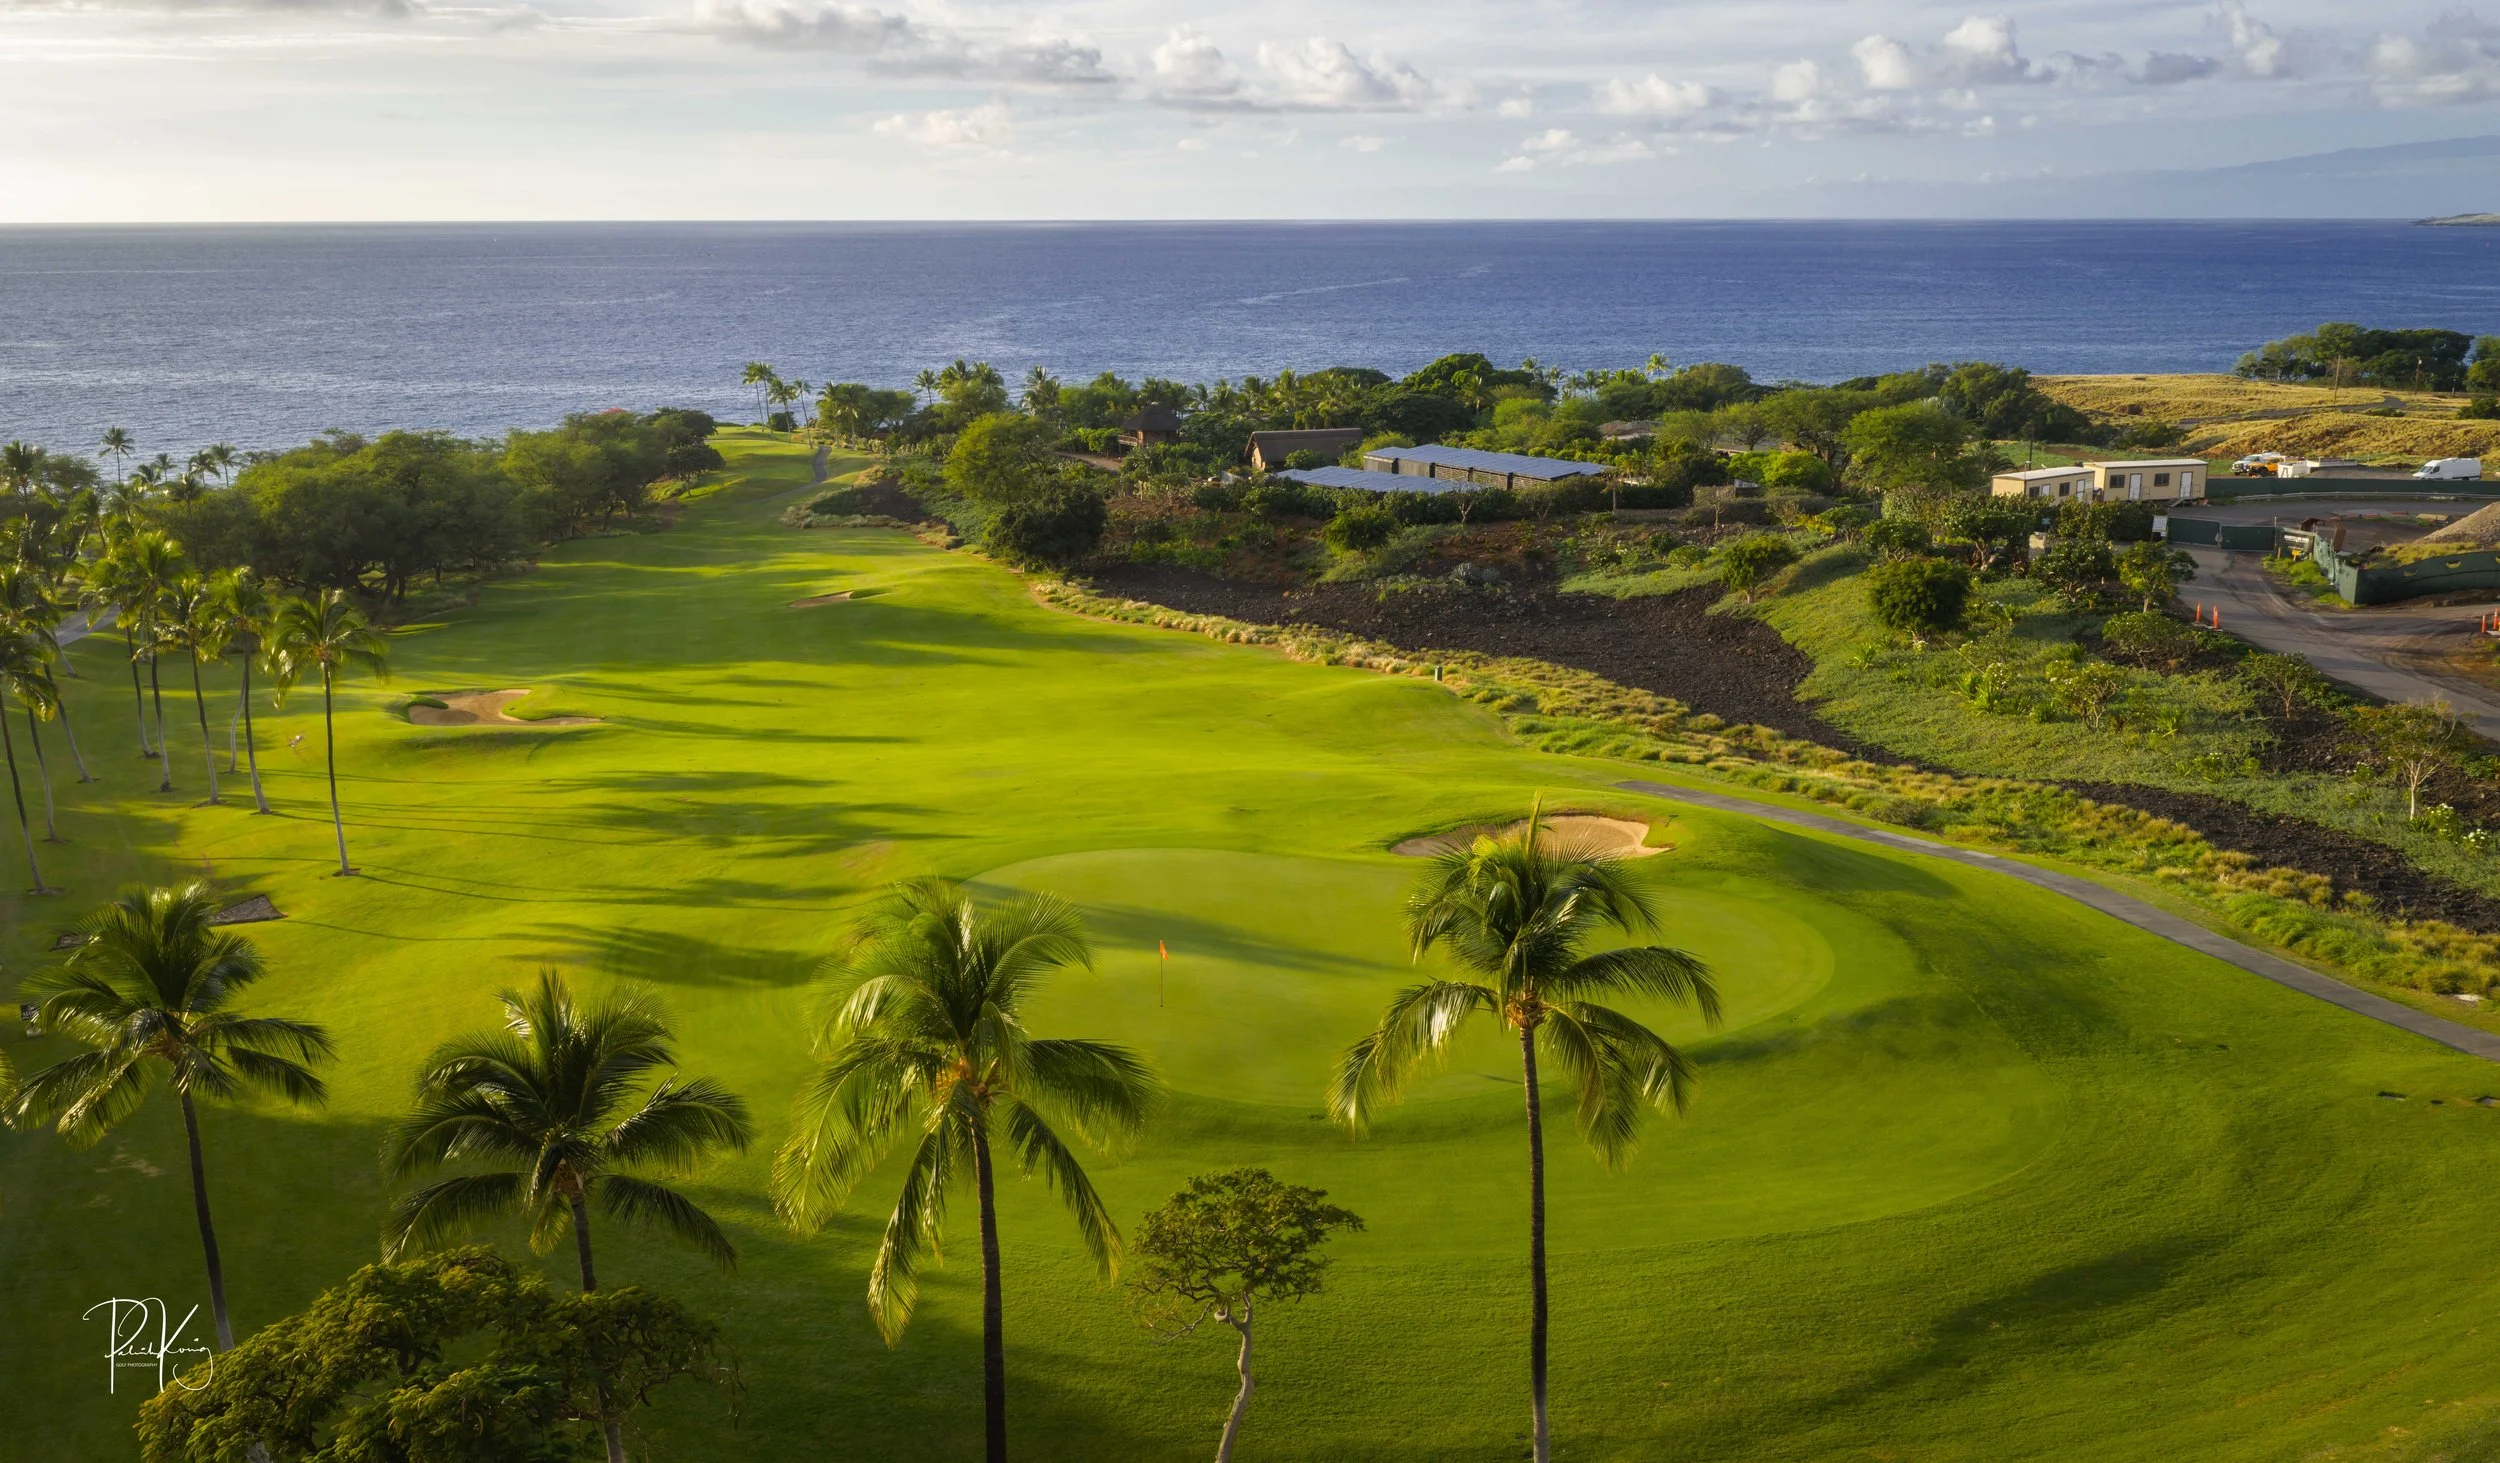
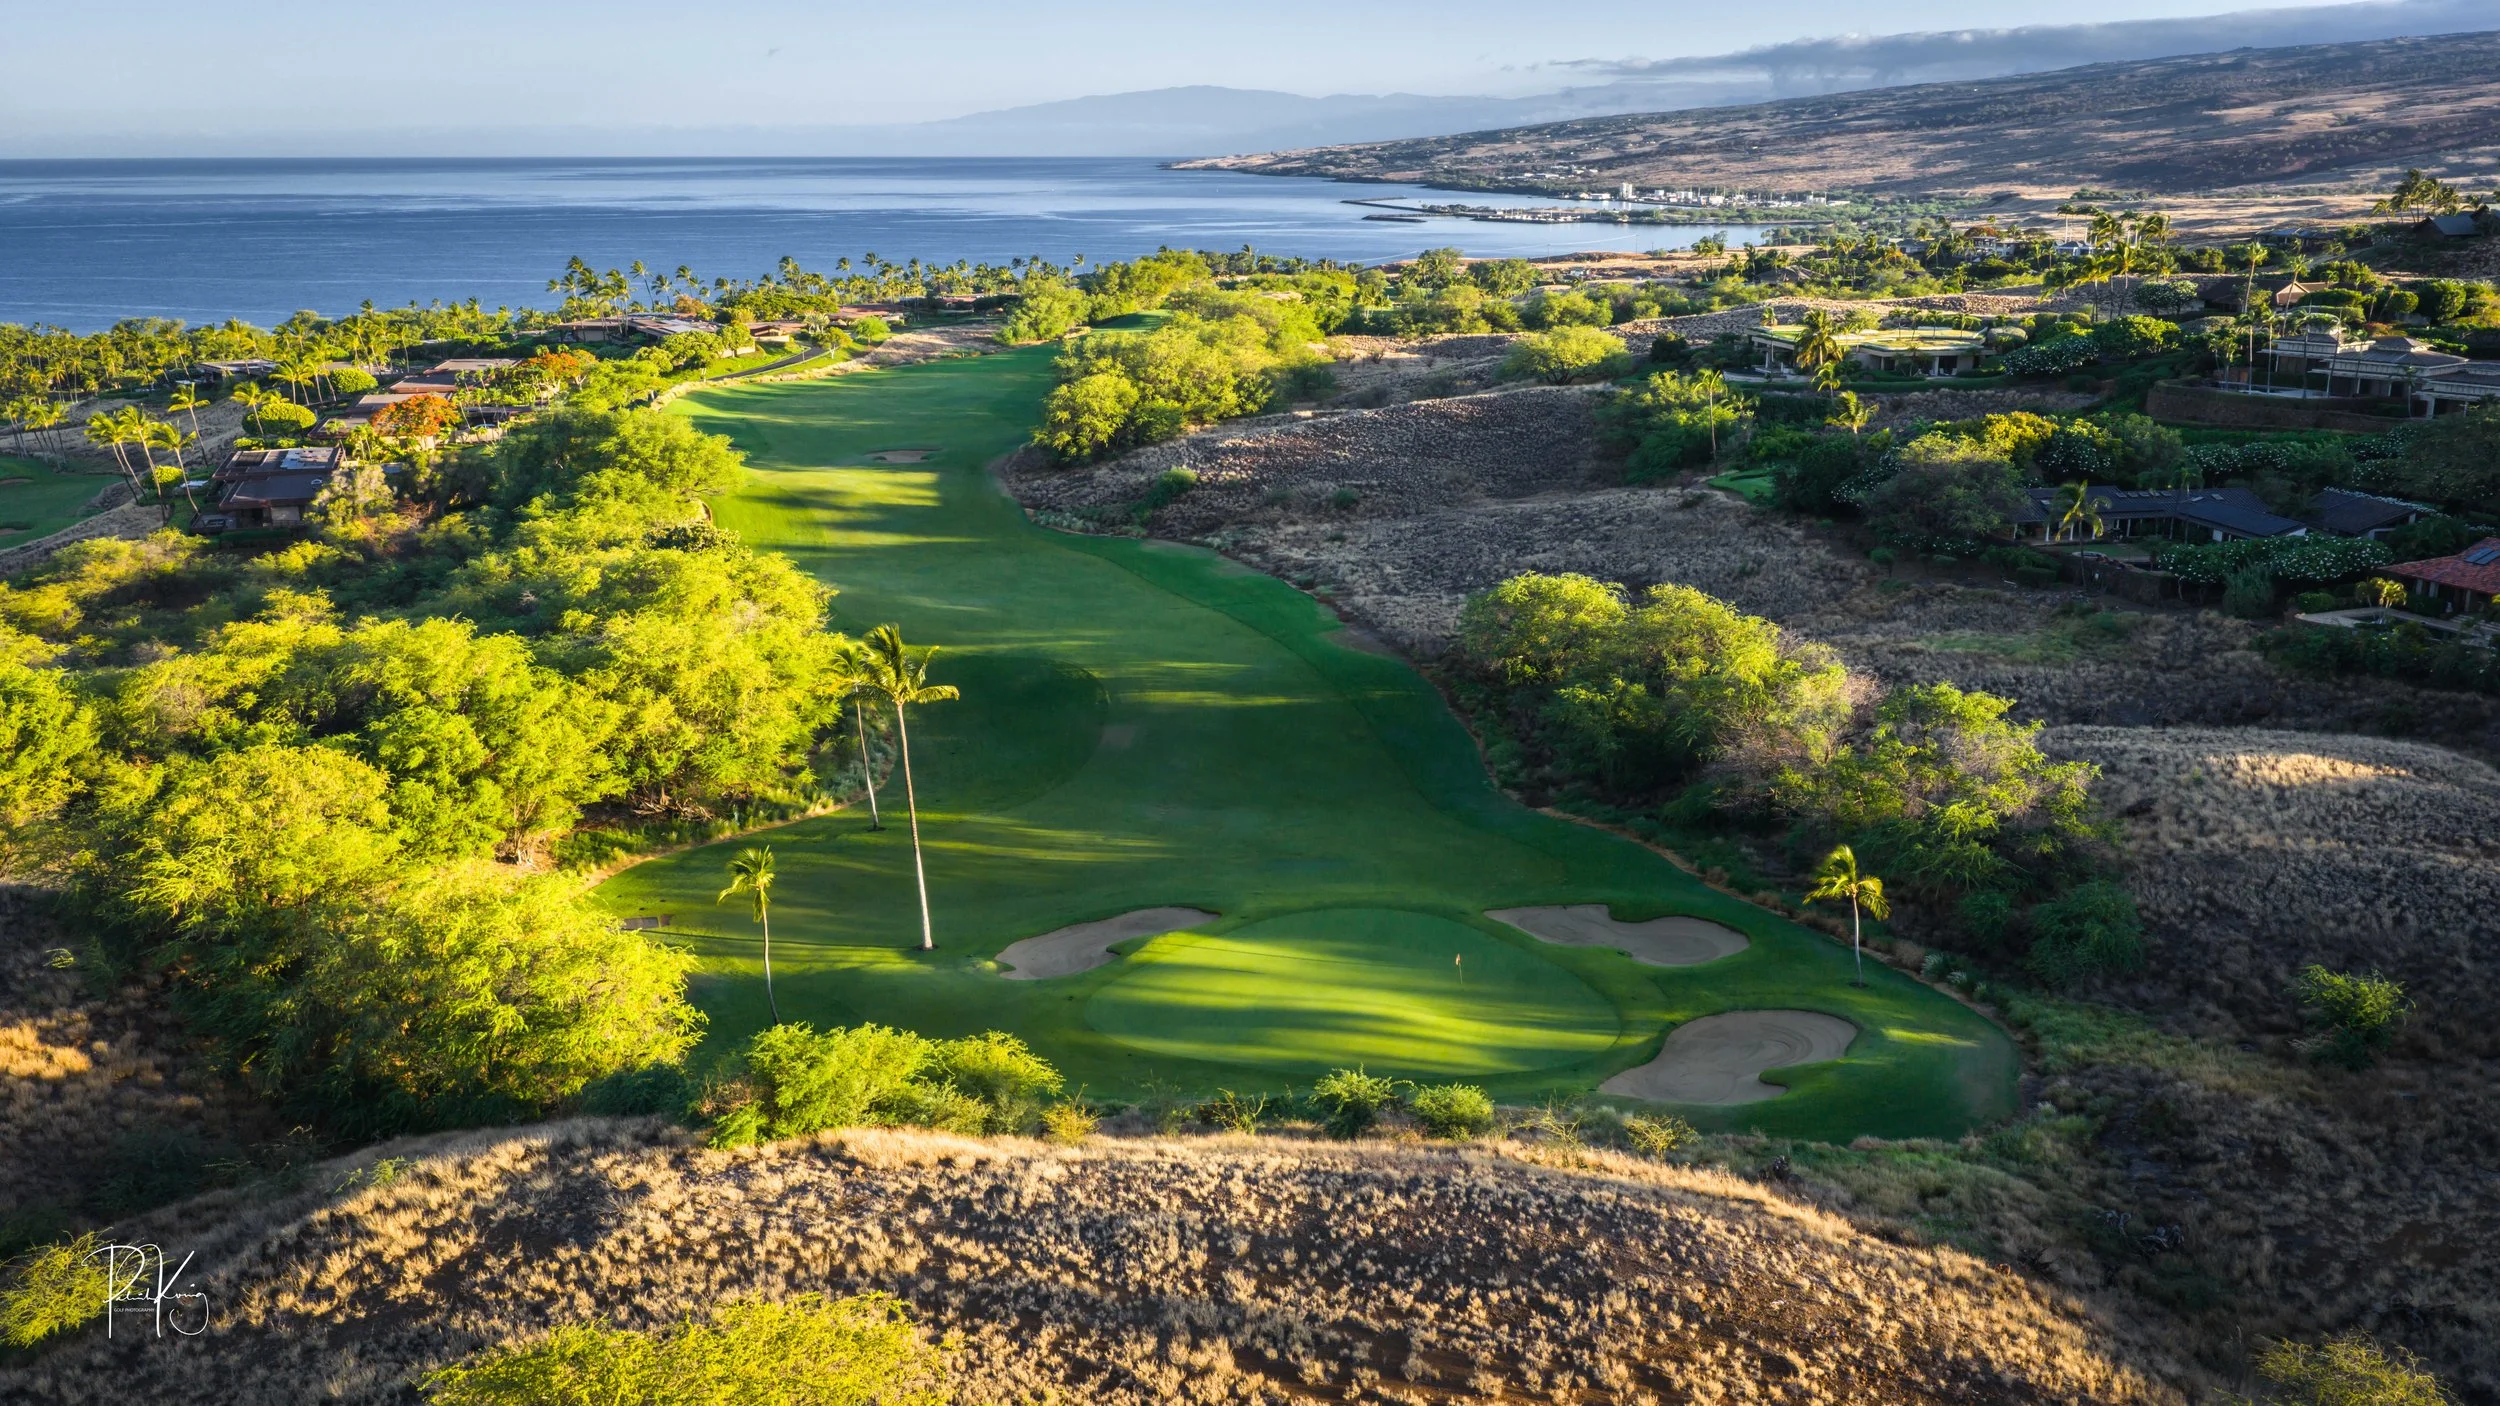
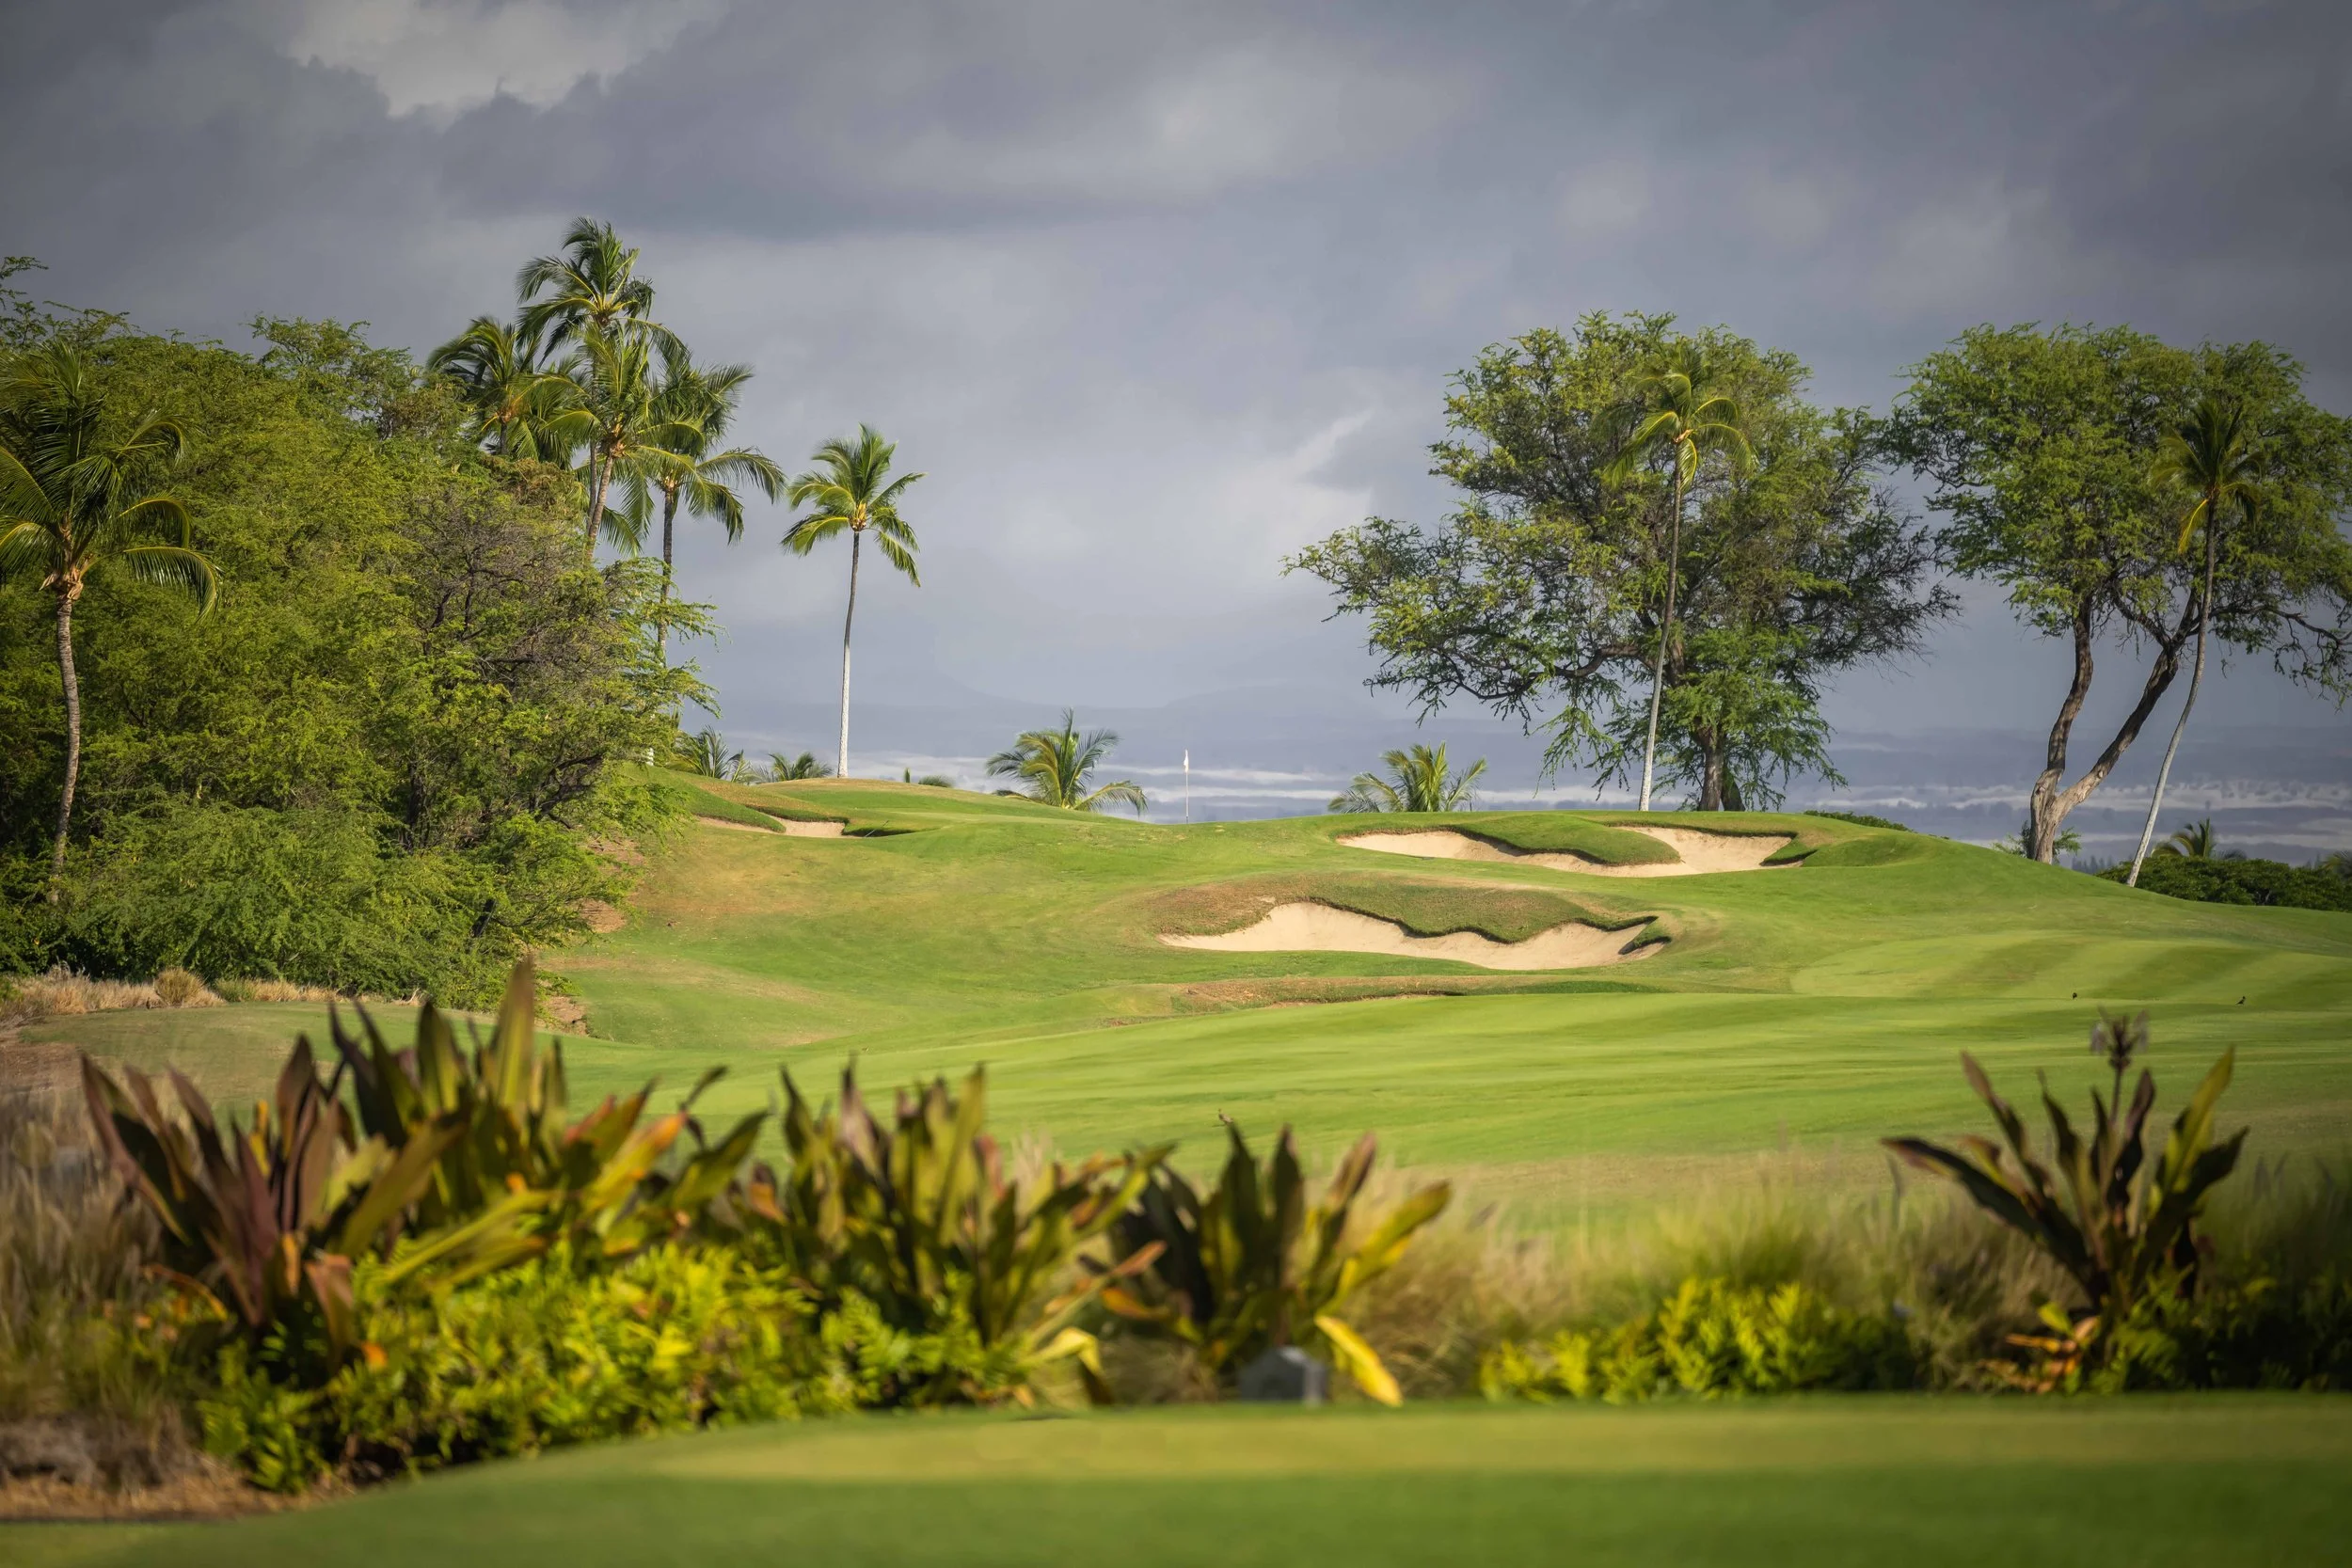
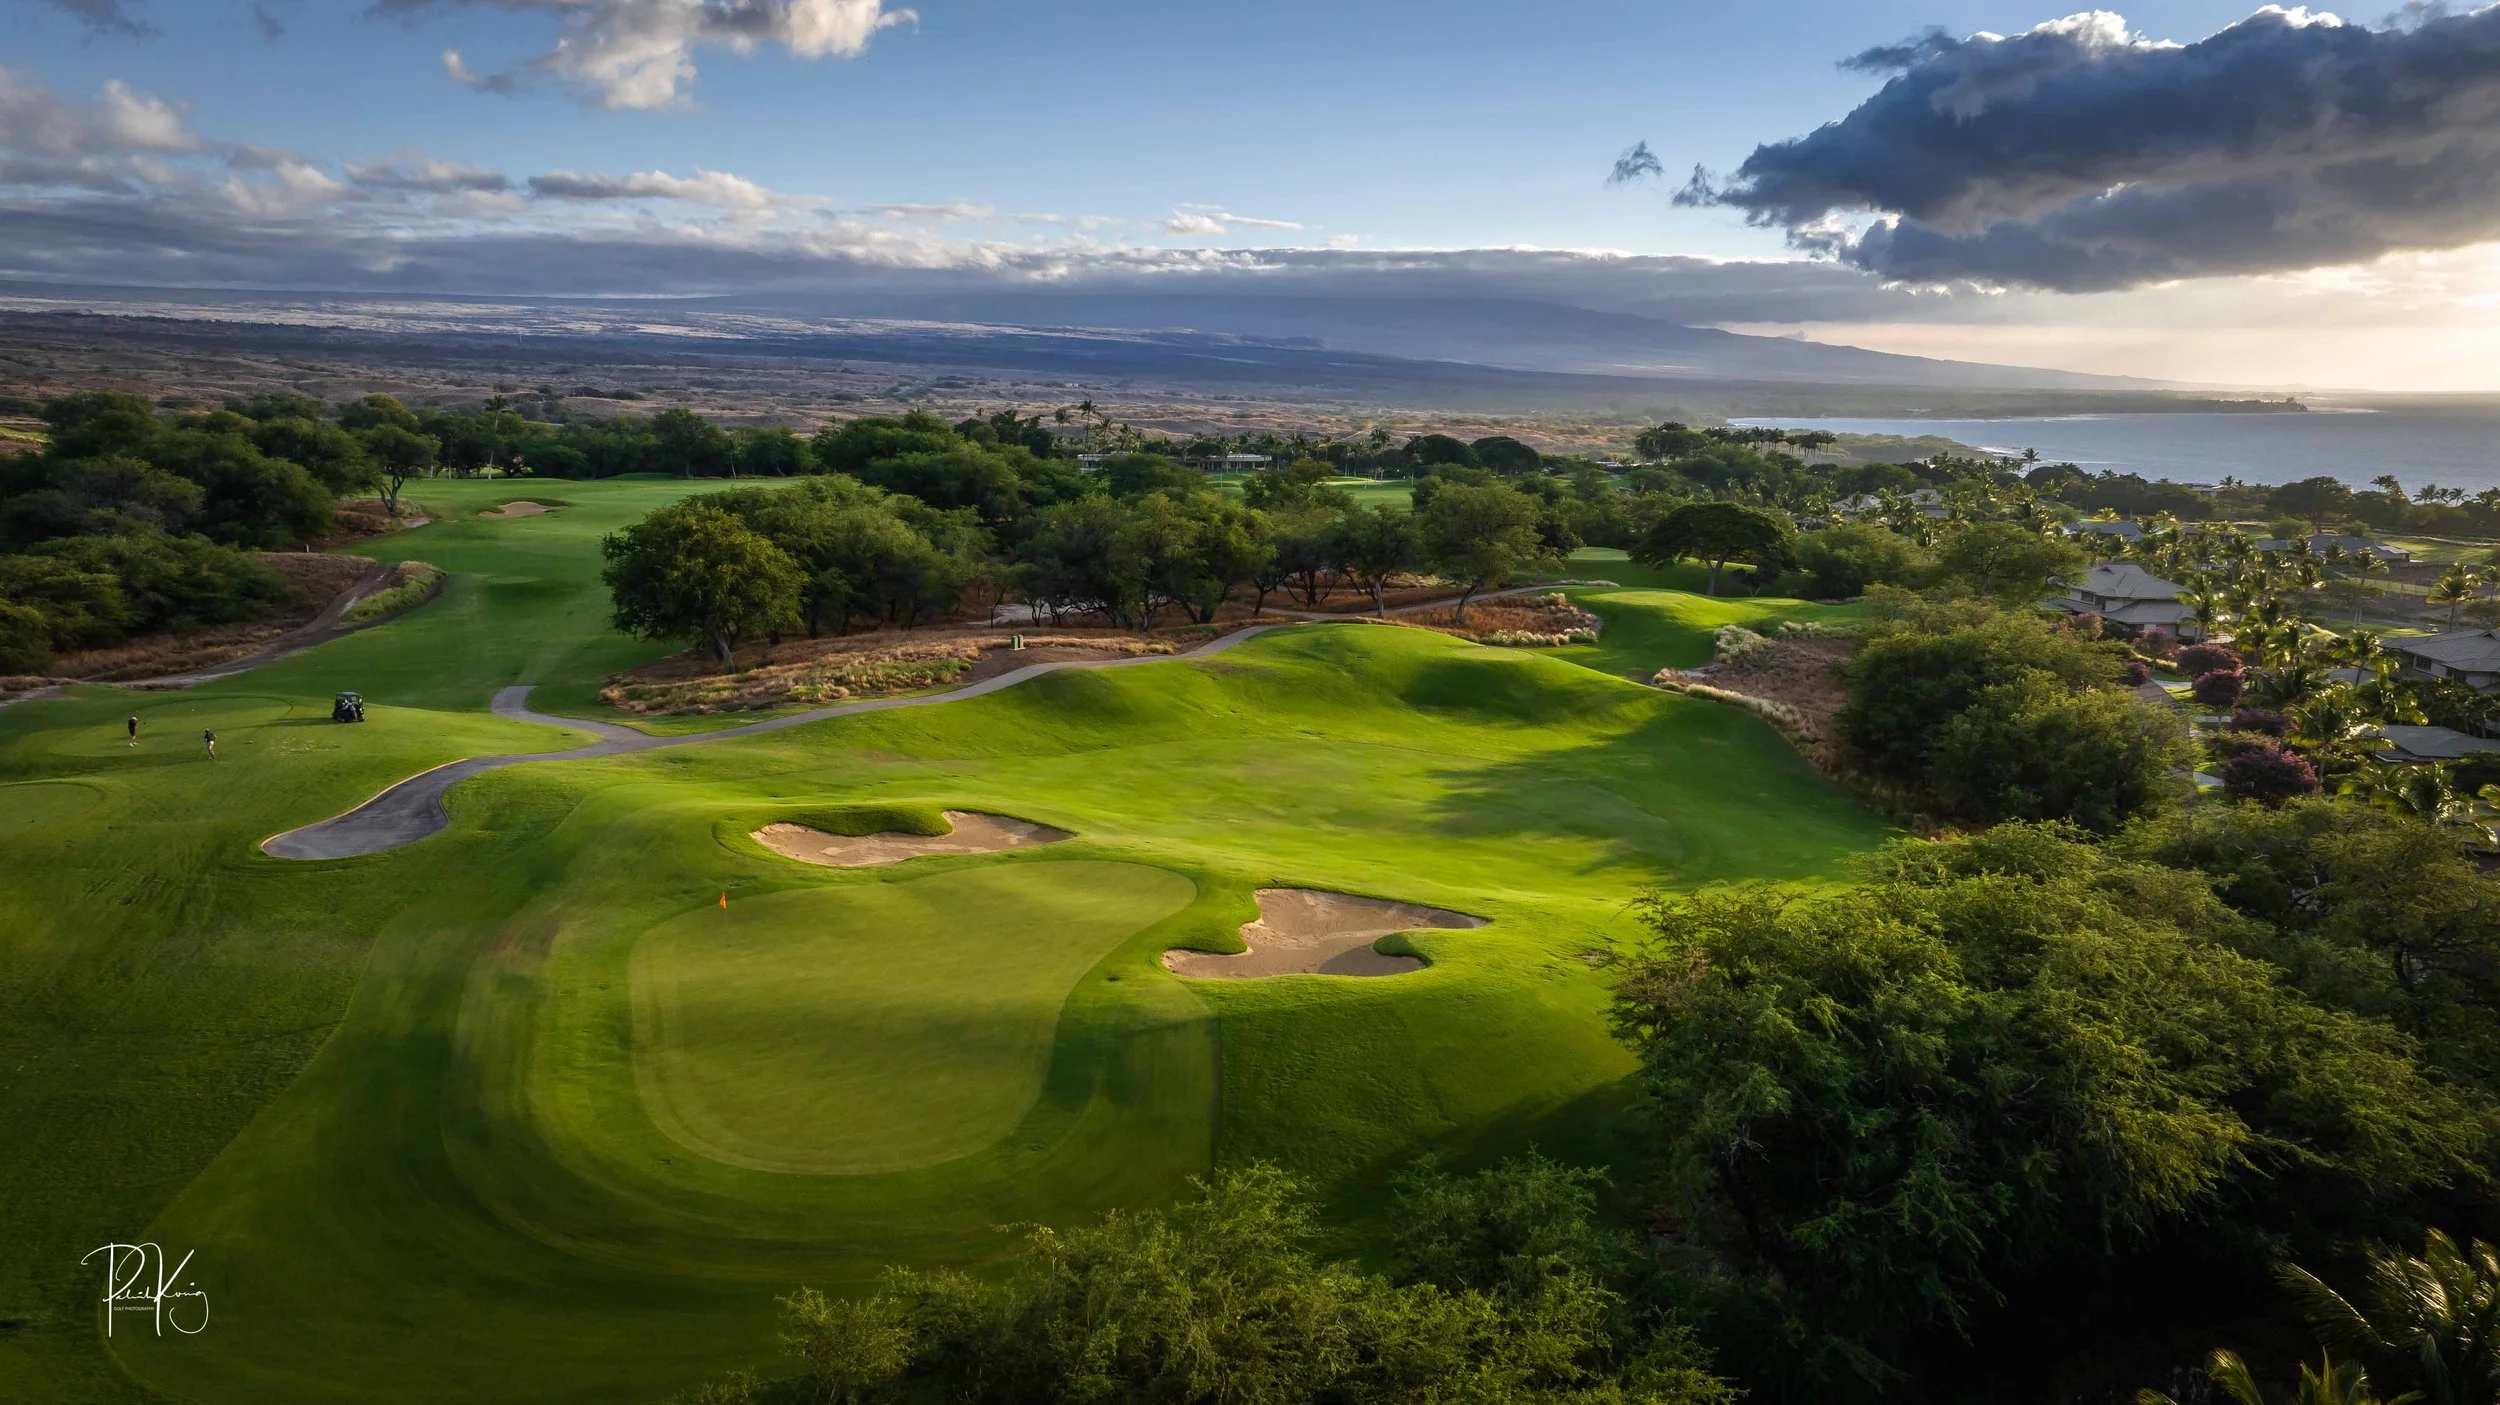
Hole #4 - Par 4 - 438 yards
Things calm down a bit after the excitement along the ocean at the 3rd hole. The volume of photography certainly chills out as well. This medium length par 4 plays long and back up the slope of the island and away from the ocean. There is a massive fairway with a pair of bunkers that should be avoided. The approach shot continues up the hill and you will need at least one extra club. The 4th hole also features a double plateau green that adds a bit of interest.
Hole #5 - Par 5 - 600 yards
The first par 5 at Mauna Kea reaches 600 yards and it is only the second longest hole on the golf course. There is plenty of room to the right off of the tee and left gets ugly fast. Playing right of the tee line and into the upcoming 6th hole is possible, but trees will almost block your approach. 2 bunkers pinch in the front of the green and most golfers will need 3 good shots if they want to putt for birdie.
Hole #6 - Par 4 - 338 yards
The 6th hole is one of my favorites at Mauna Kea. At a shade over 300 yards, some of the bigger hitters will be tempted to go for the green, but for normal golfers, the green will be far out of reach. A solid layup will leave a short wedge into a green perched on top of a hill. This partial punch bowl green adds an extra bit of spice to an already interesting short par 4.
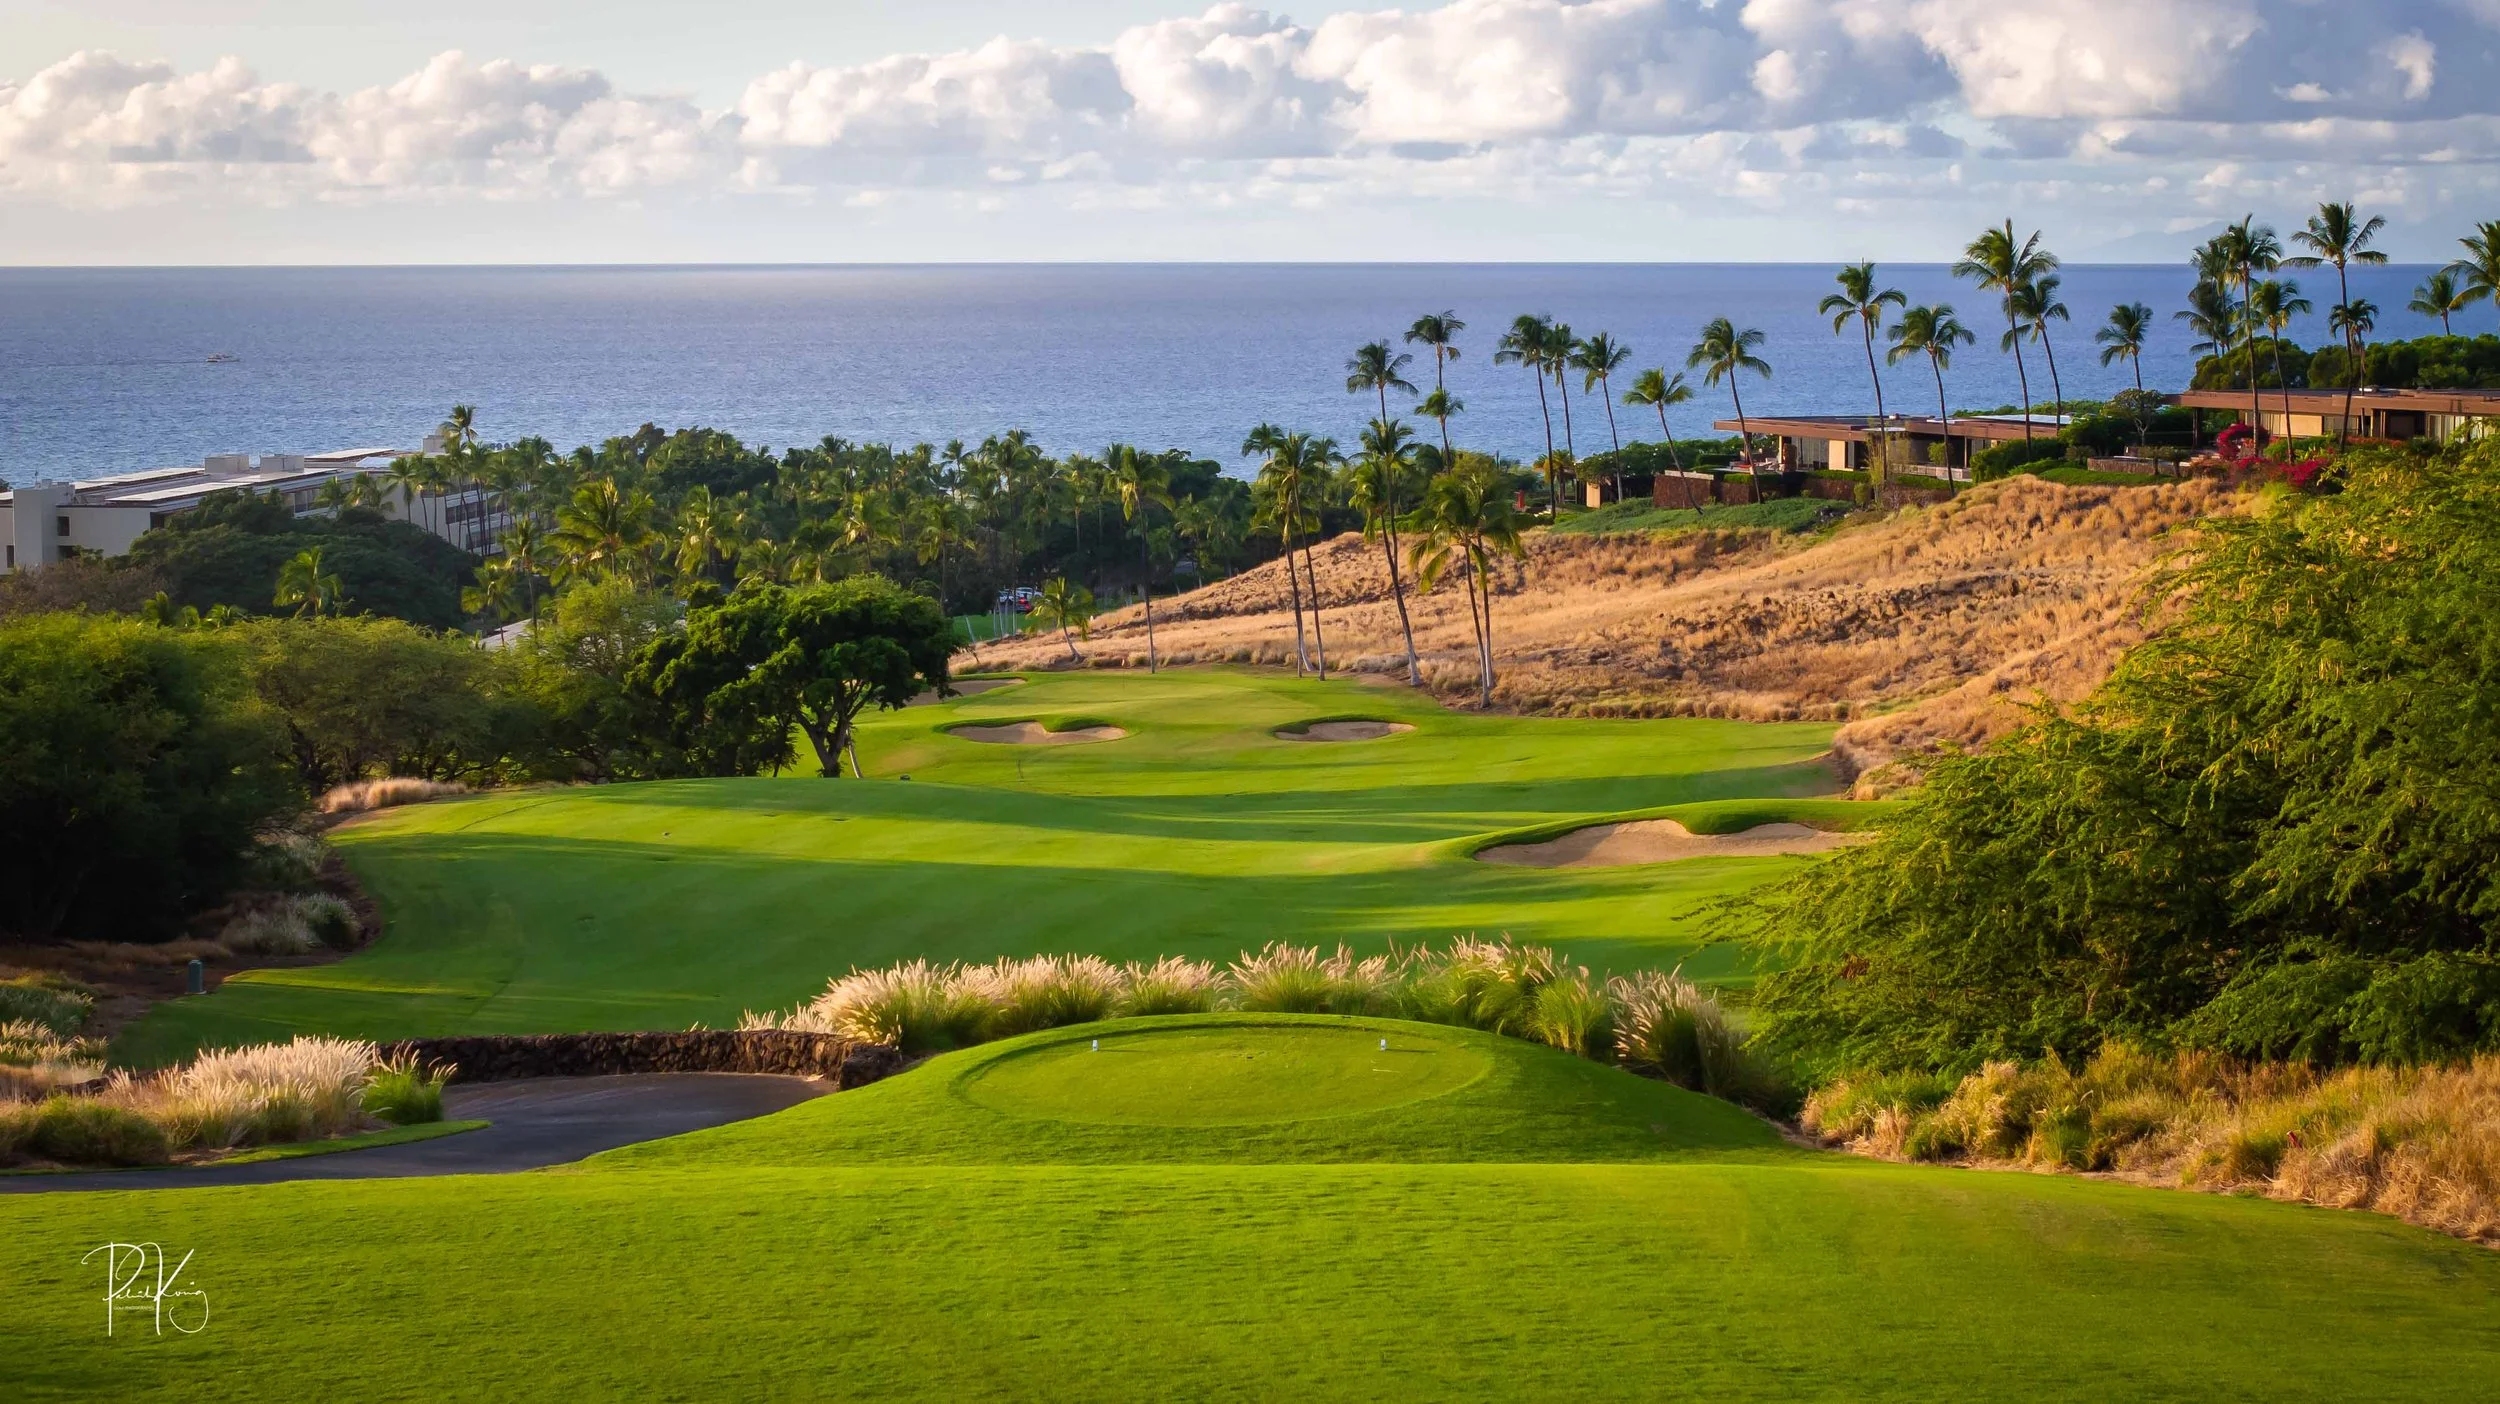
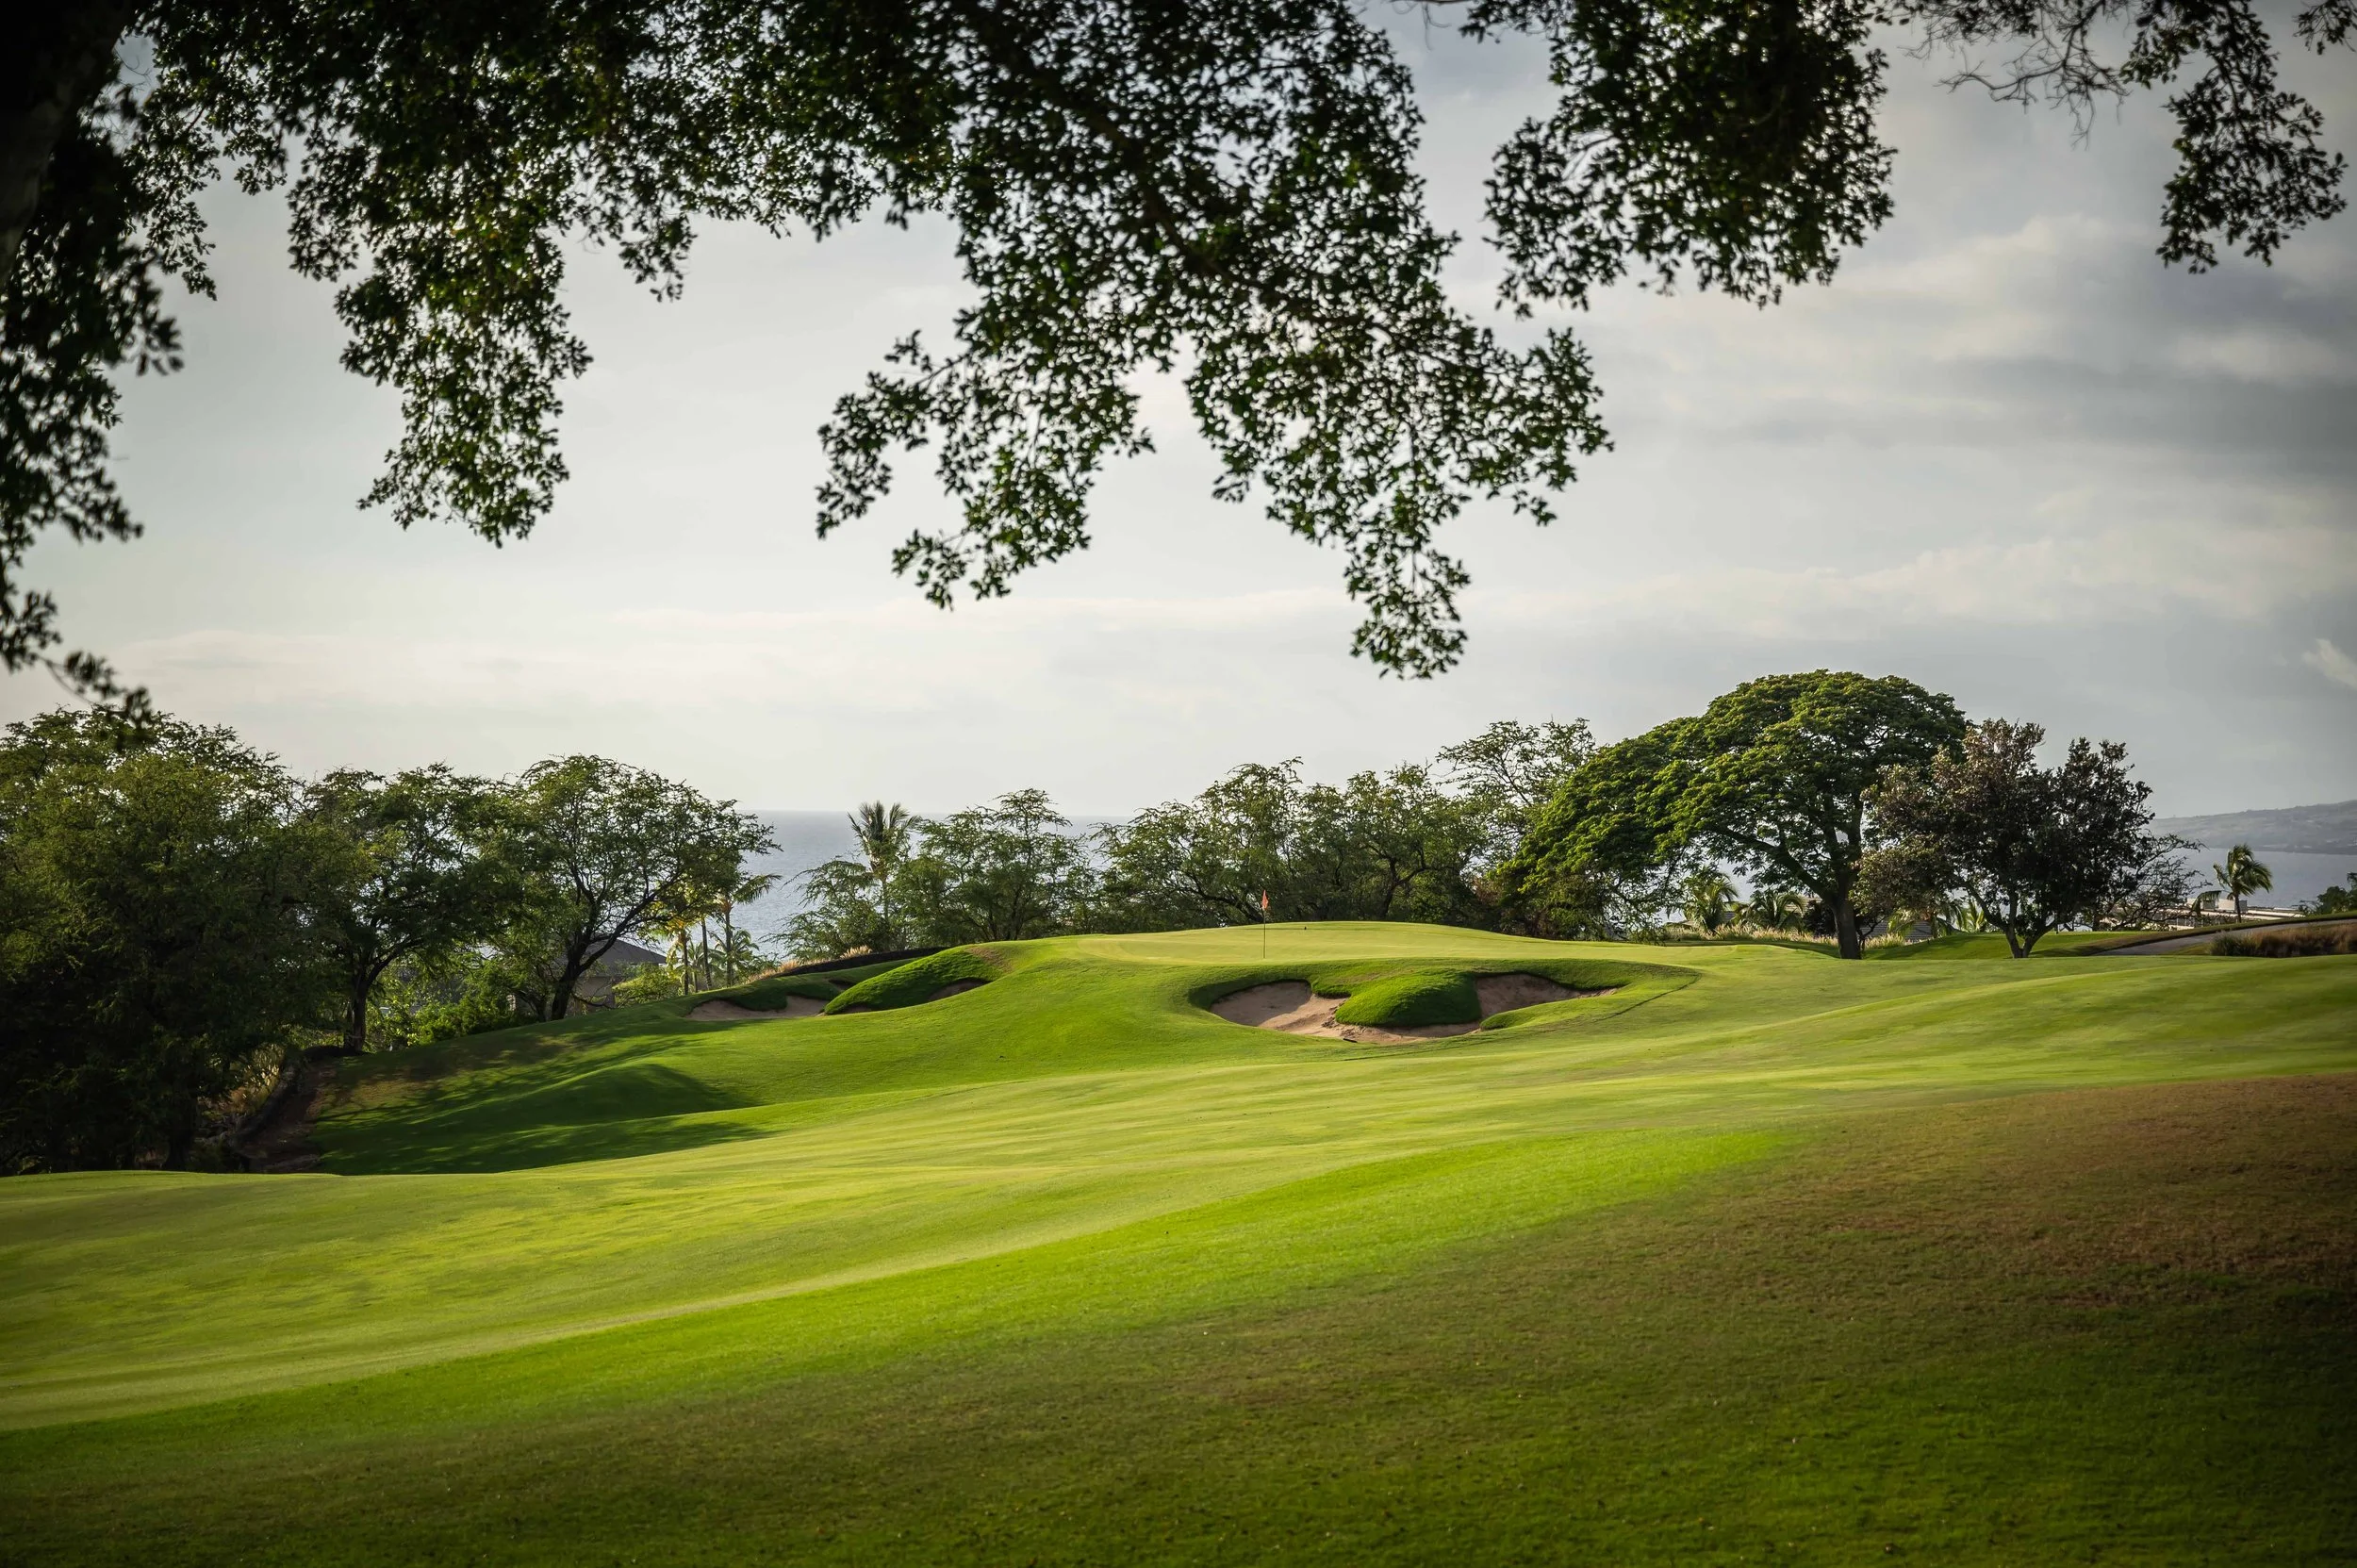
Hole #7 - Par 3 - 218 yards
Another lengthy par 3 that will require most golfers to pull a long iron on this redan style golf hole. The green is relatively small and even some well struck golf shots will fail to find the putting surface. A duo of bunkers protect the front and back of the green and it is easy to to come up short or run your approach through the green here. A par on the 7th is a great score.
Hole #8 - Par 5 - 547 yards
Things can get interesting from the tee box on this par 5. A big drive down the left hand side can clear the fairway bunkers, find a speed slot and give the golfer a long iron approach to reach this green in 2 shots. The golfers that find themselves trapped behind or in the bunkers will have to settle for 3 shots into the green. This is Mauna Kea’s best opportunity for eagle.
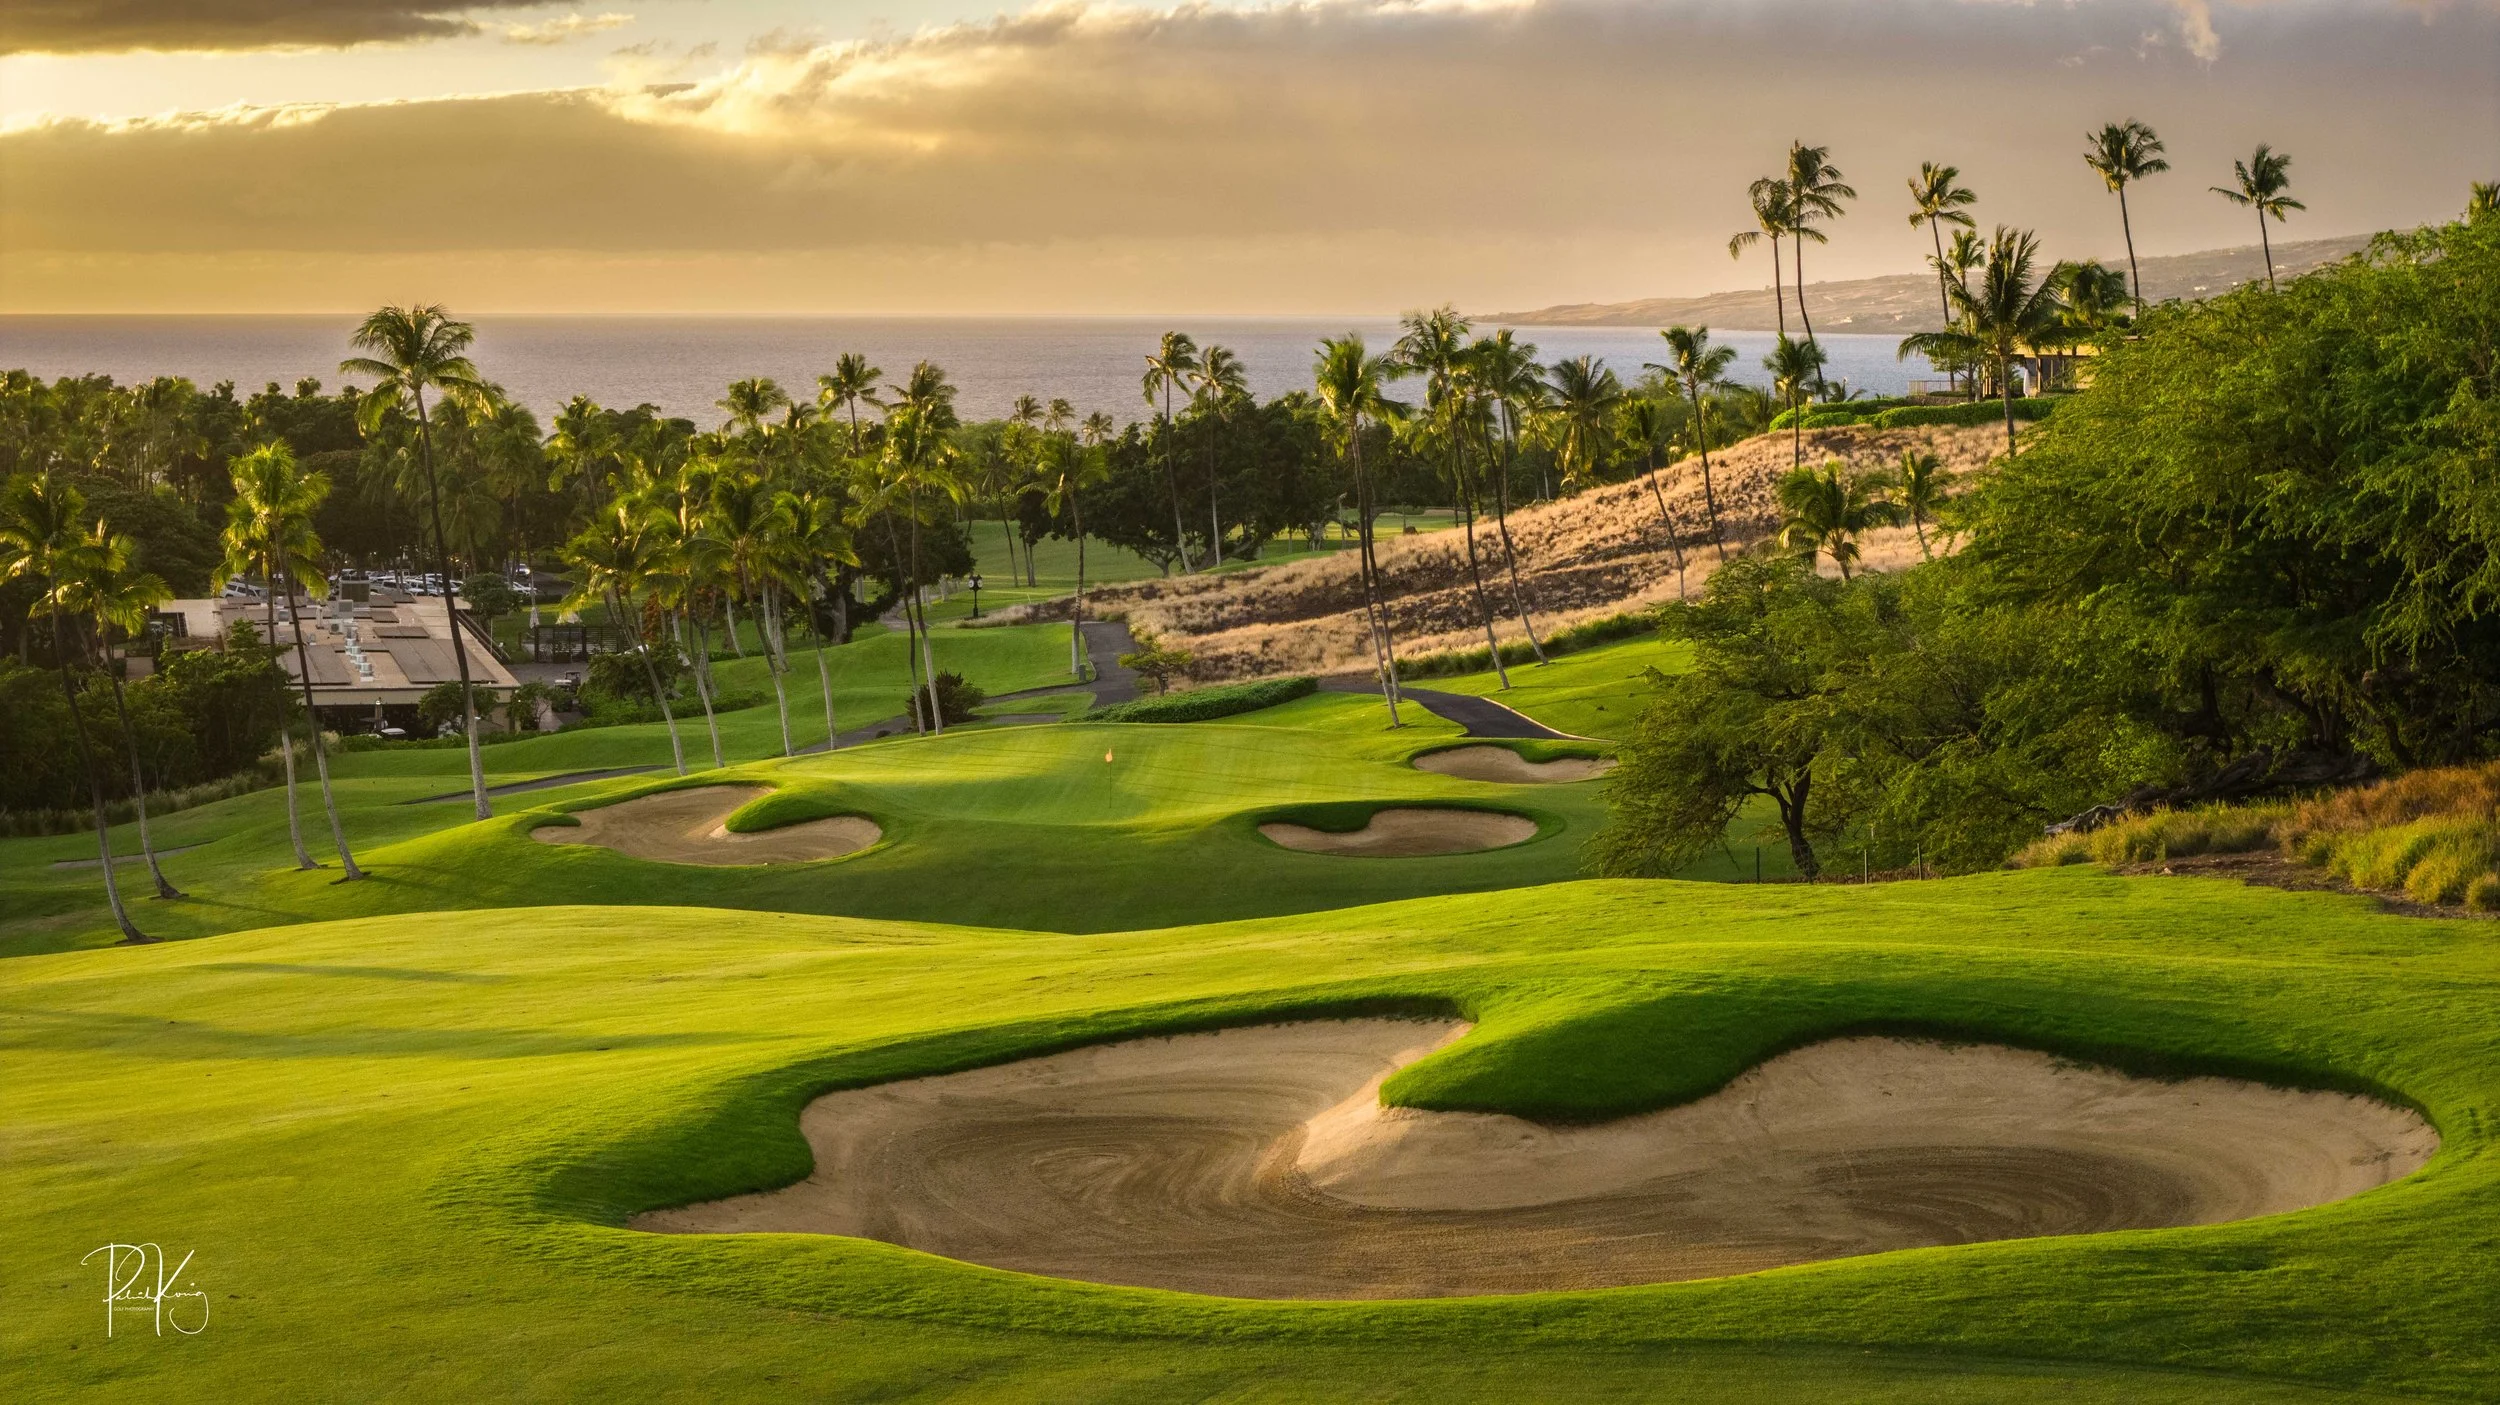
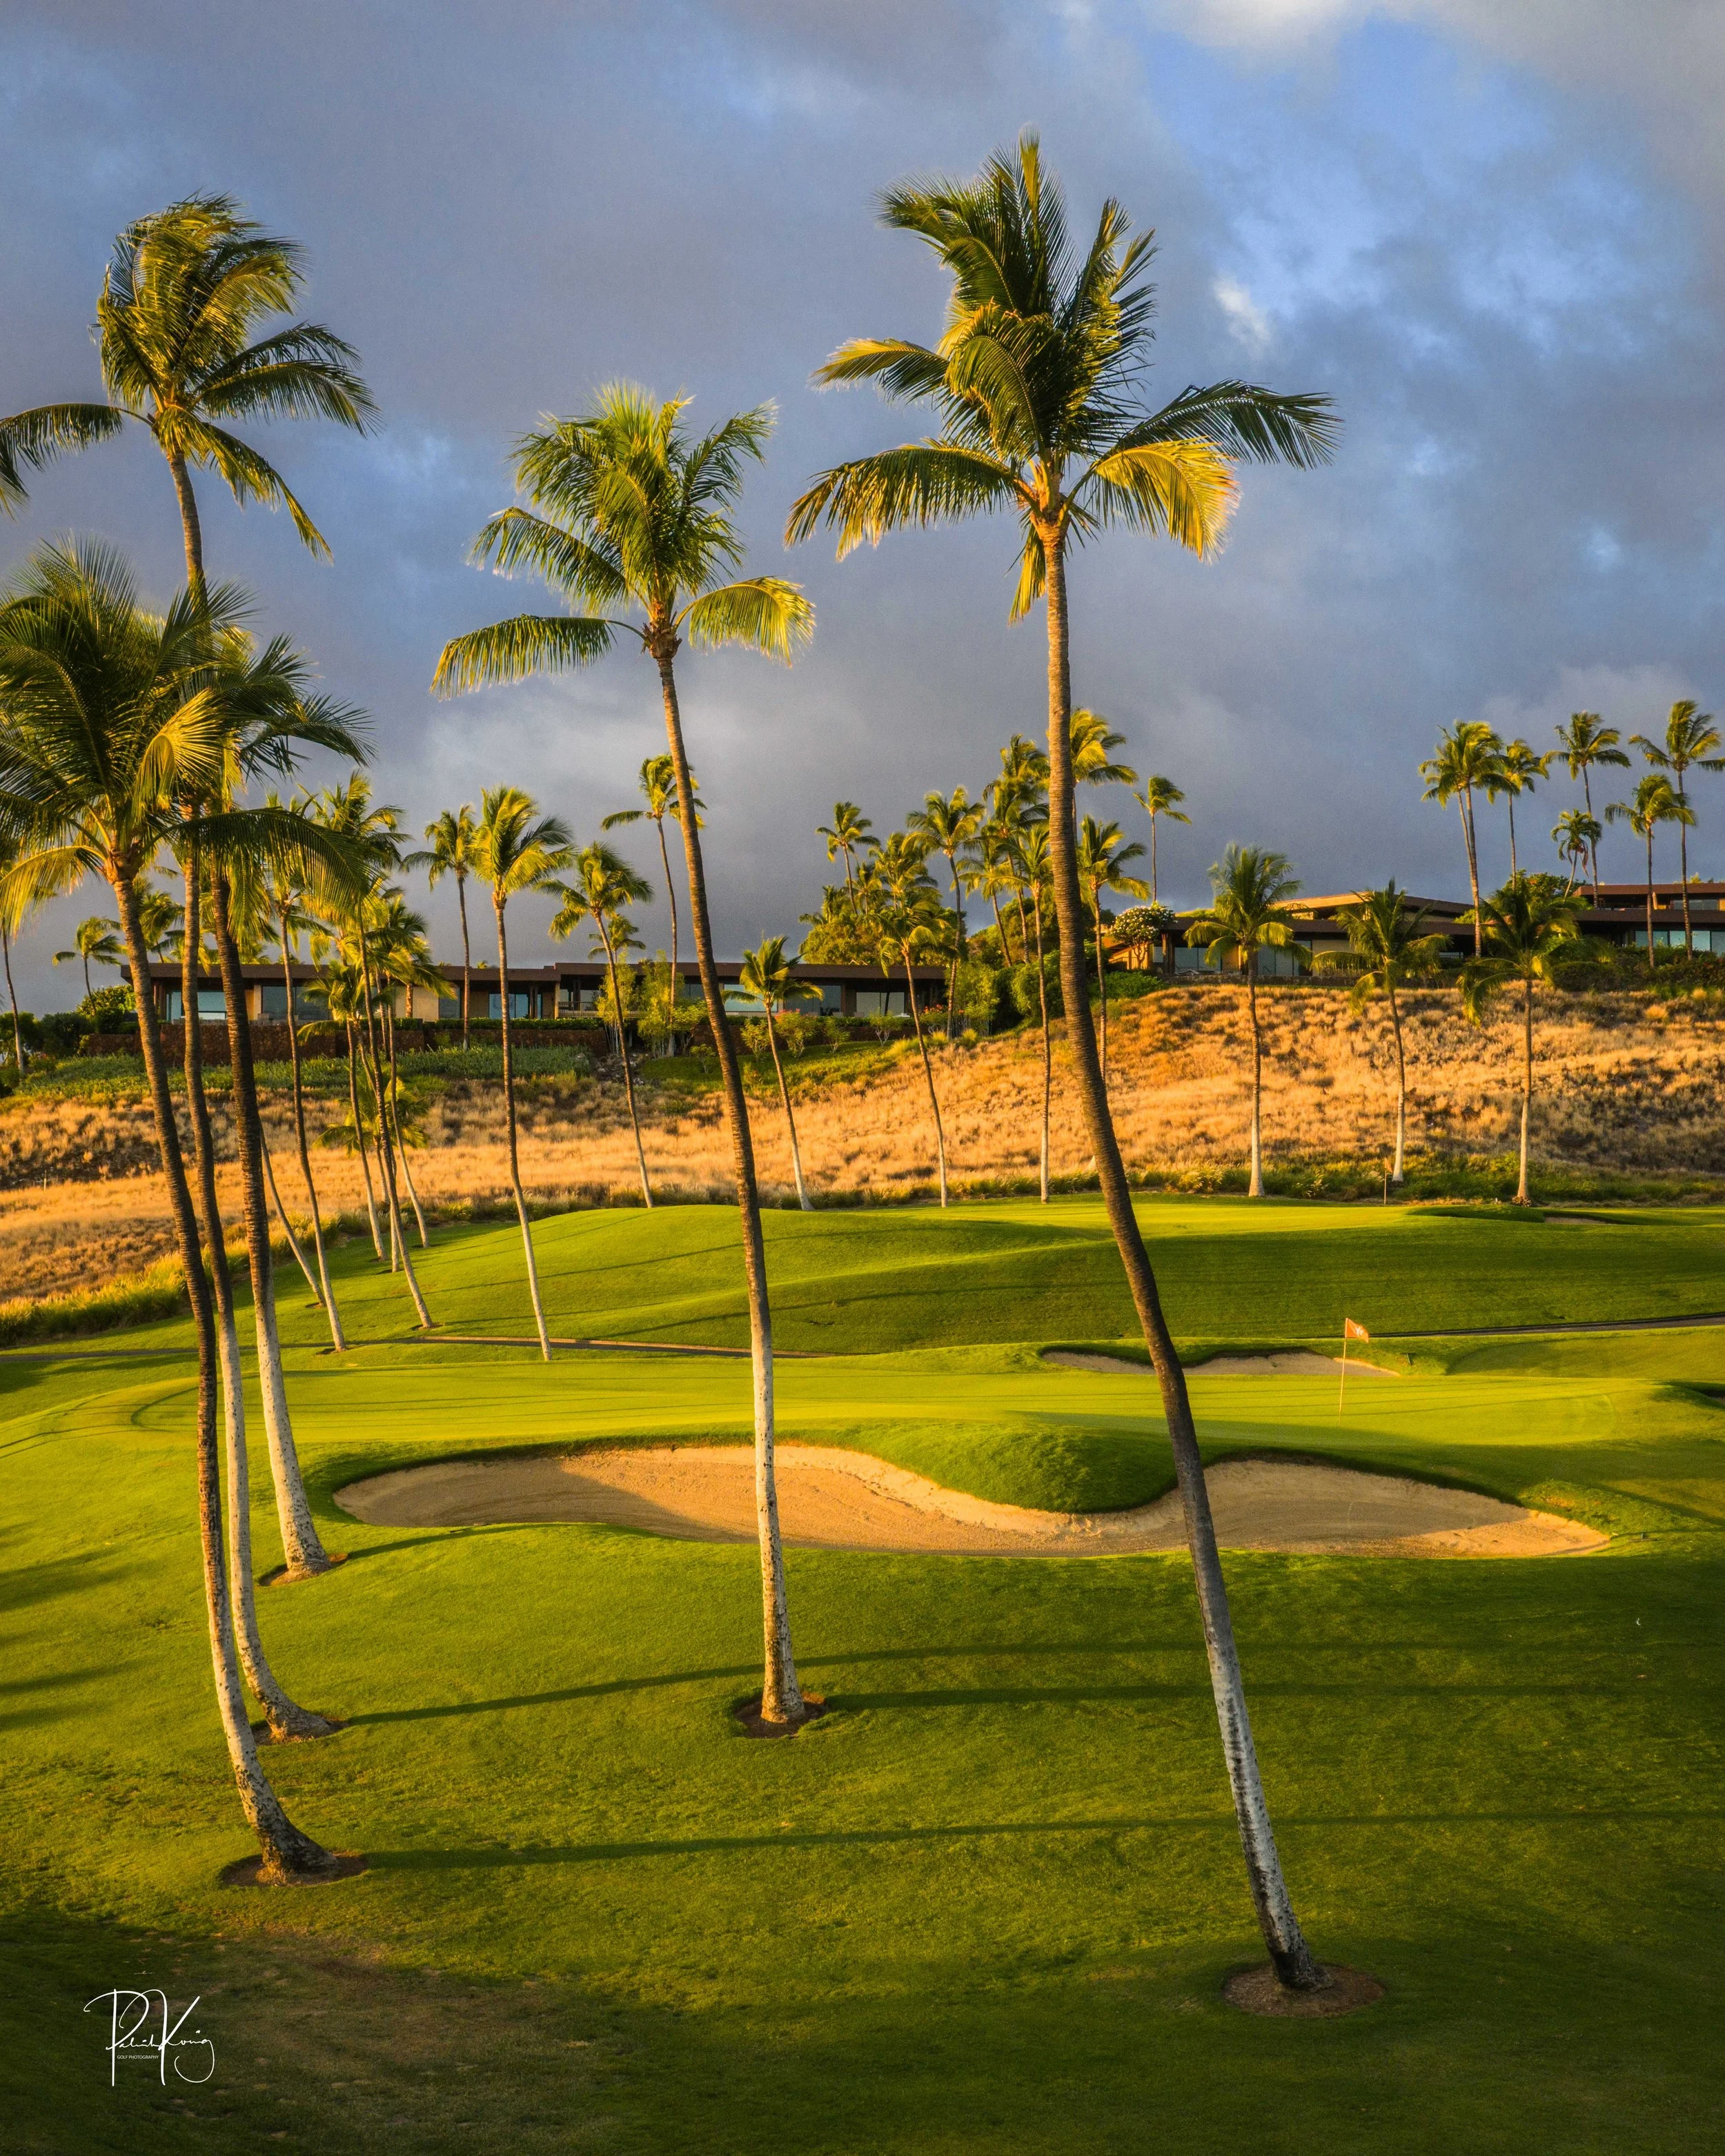
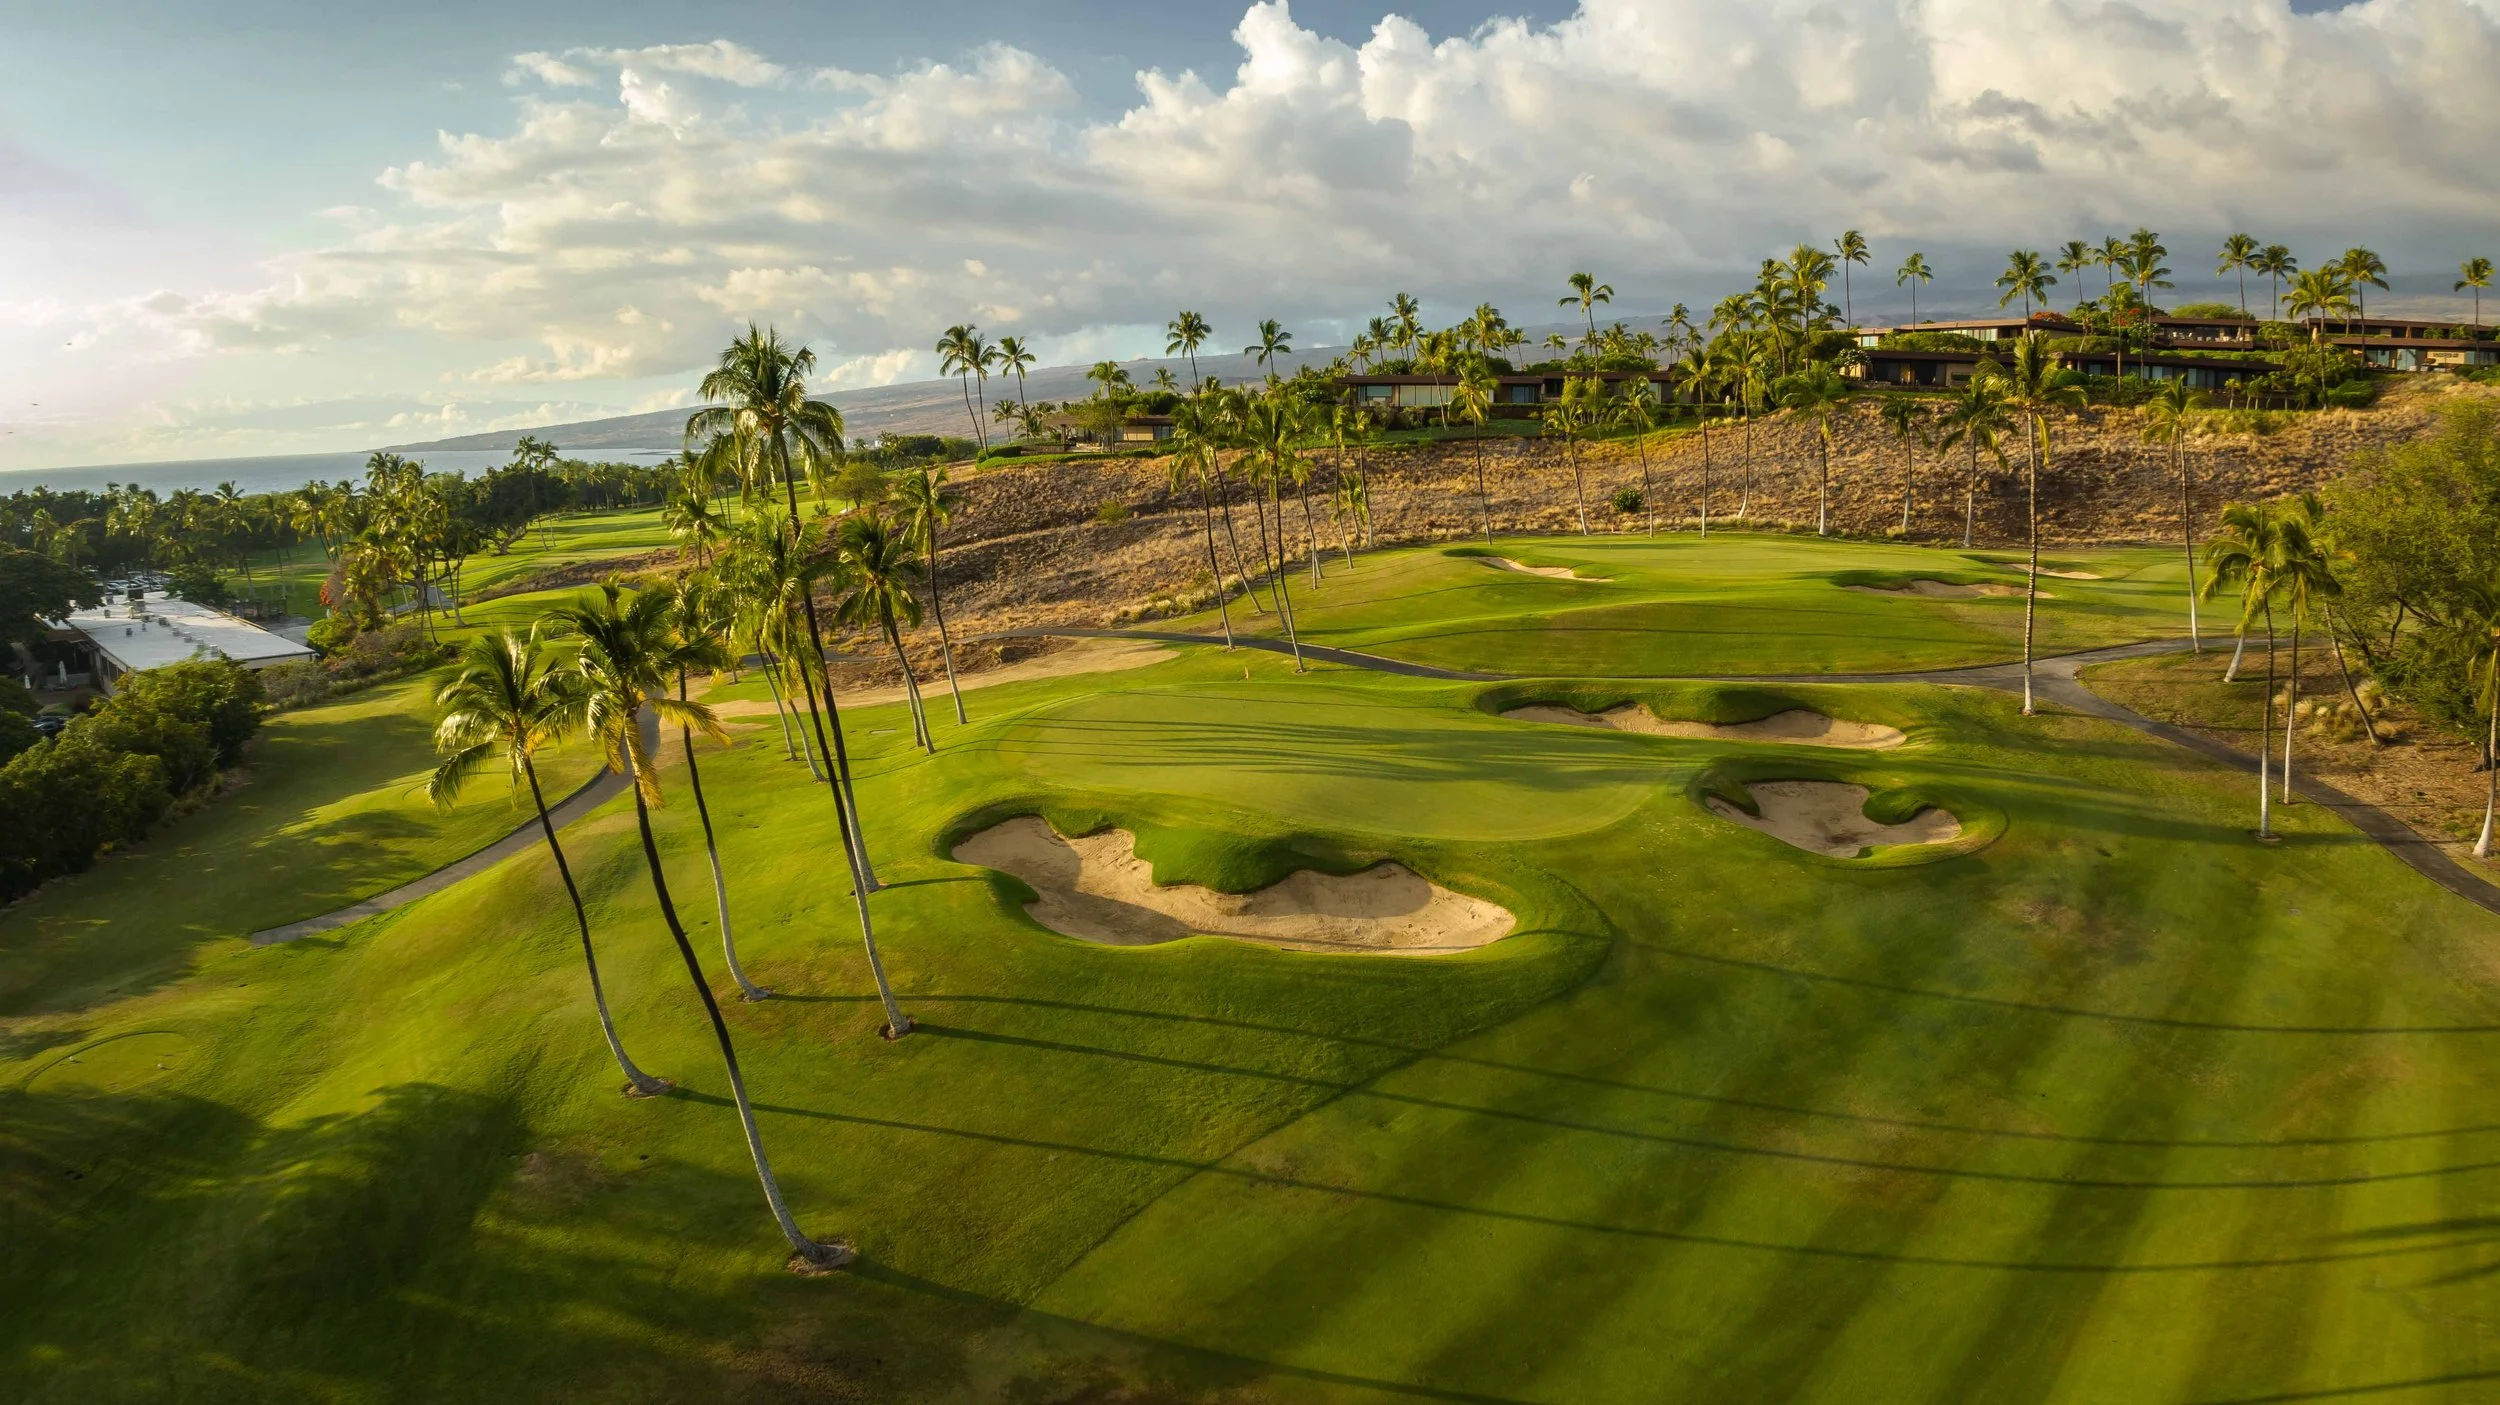
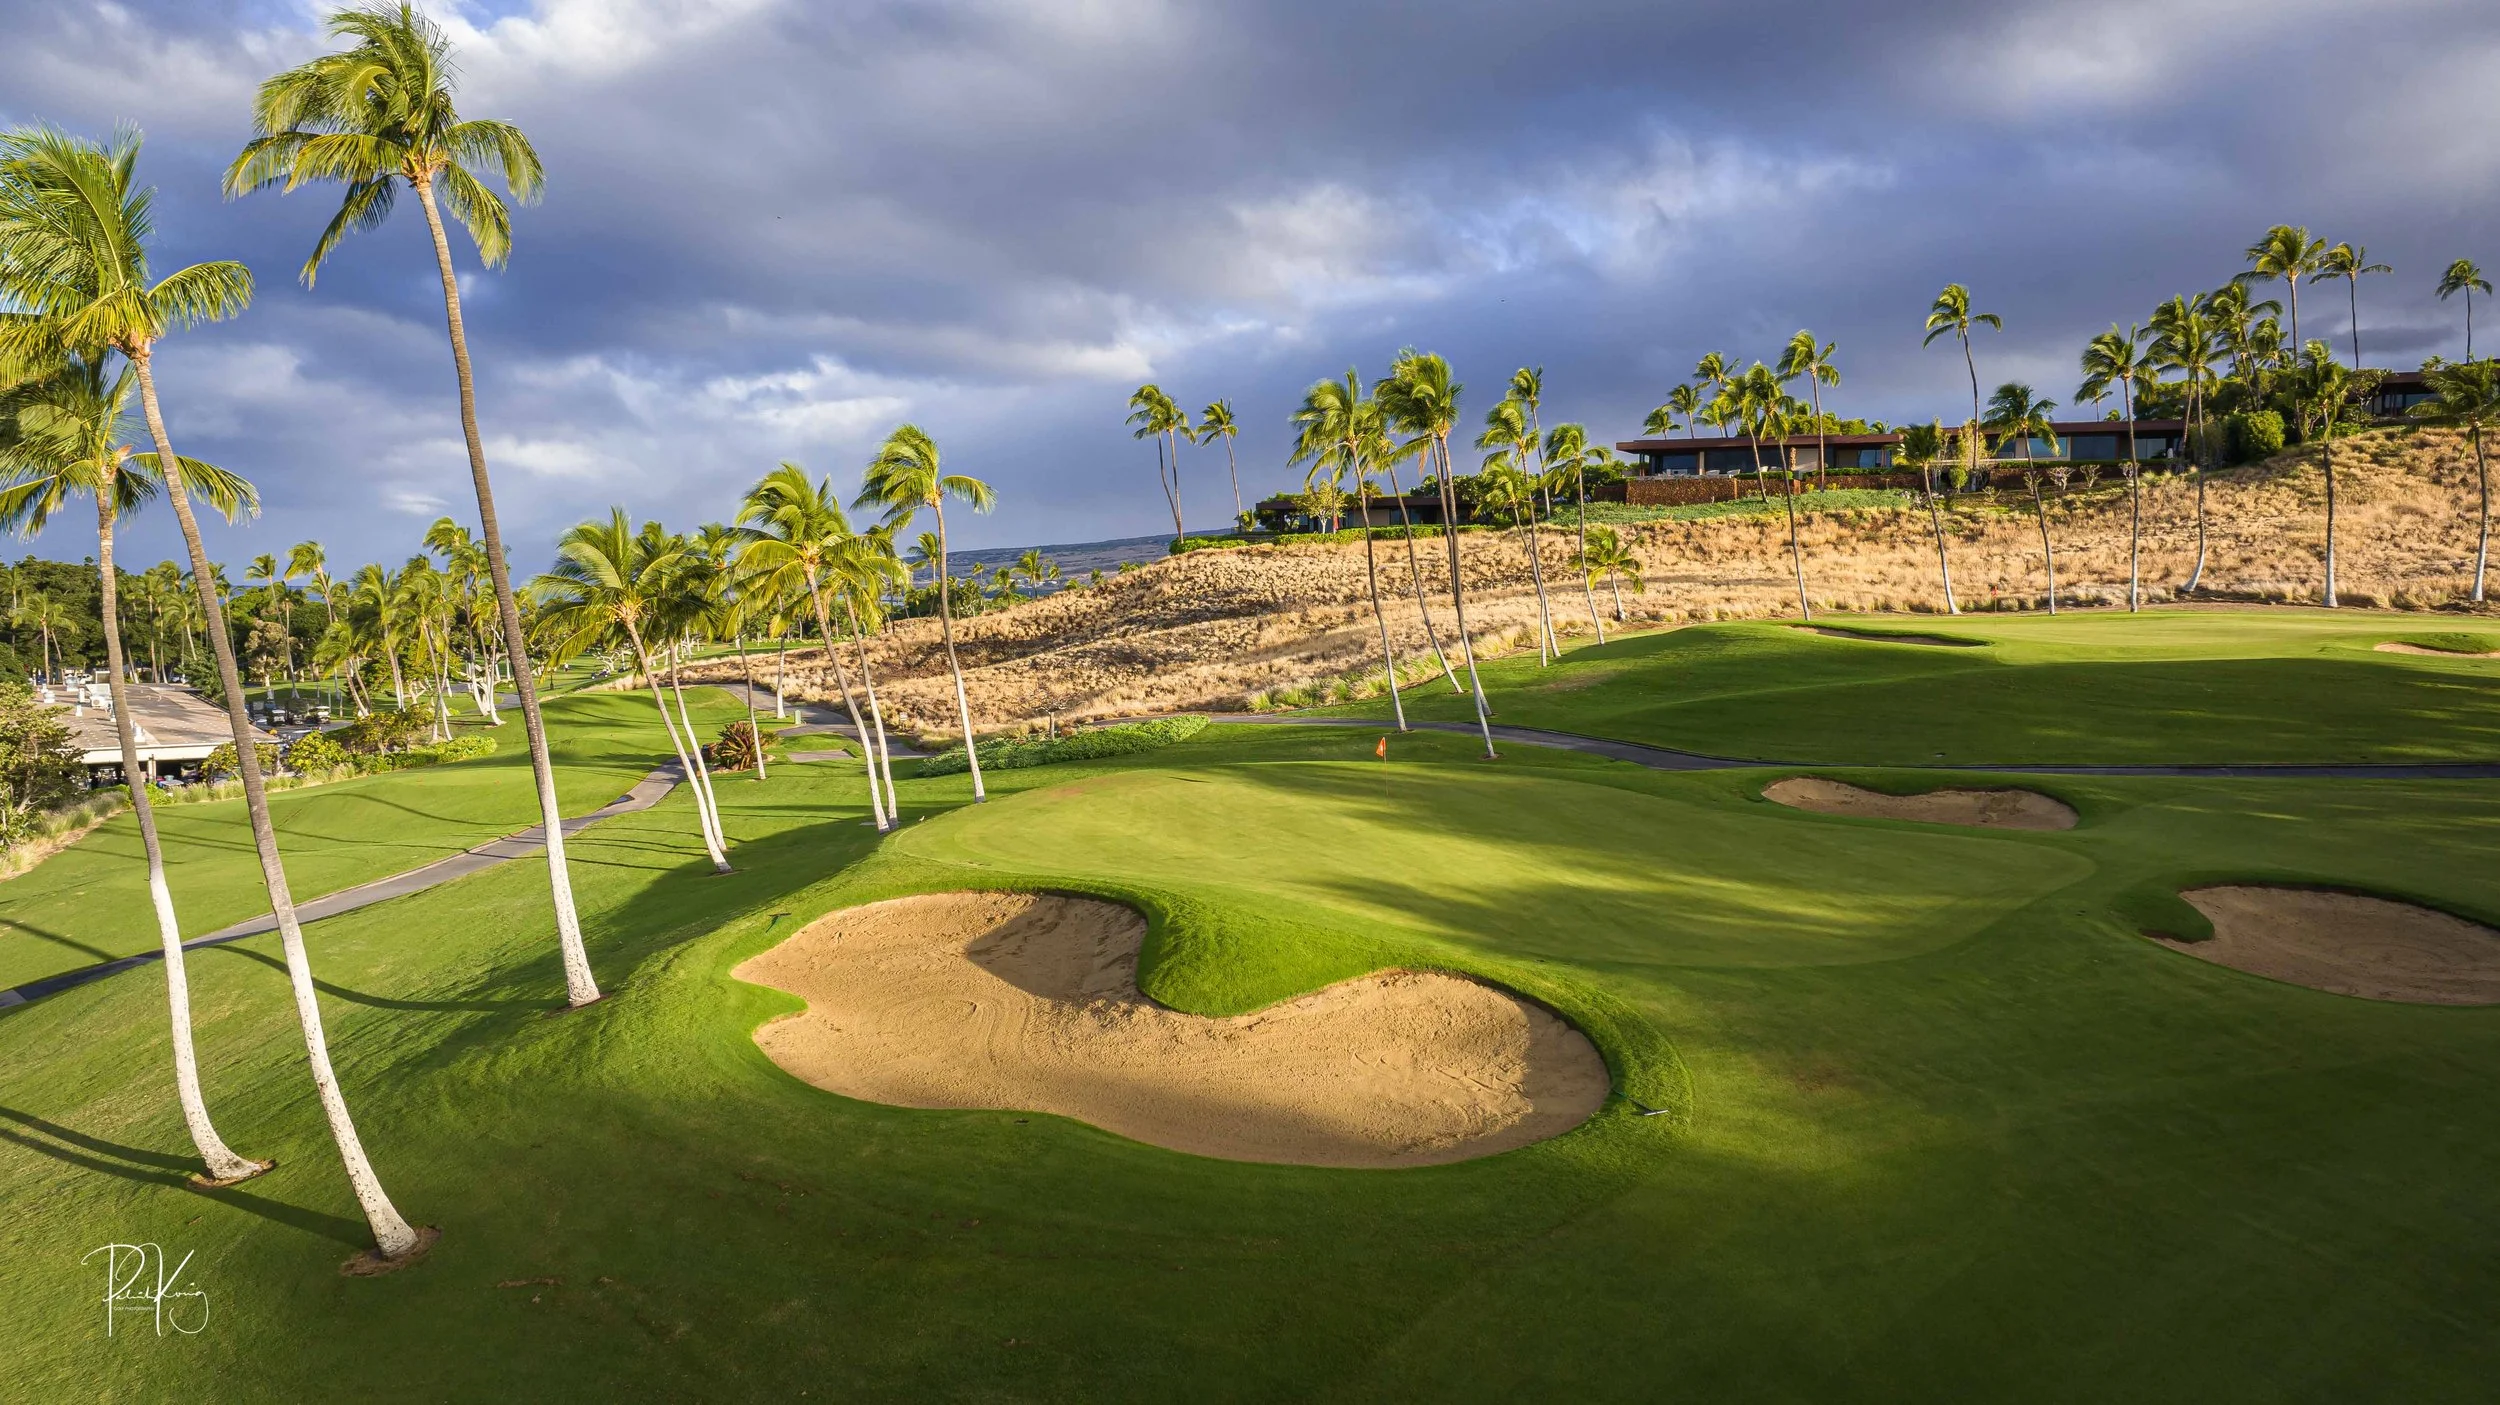
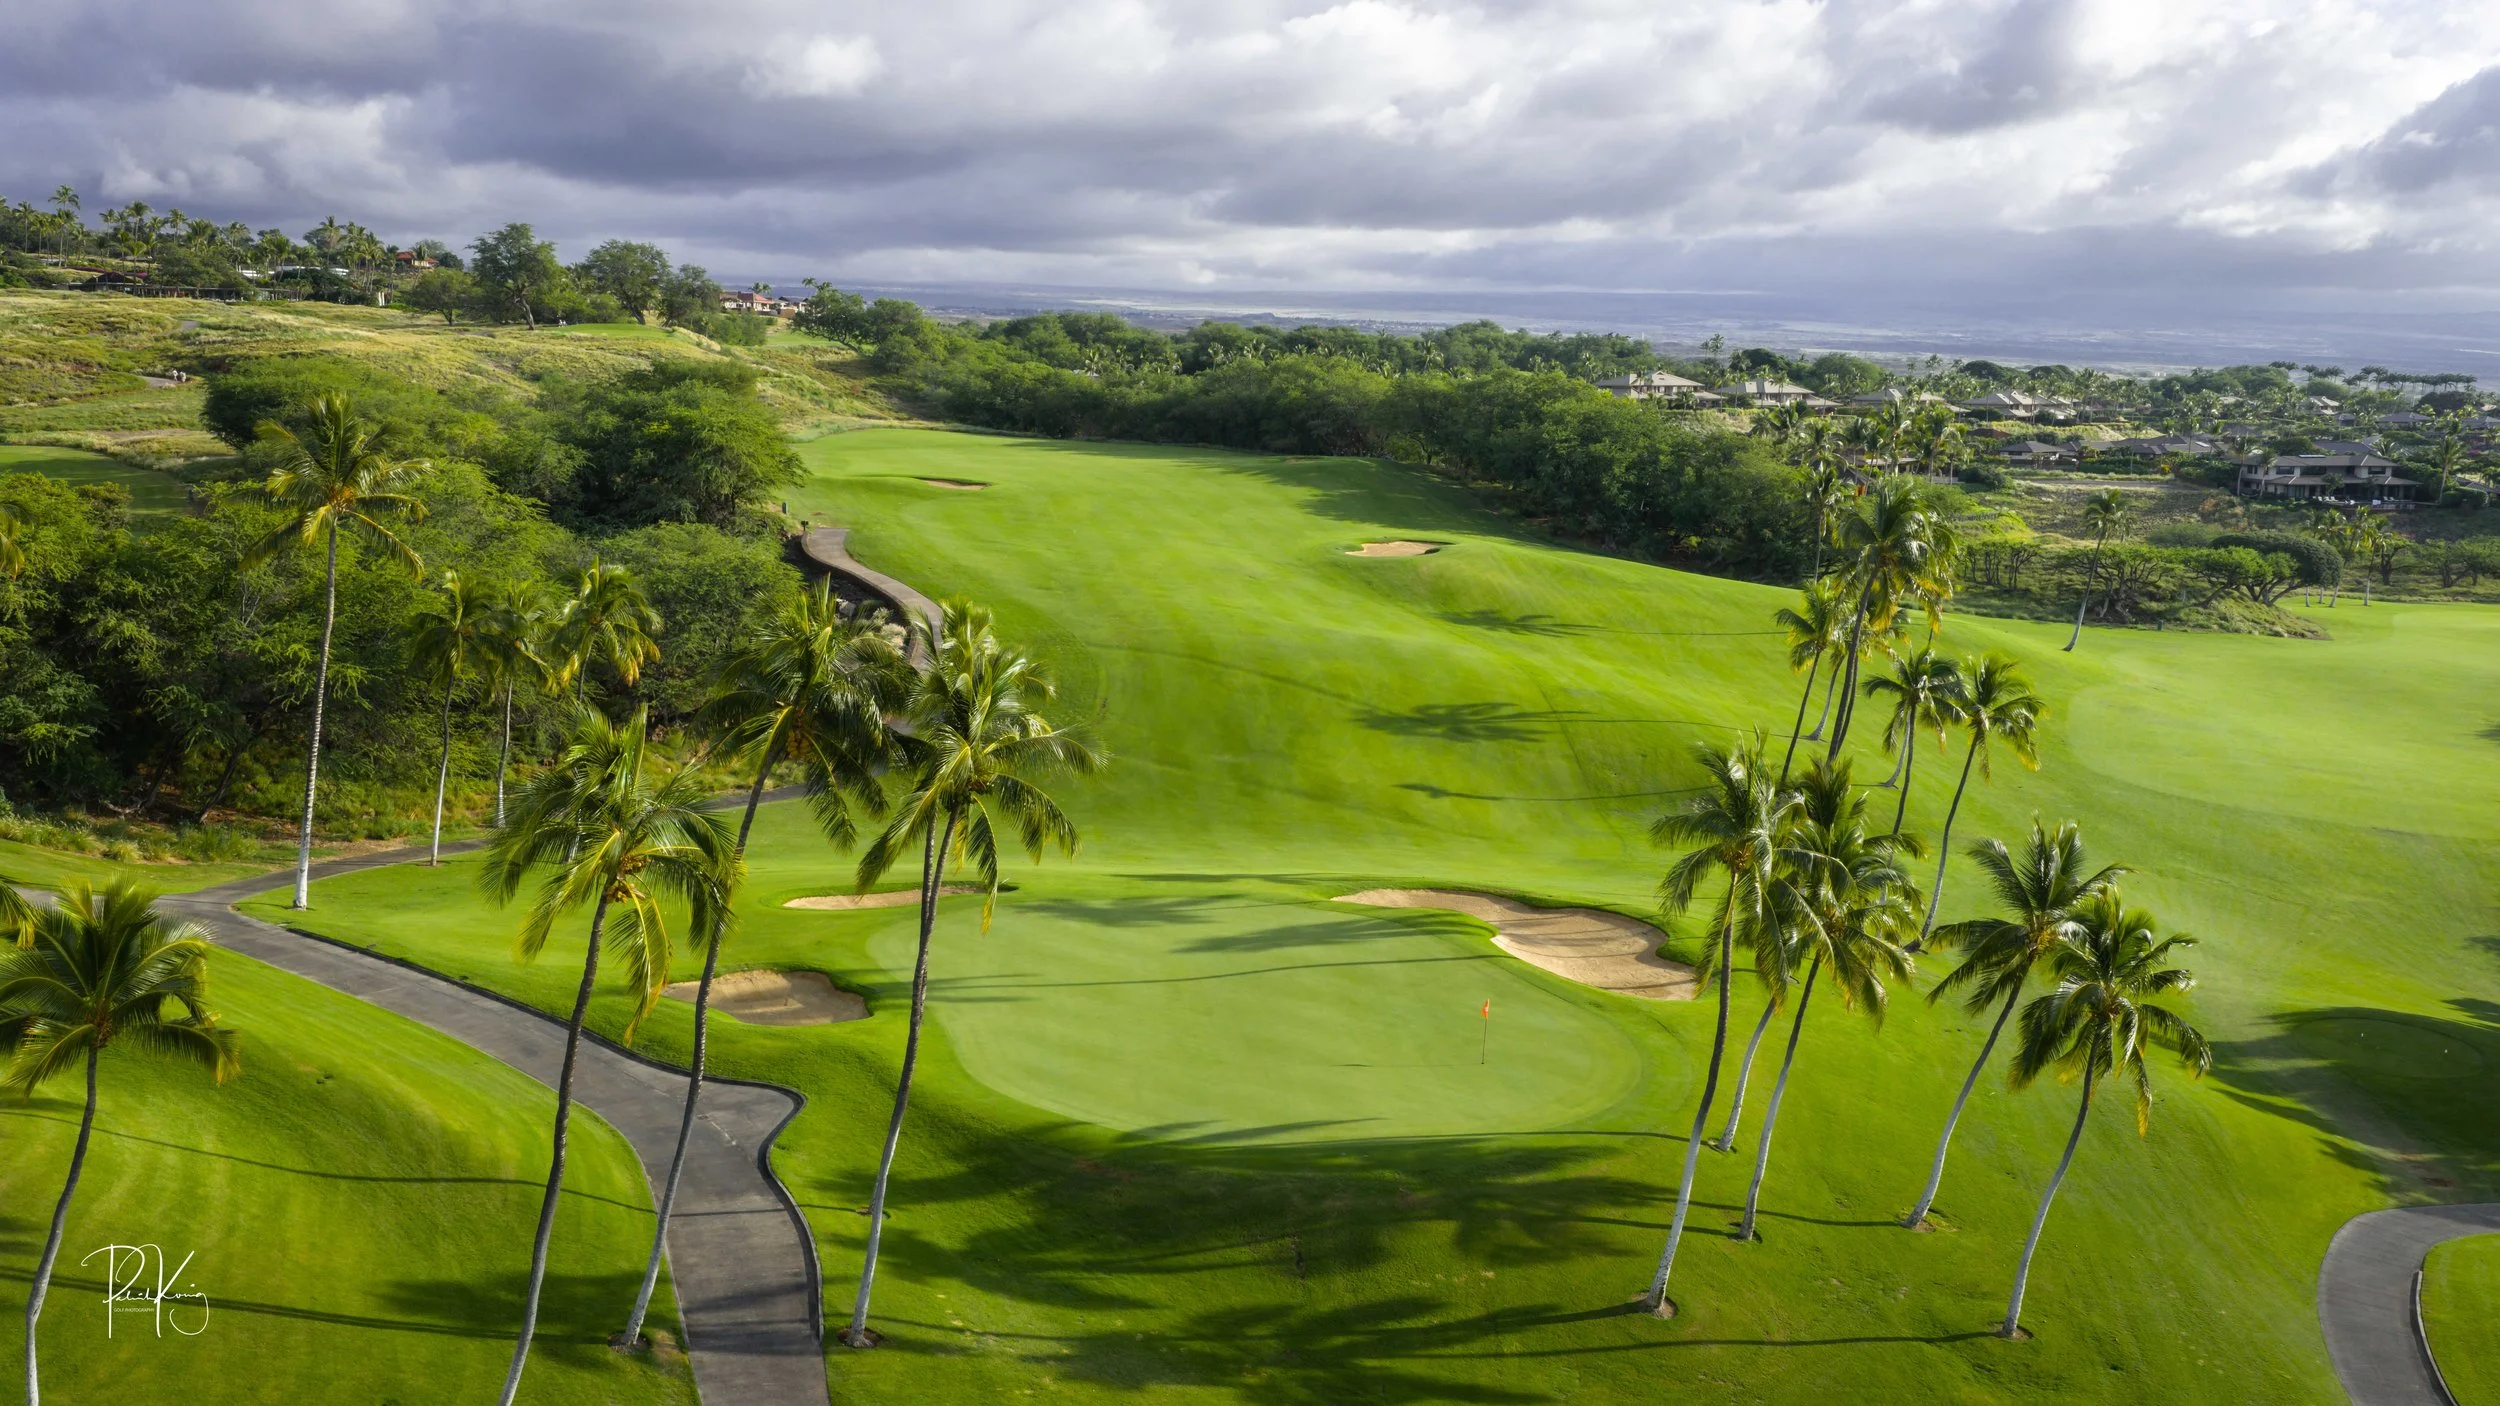
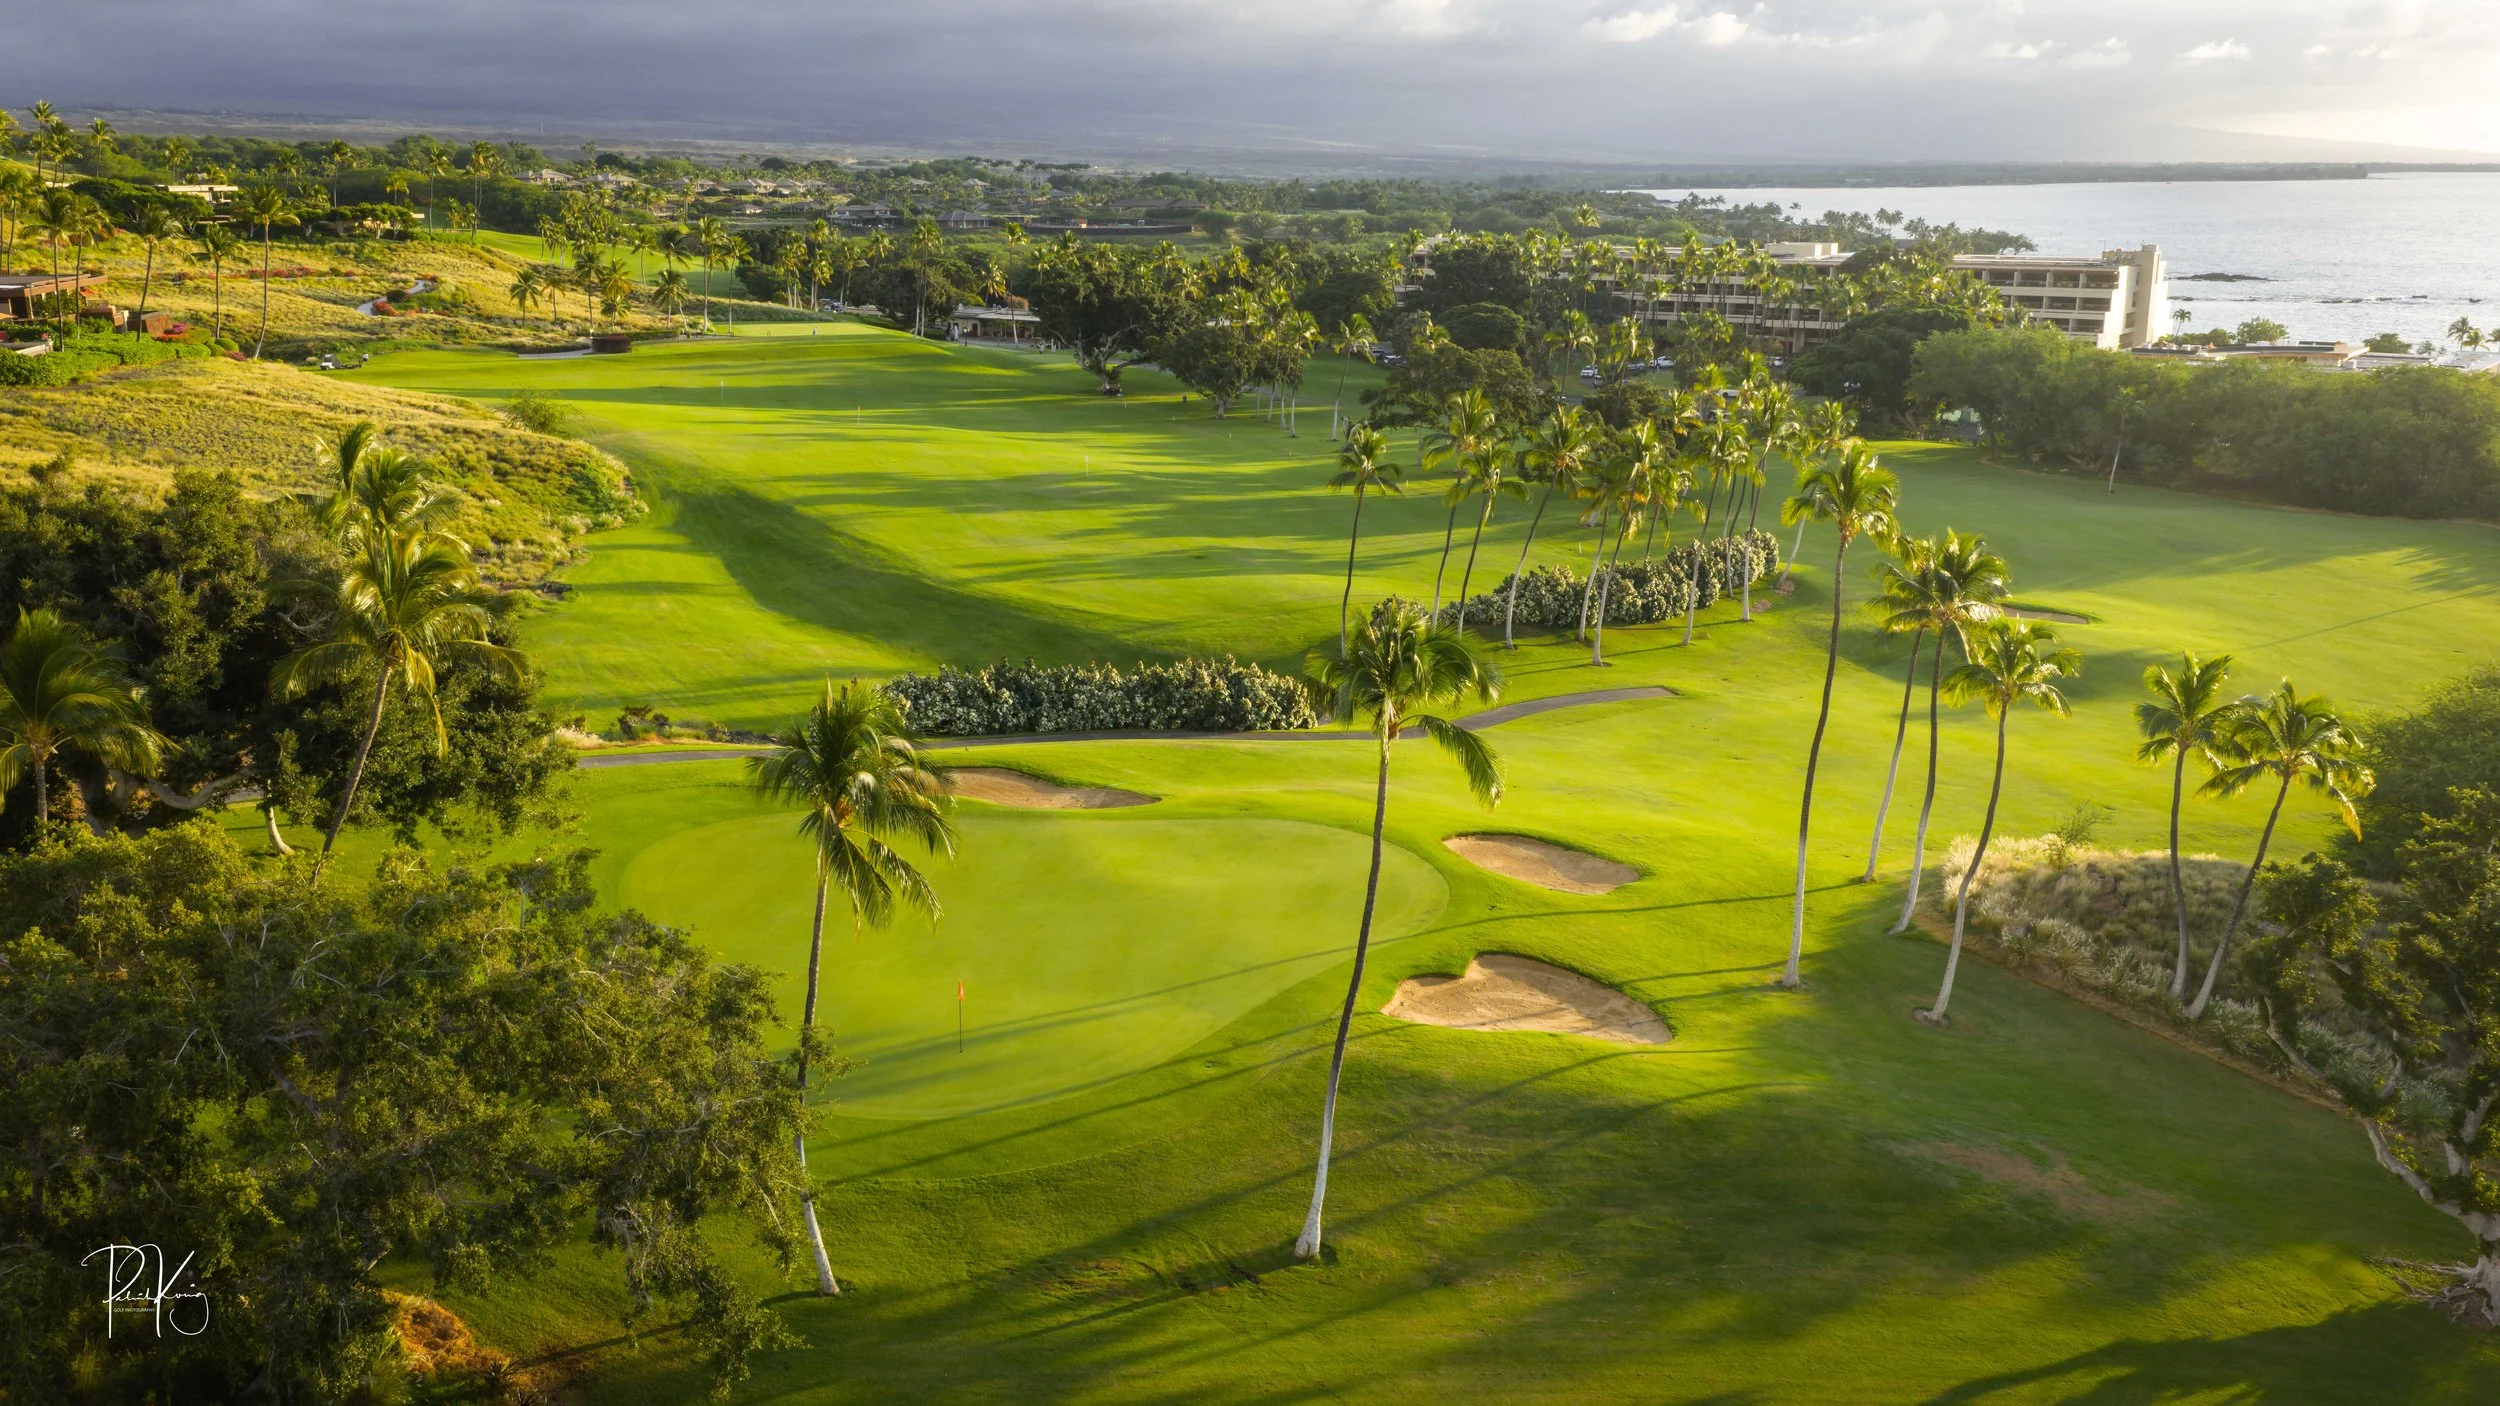
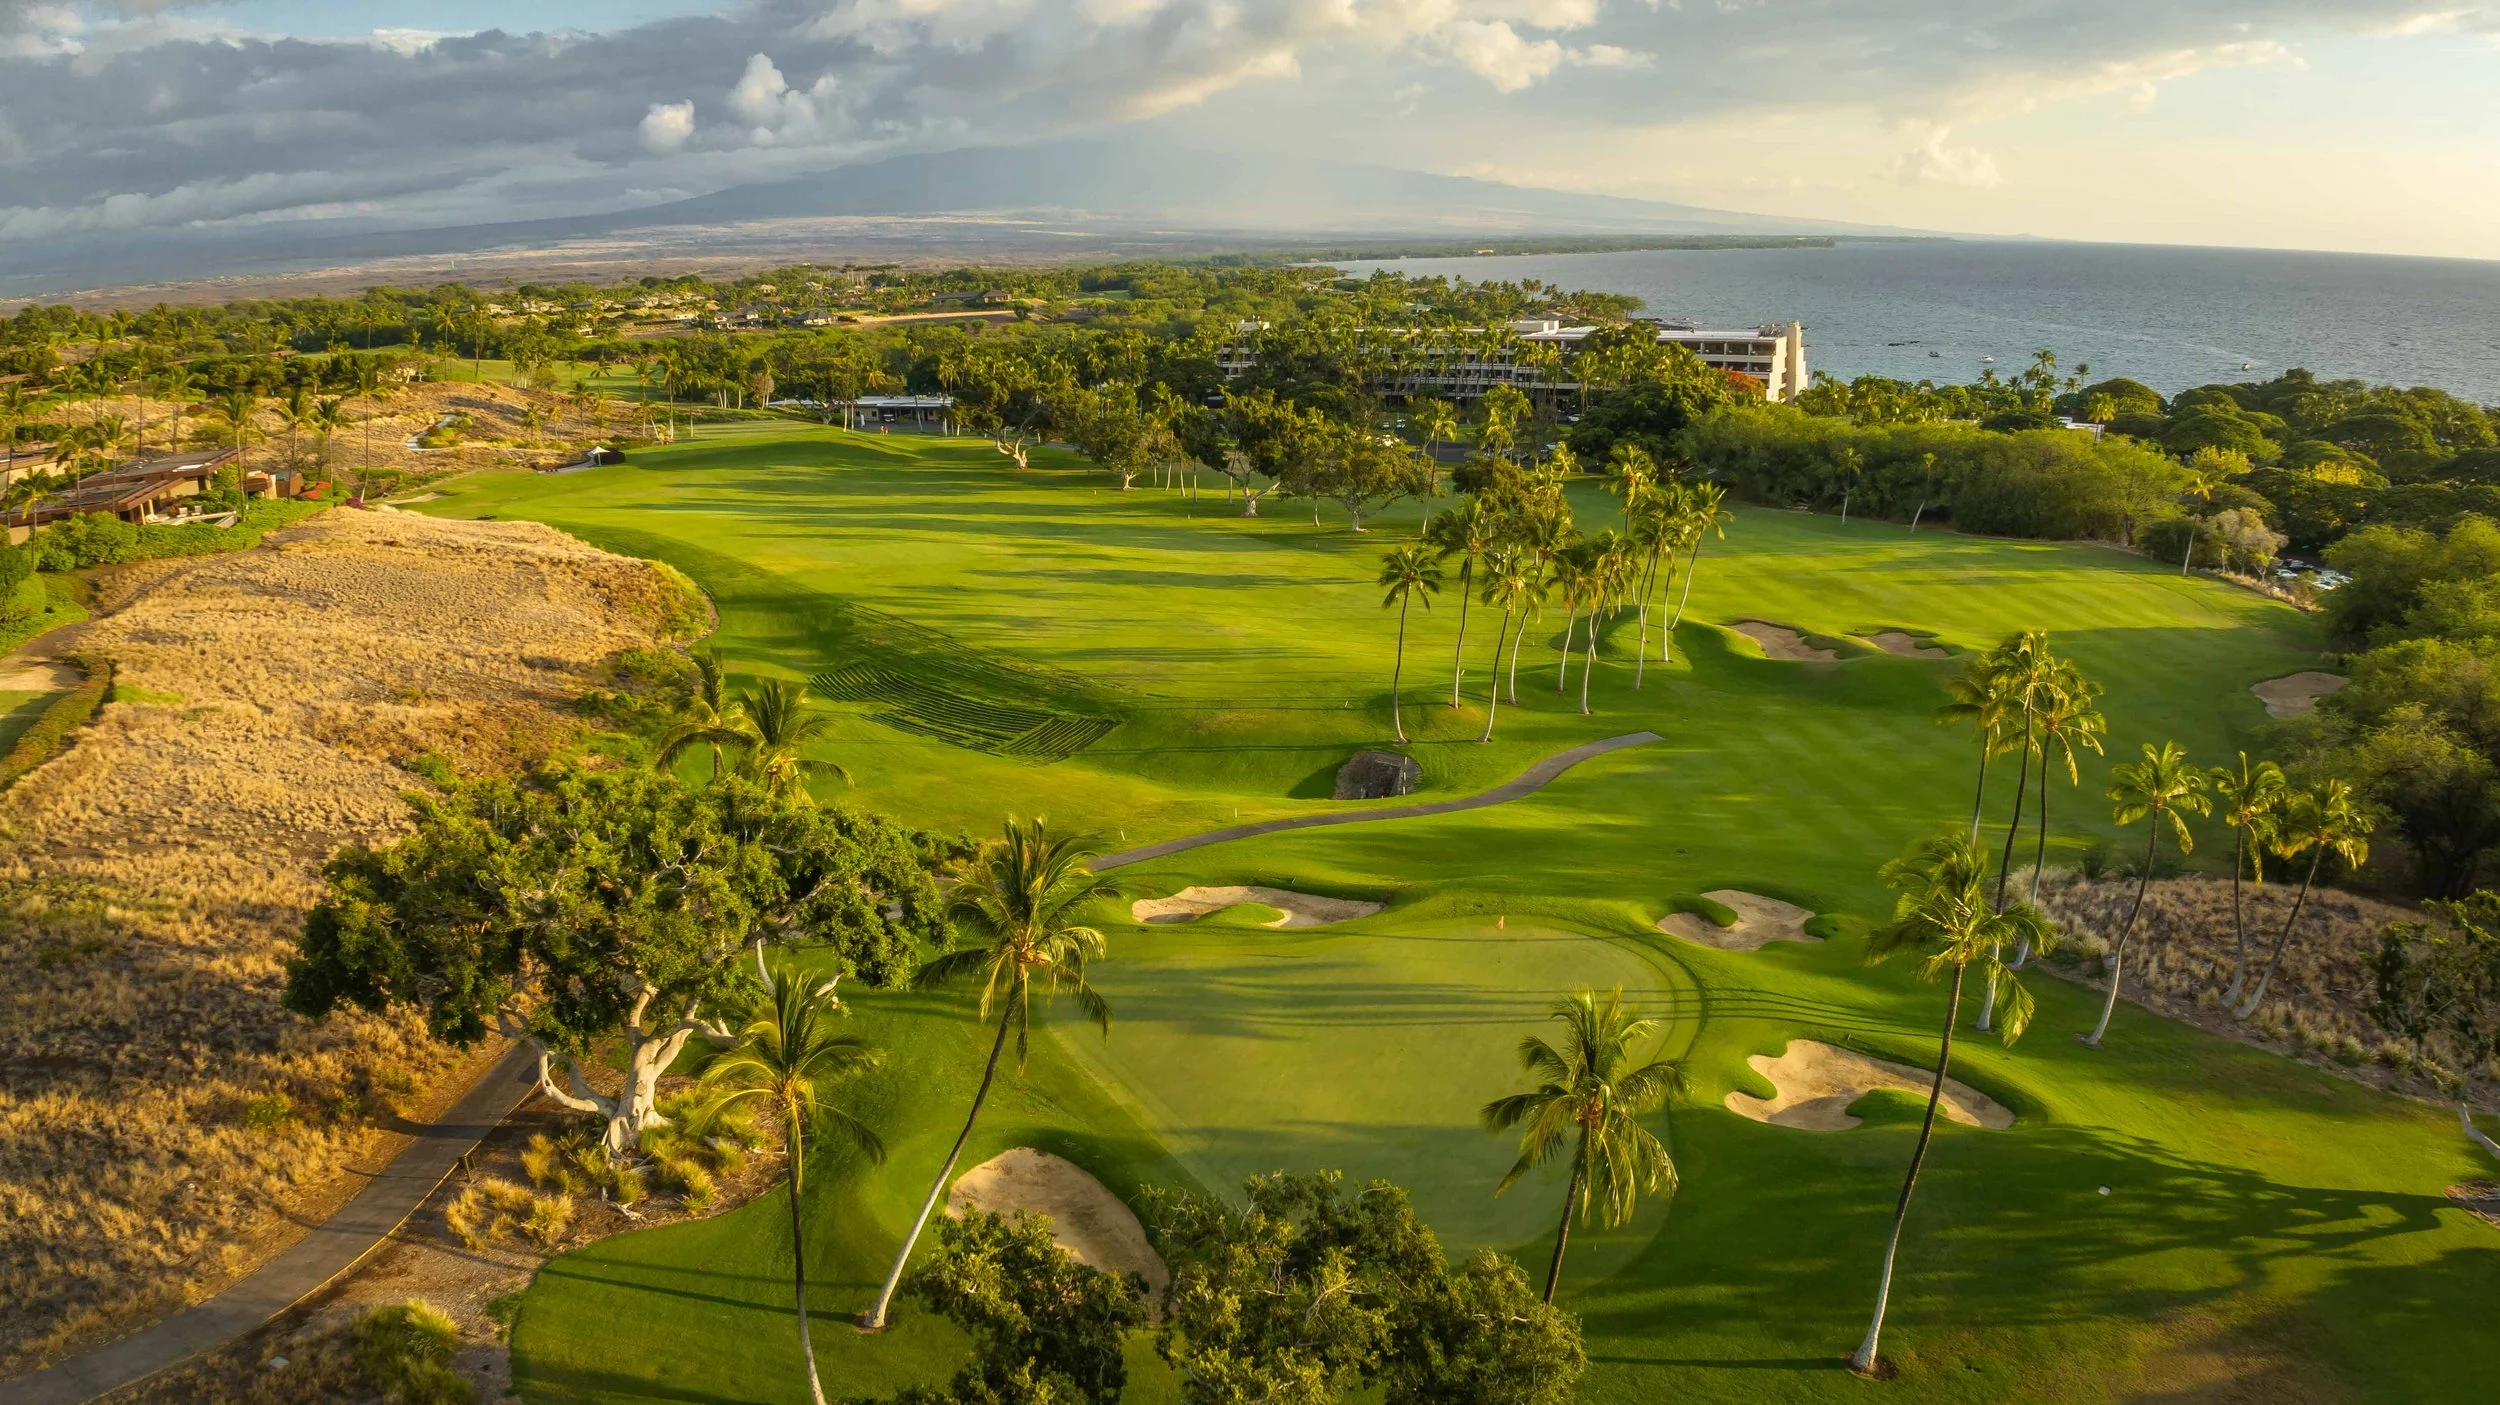
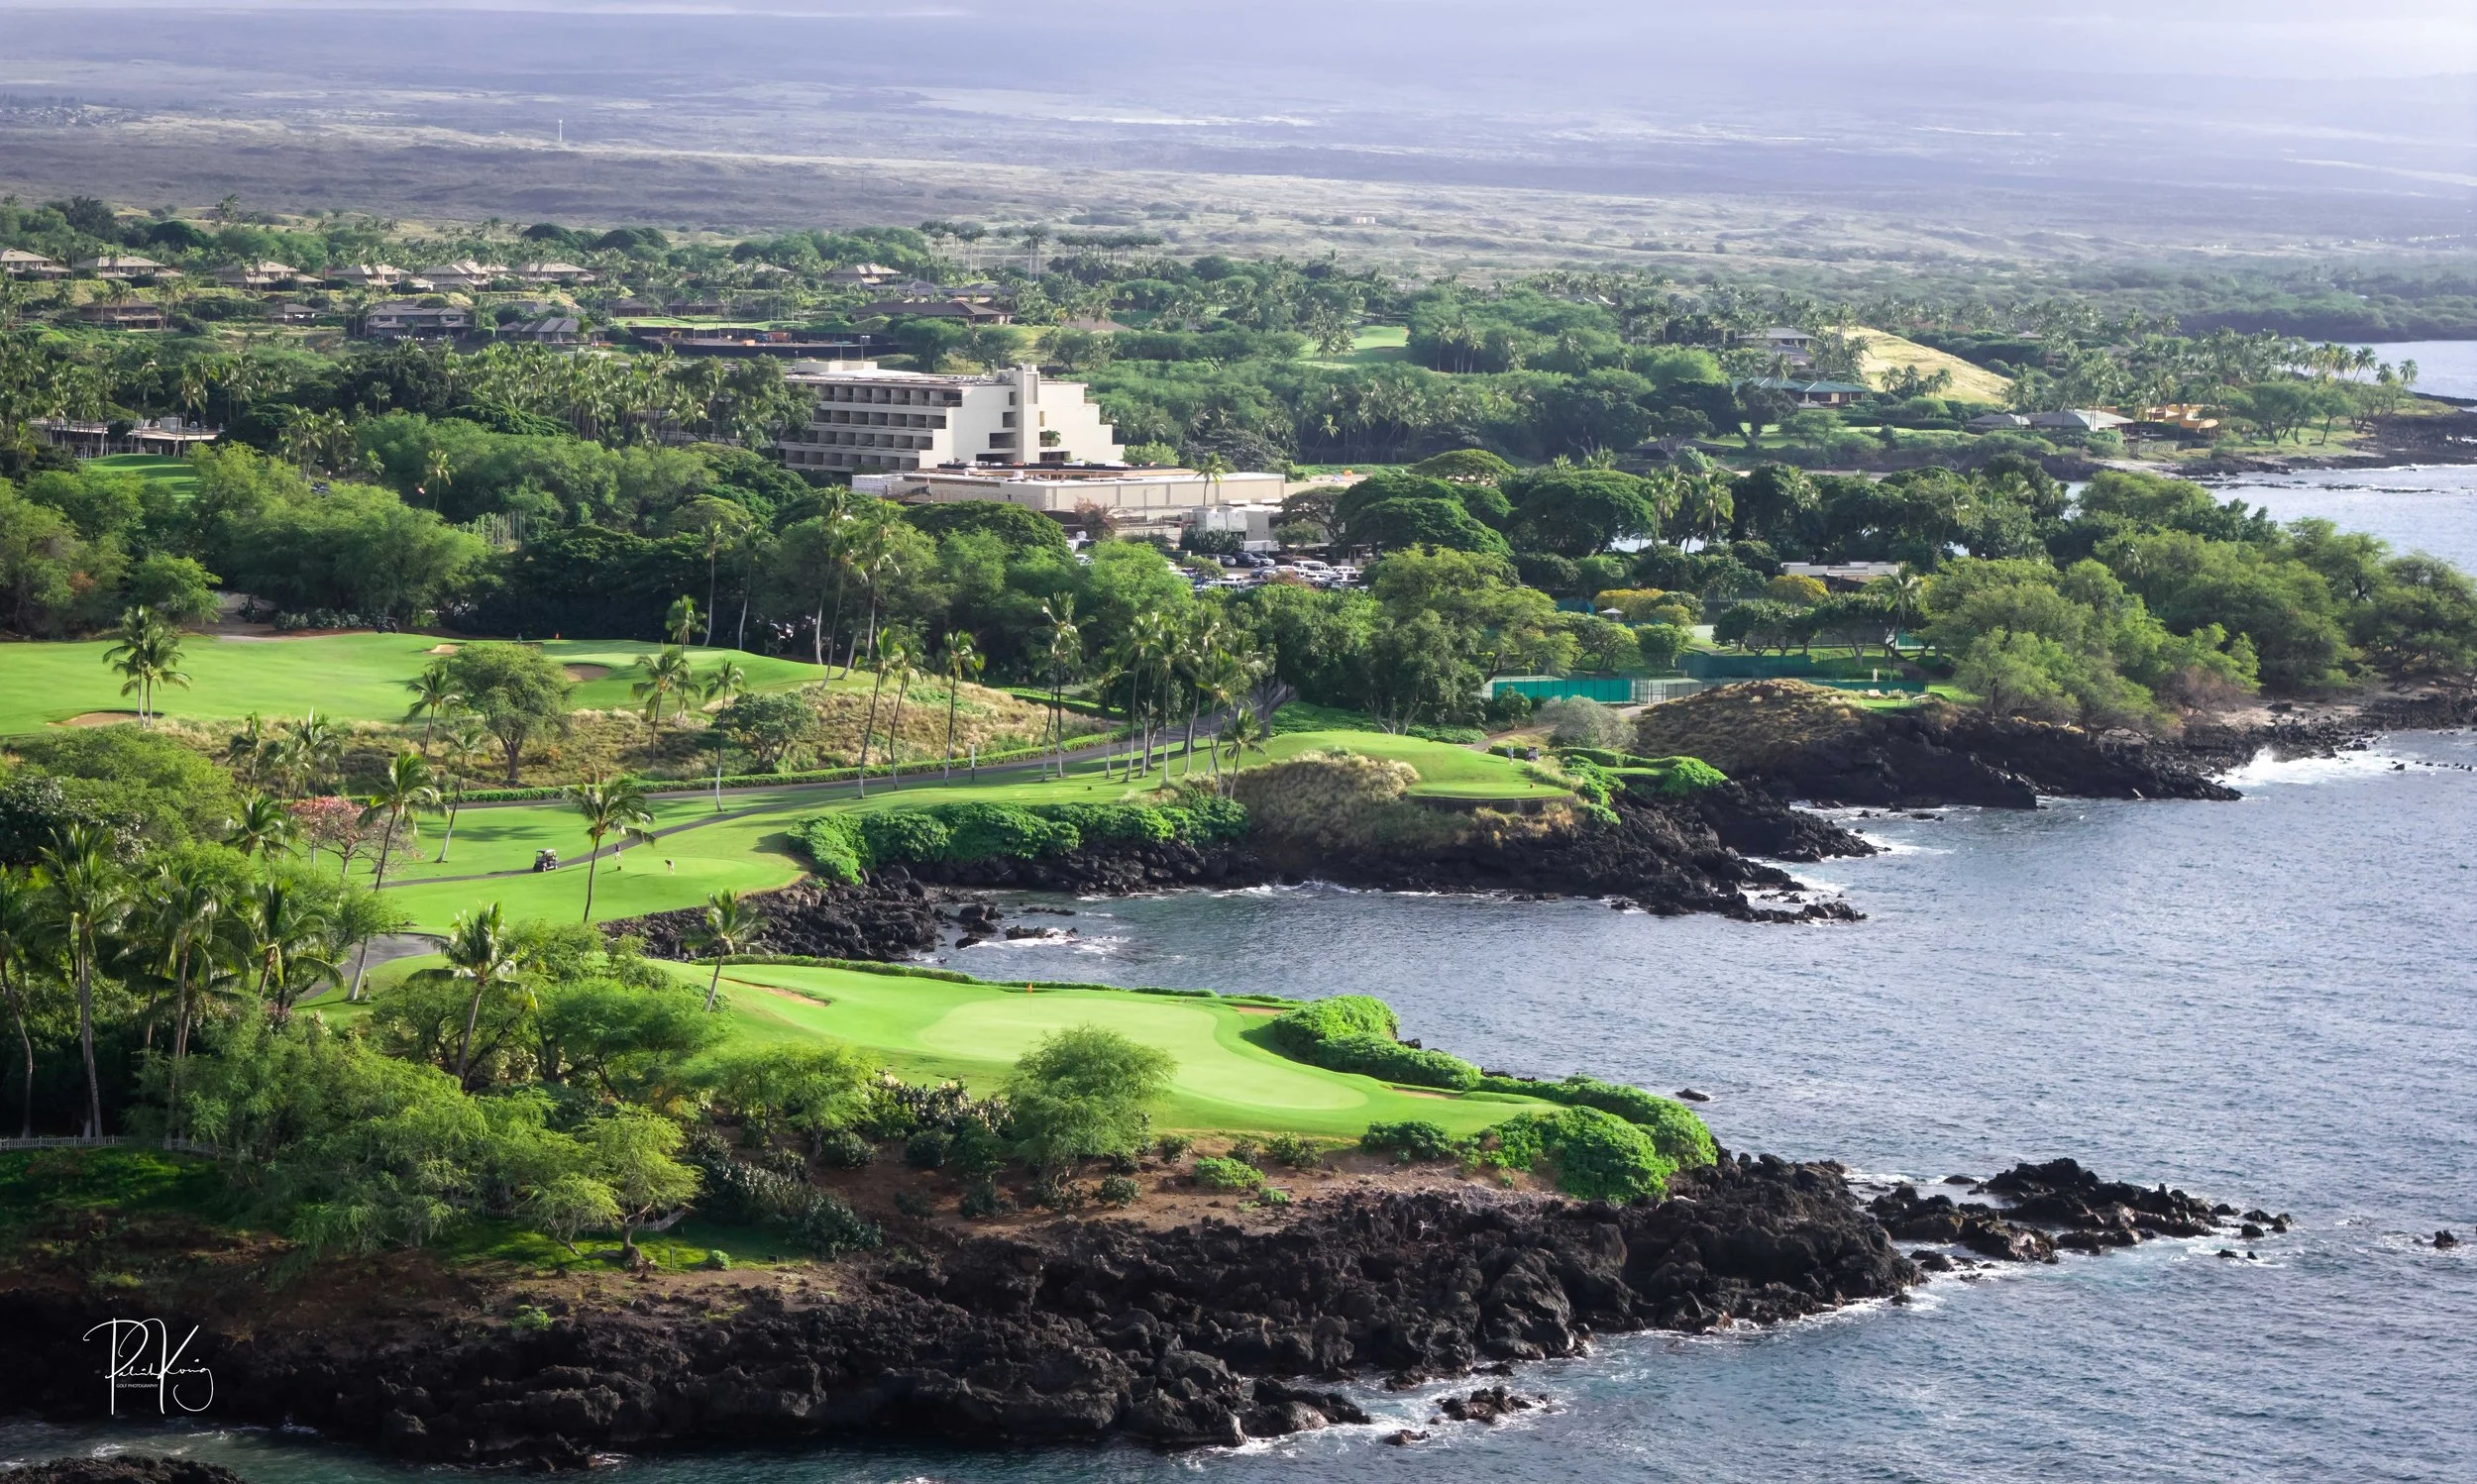
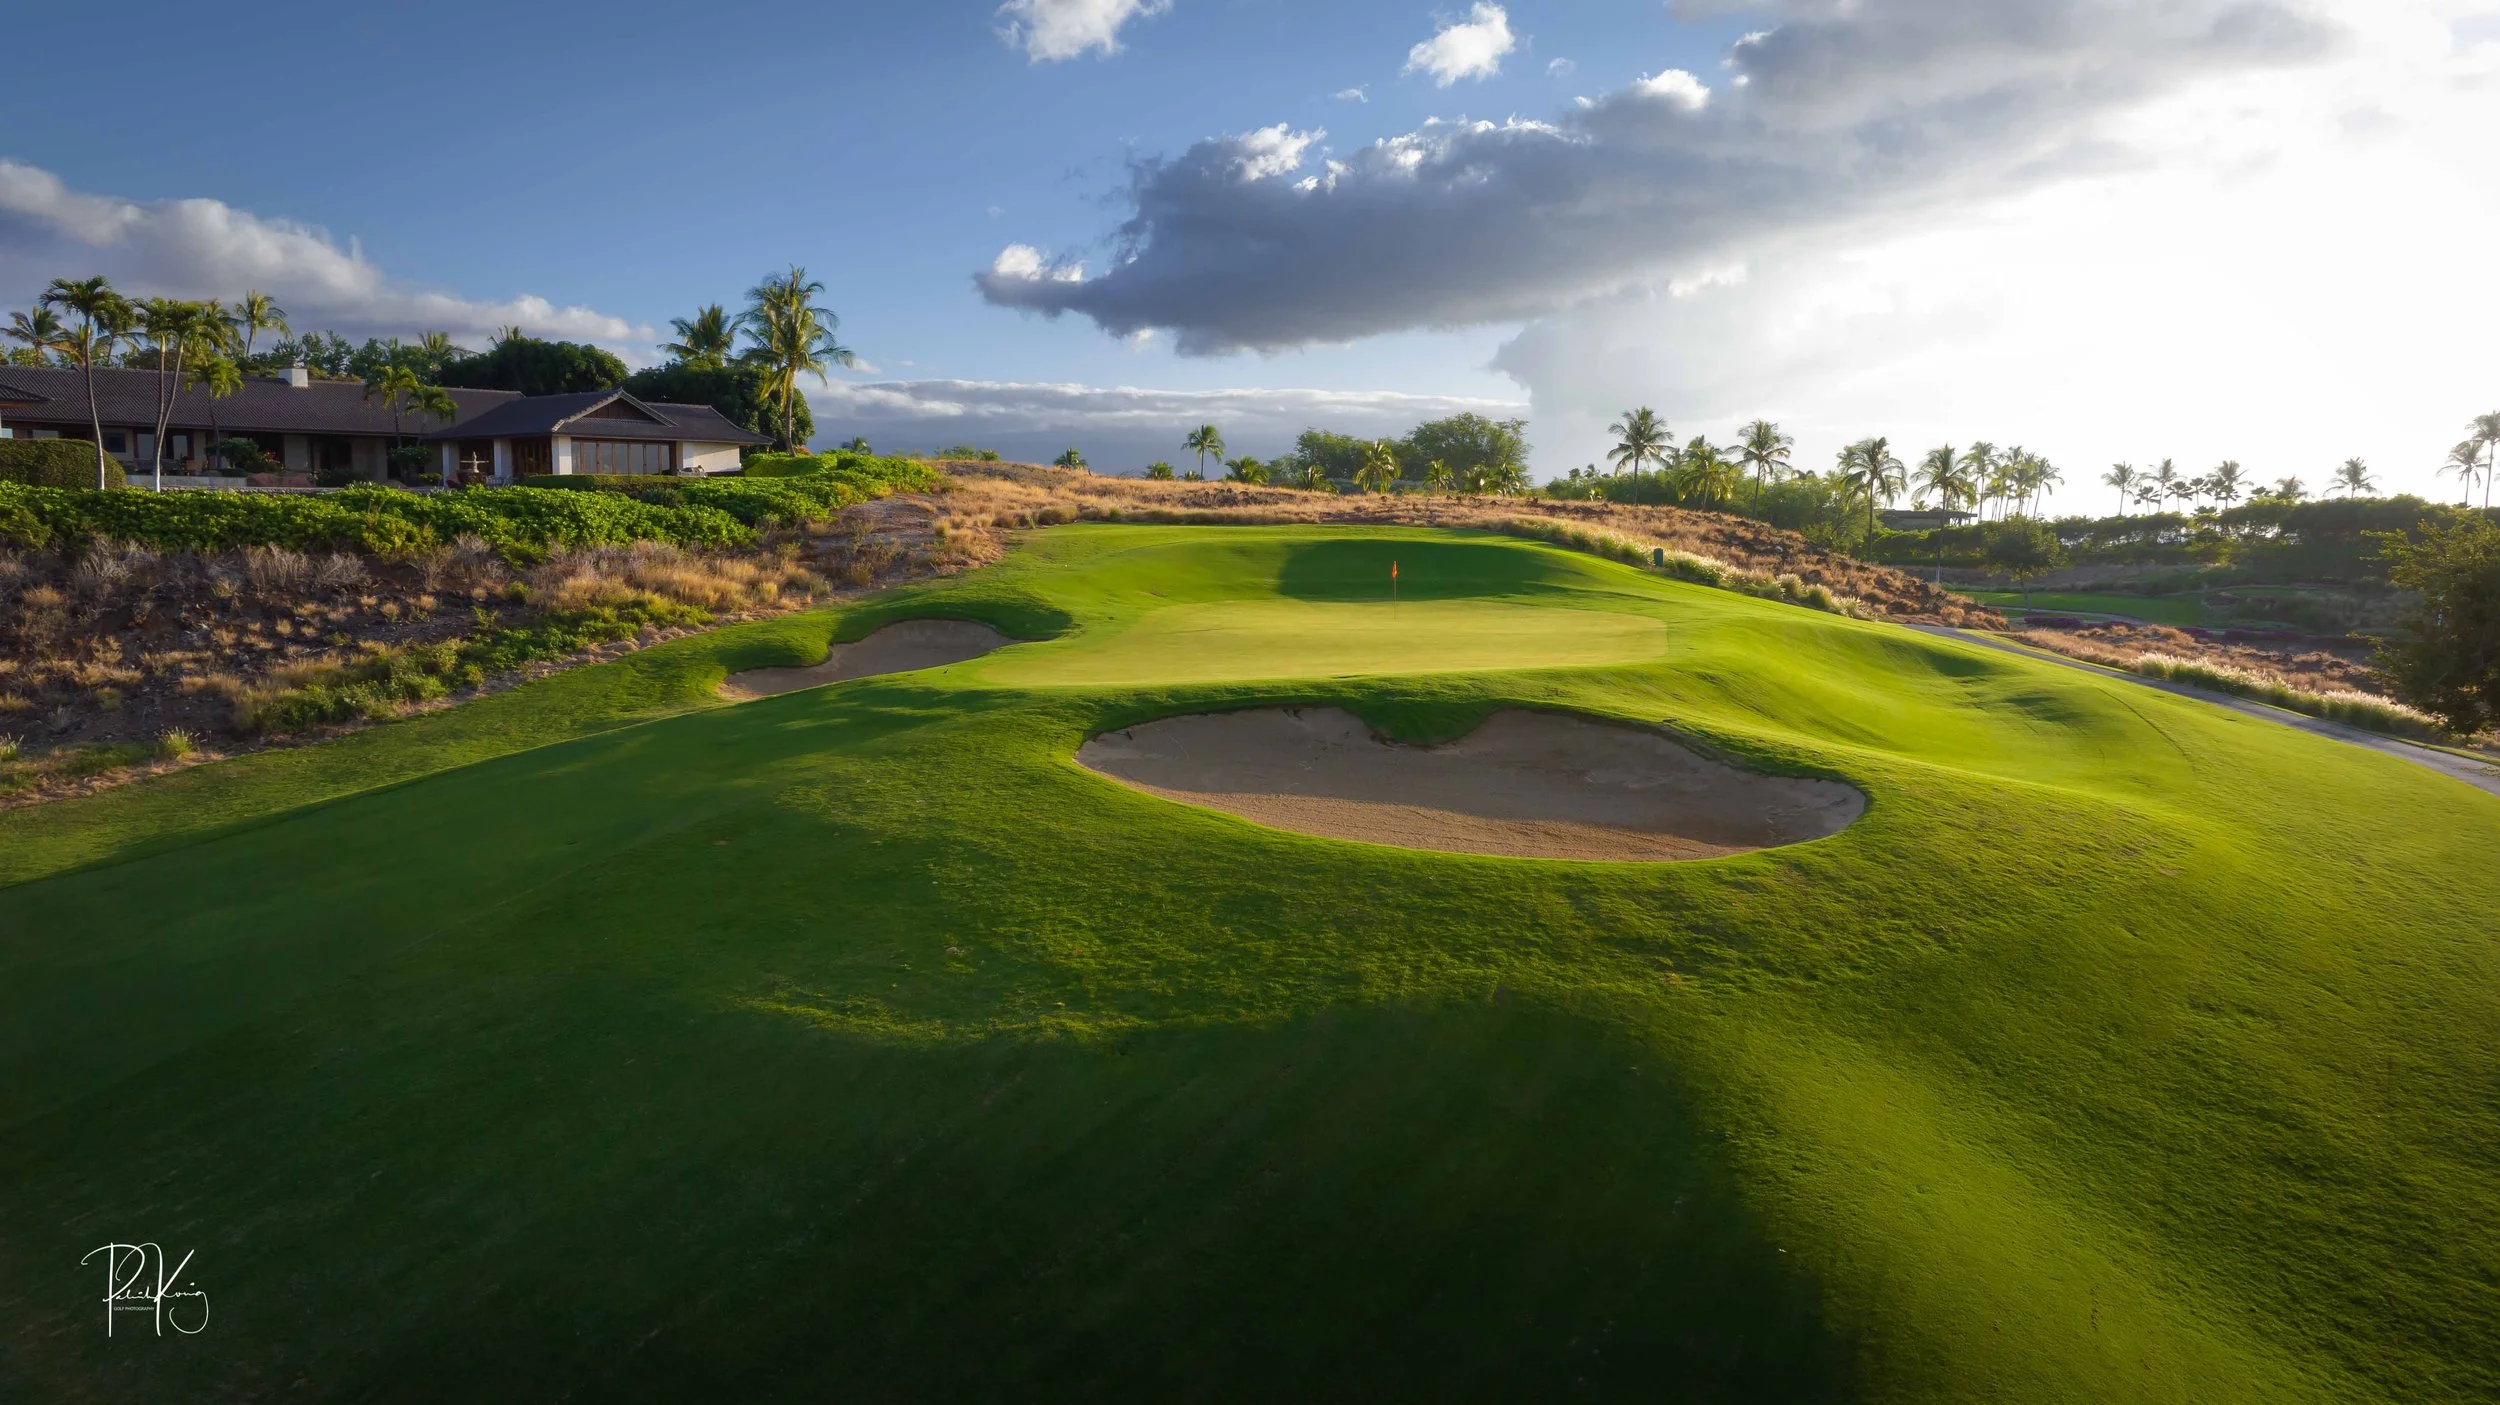
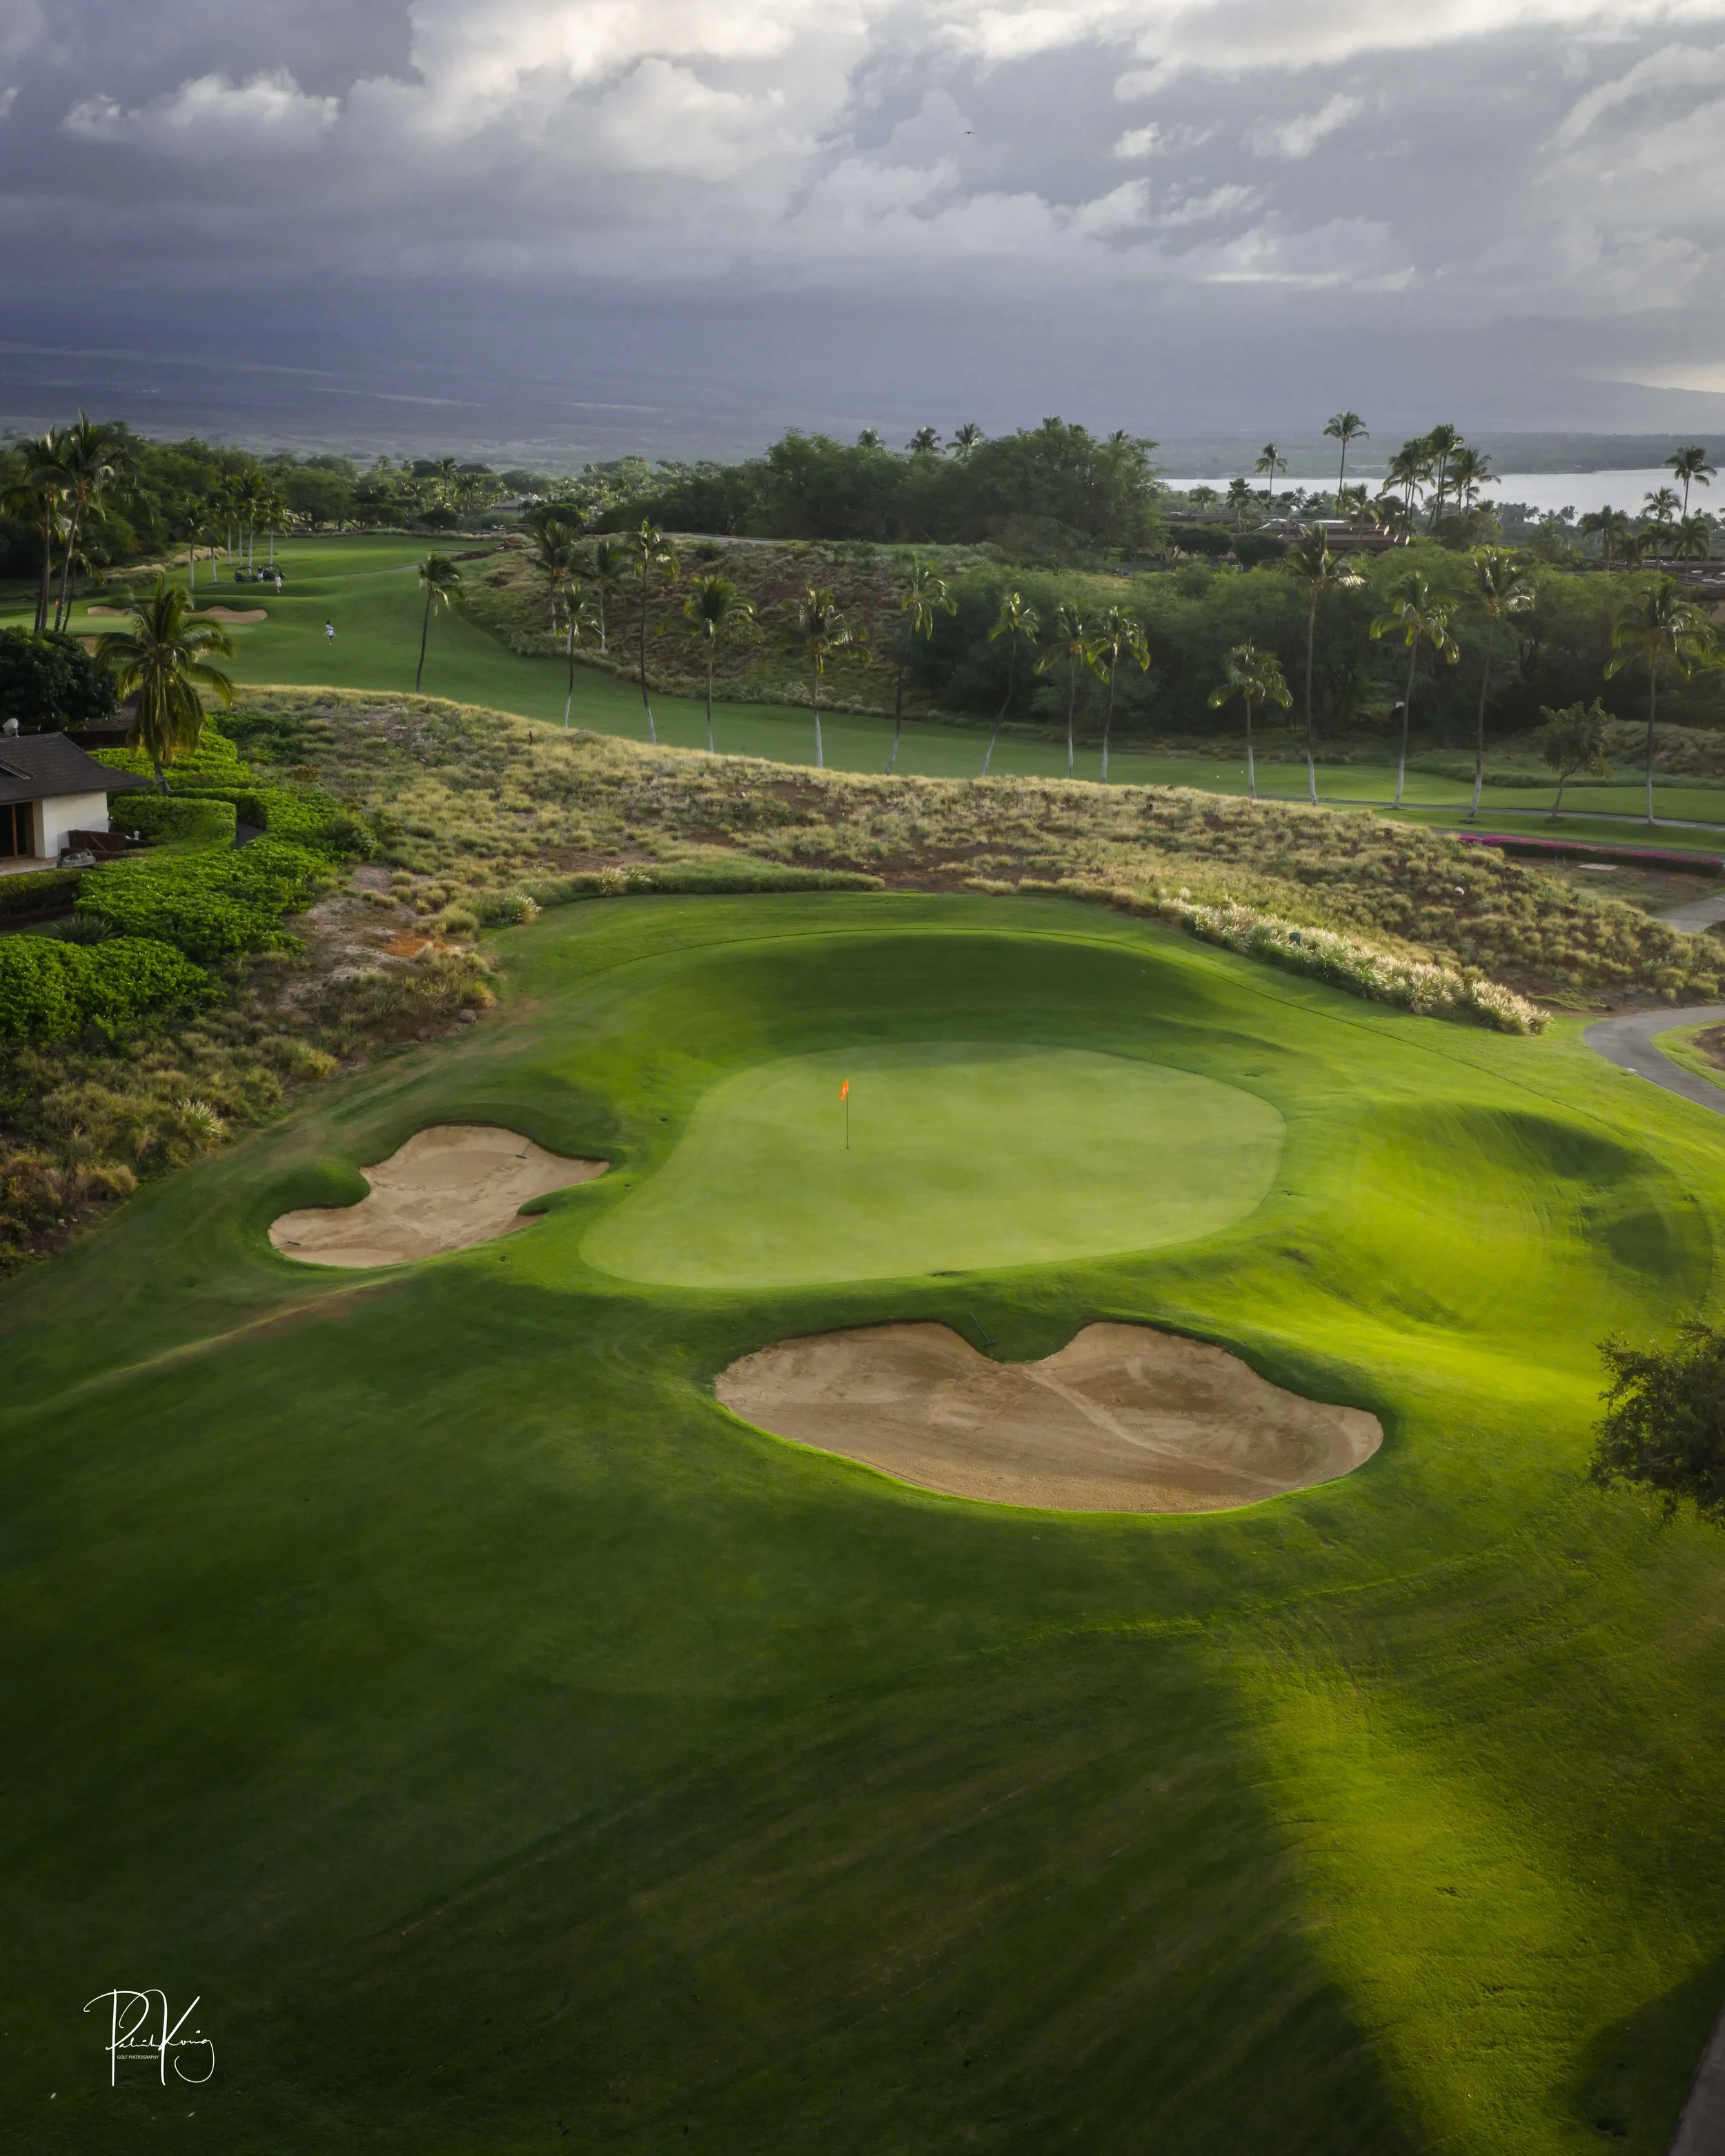
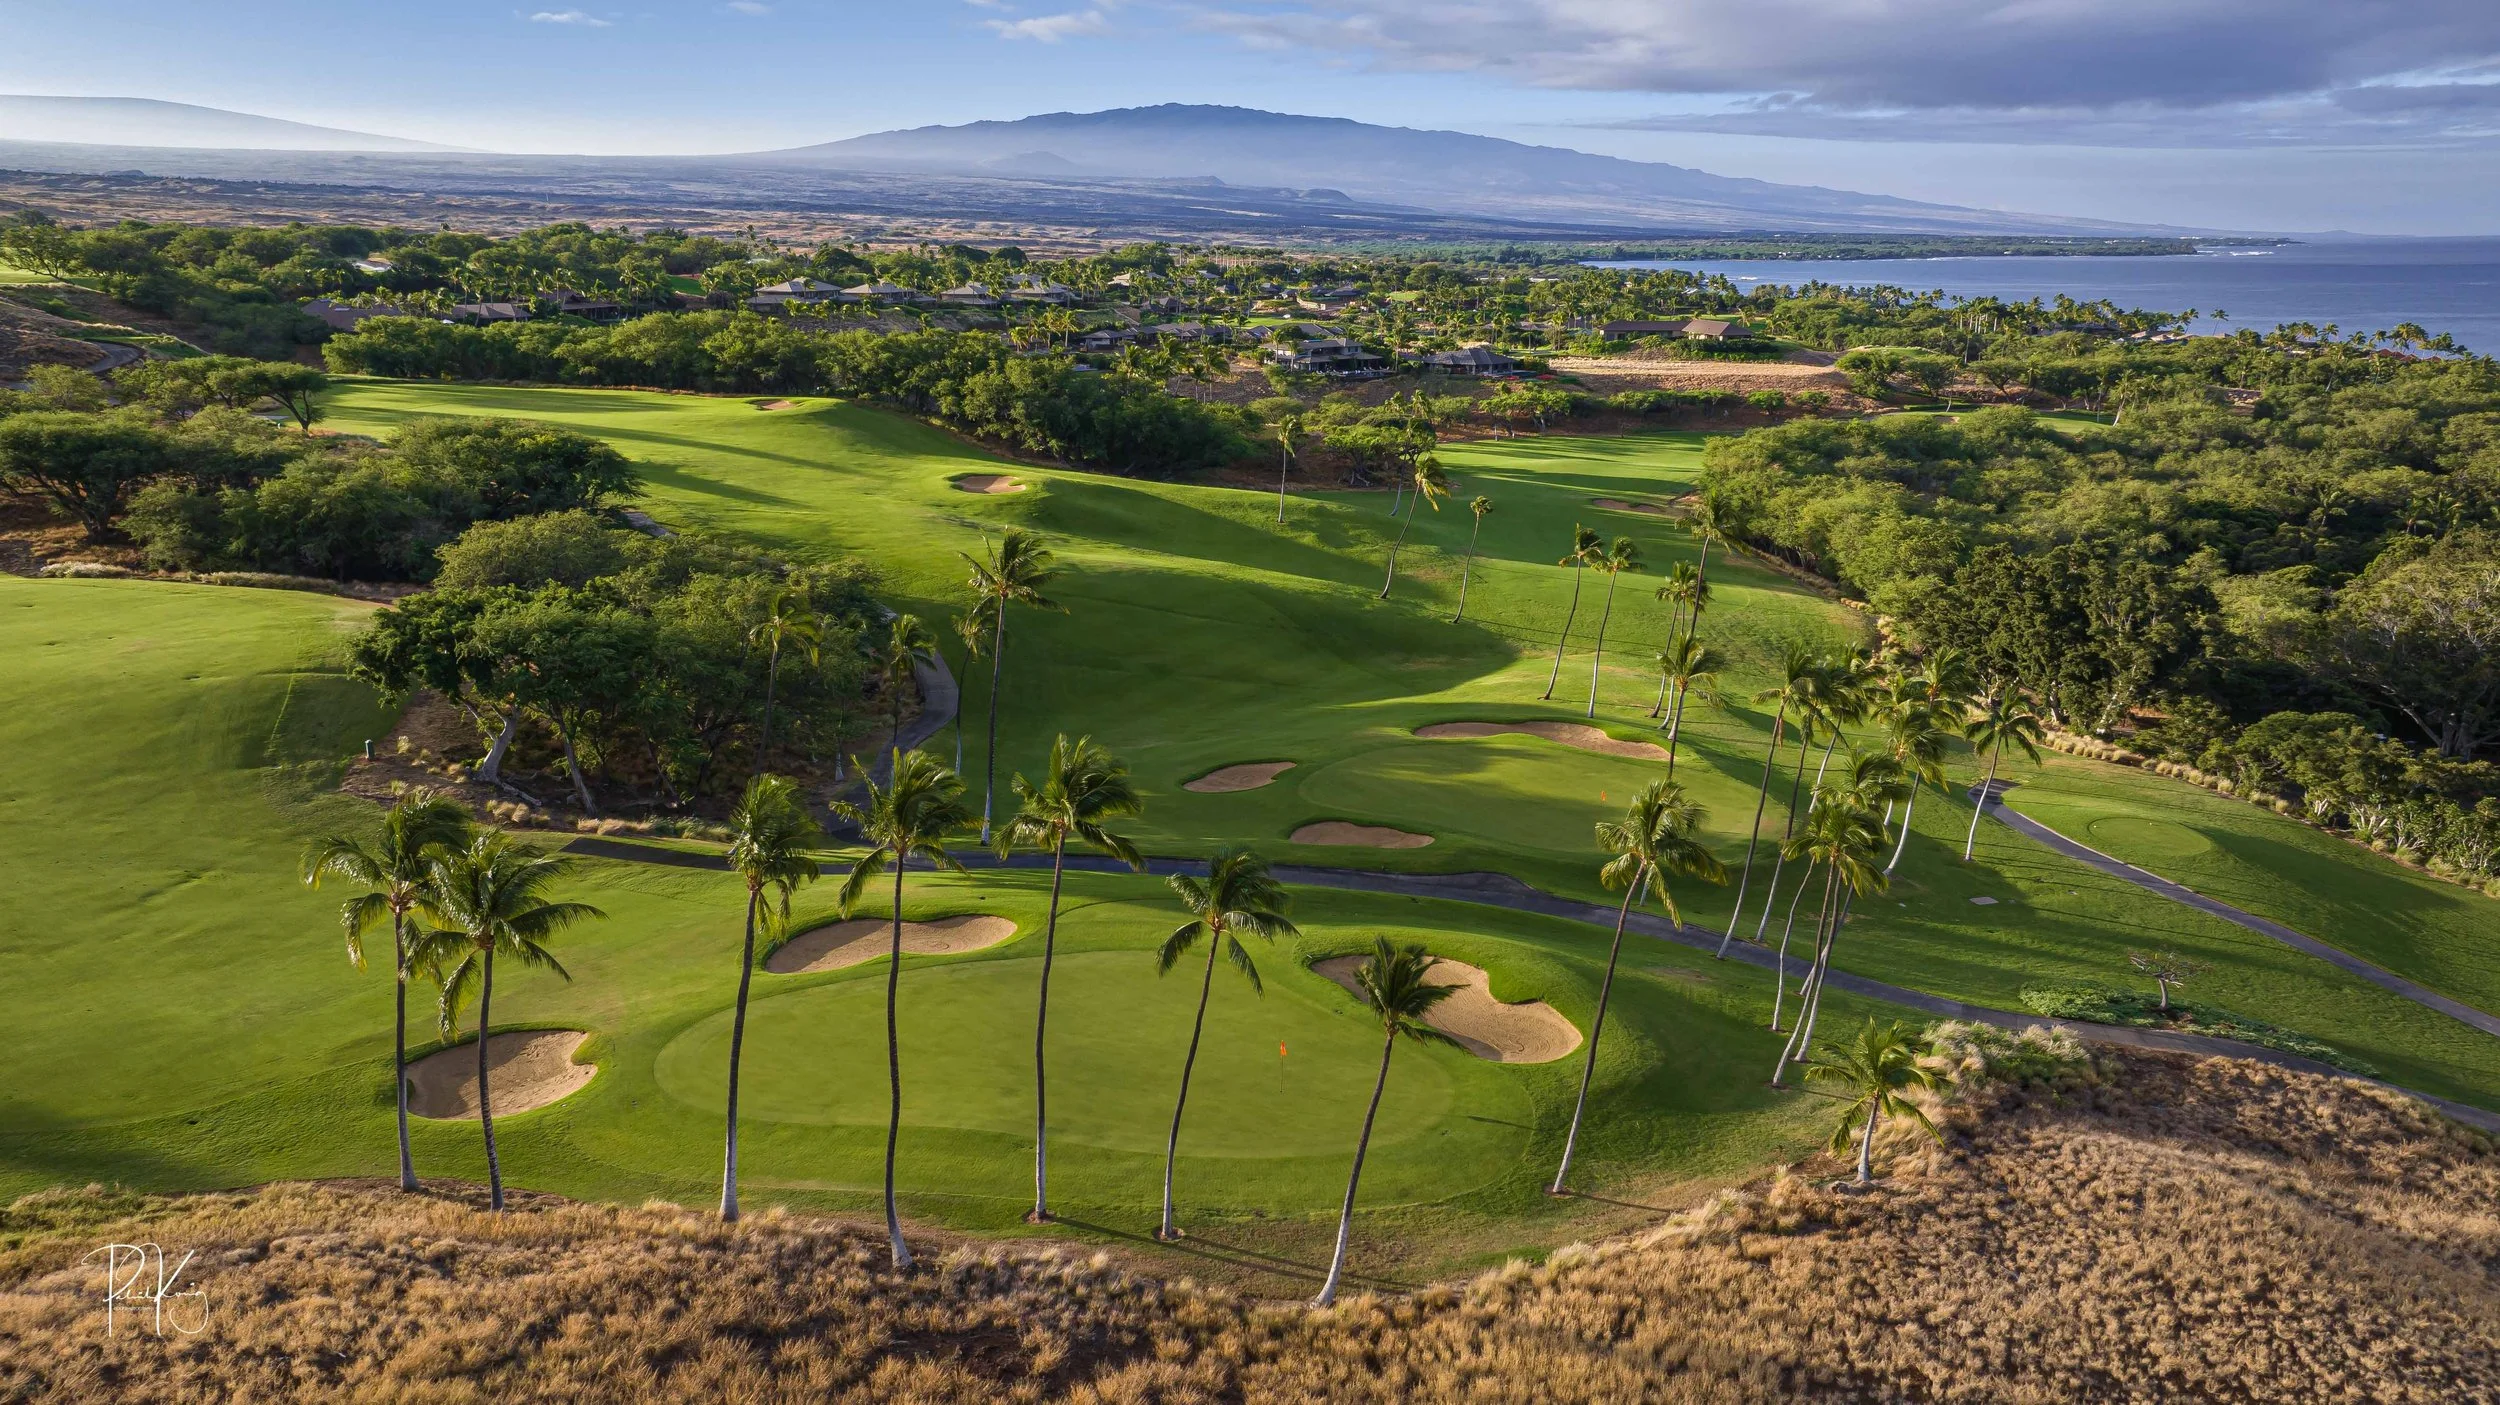
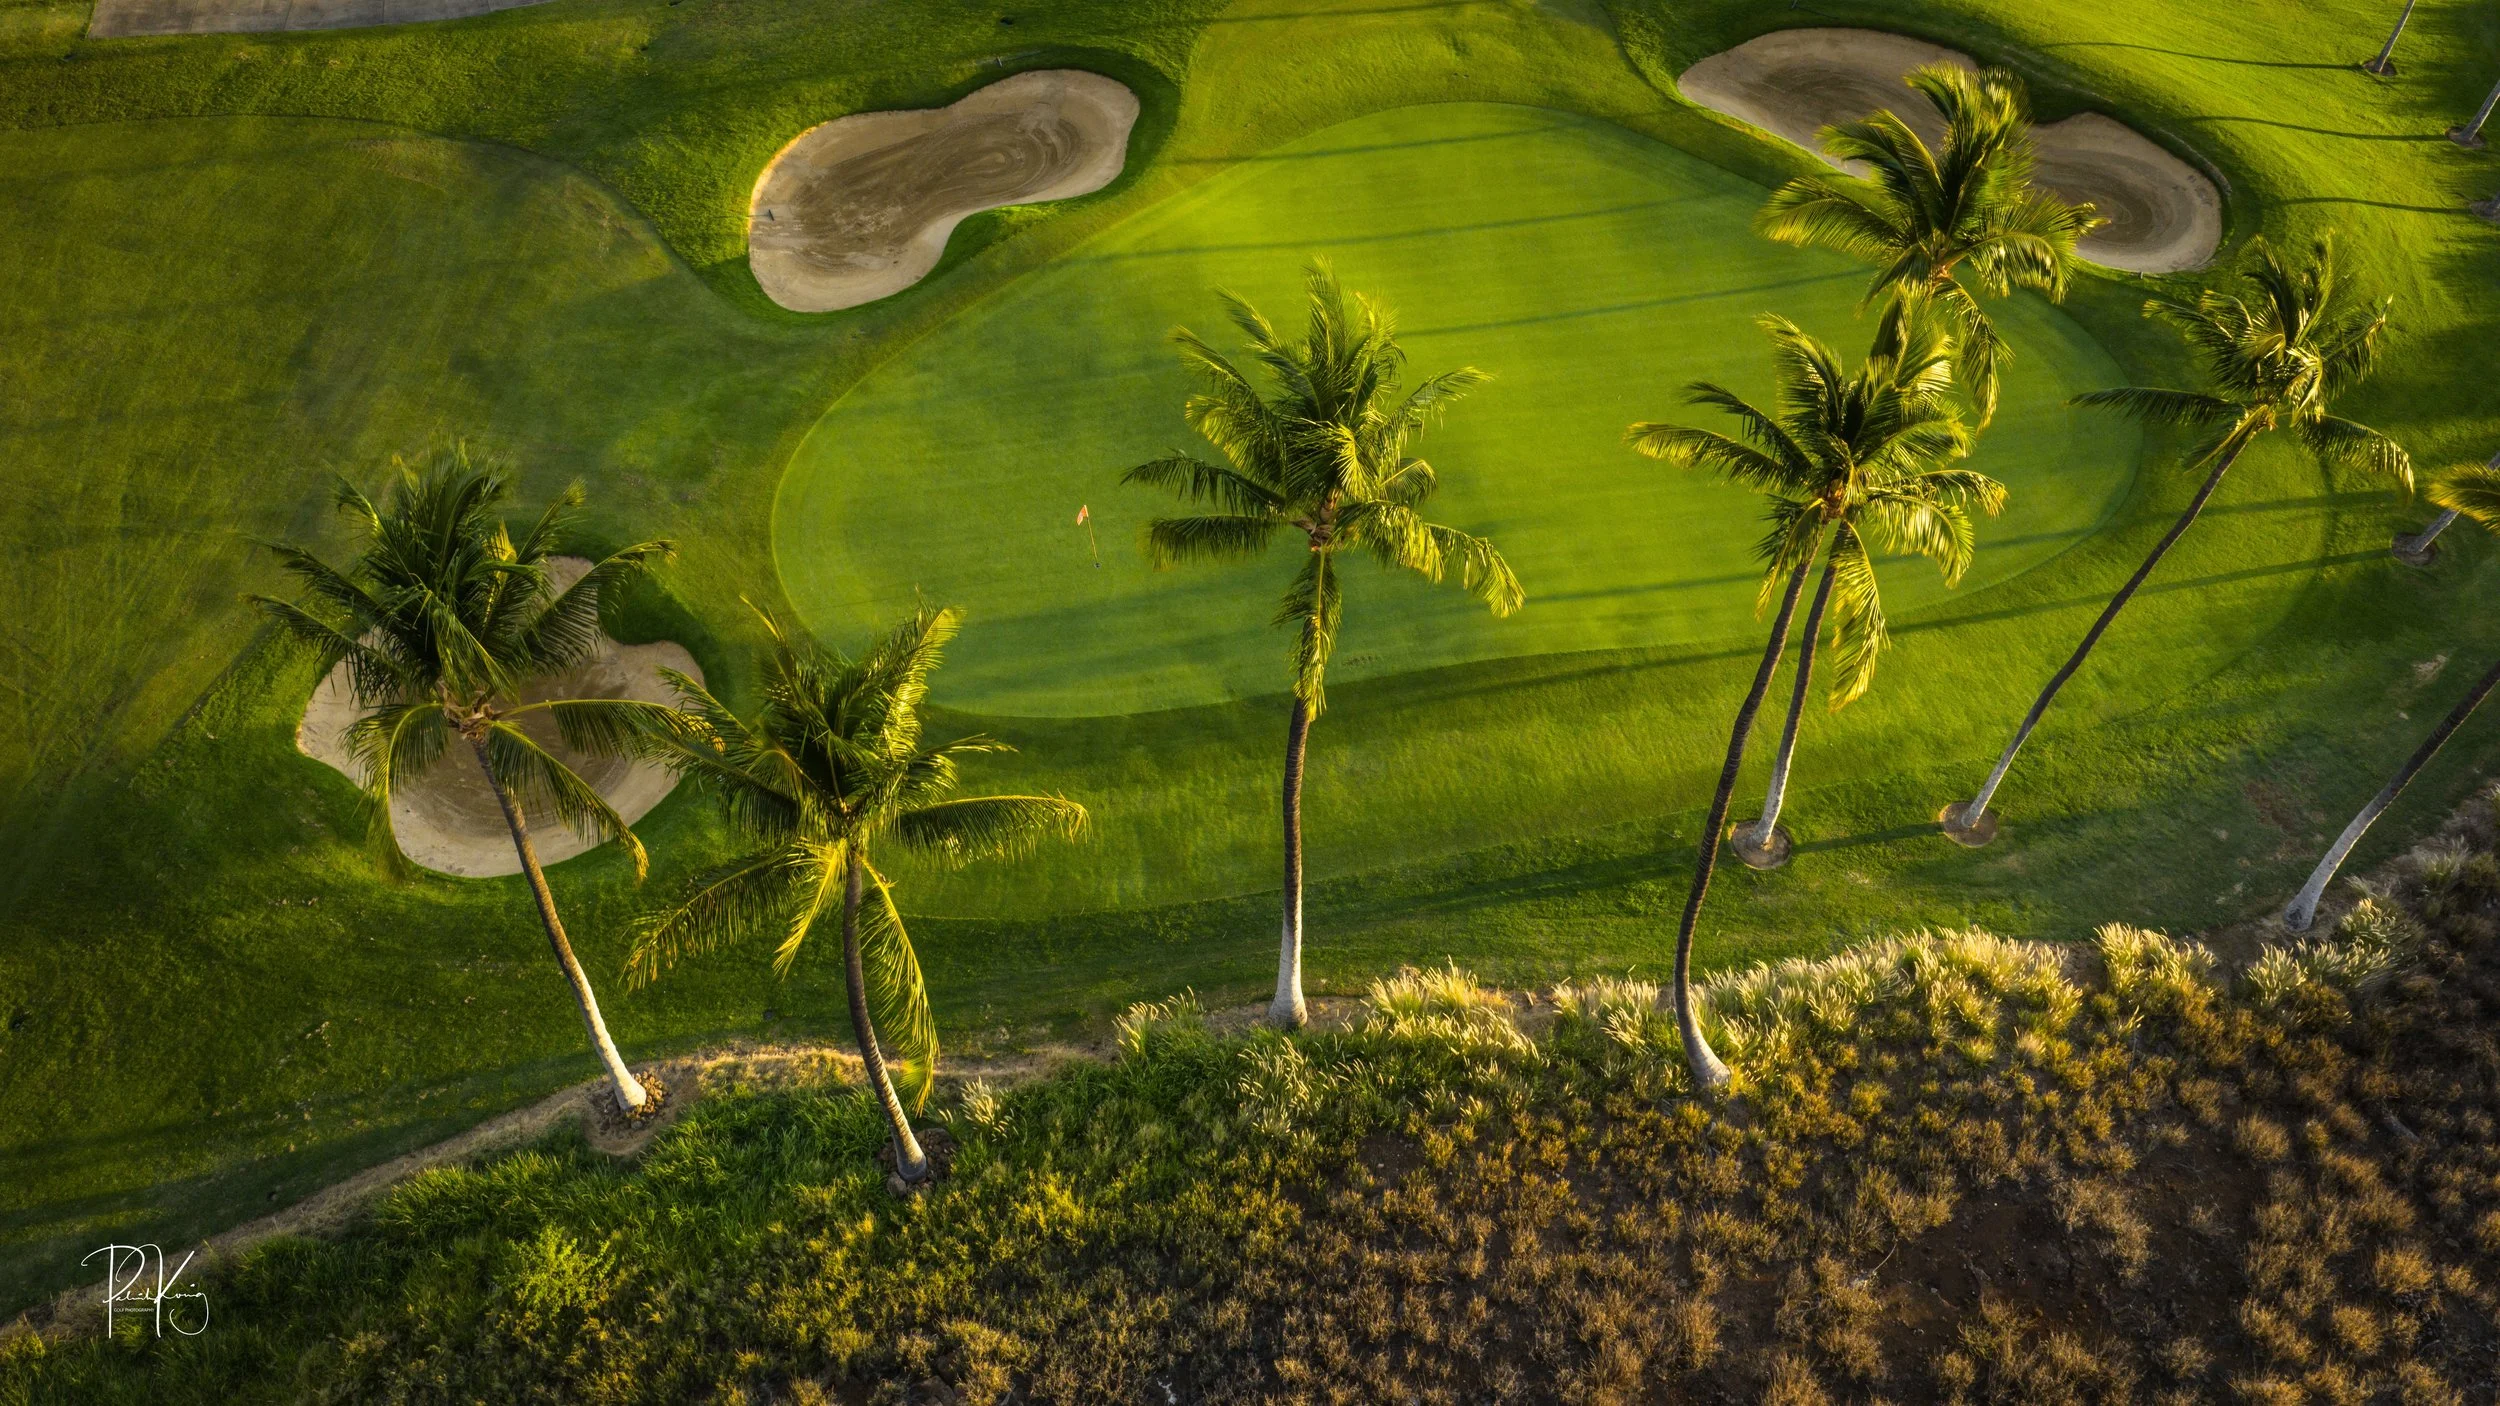
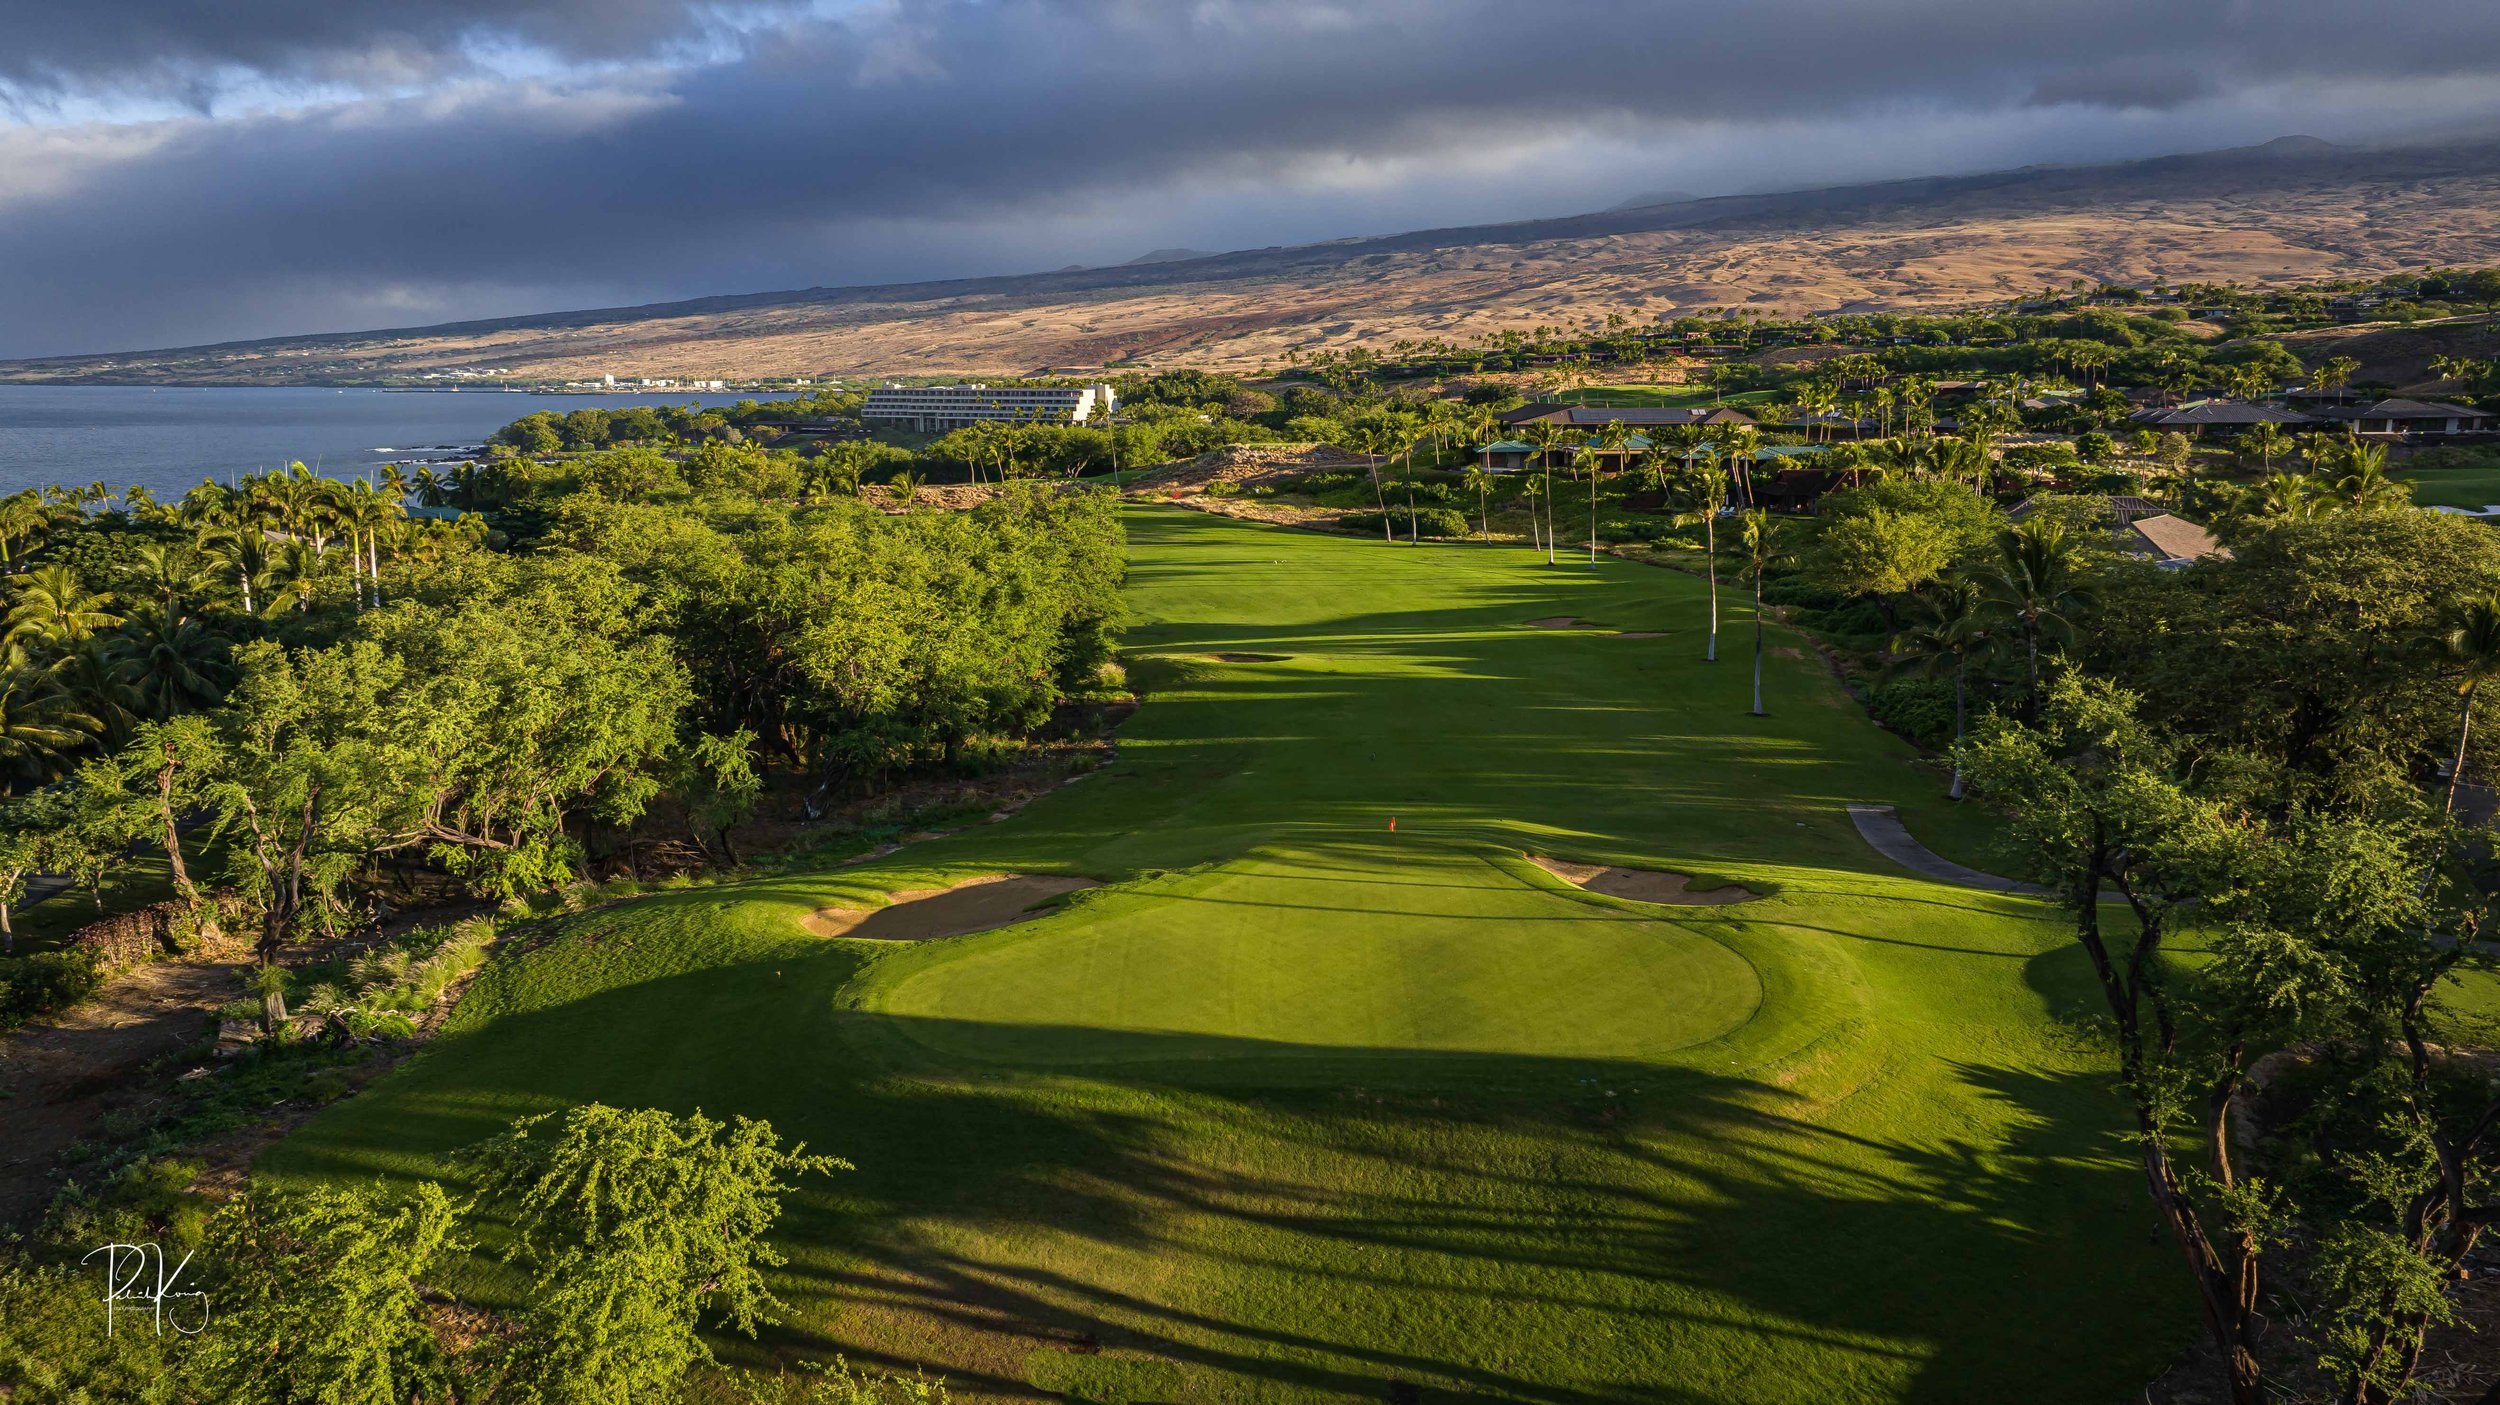
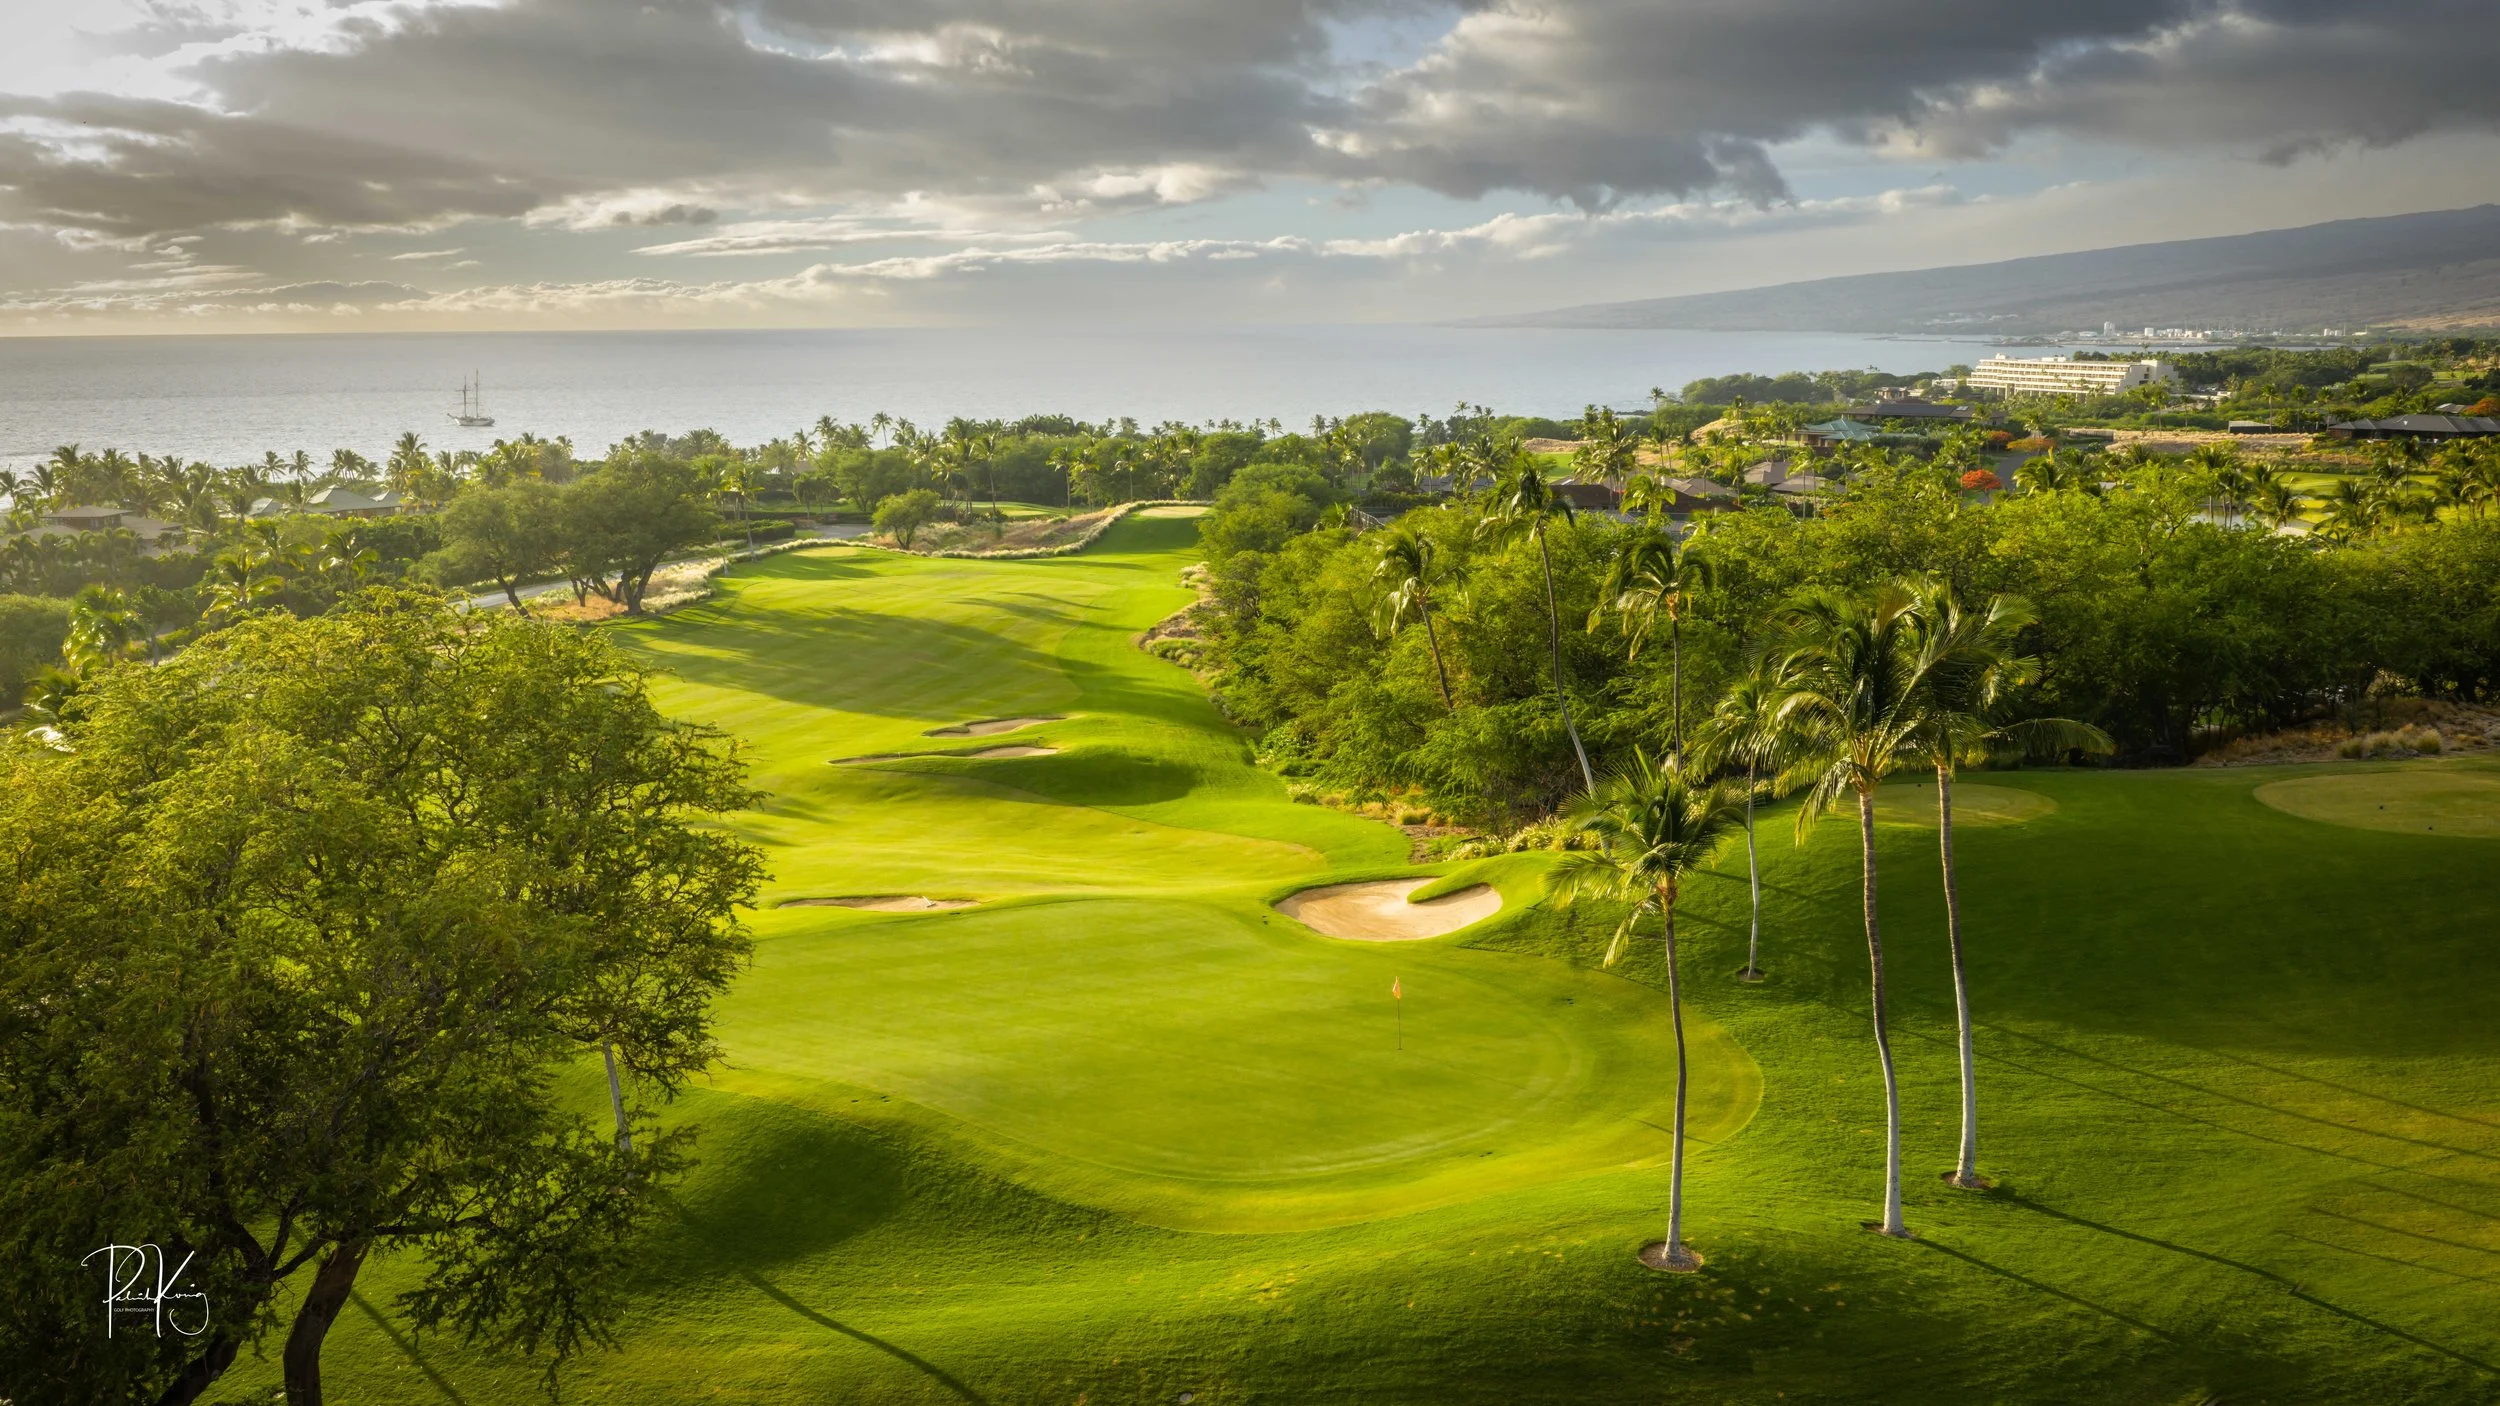
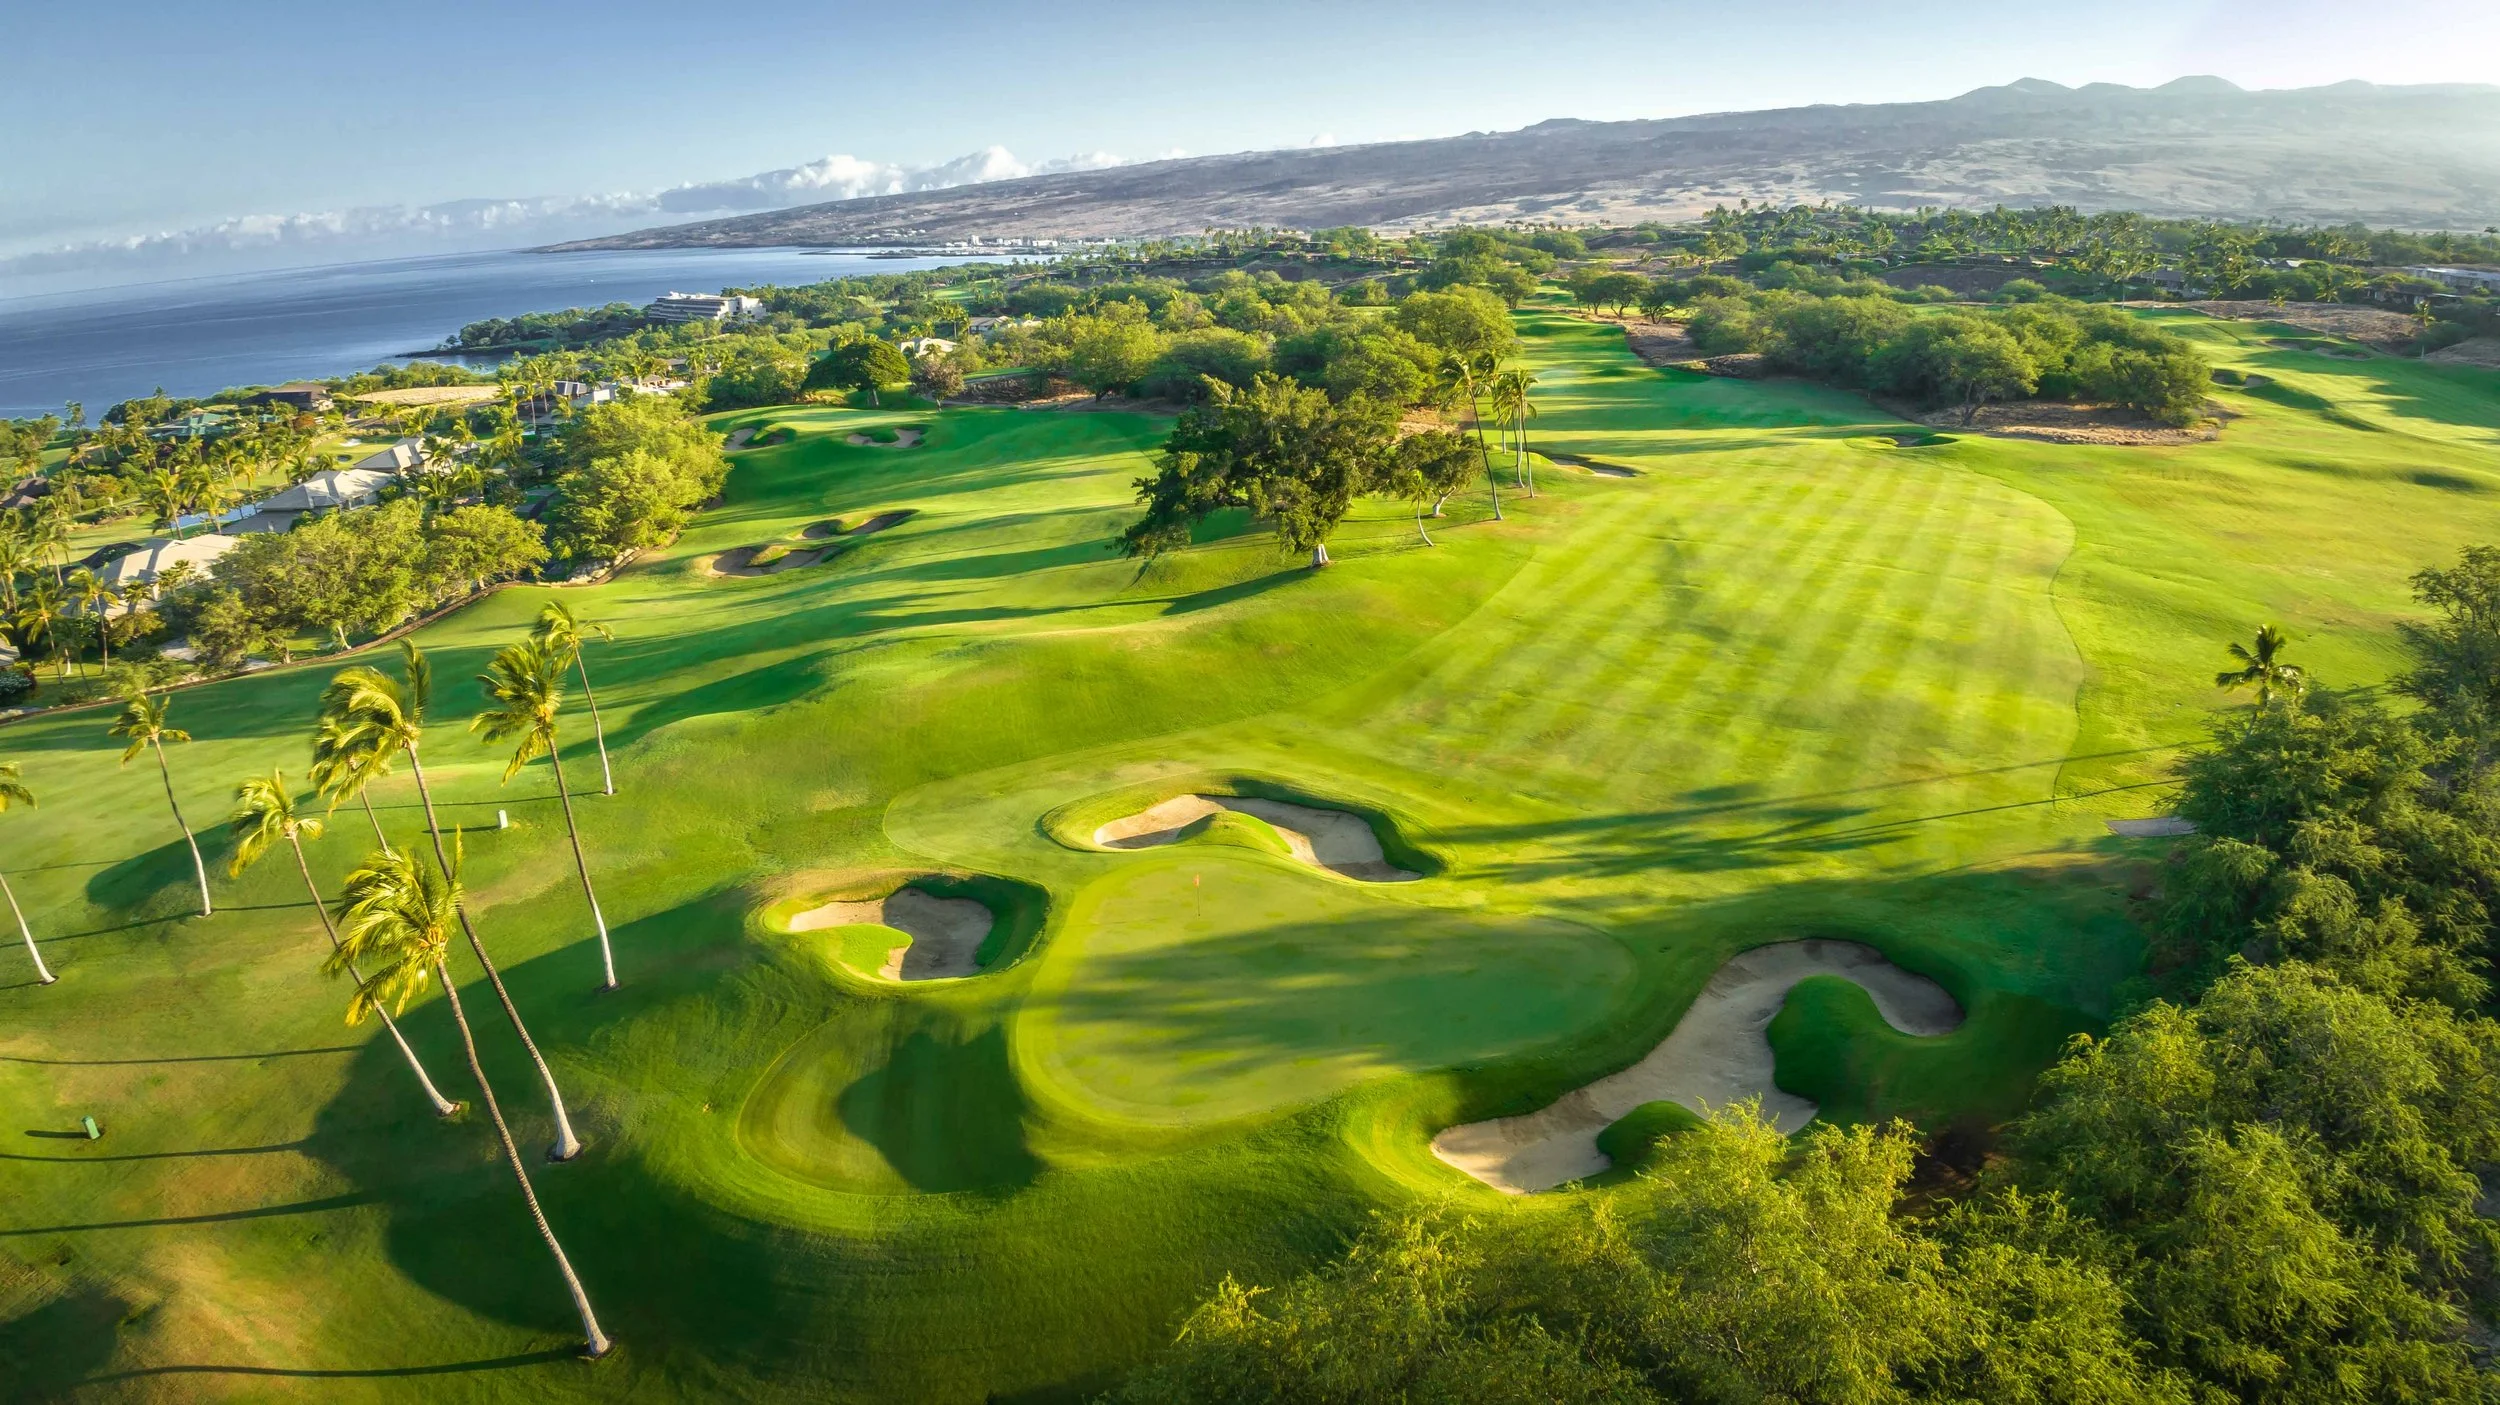
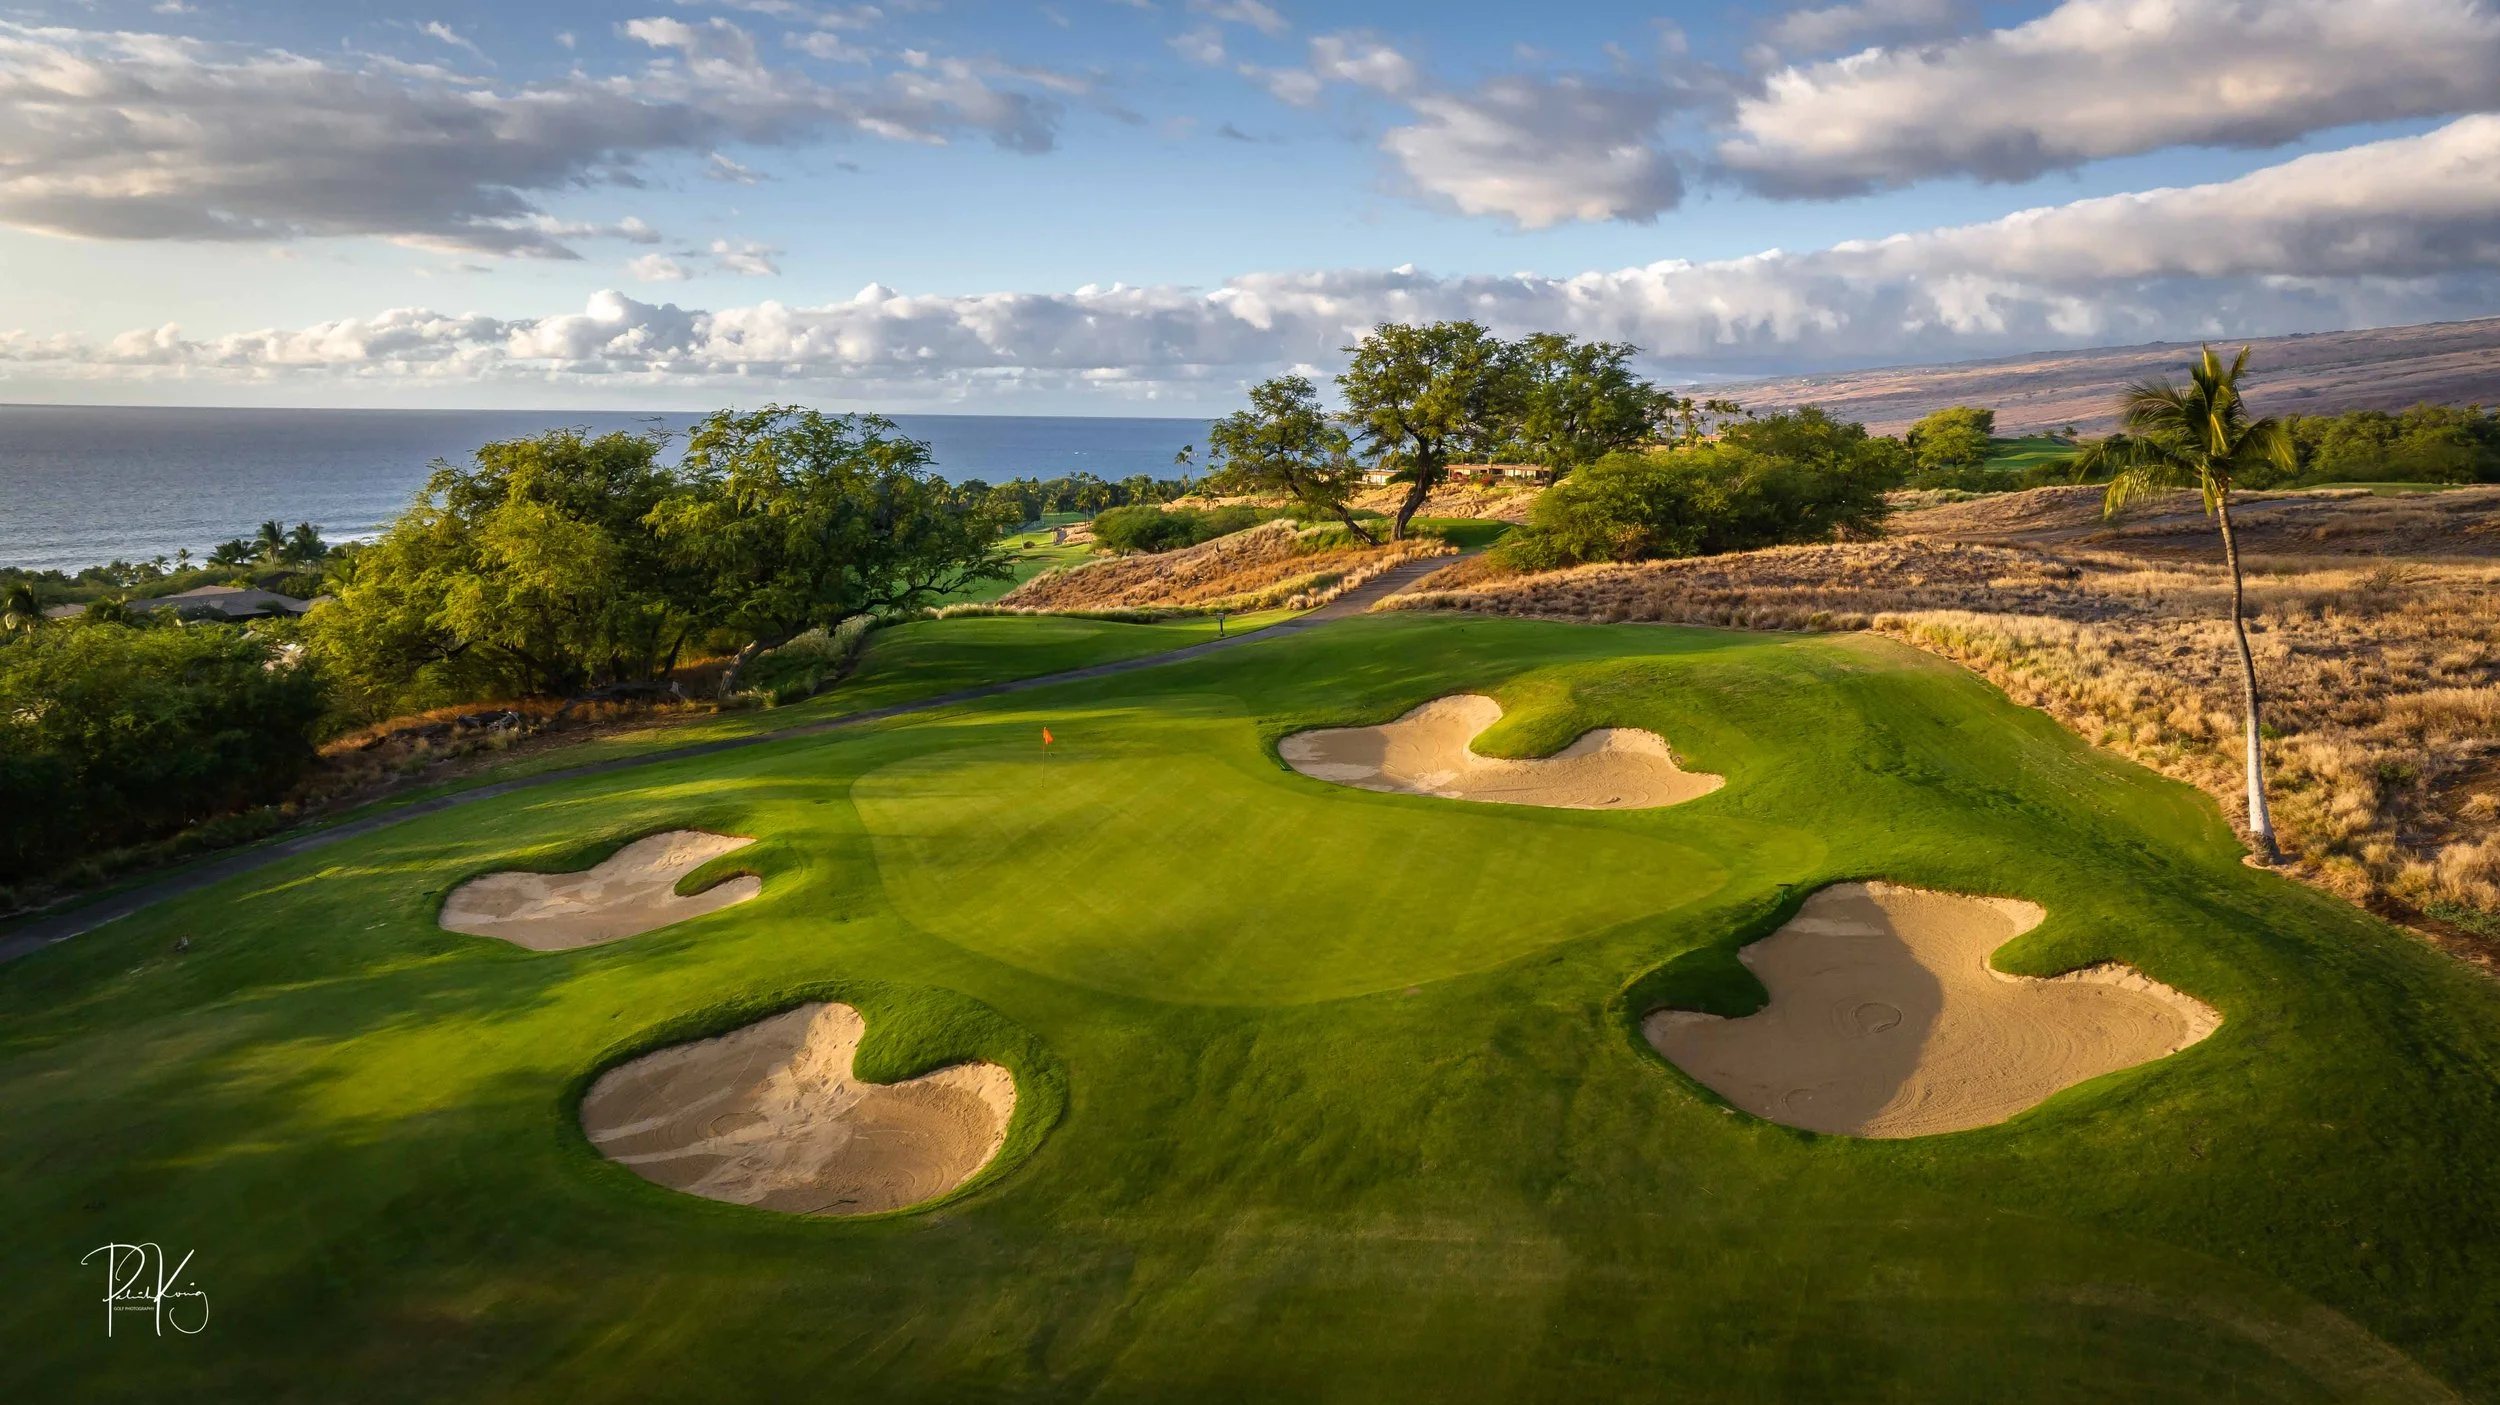
Hole #9 - Par 4 - 430 yards
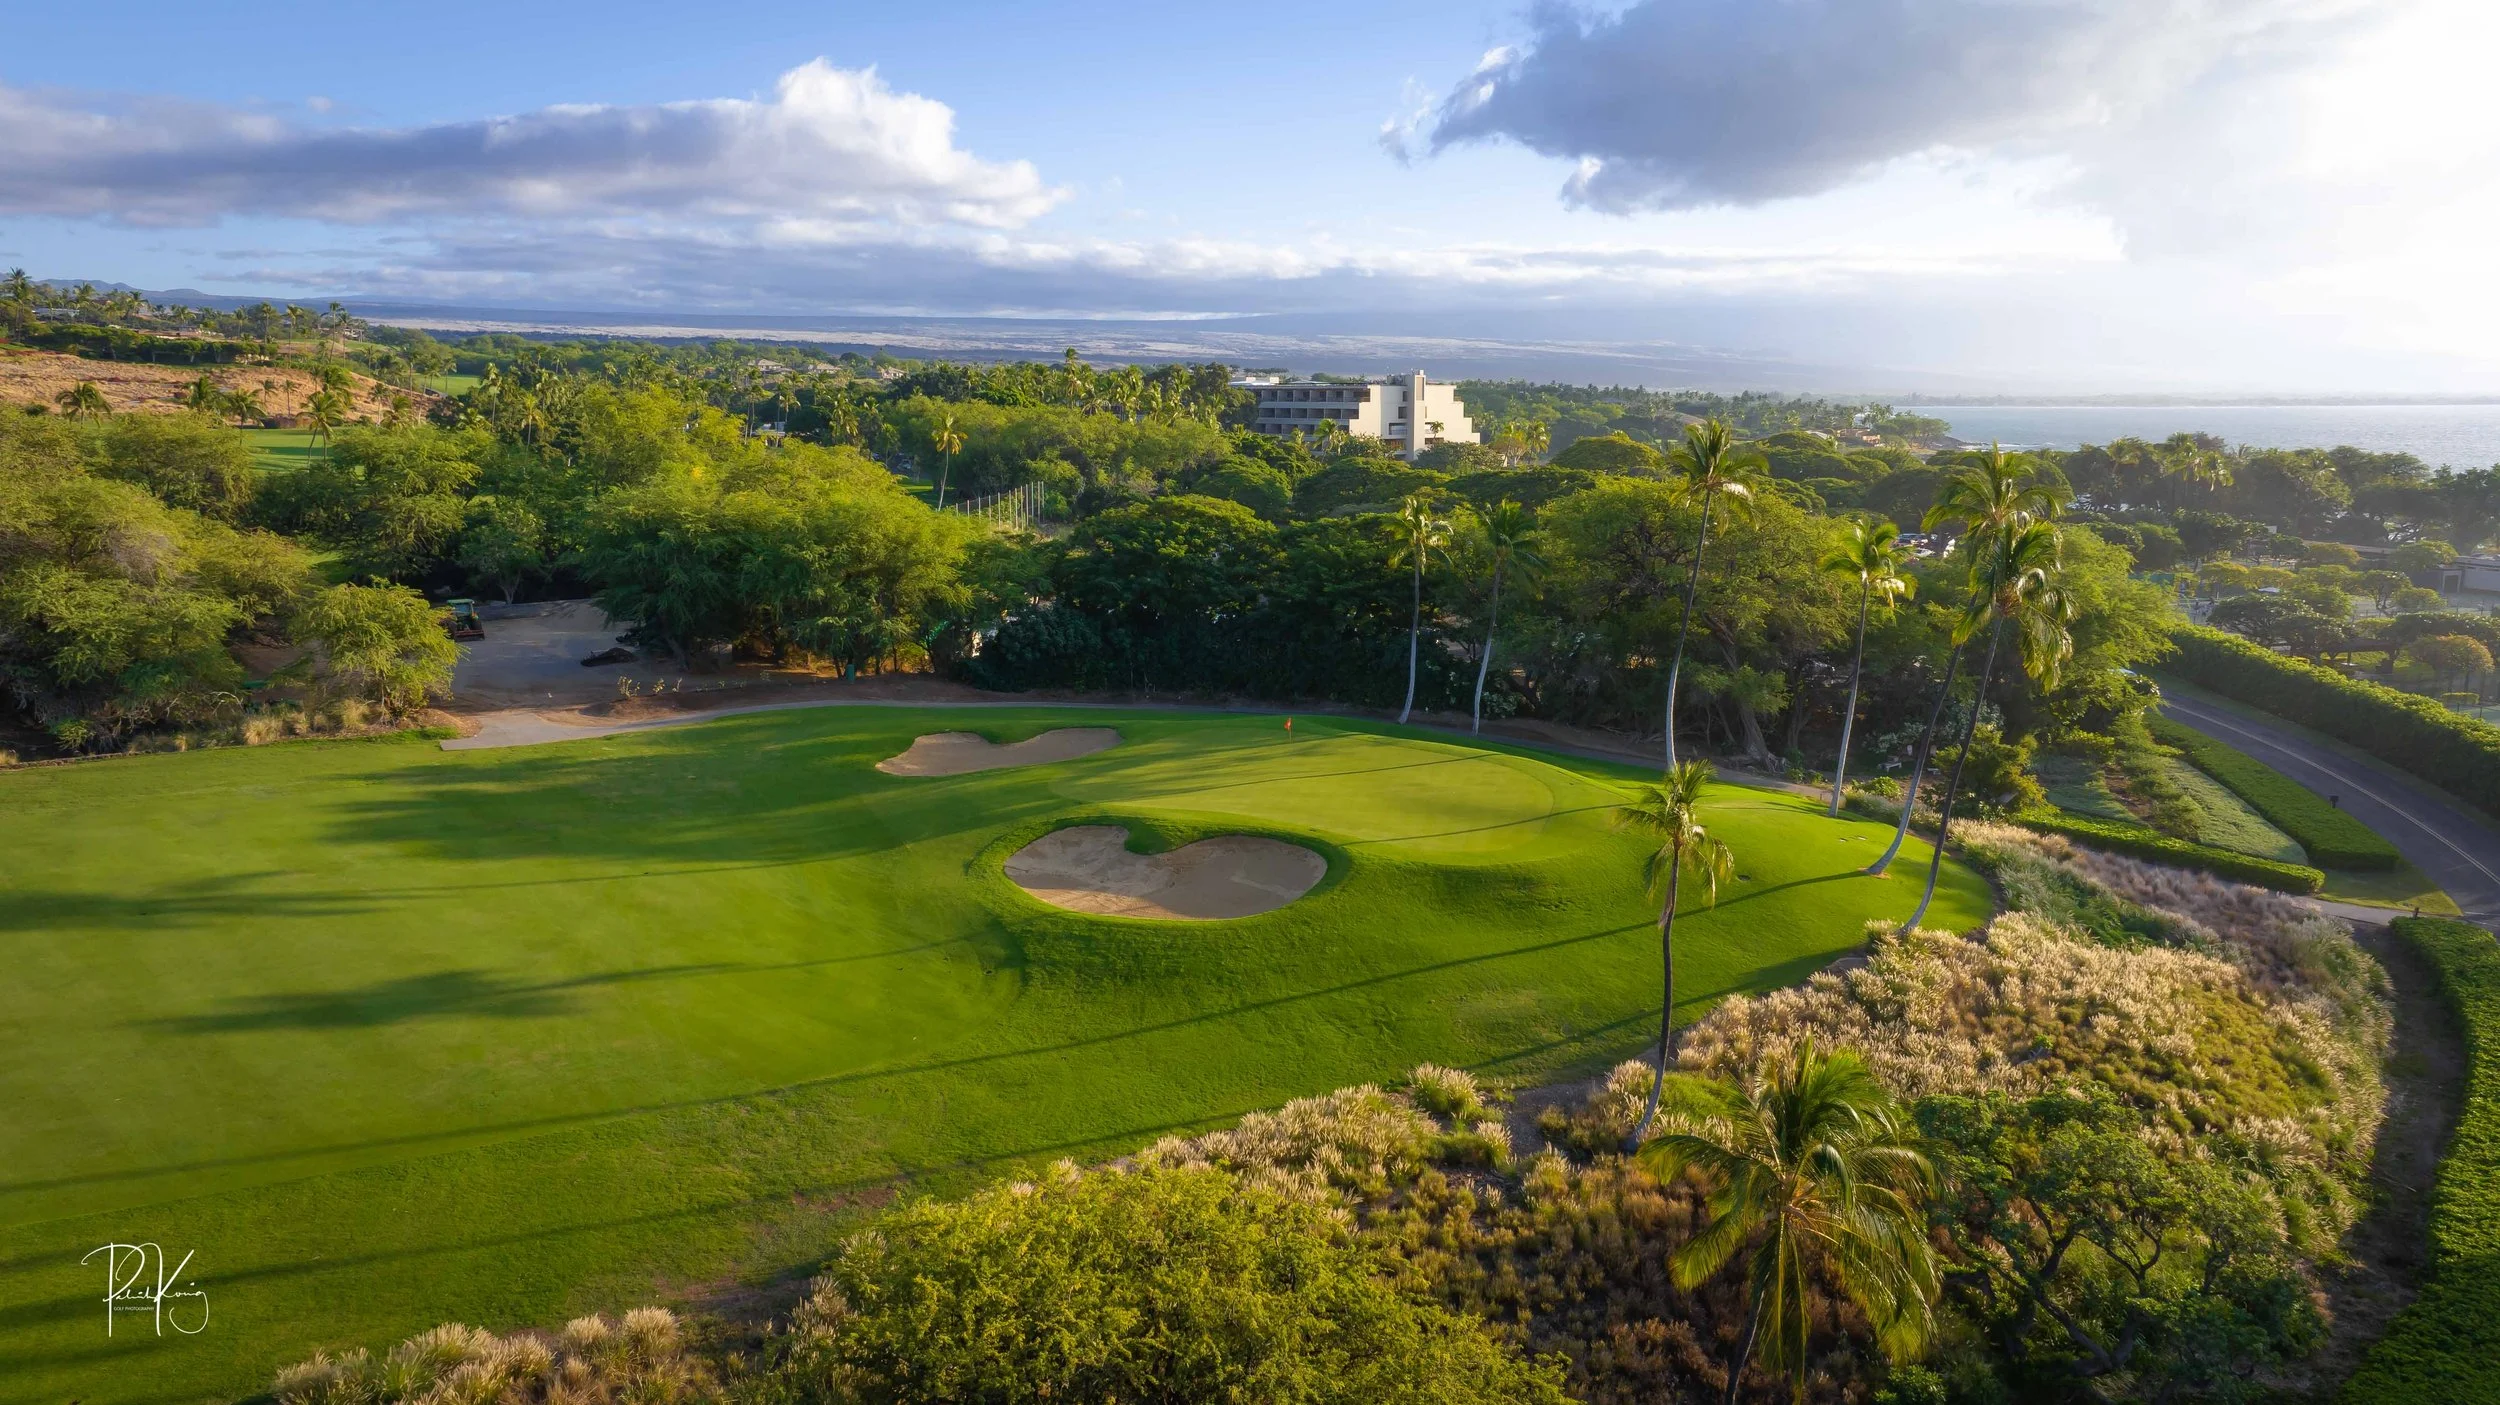
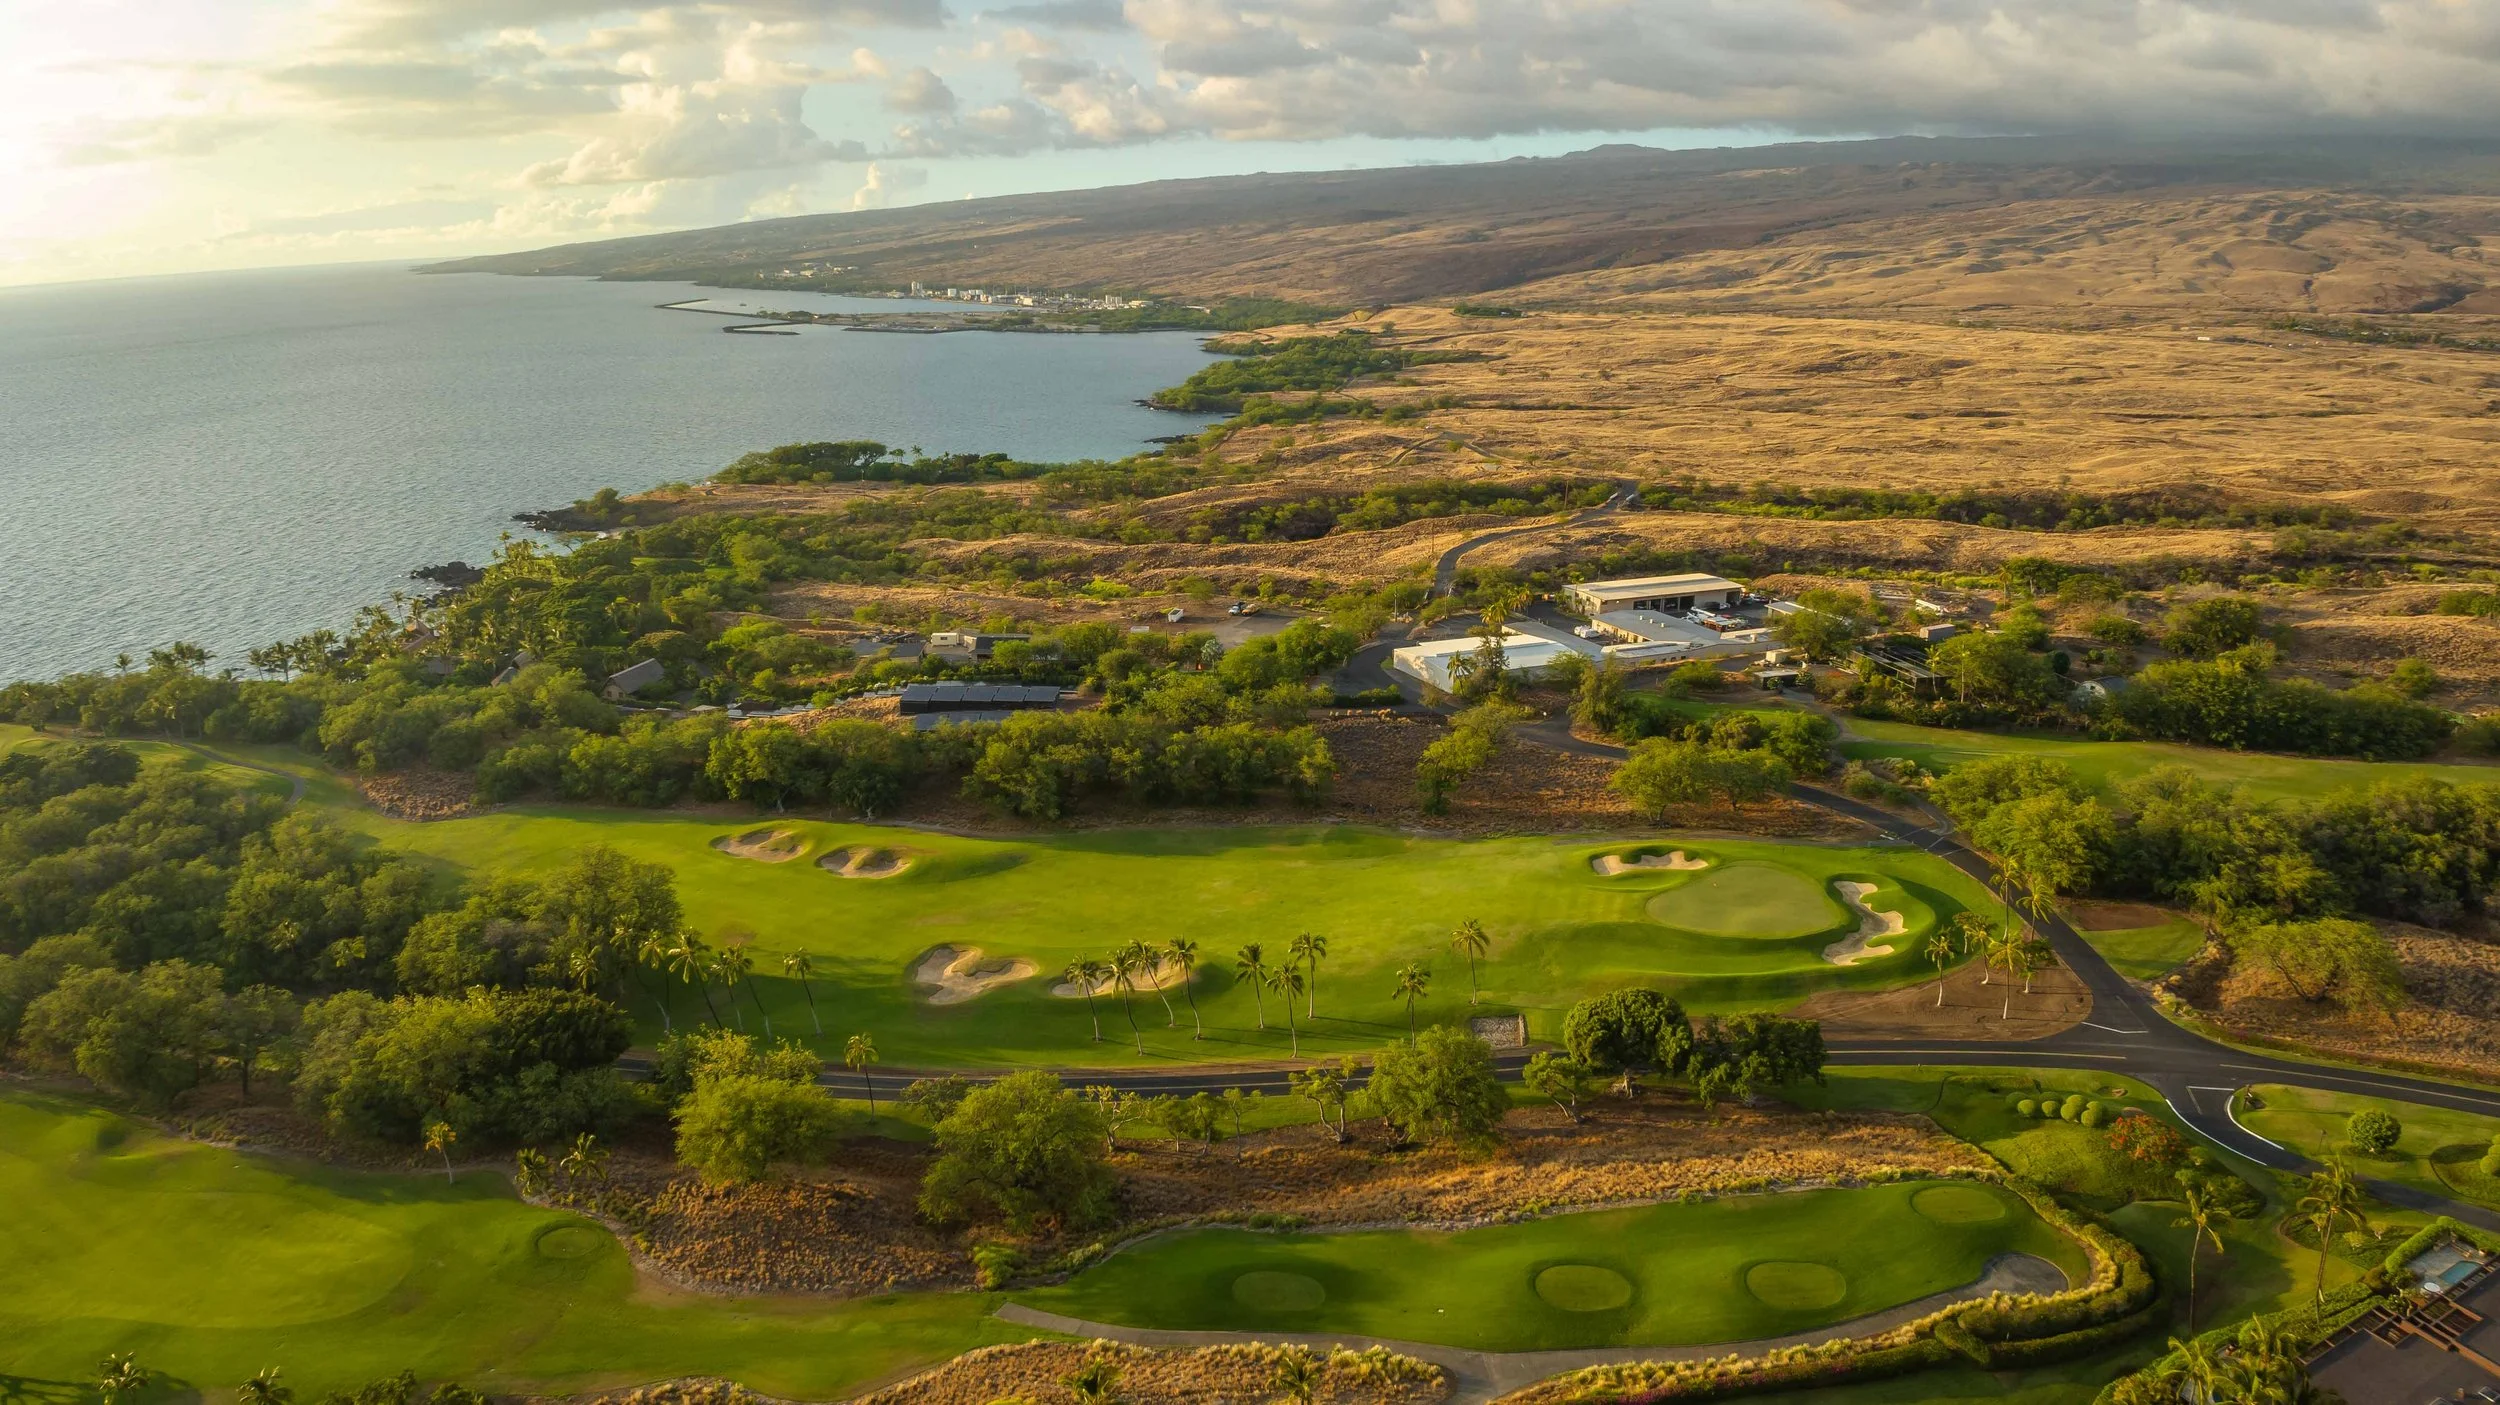
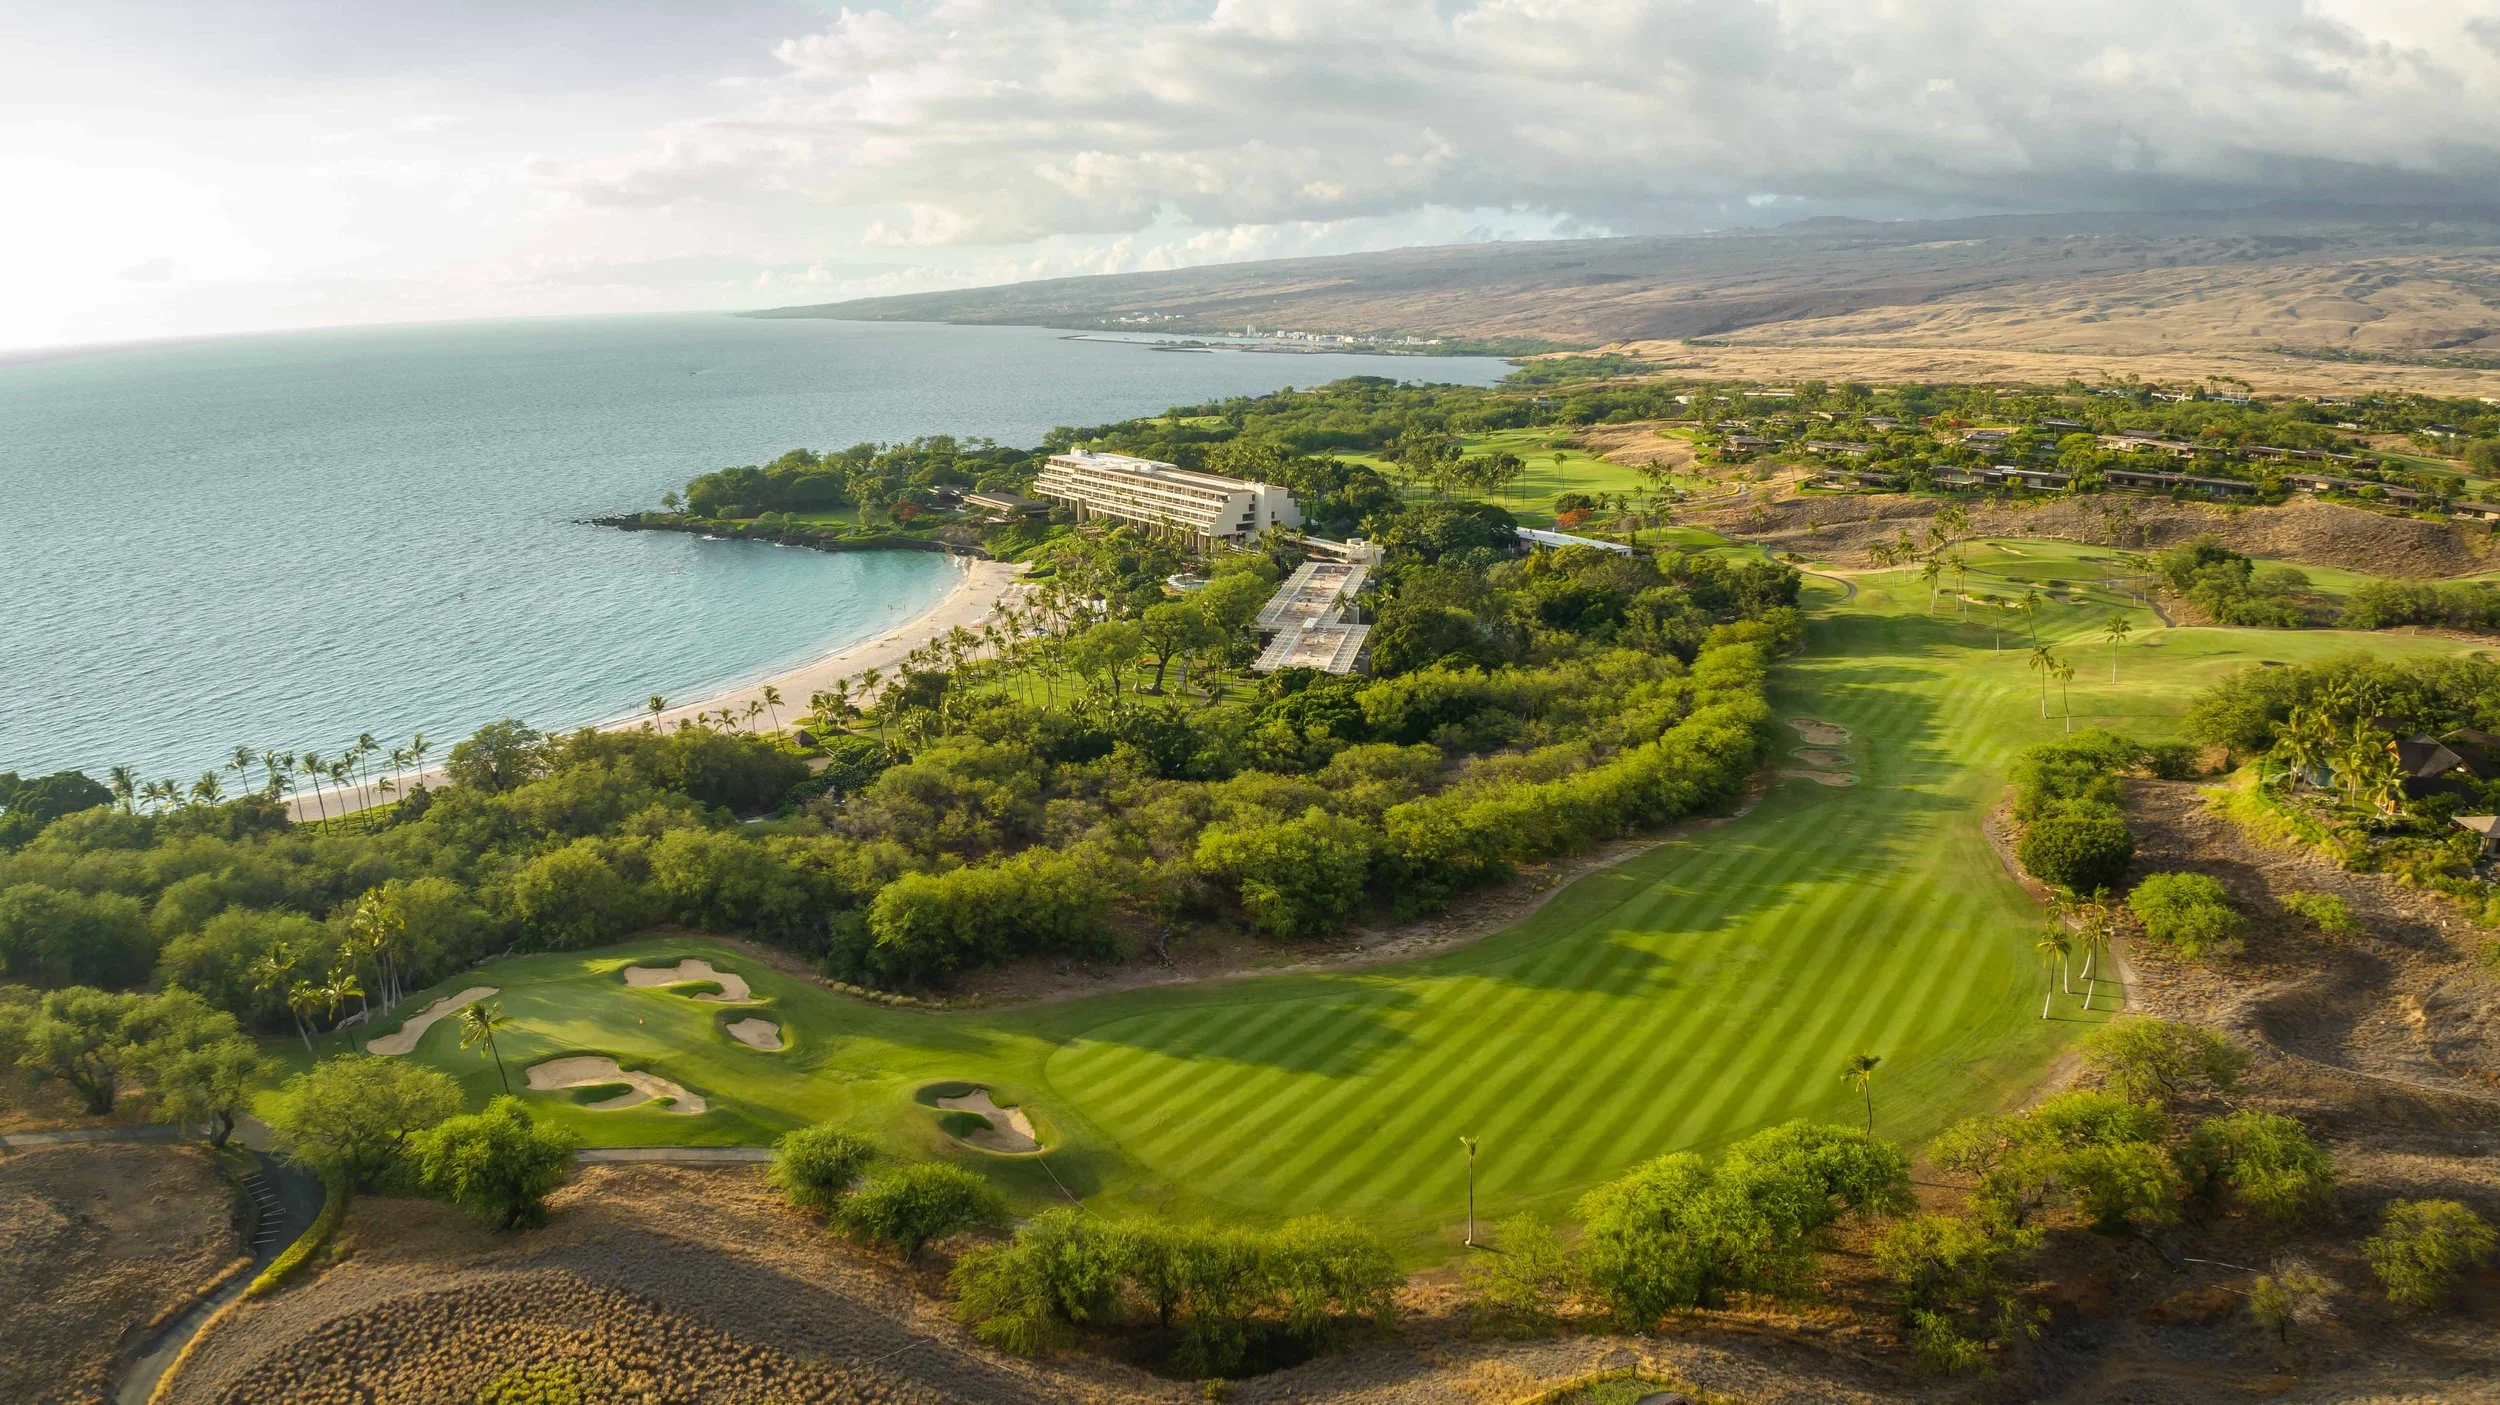
The front nine finishes with a fun downhill par 4 and sweeping views of the ocean and Mauna Kea resort. With the entire golf hole sloping down and towards the ocean, the 9th plays much shorter than the scorecard suggest. The green is also well protected with a trio of bunkers. A quick look to the left and you will get a preview of the 18th green which sits right next to the 9th hole. Any wise golfer will take a peak at the pin location and the slope of the green. A good mental note can come in handy when assessing your upcoming approach into 18.
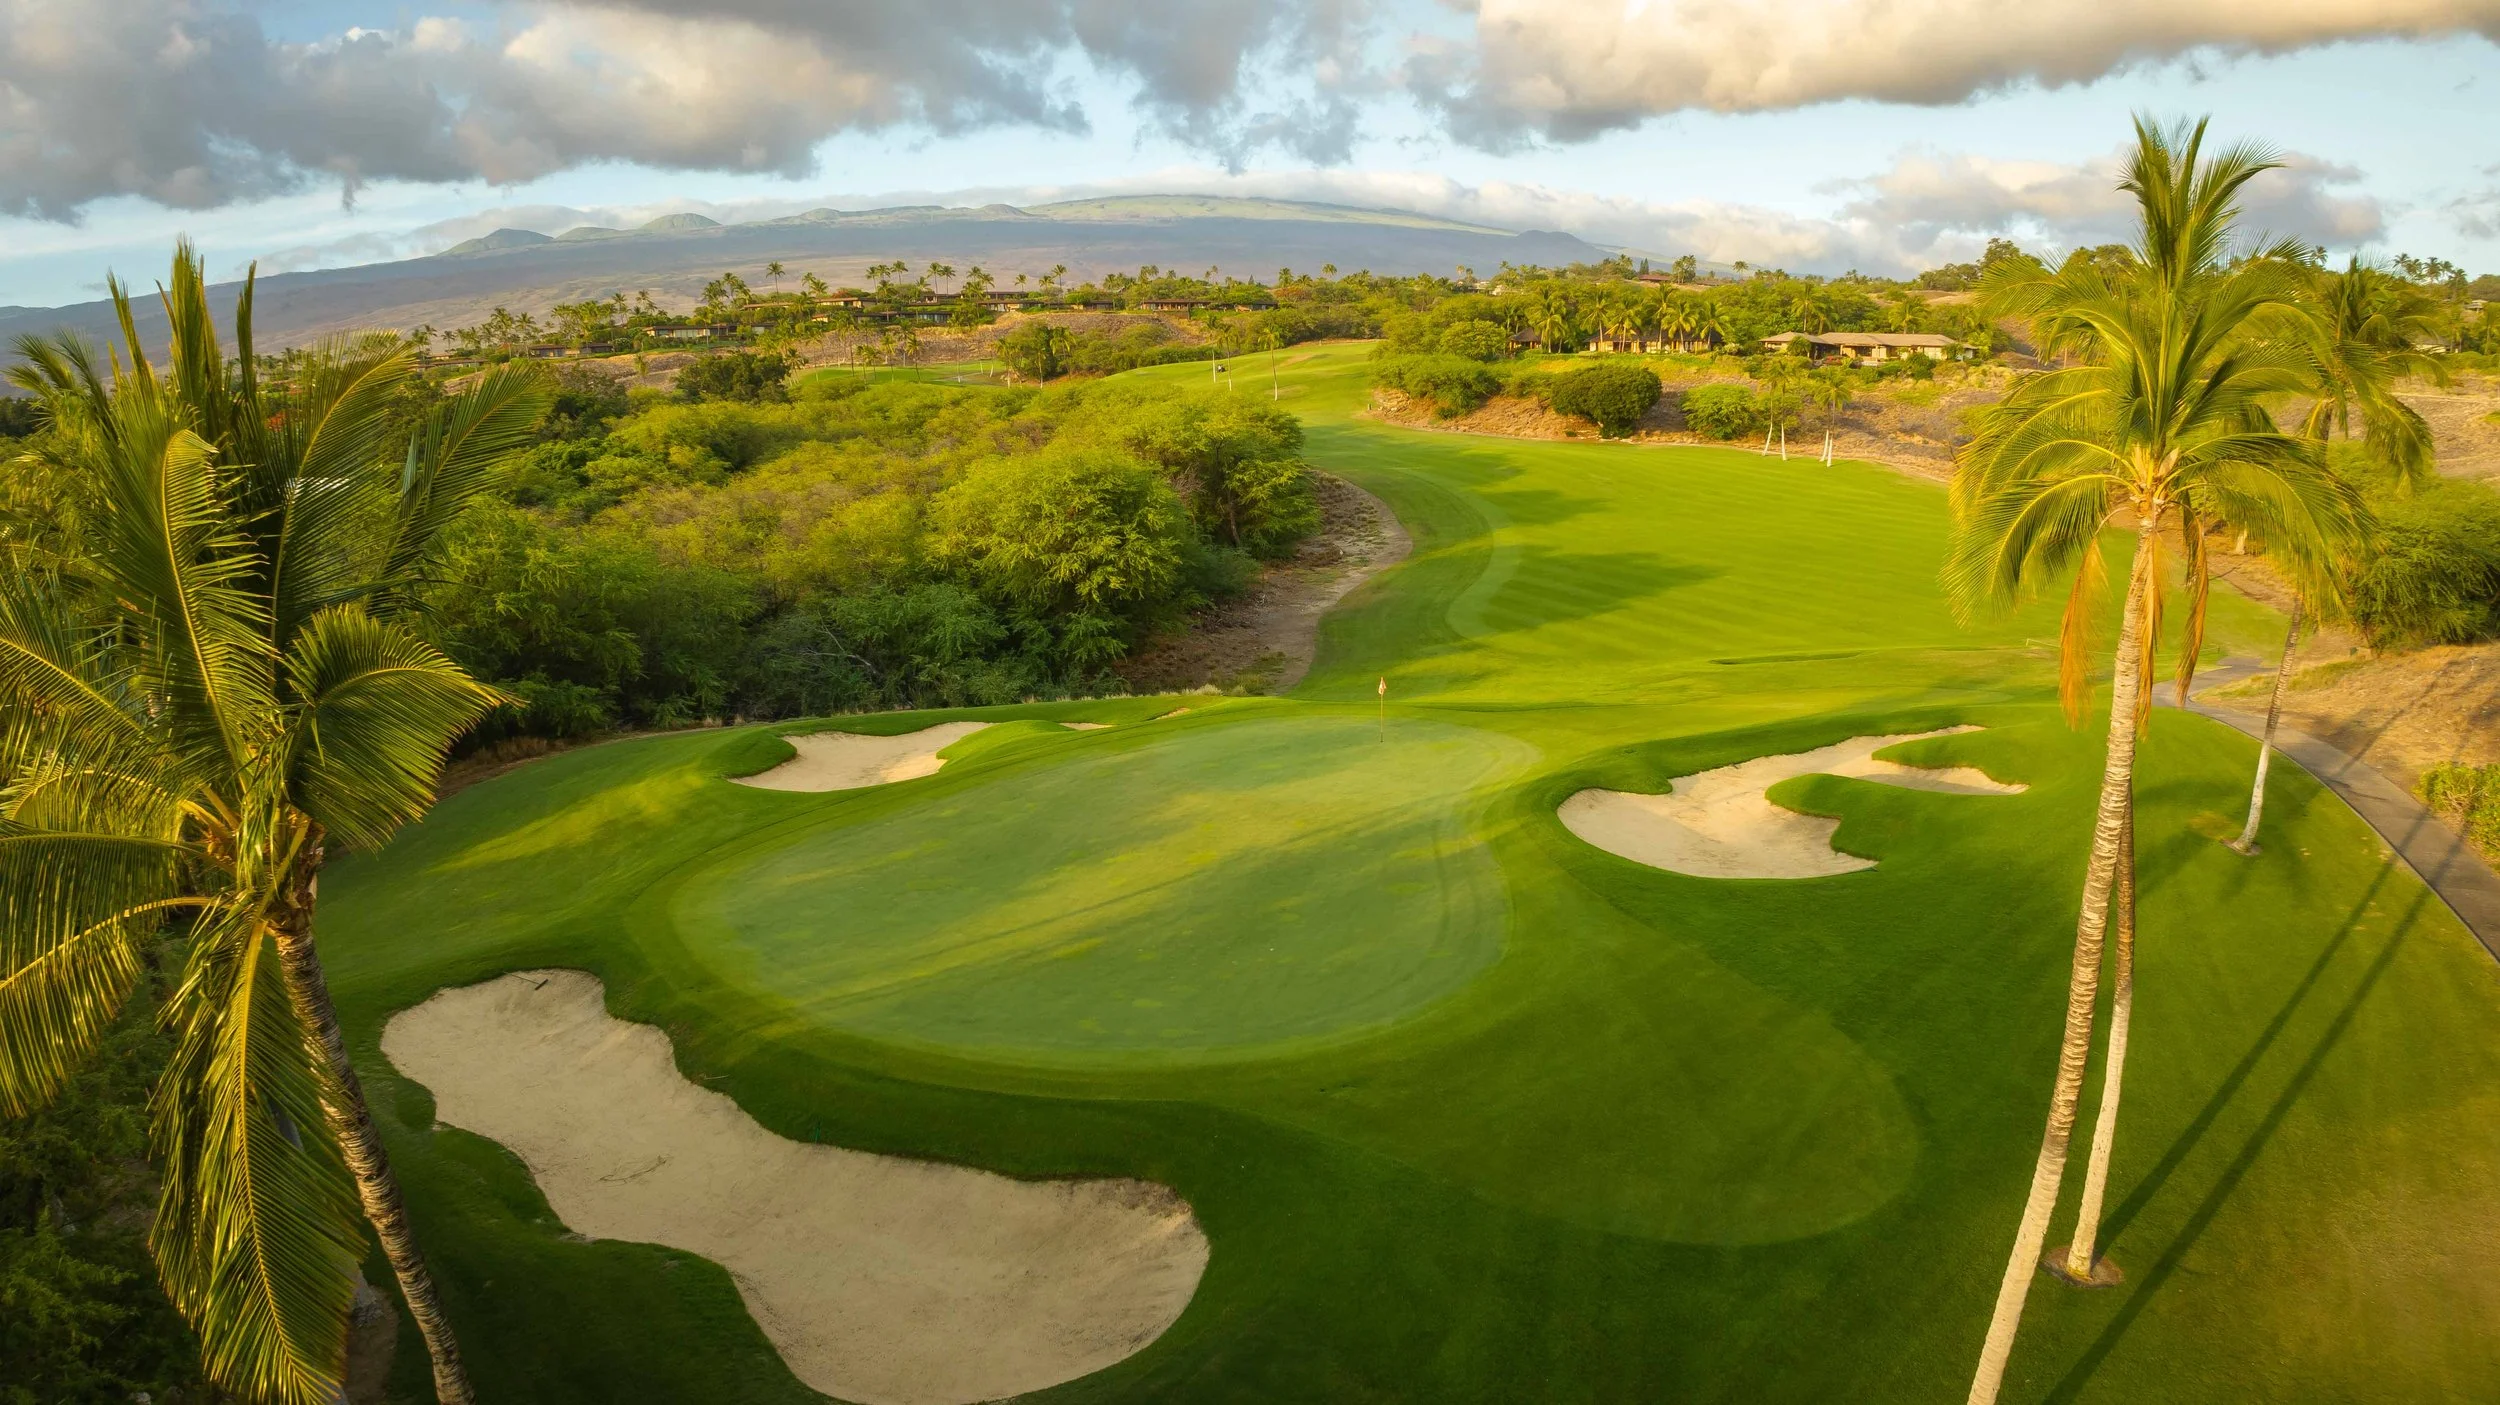
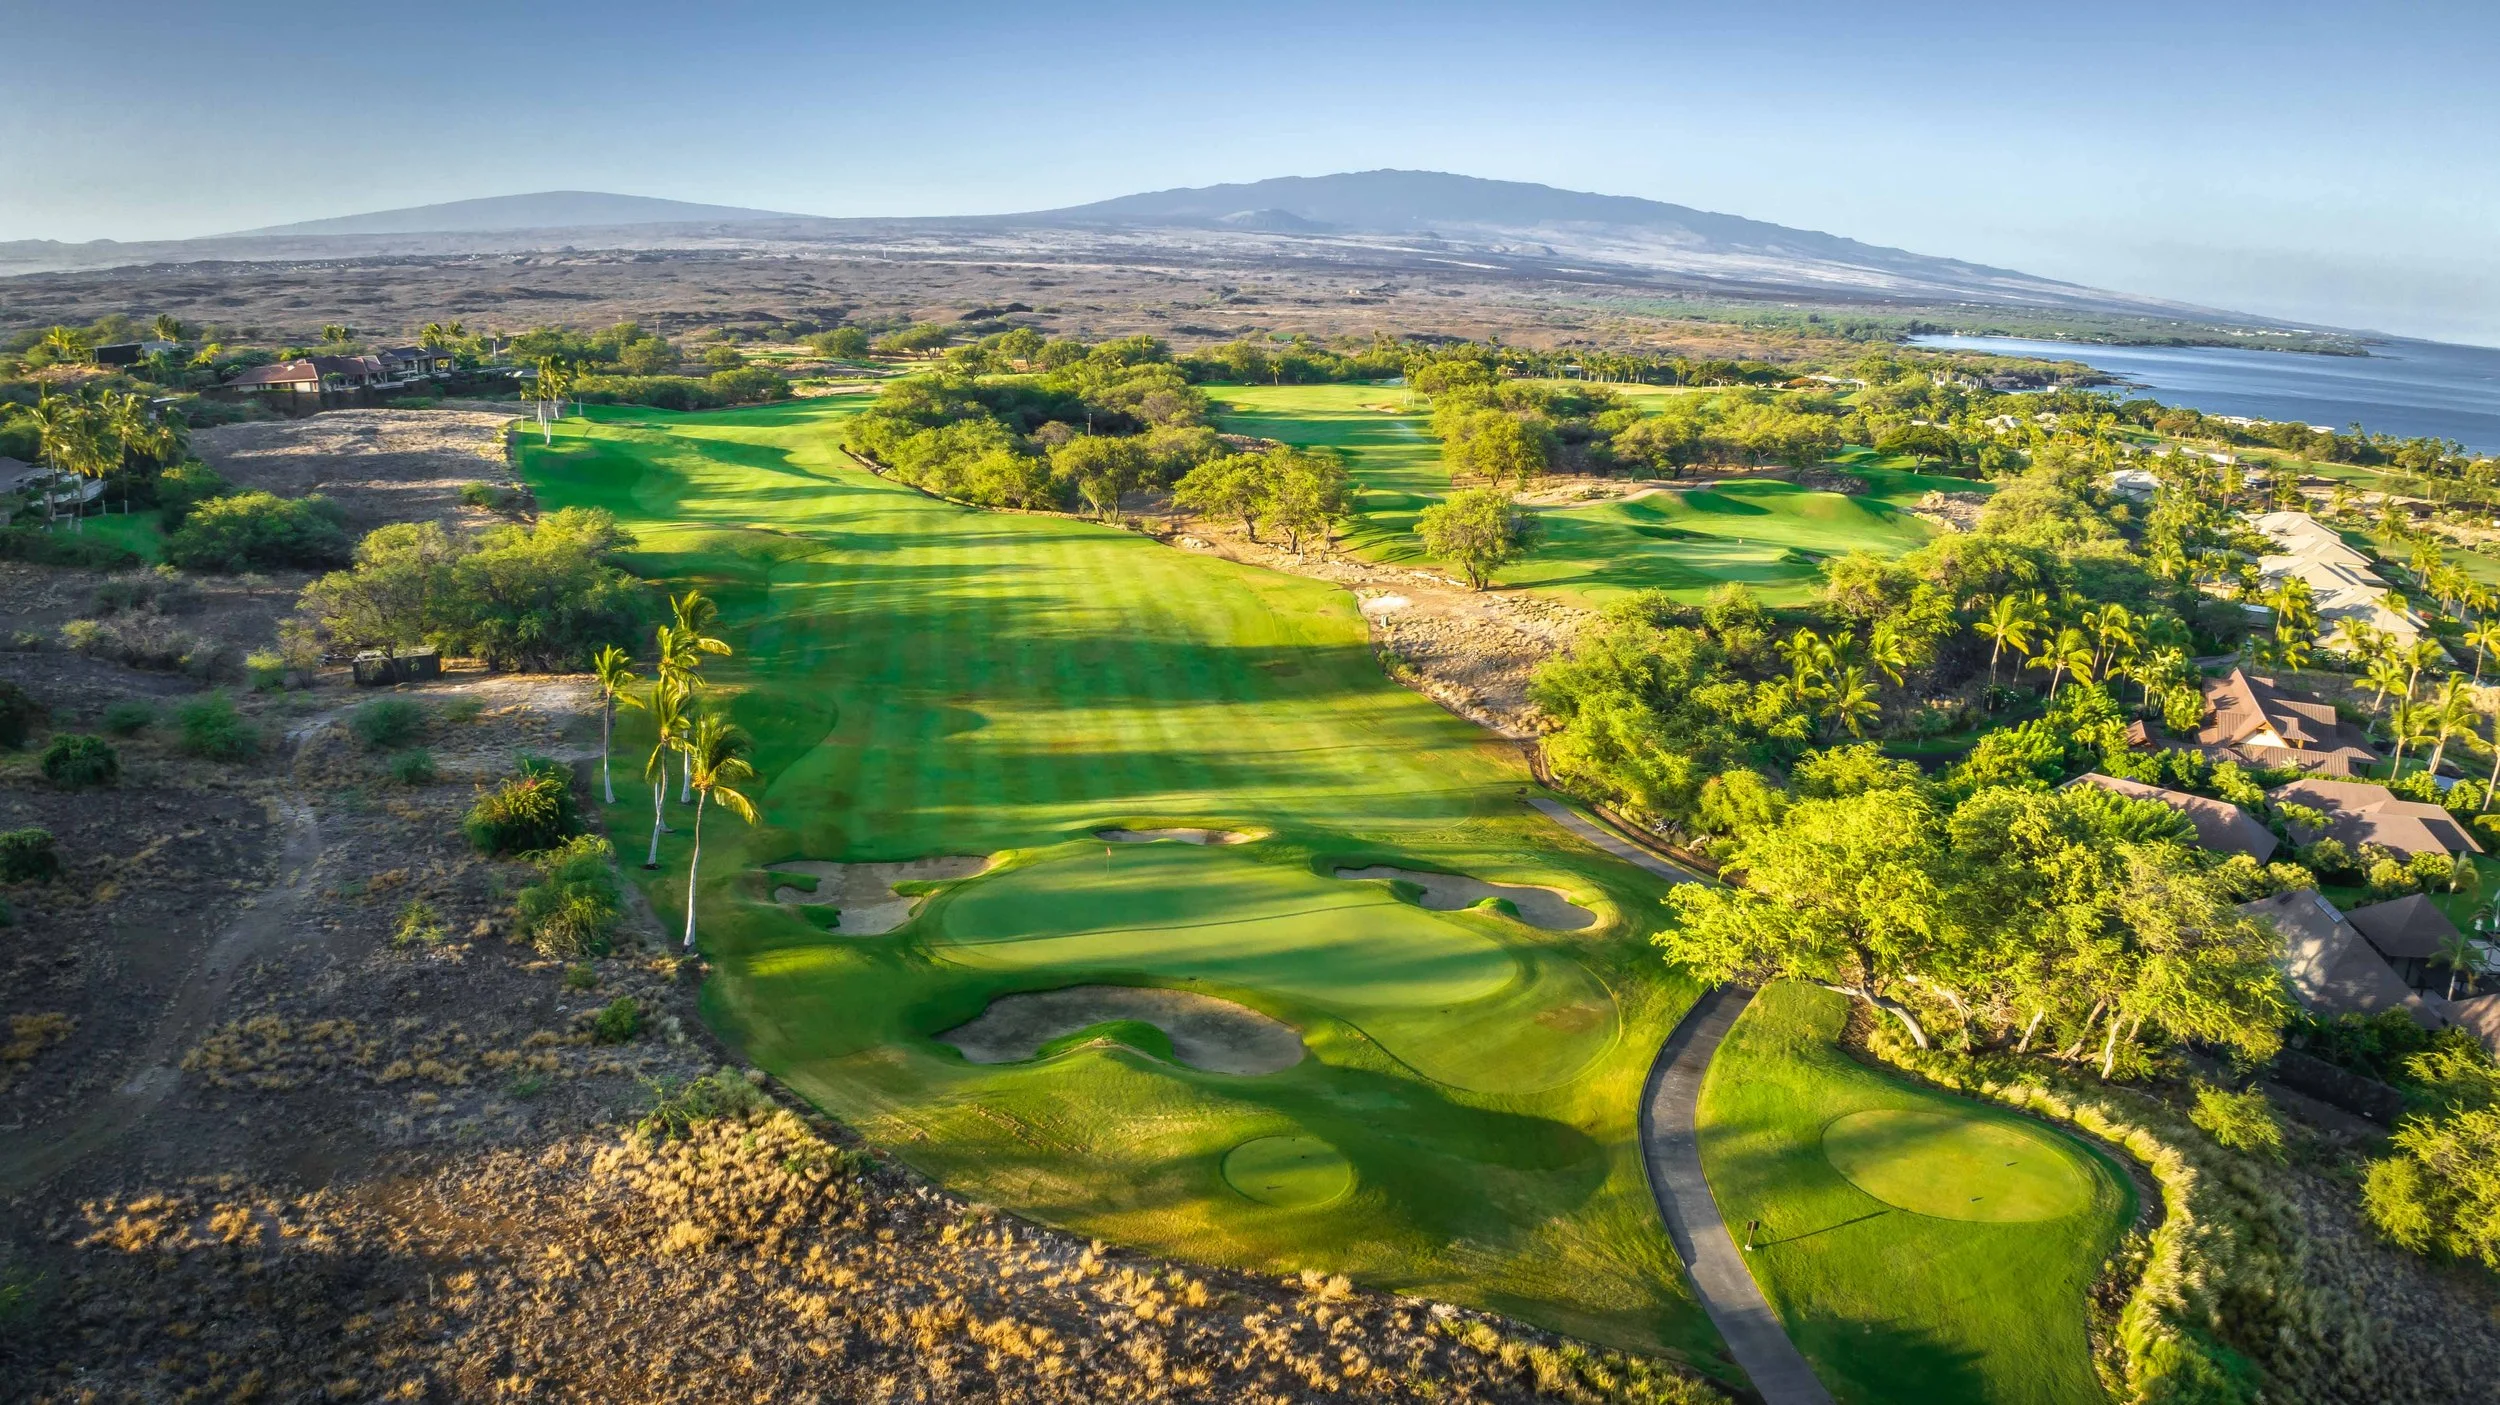
Hole #10 - Par 5 - 567 yards
I almost always manage to find some sort of trouble on the winding 10th hole. The opening tee shot is key and anything long and left will run out of fairway. Anything too far to the right will find the jungle. The second shot has similar consequences but requires more accuracy if you want to attack this hole properly from the left hand side of the fairway. The green is perched on the top of a hill and has a trio of bunkers protecting it.
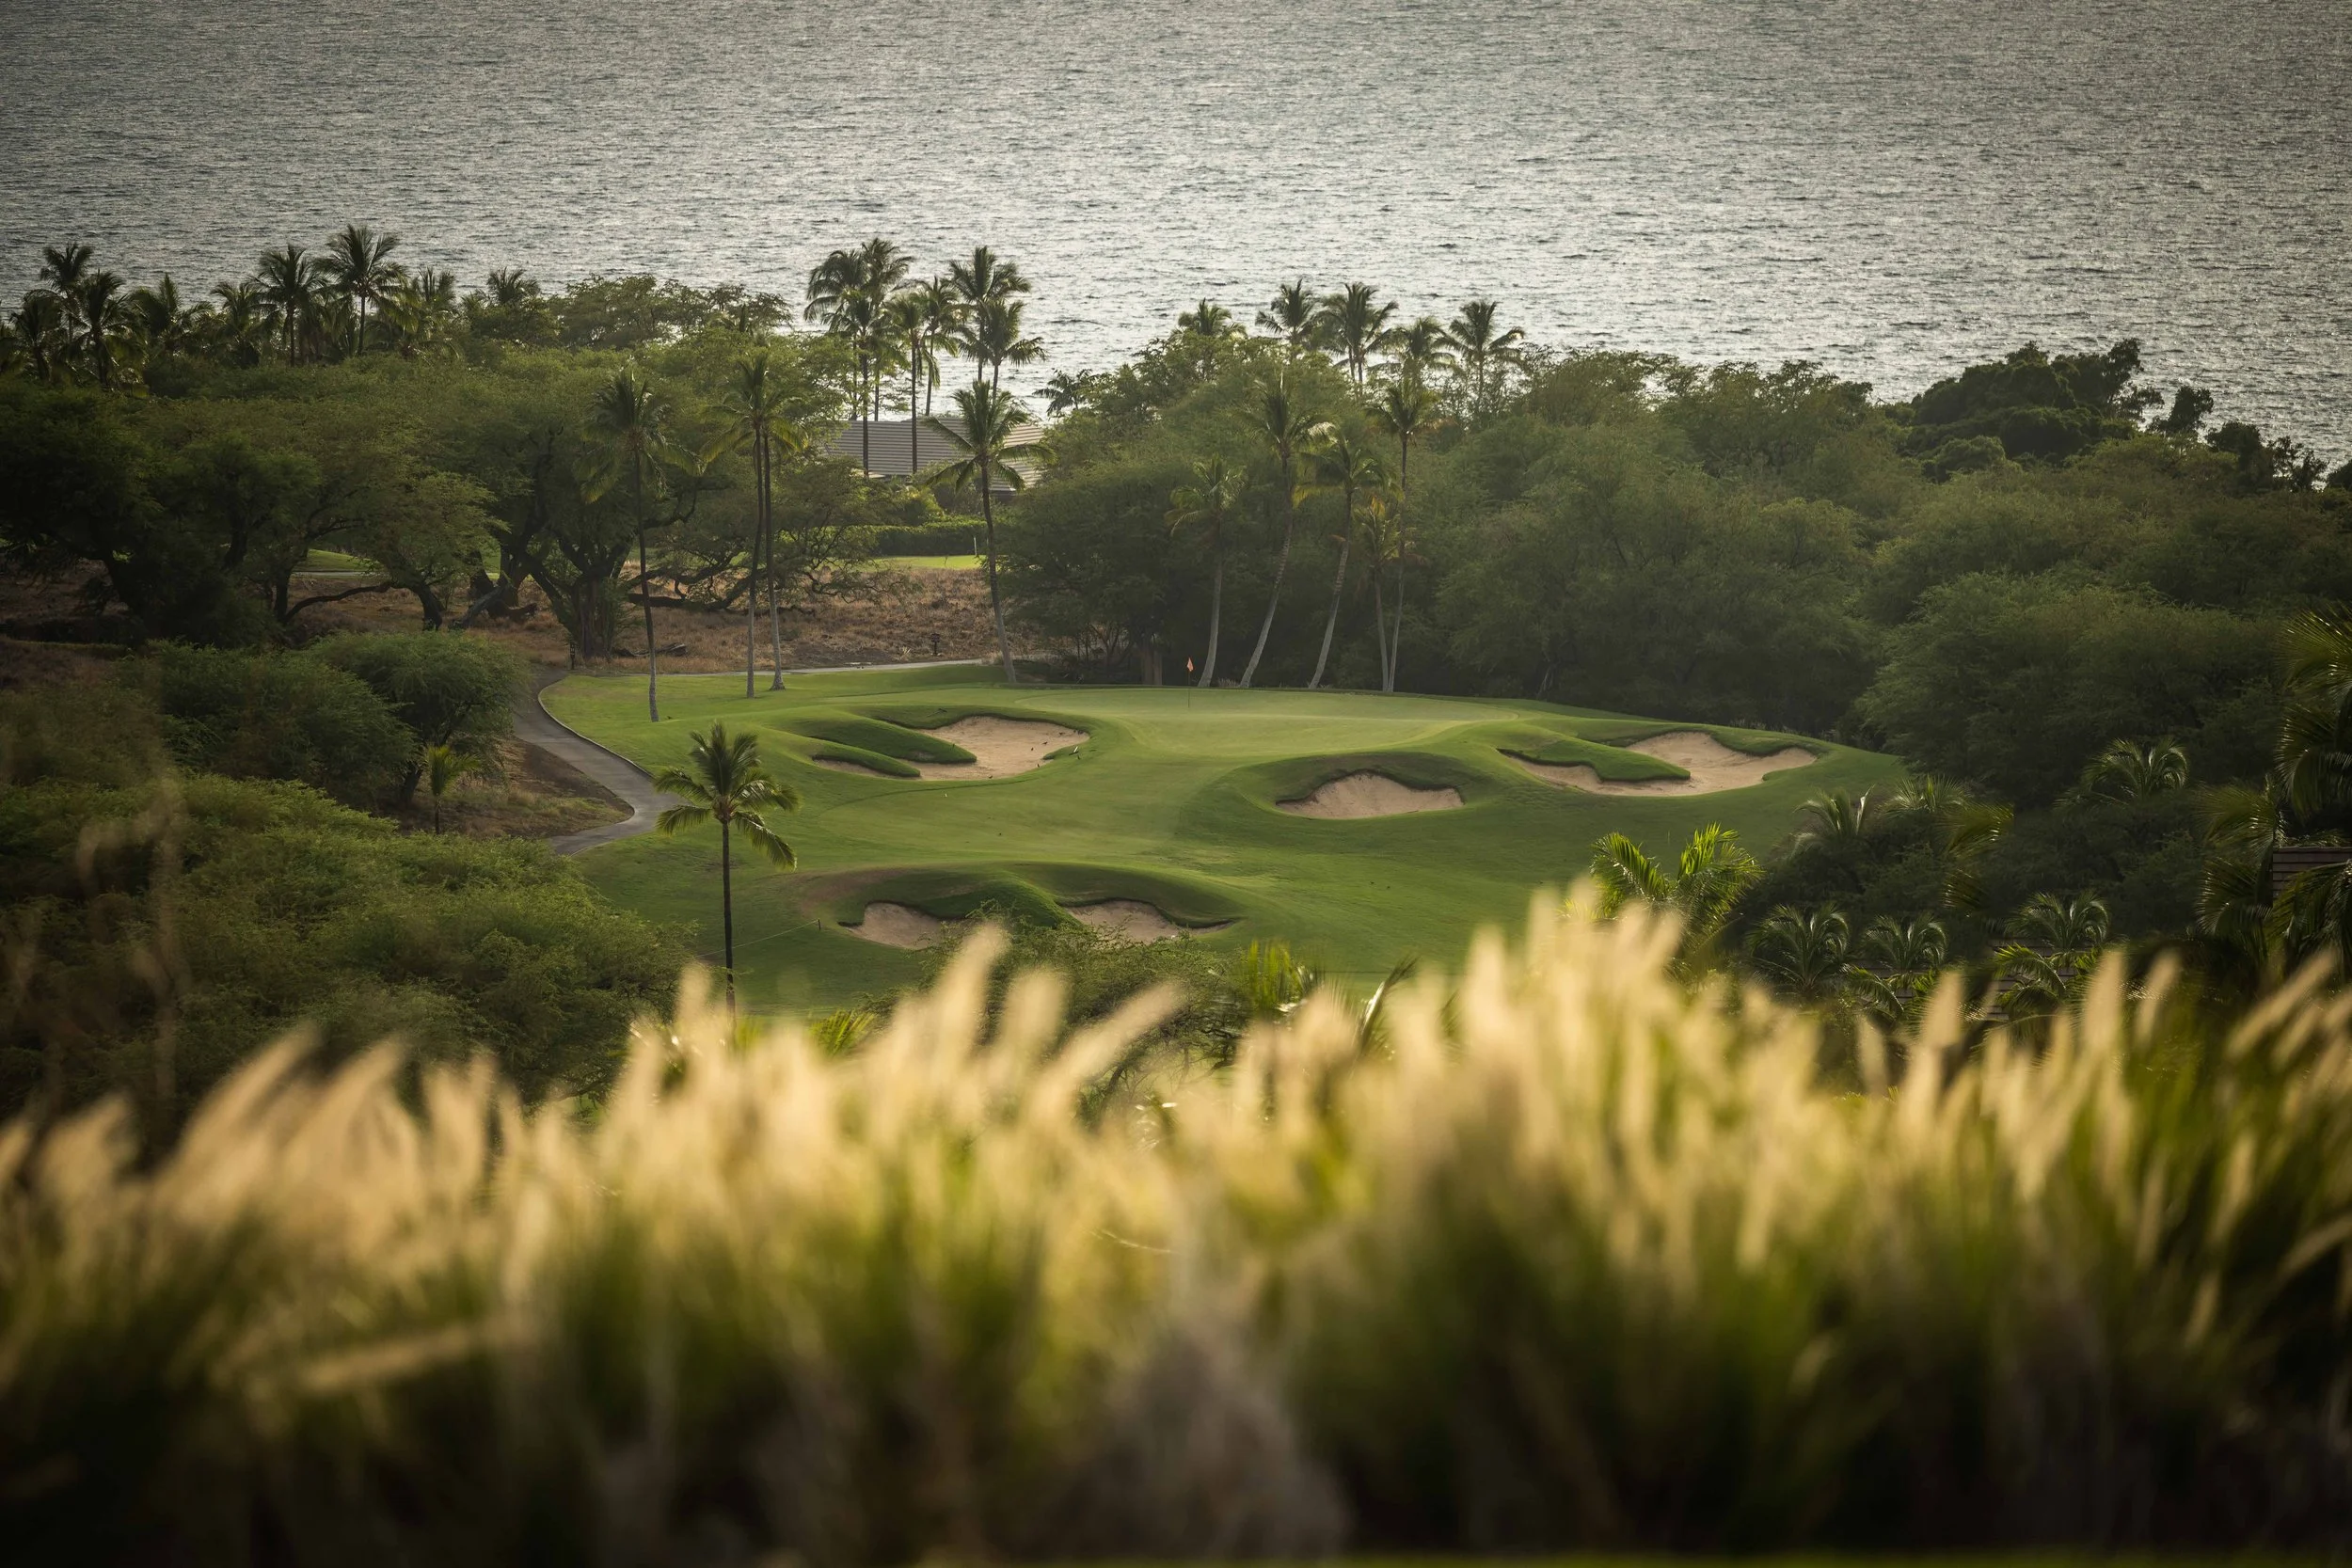

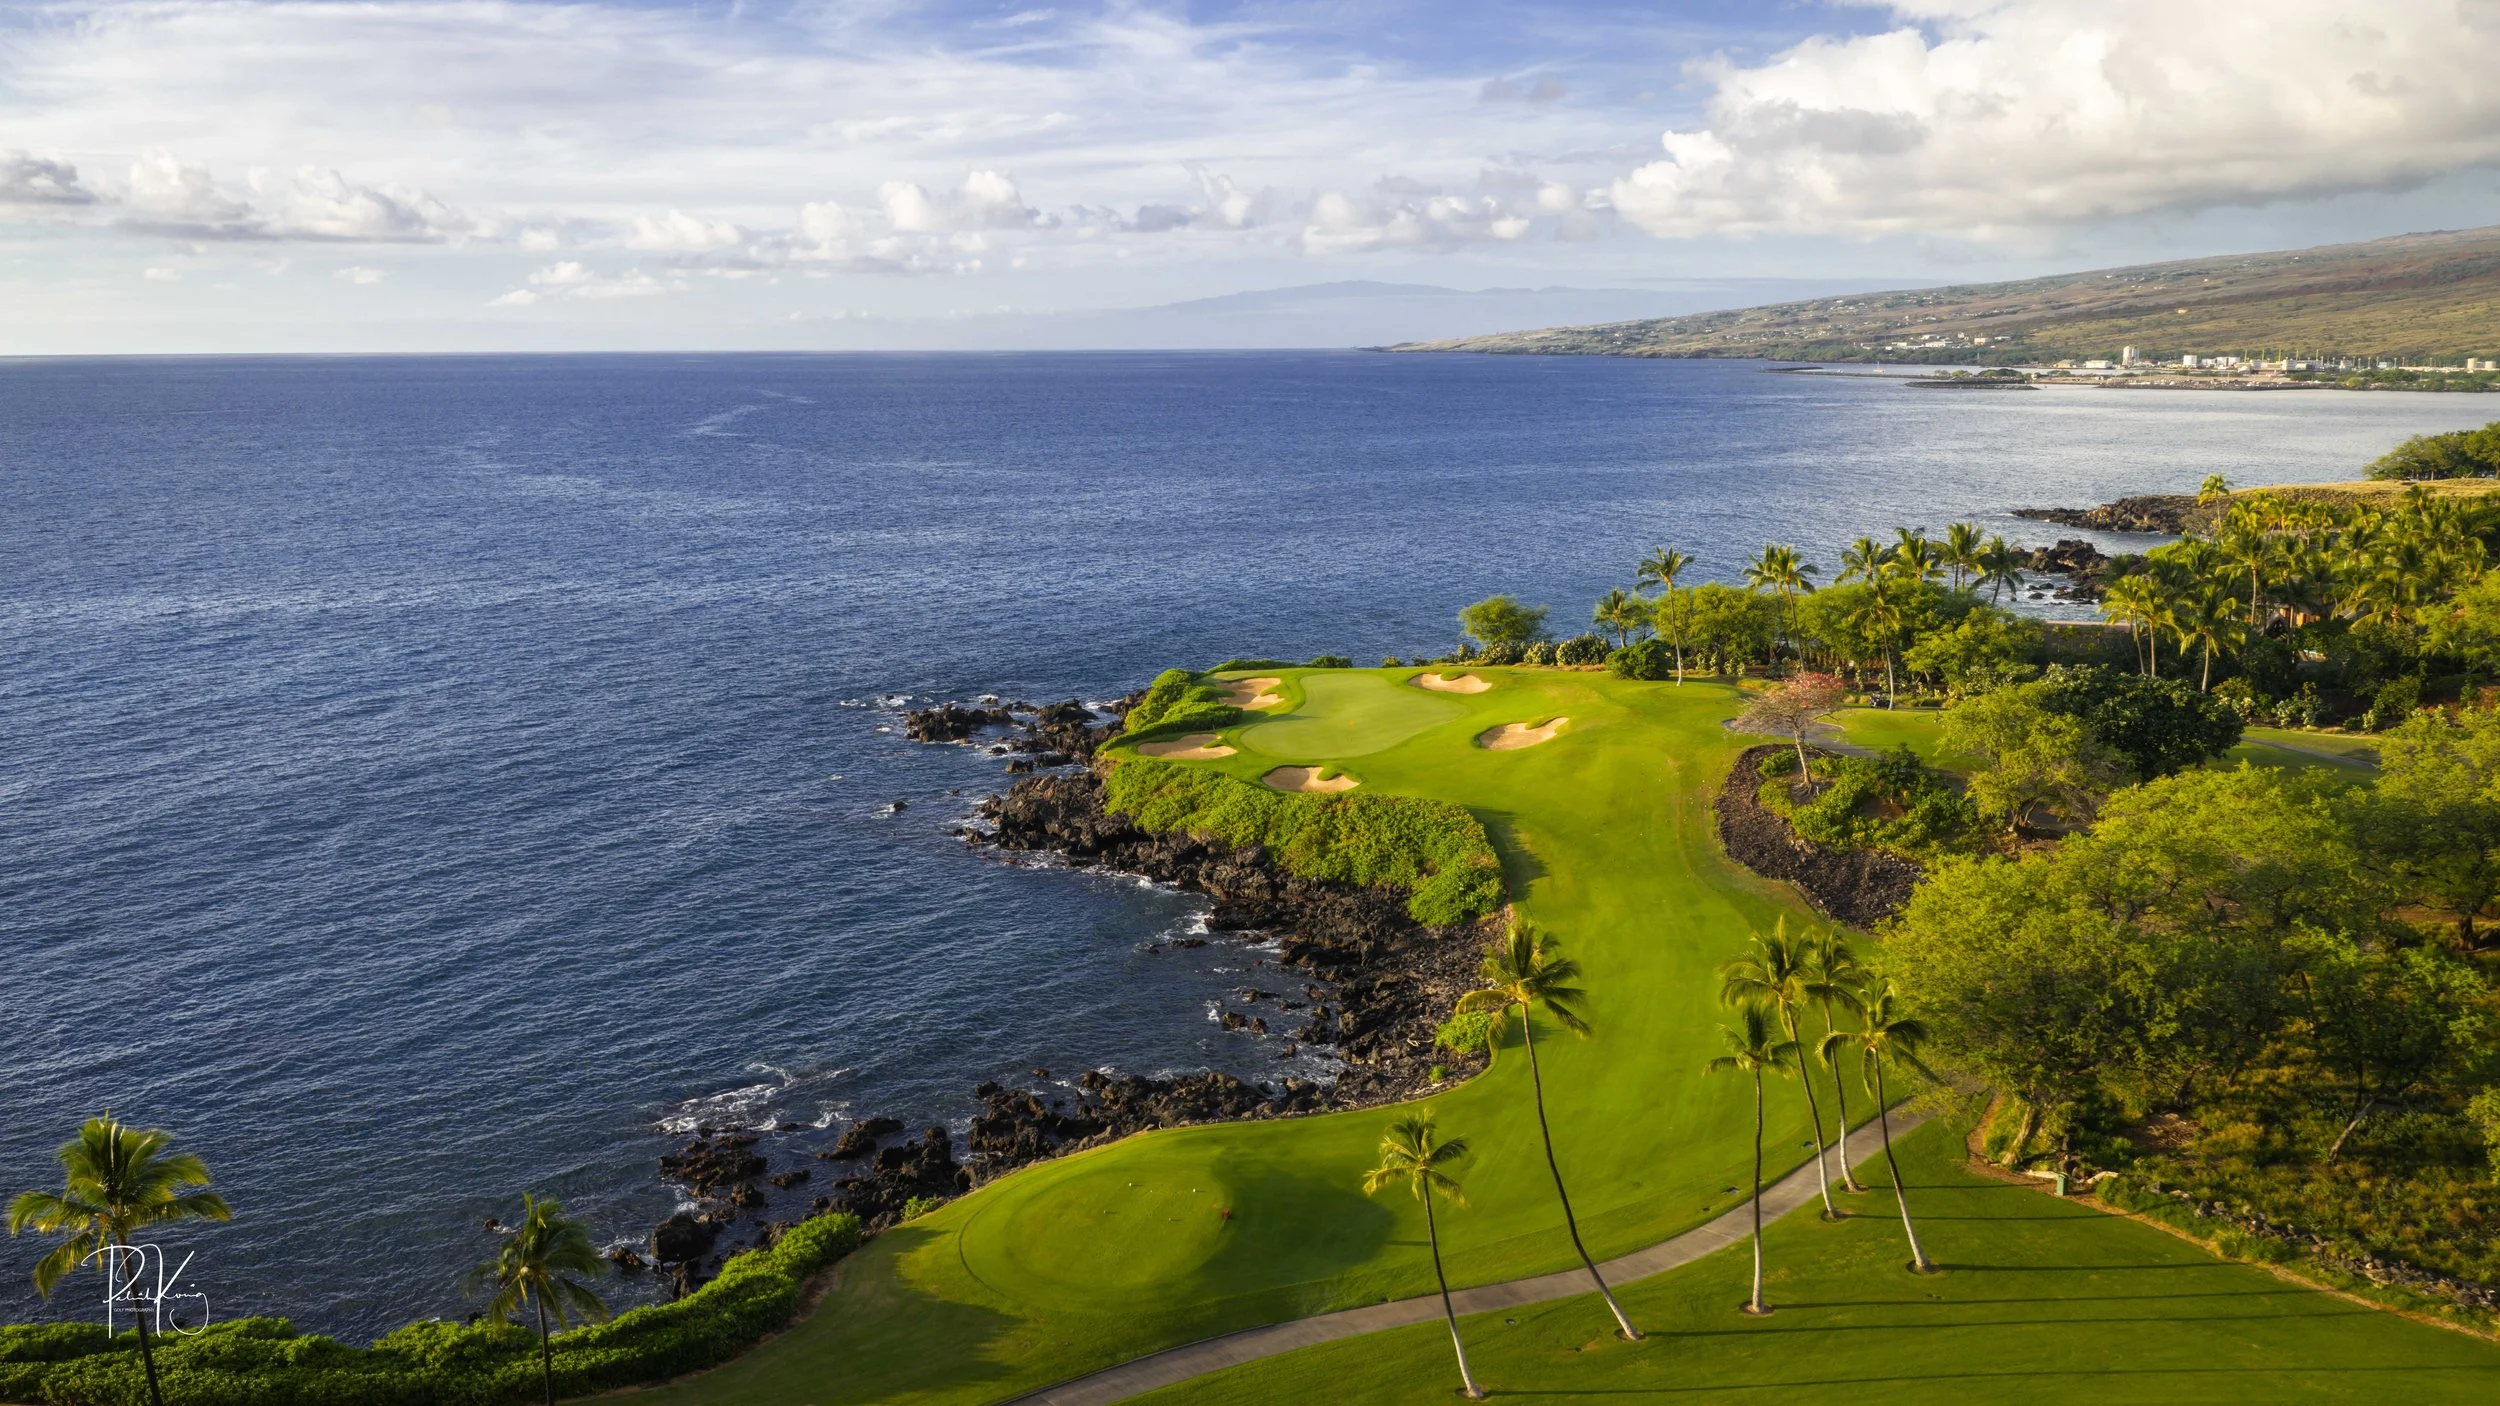
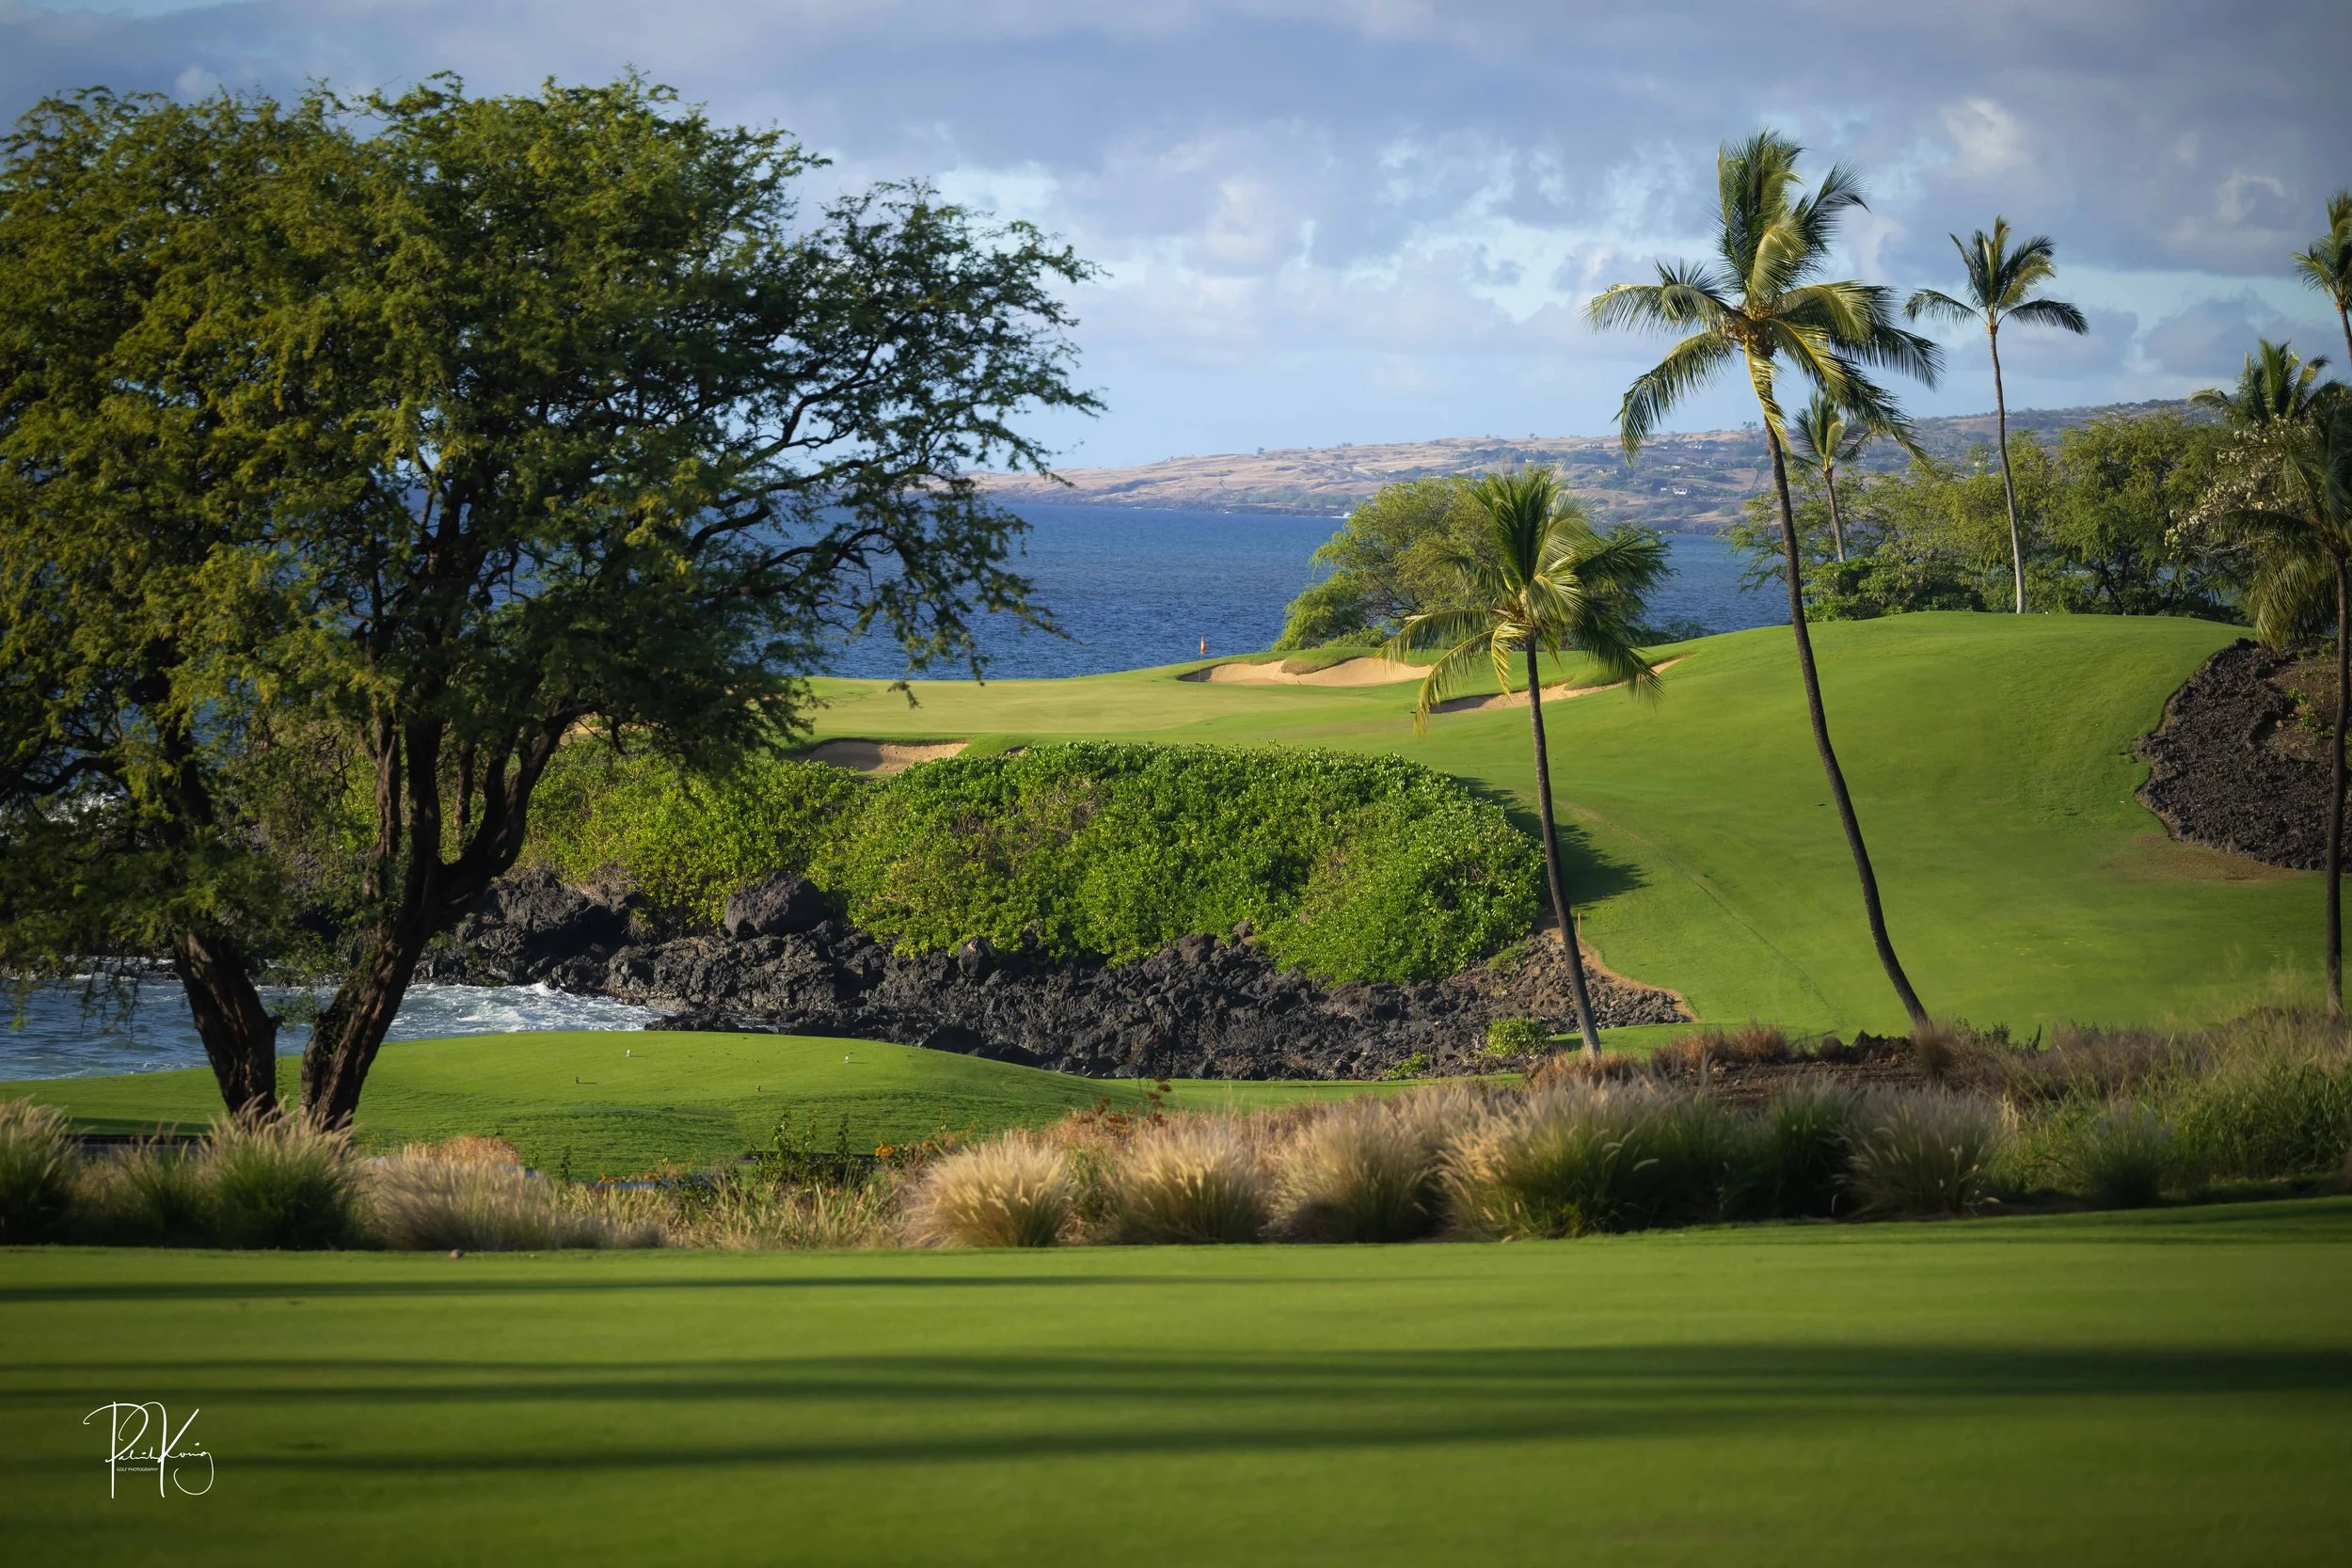
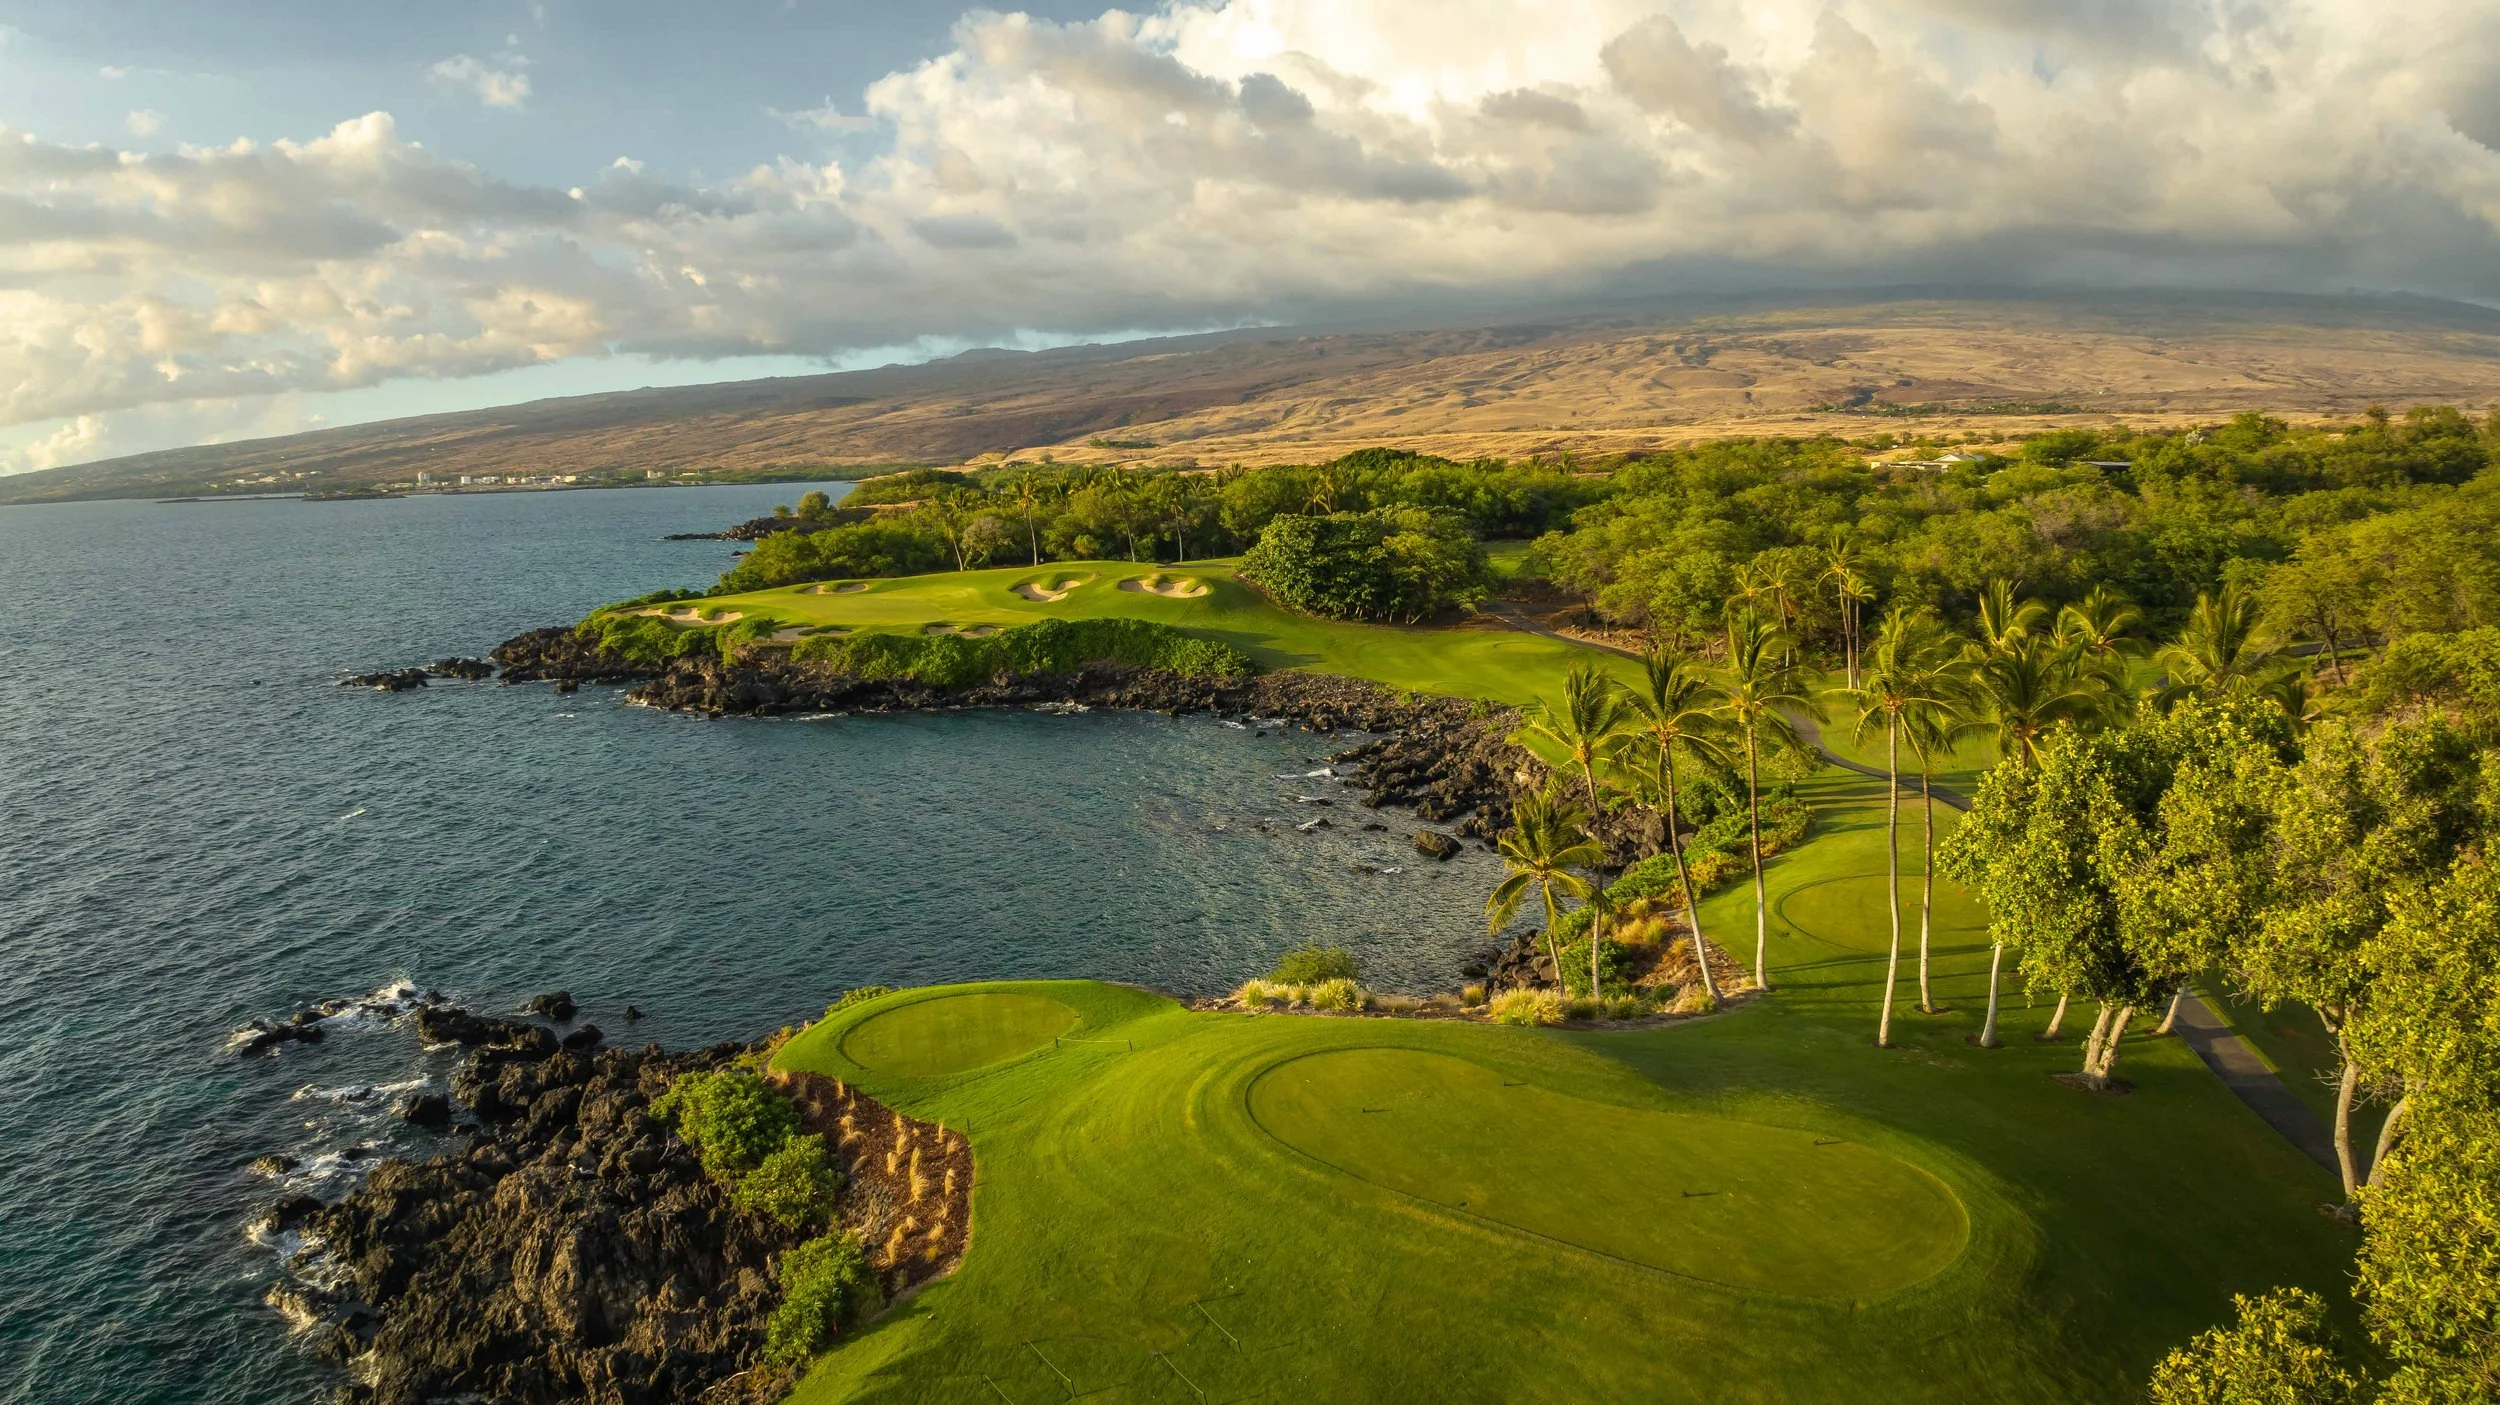
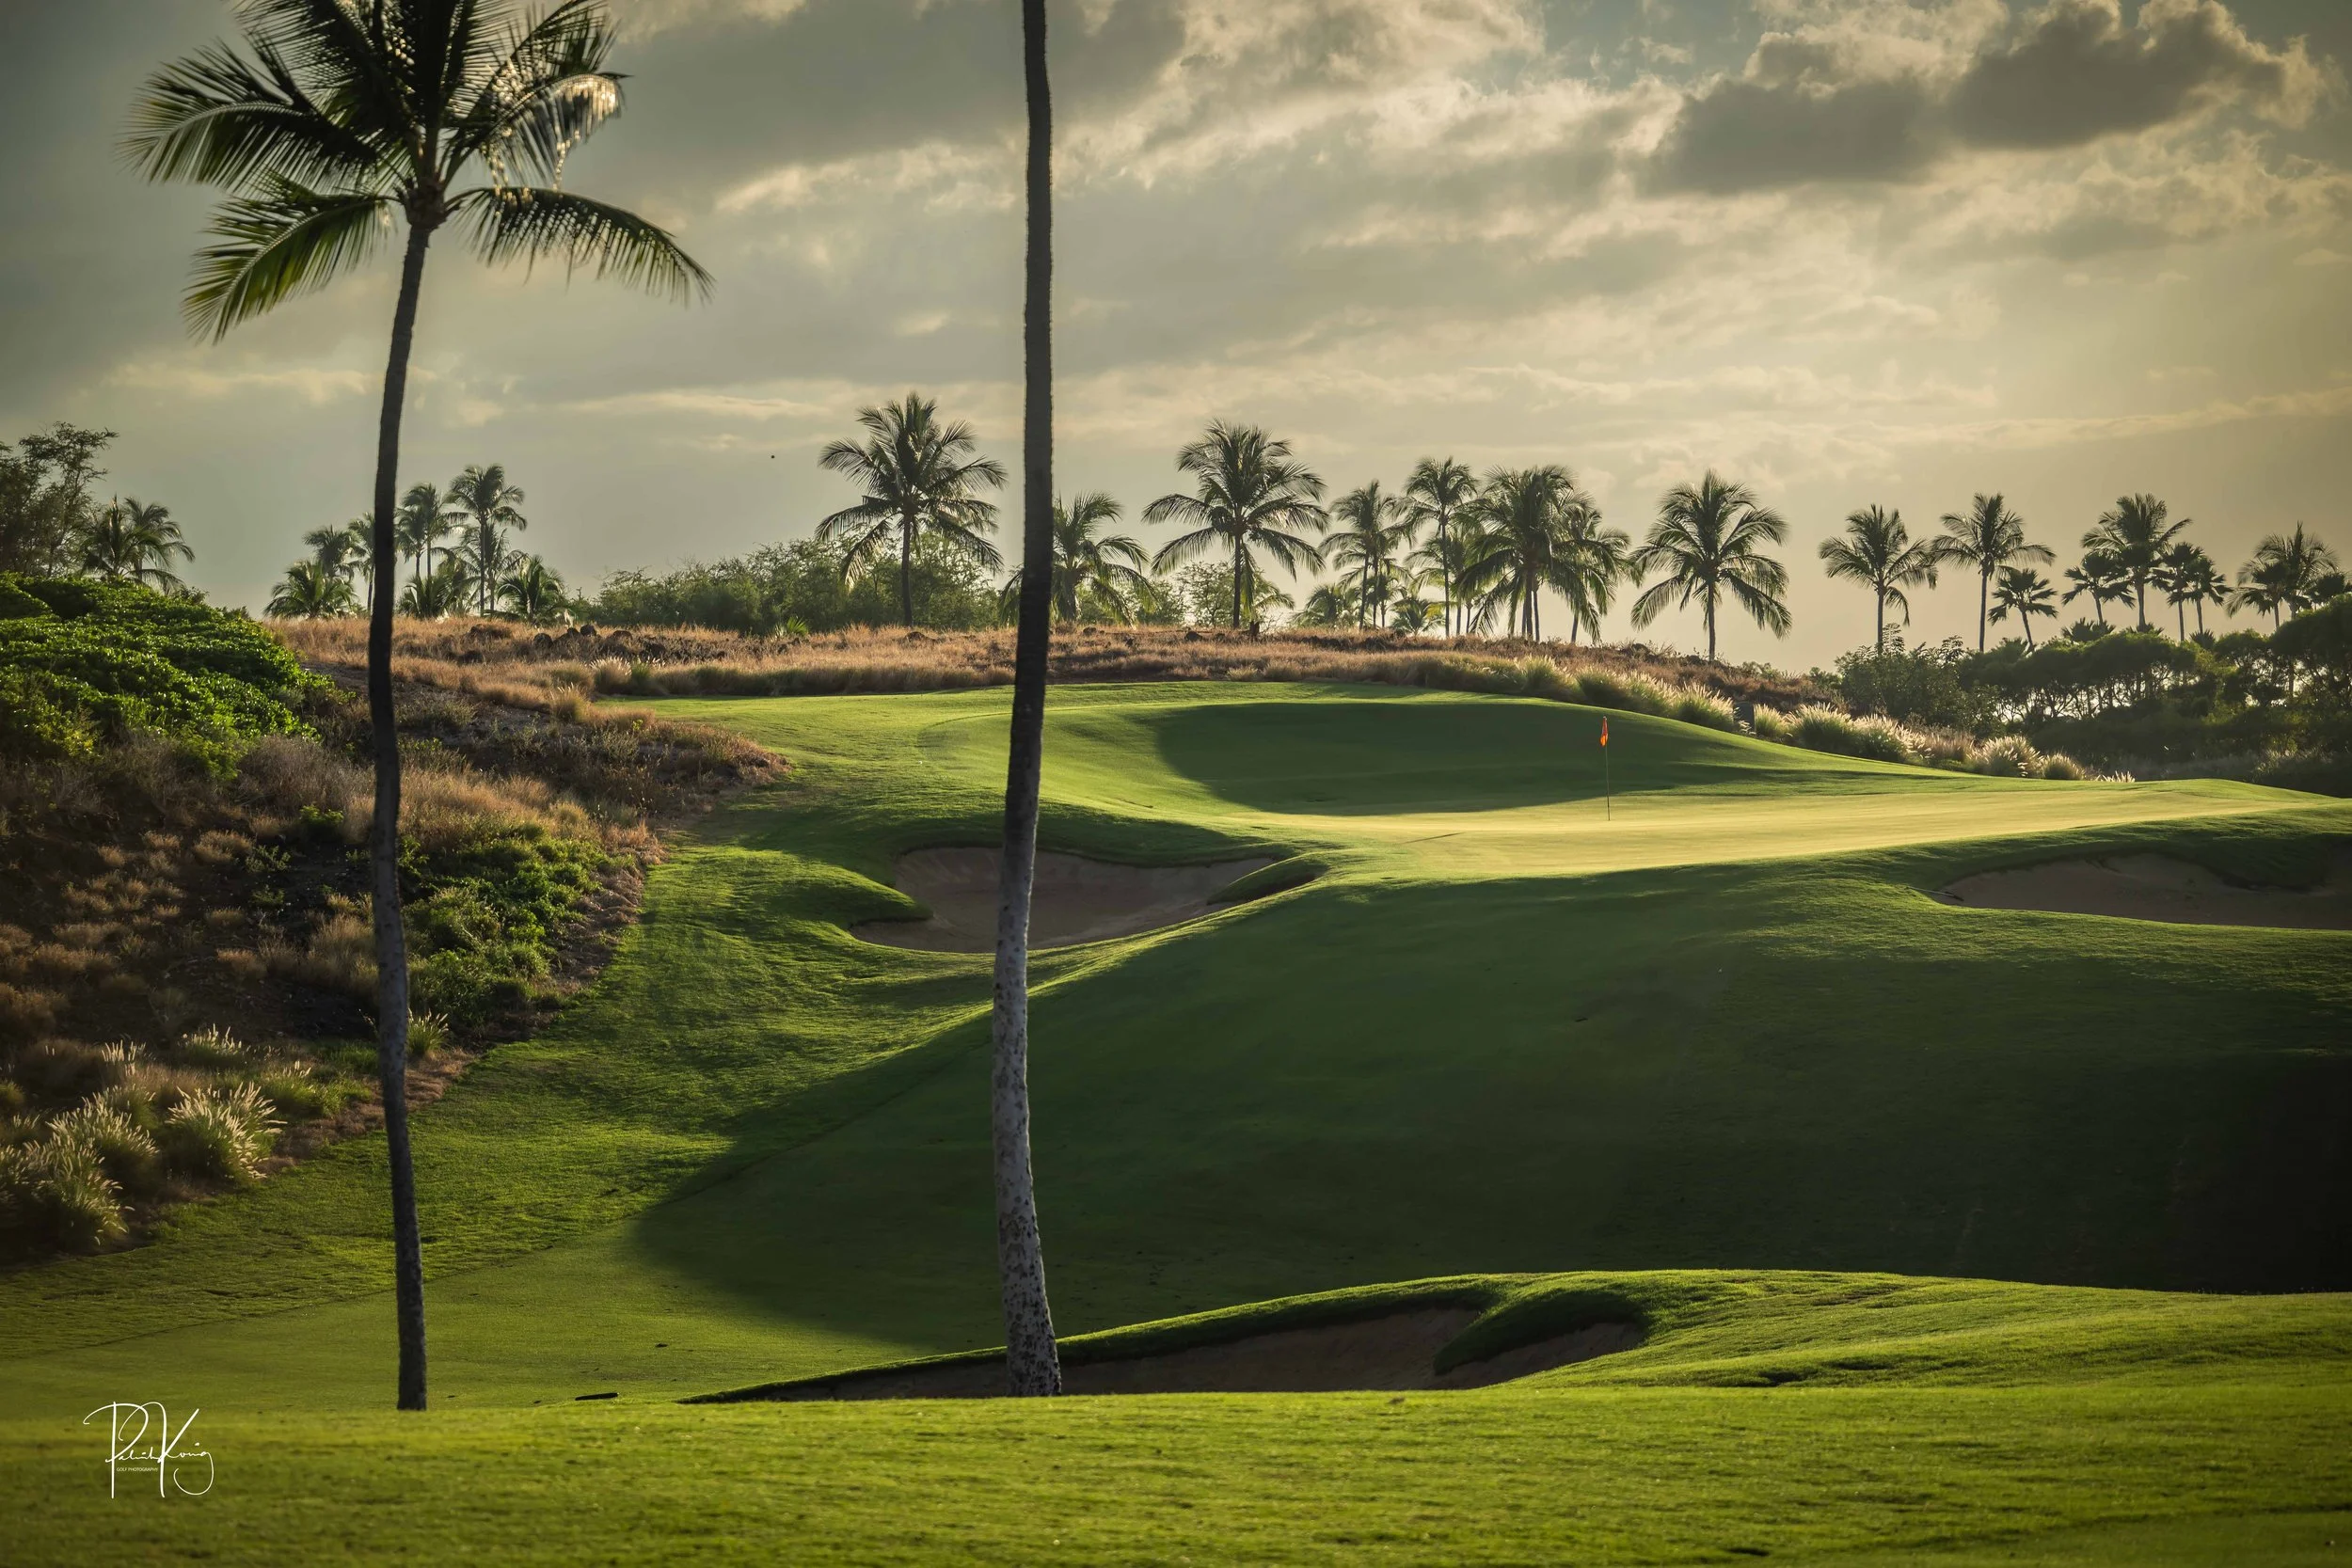
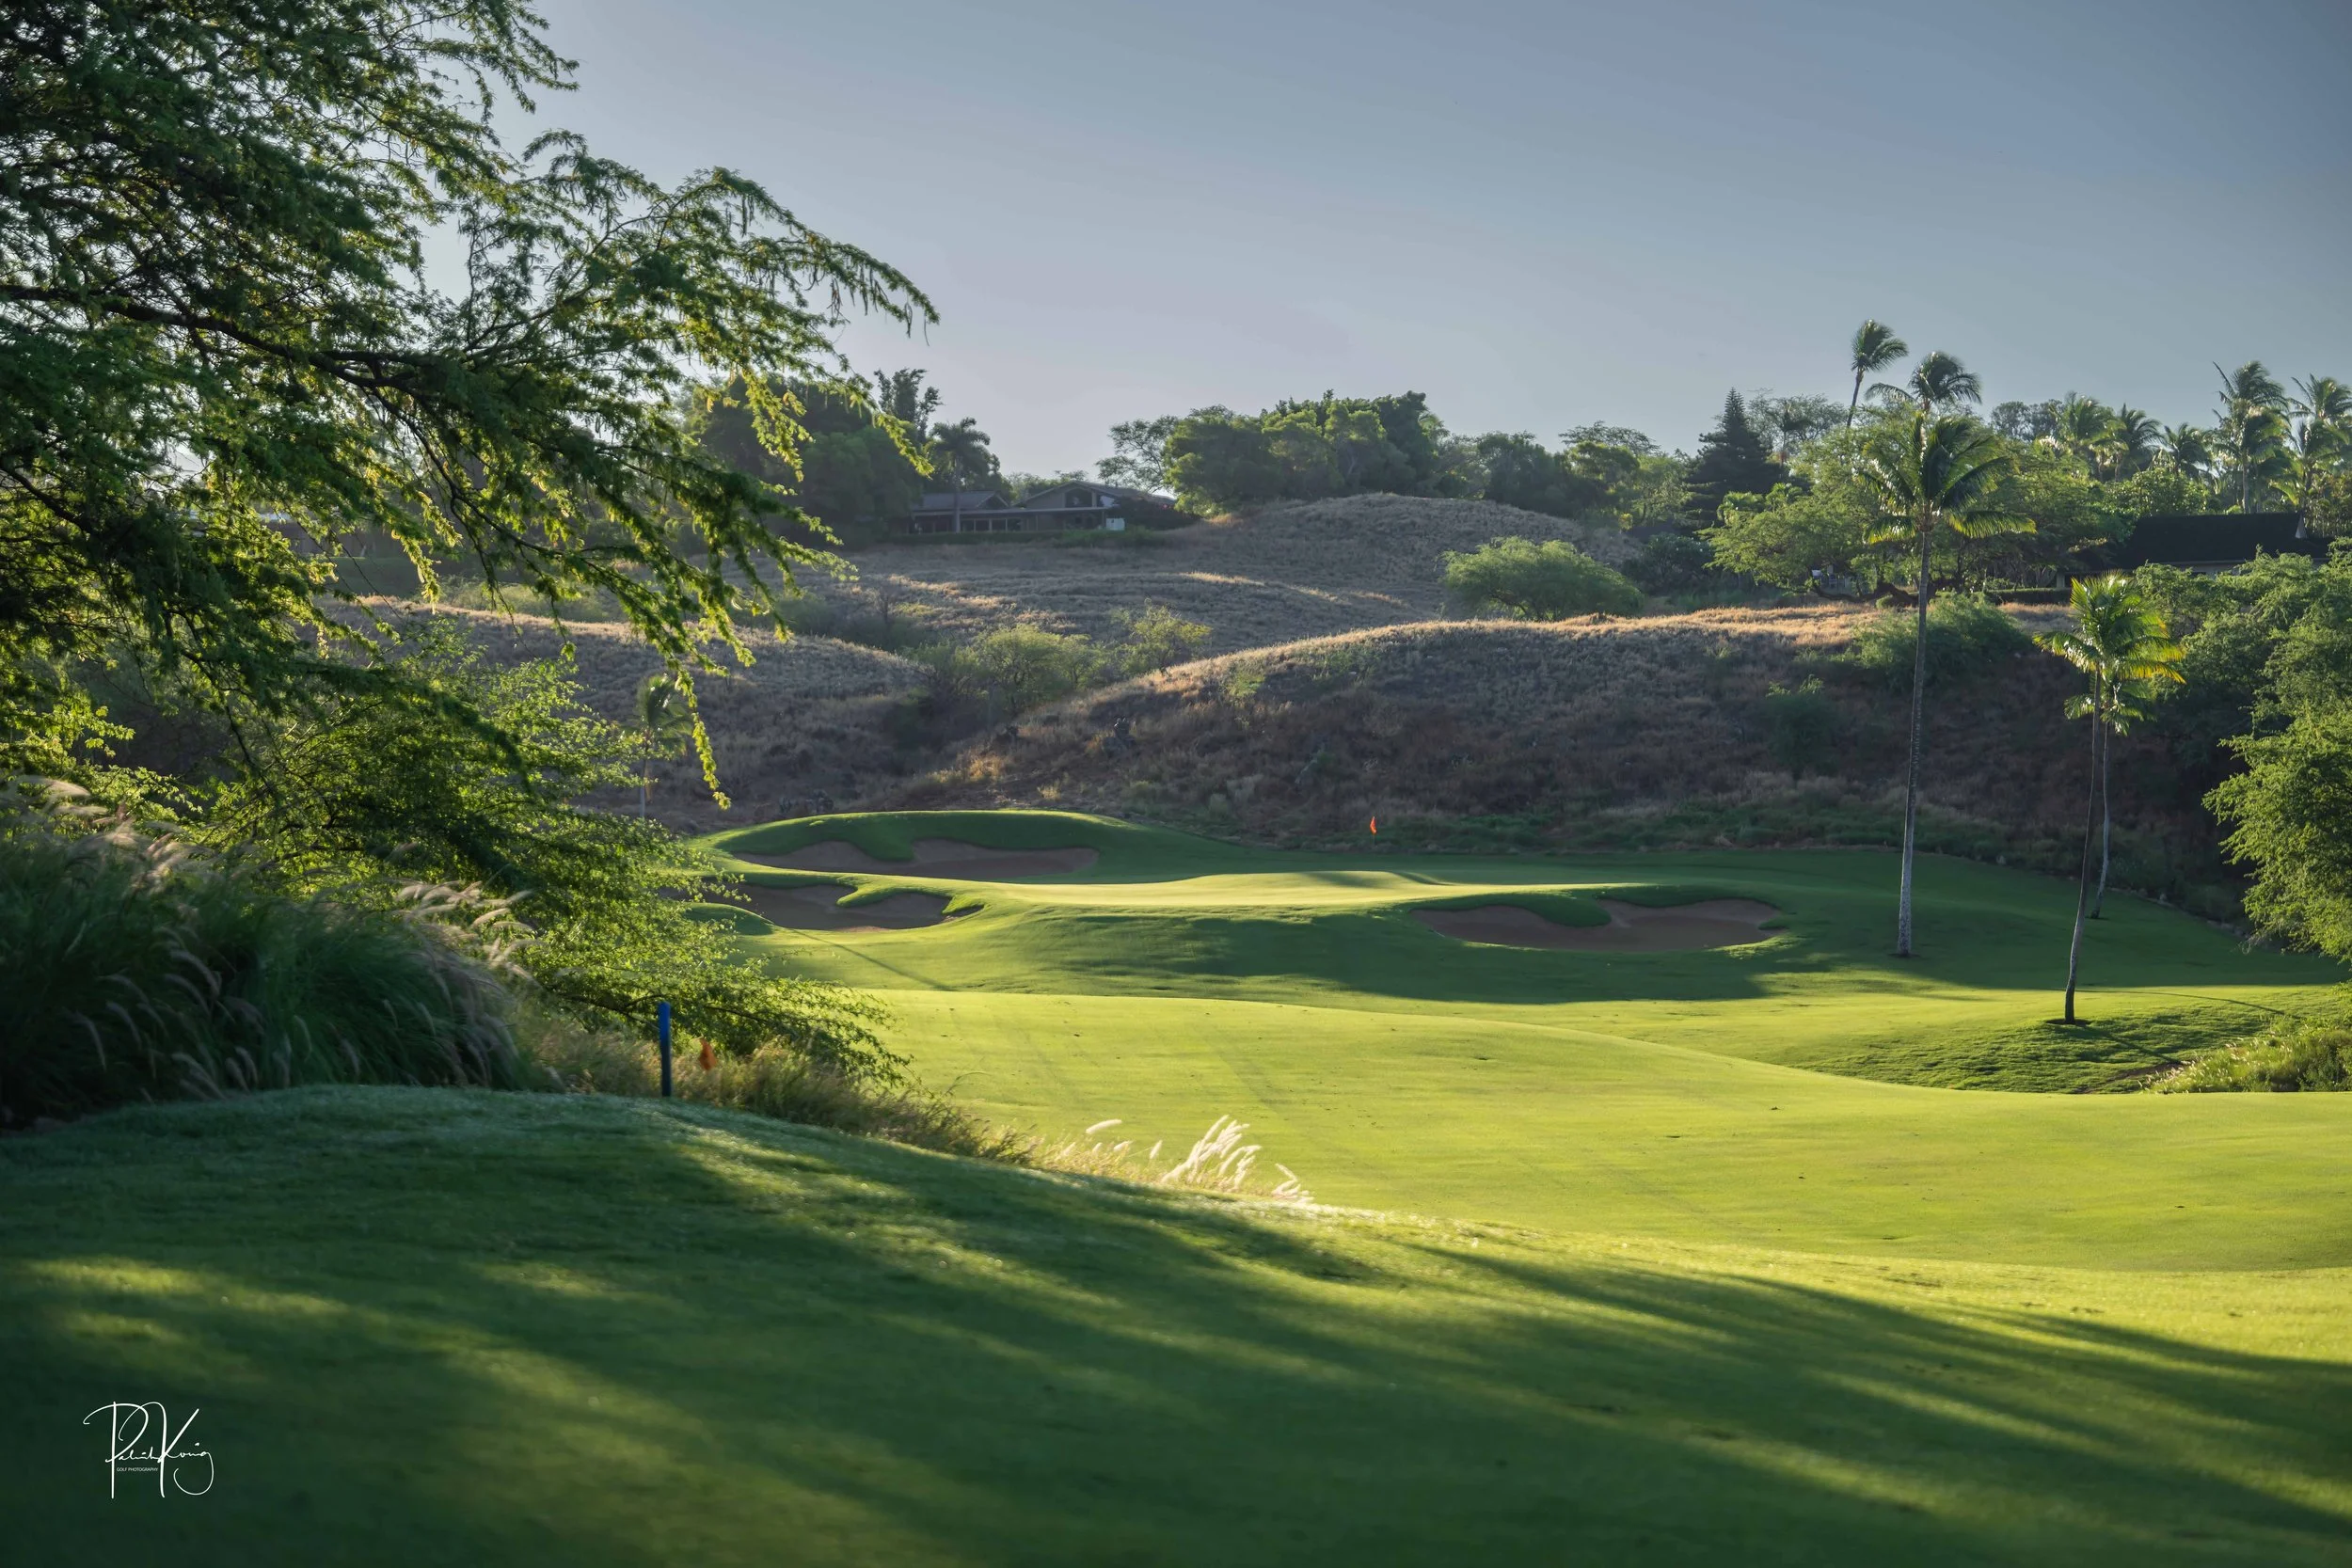
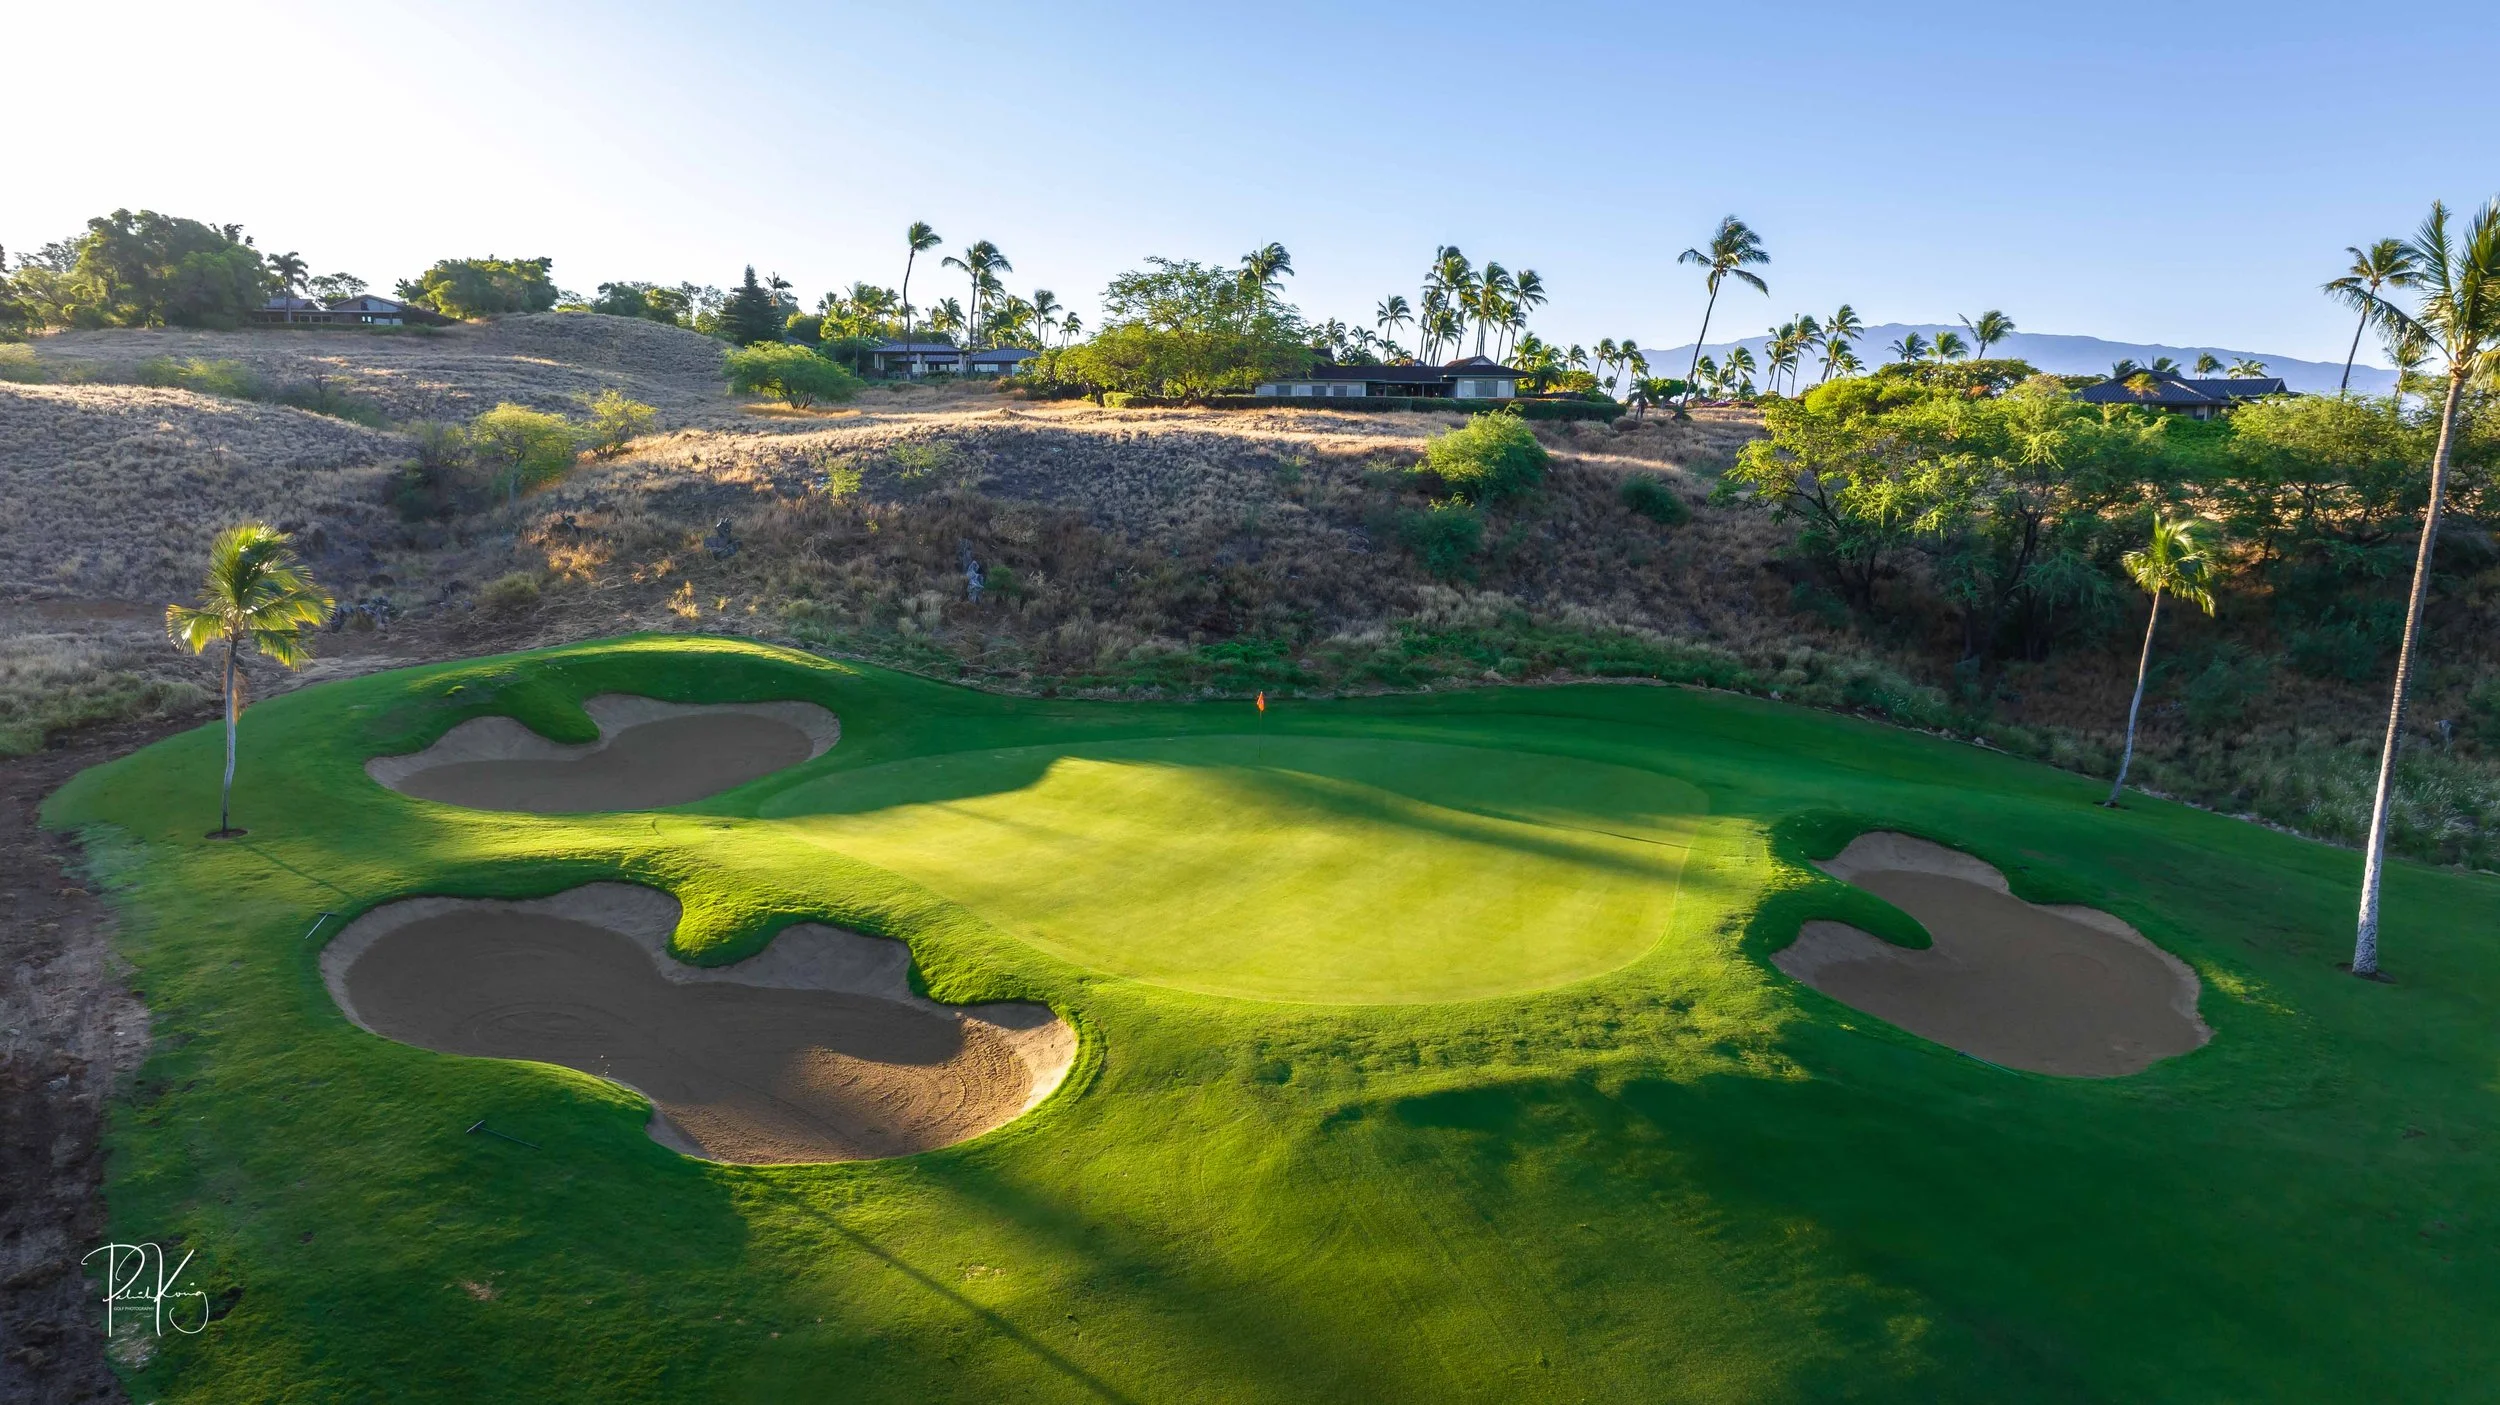
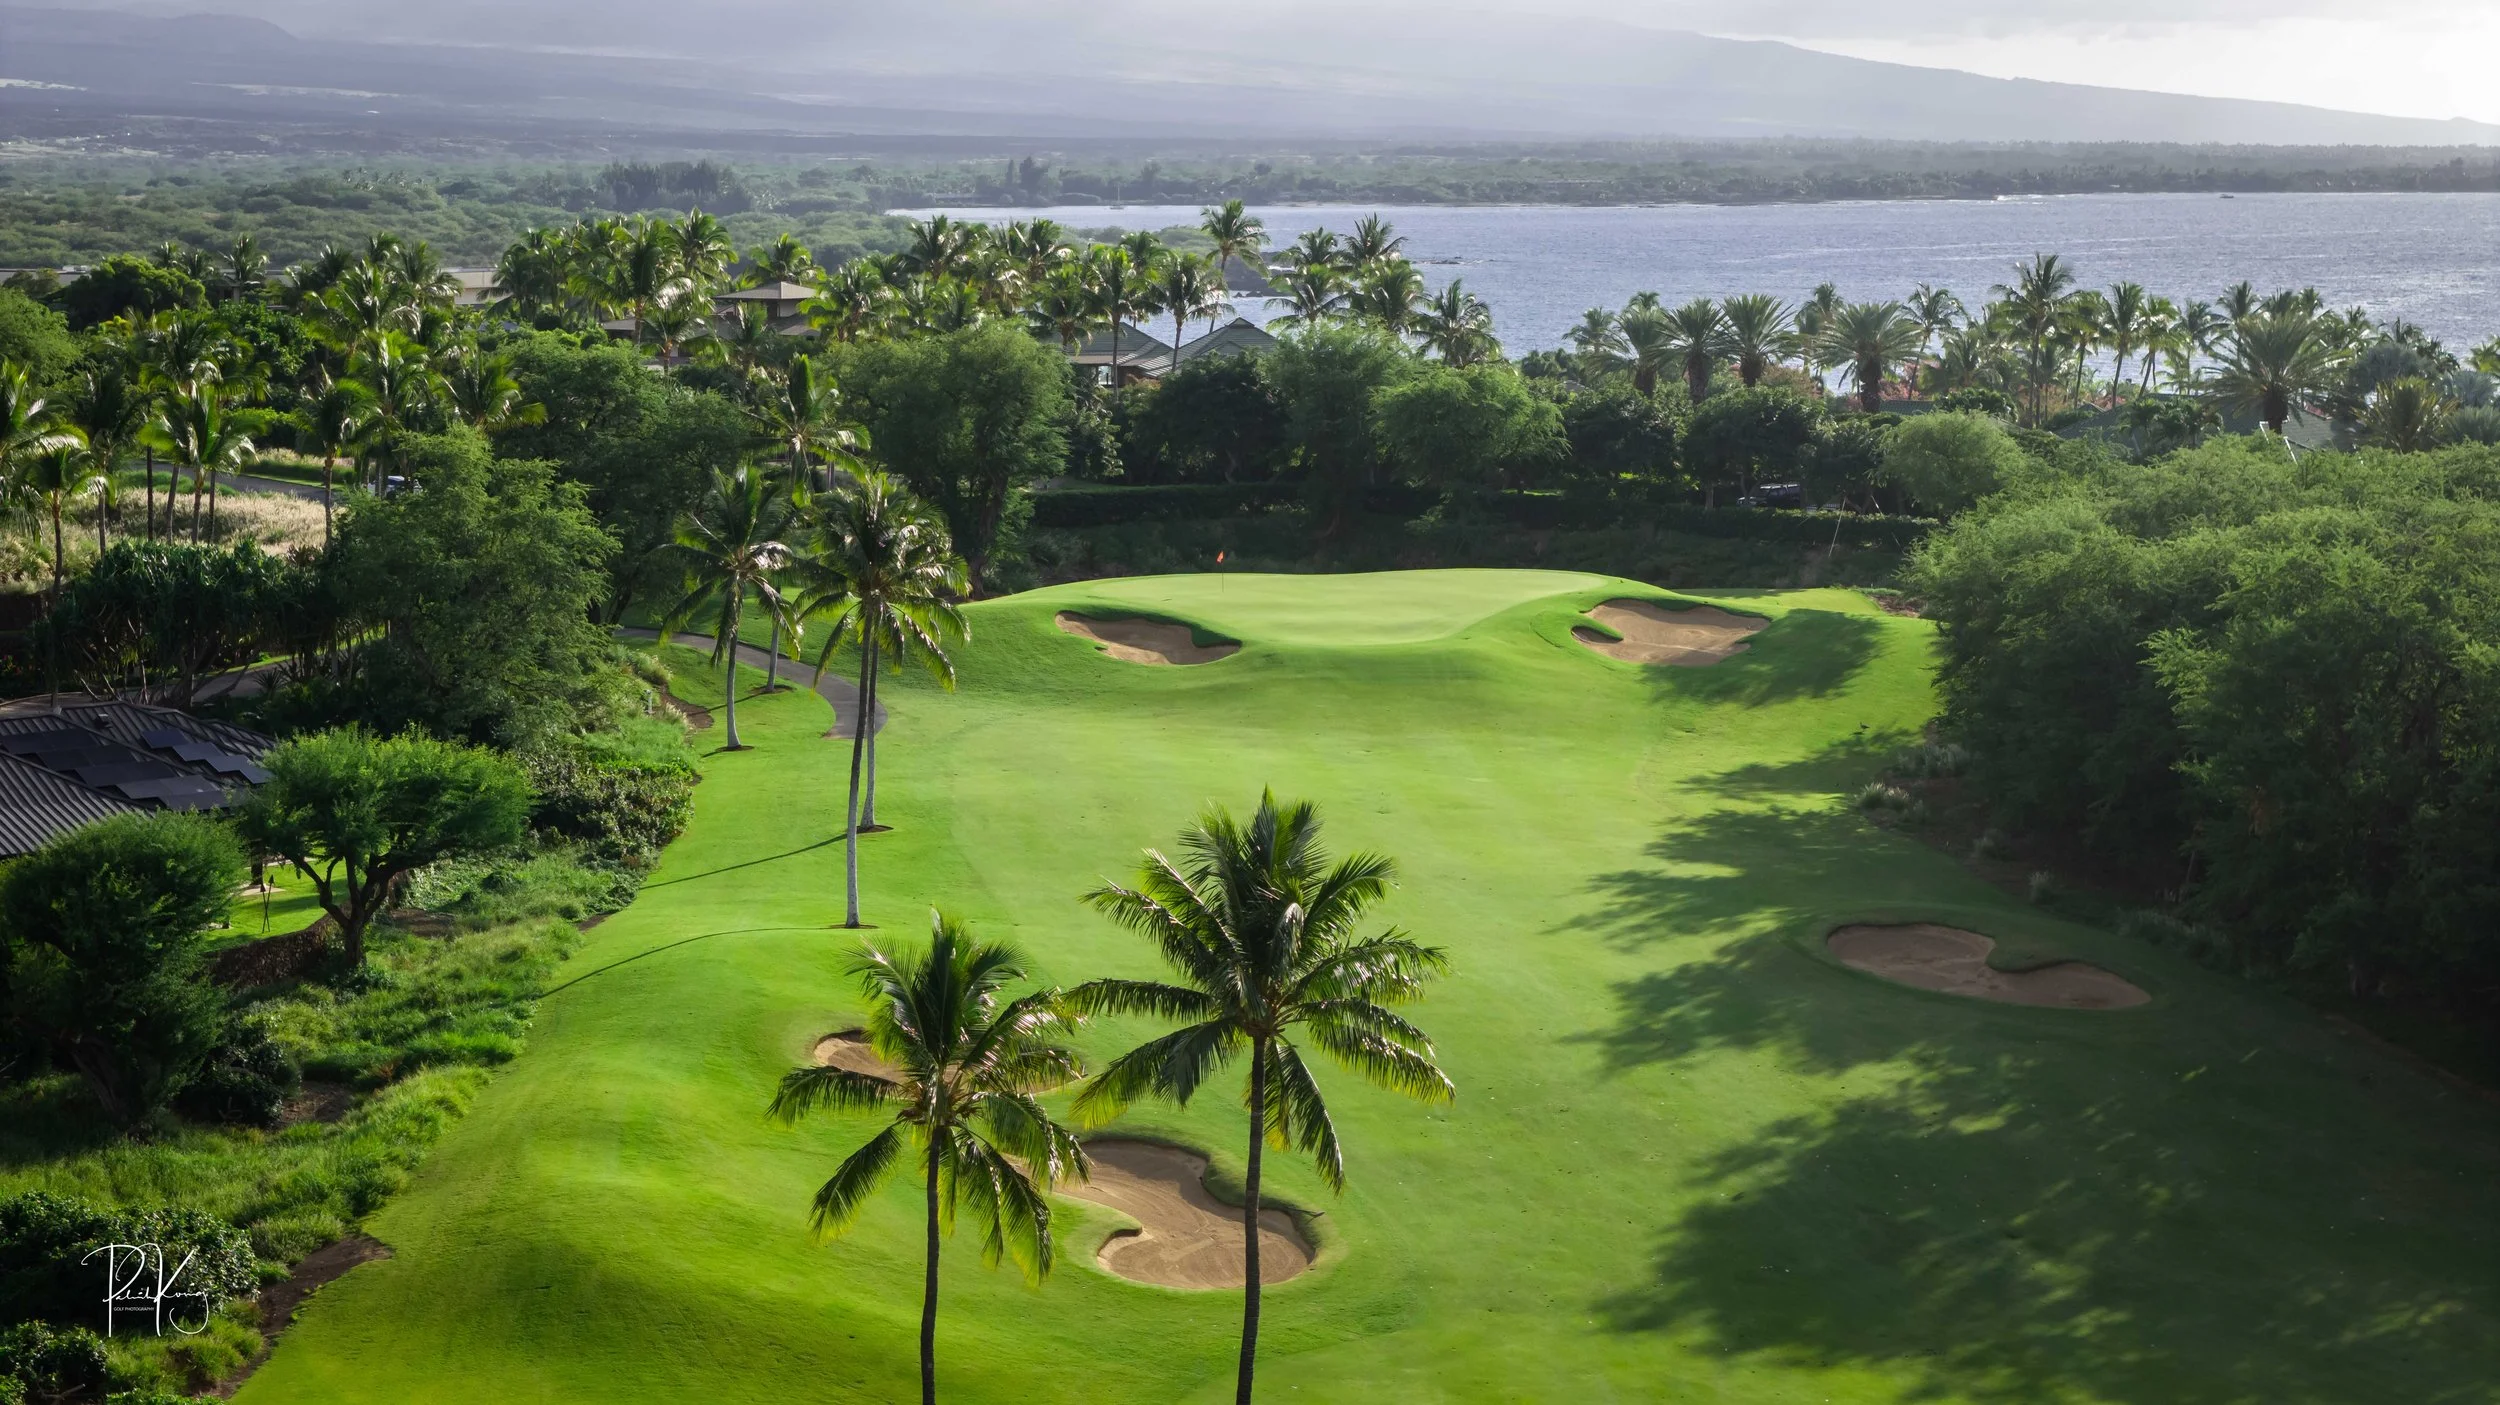
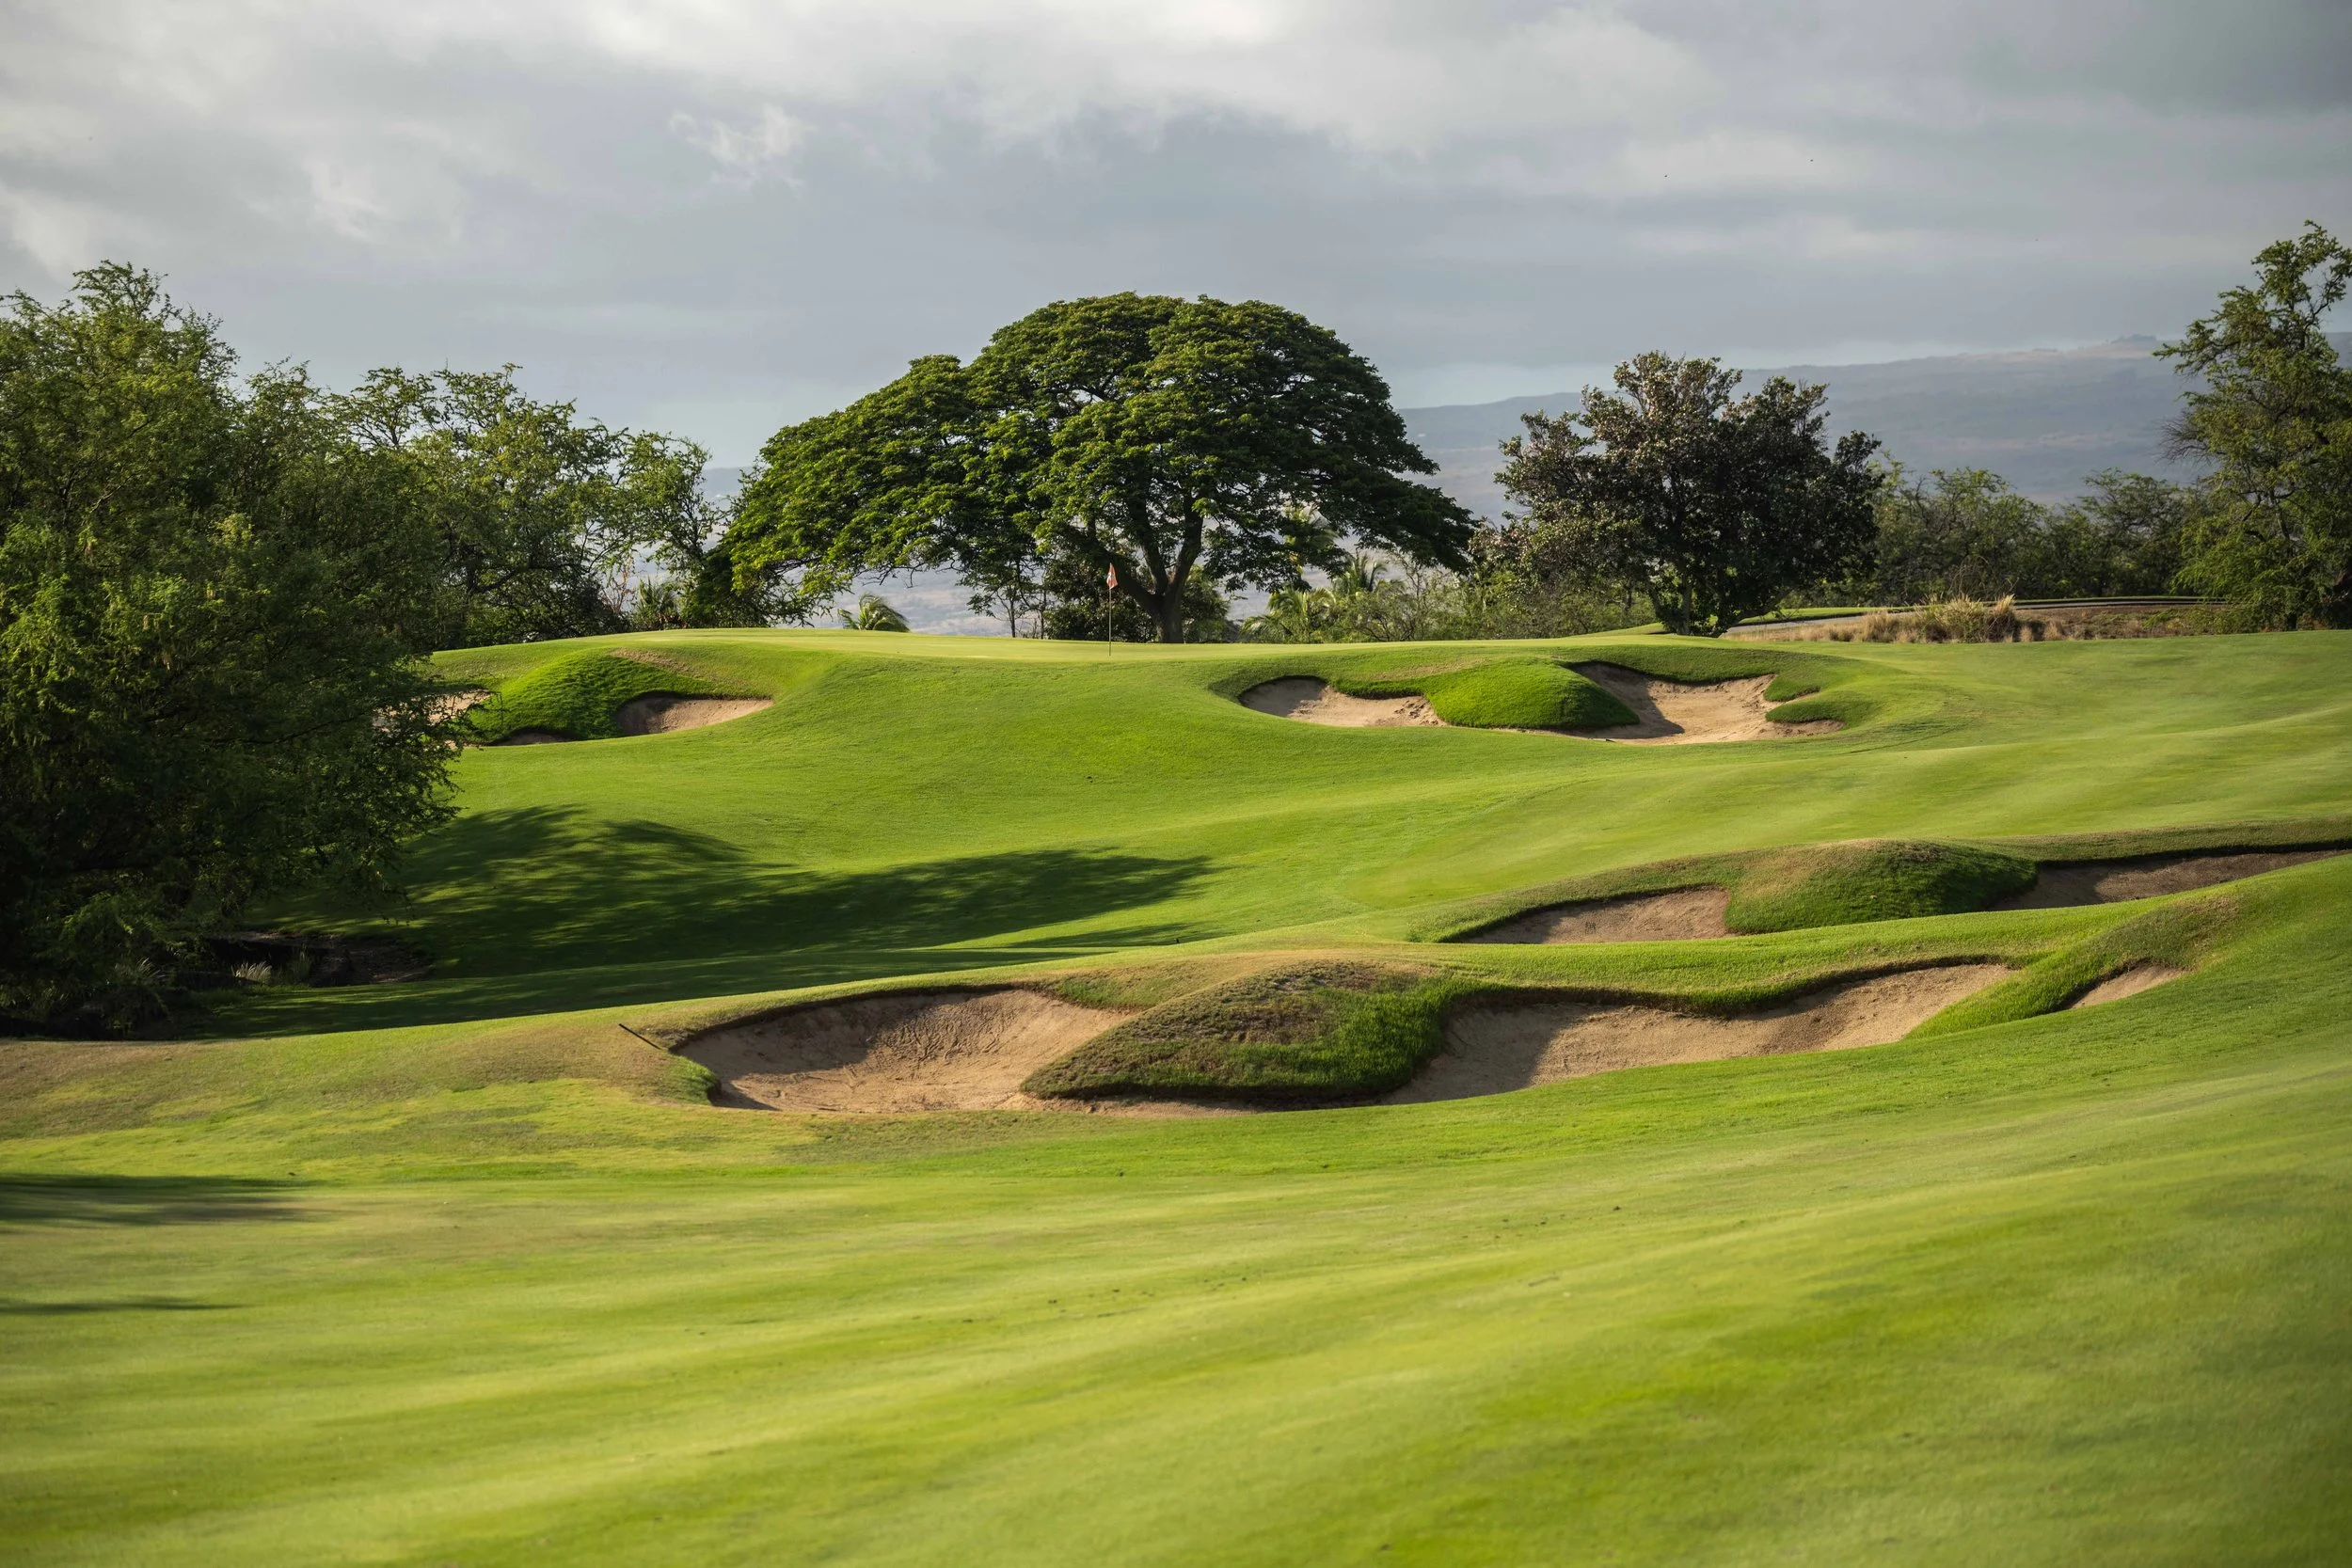
Hole #11 - Par 3 - 250 yards
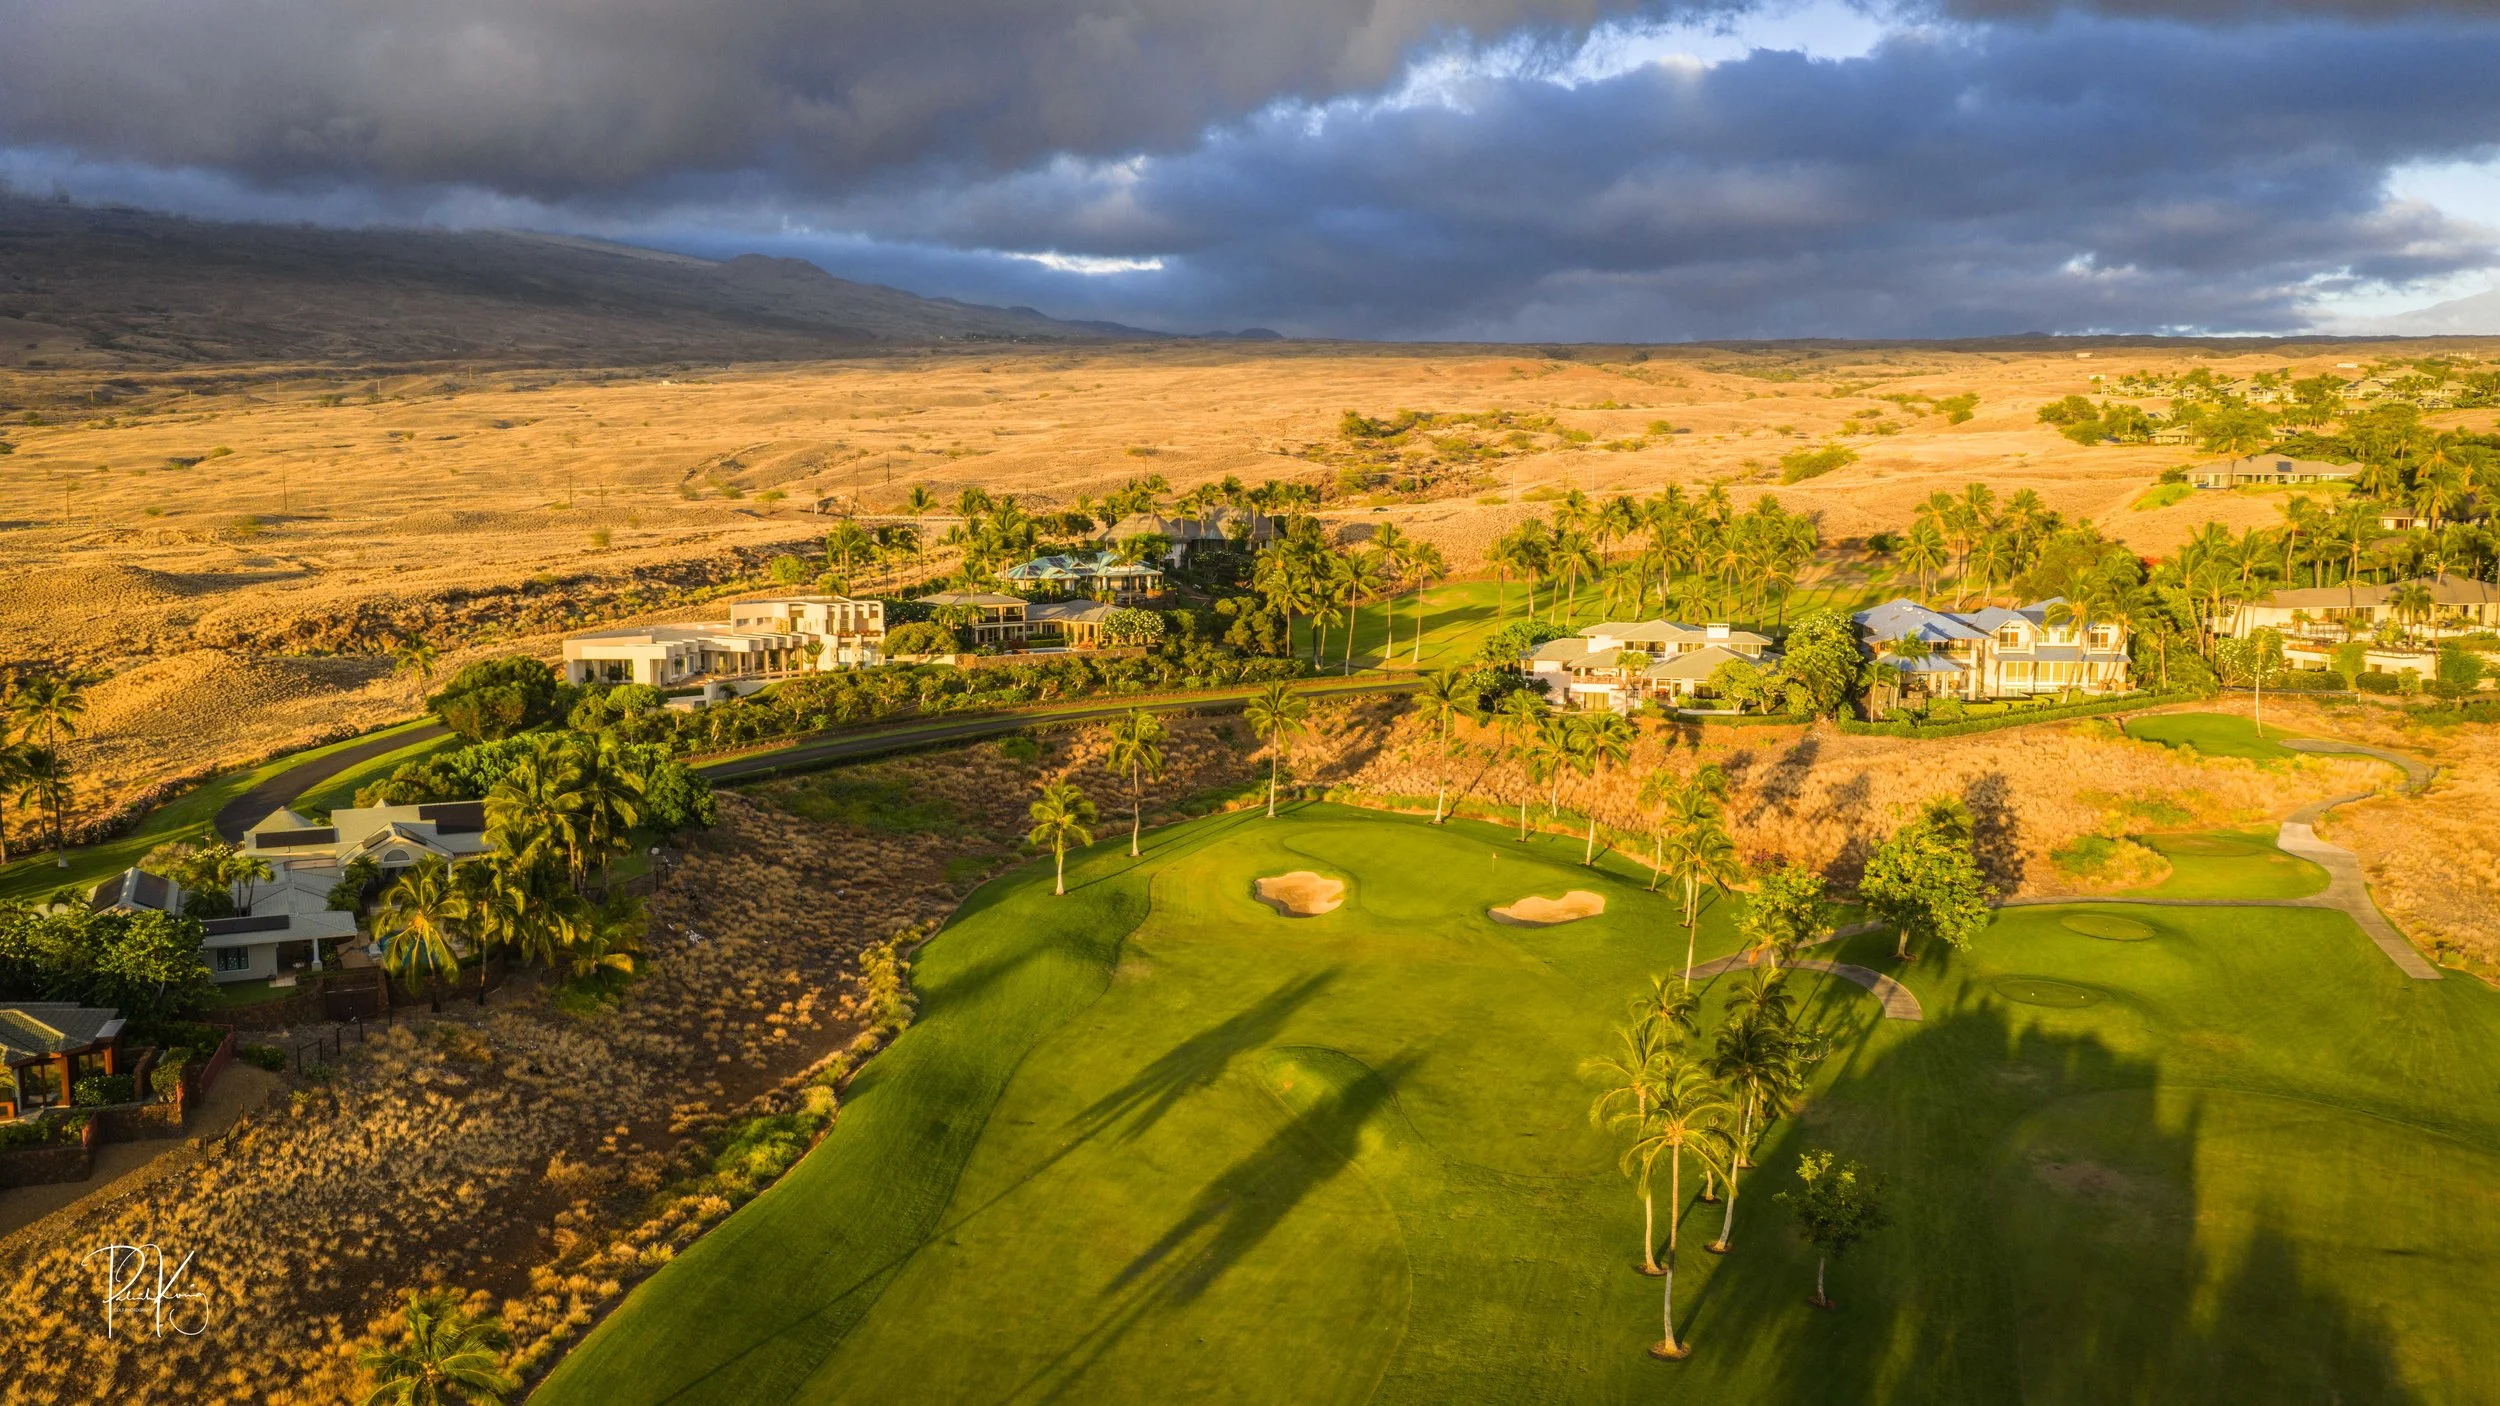
The second hole on the back nine gives the golfer their second visit to the ocean front and a fantastic view of the Mauna Kea resort. It’s not the signature hole but it does provide a signature moment. This lengthy par 3 requires a long iron if you want to find the green. Coming up short here is a good miss. Anything that misses the green left or right and fails to get caught up in the bunkers encounters a real possibility of cascading down the hill and into the brush. Which means that your golf ball will spend eternity amongst the lava rocks and you will head to the next tee box with your golf bag weighing approximately 1.62 oz less.
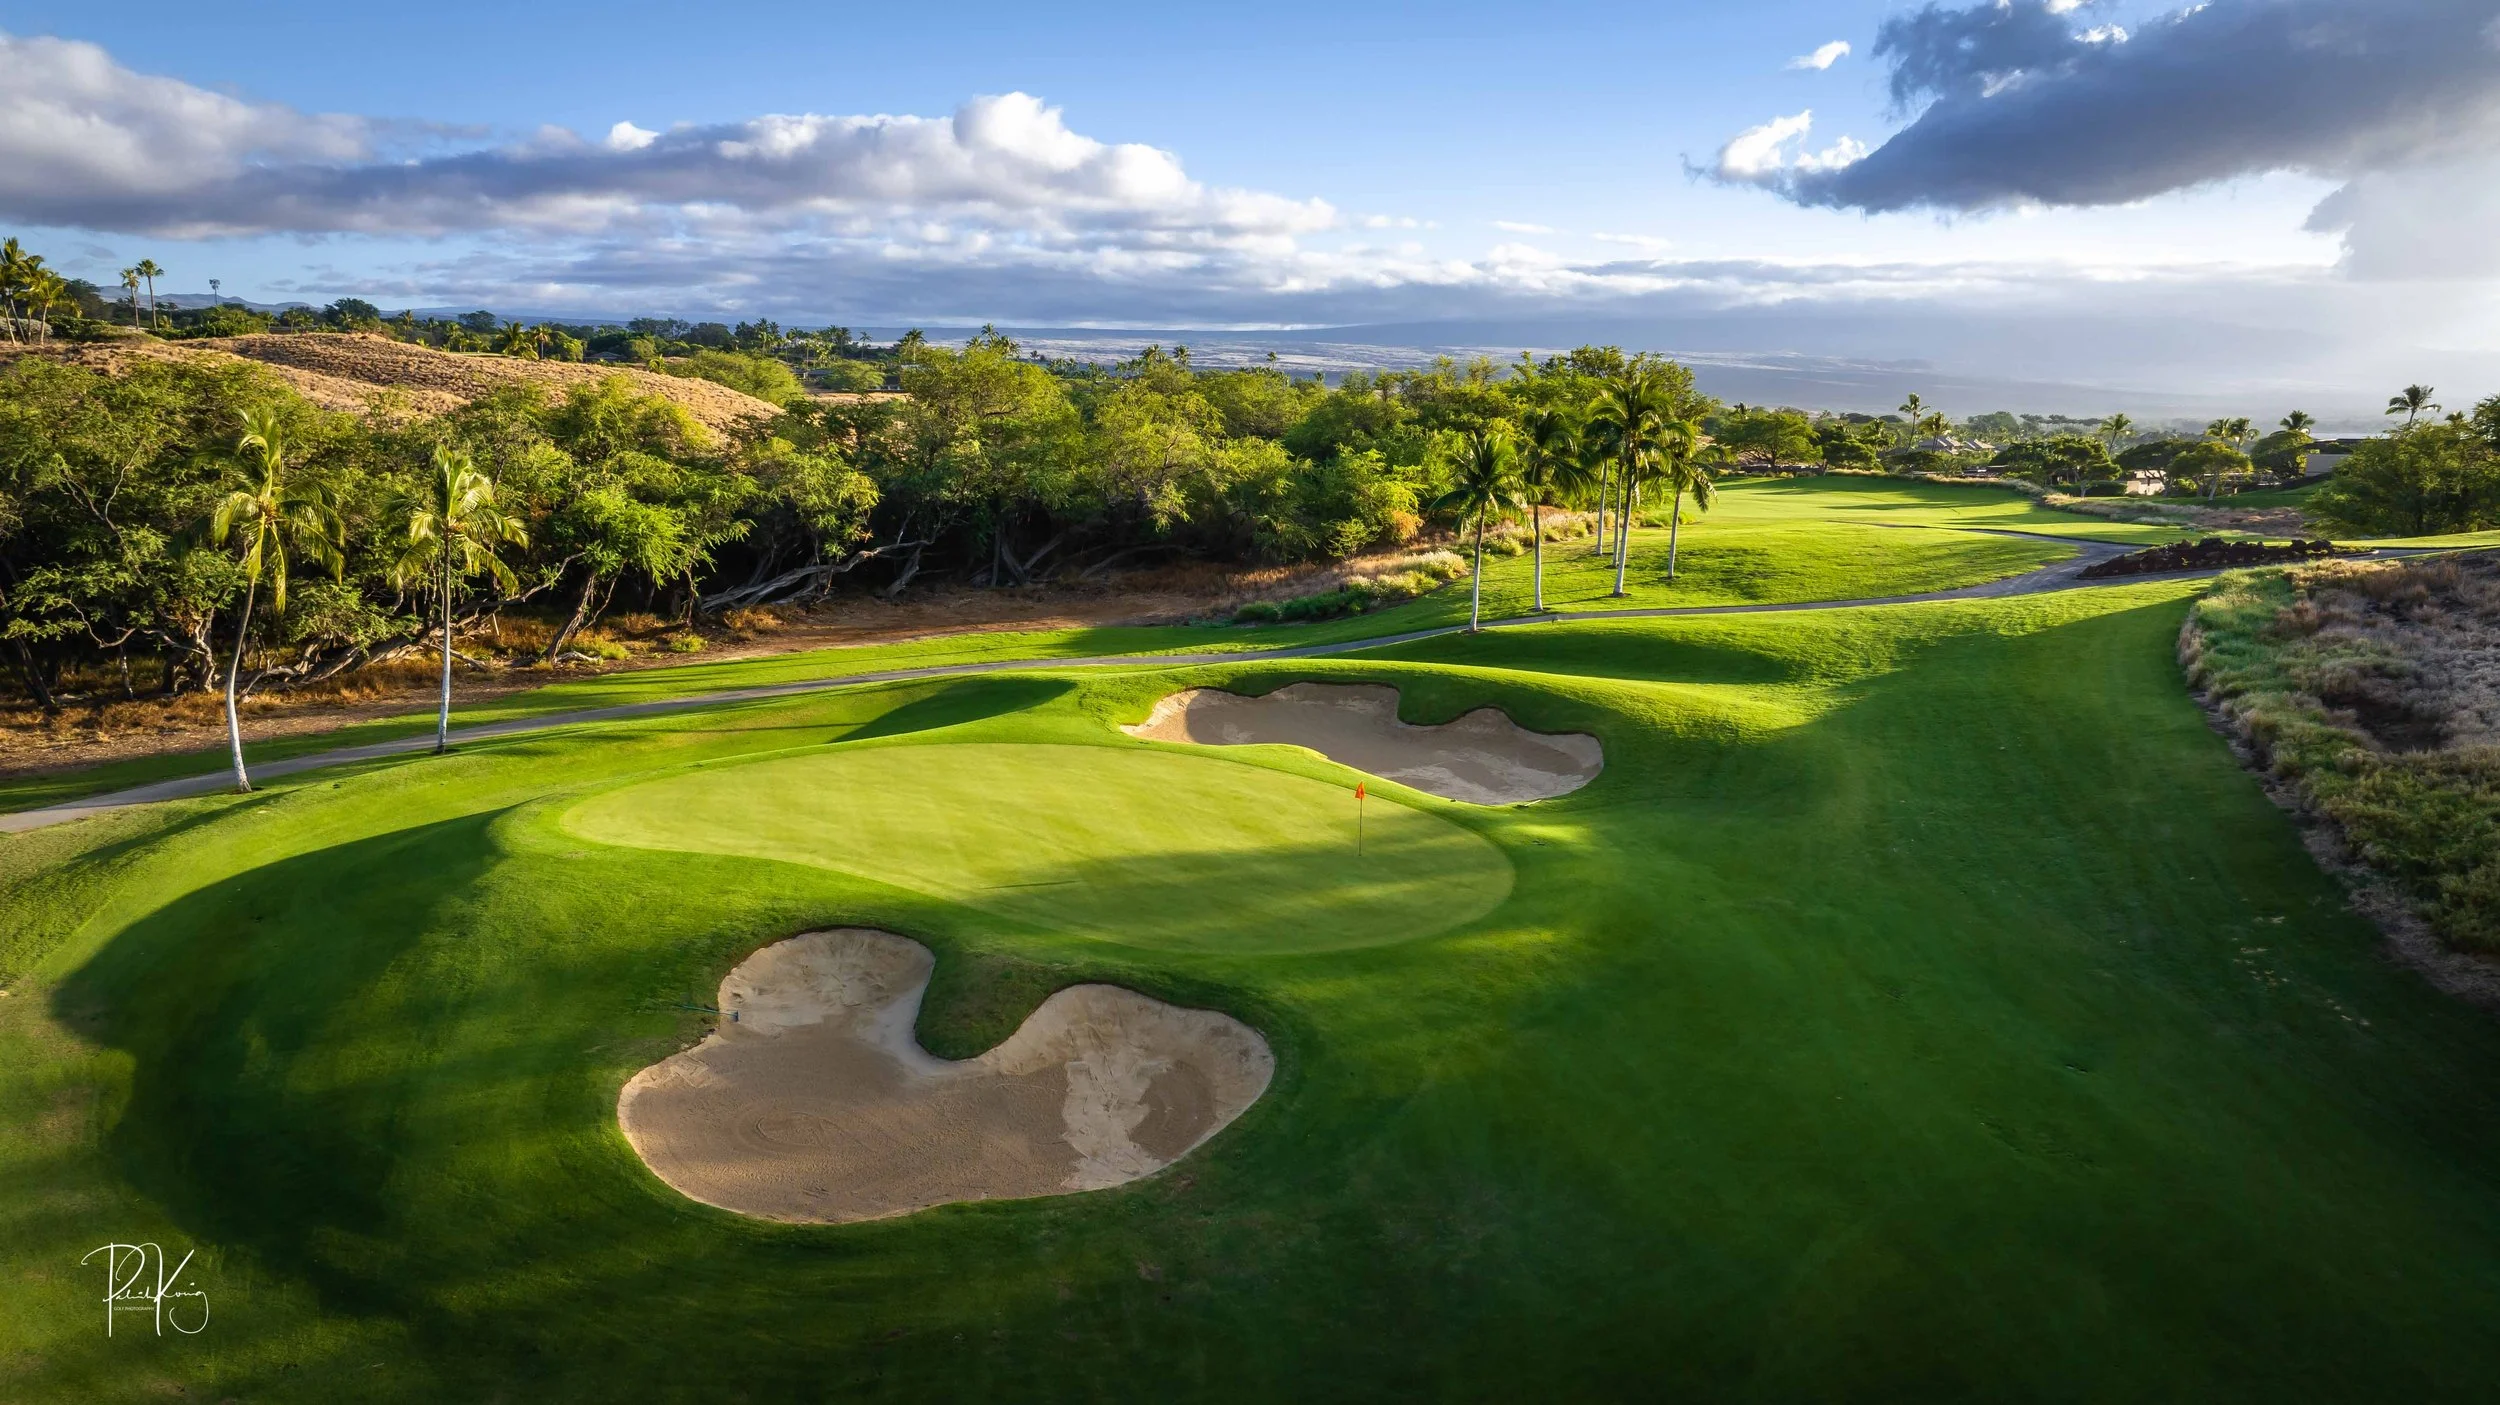
Hole #12 - Par 4 - 392 yards
This relatively short par 4 is another dog leg right with no forgiveness on the right hand side. You can challenge the fairway bunker for an ideal approach angle and a short club into the green. The triangular shaped putting surgace is located on top of another hill and has a number of challenging pin positions.
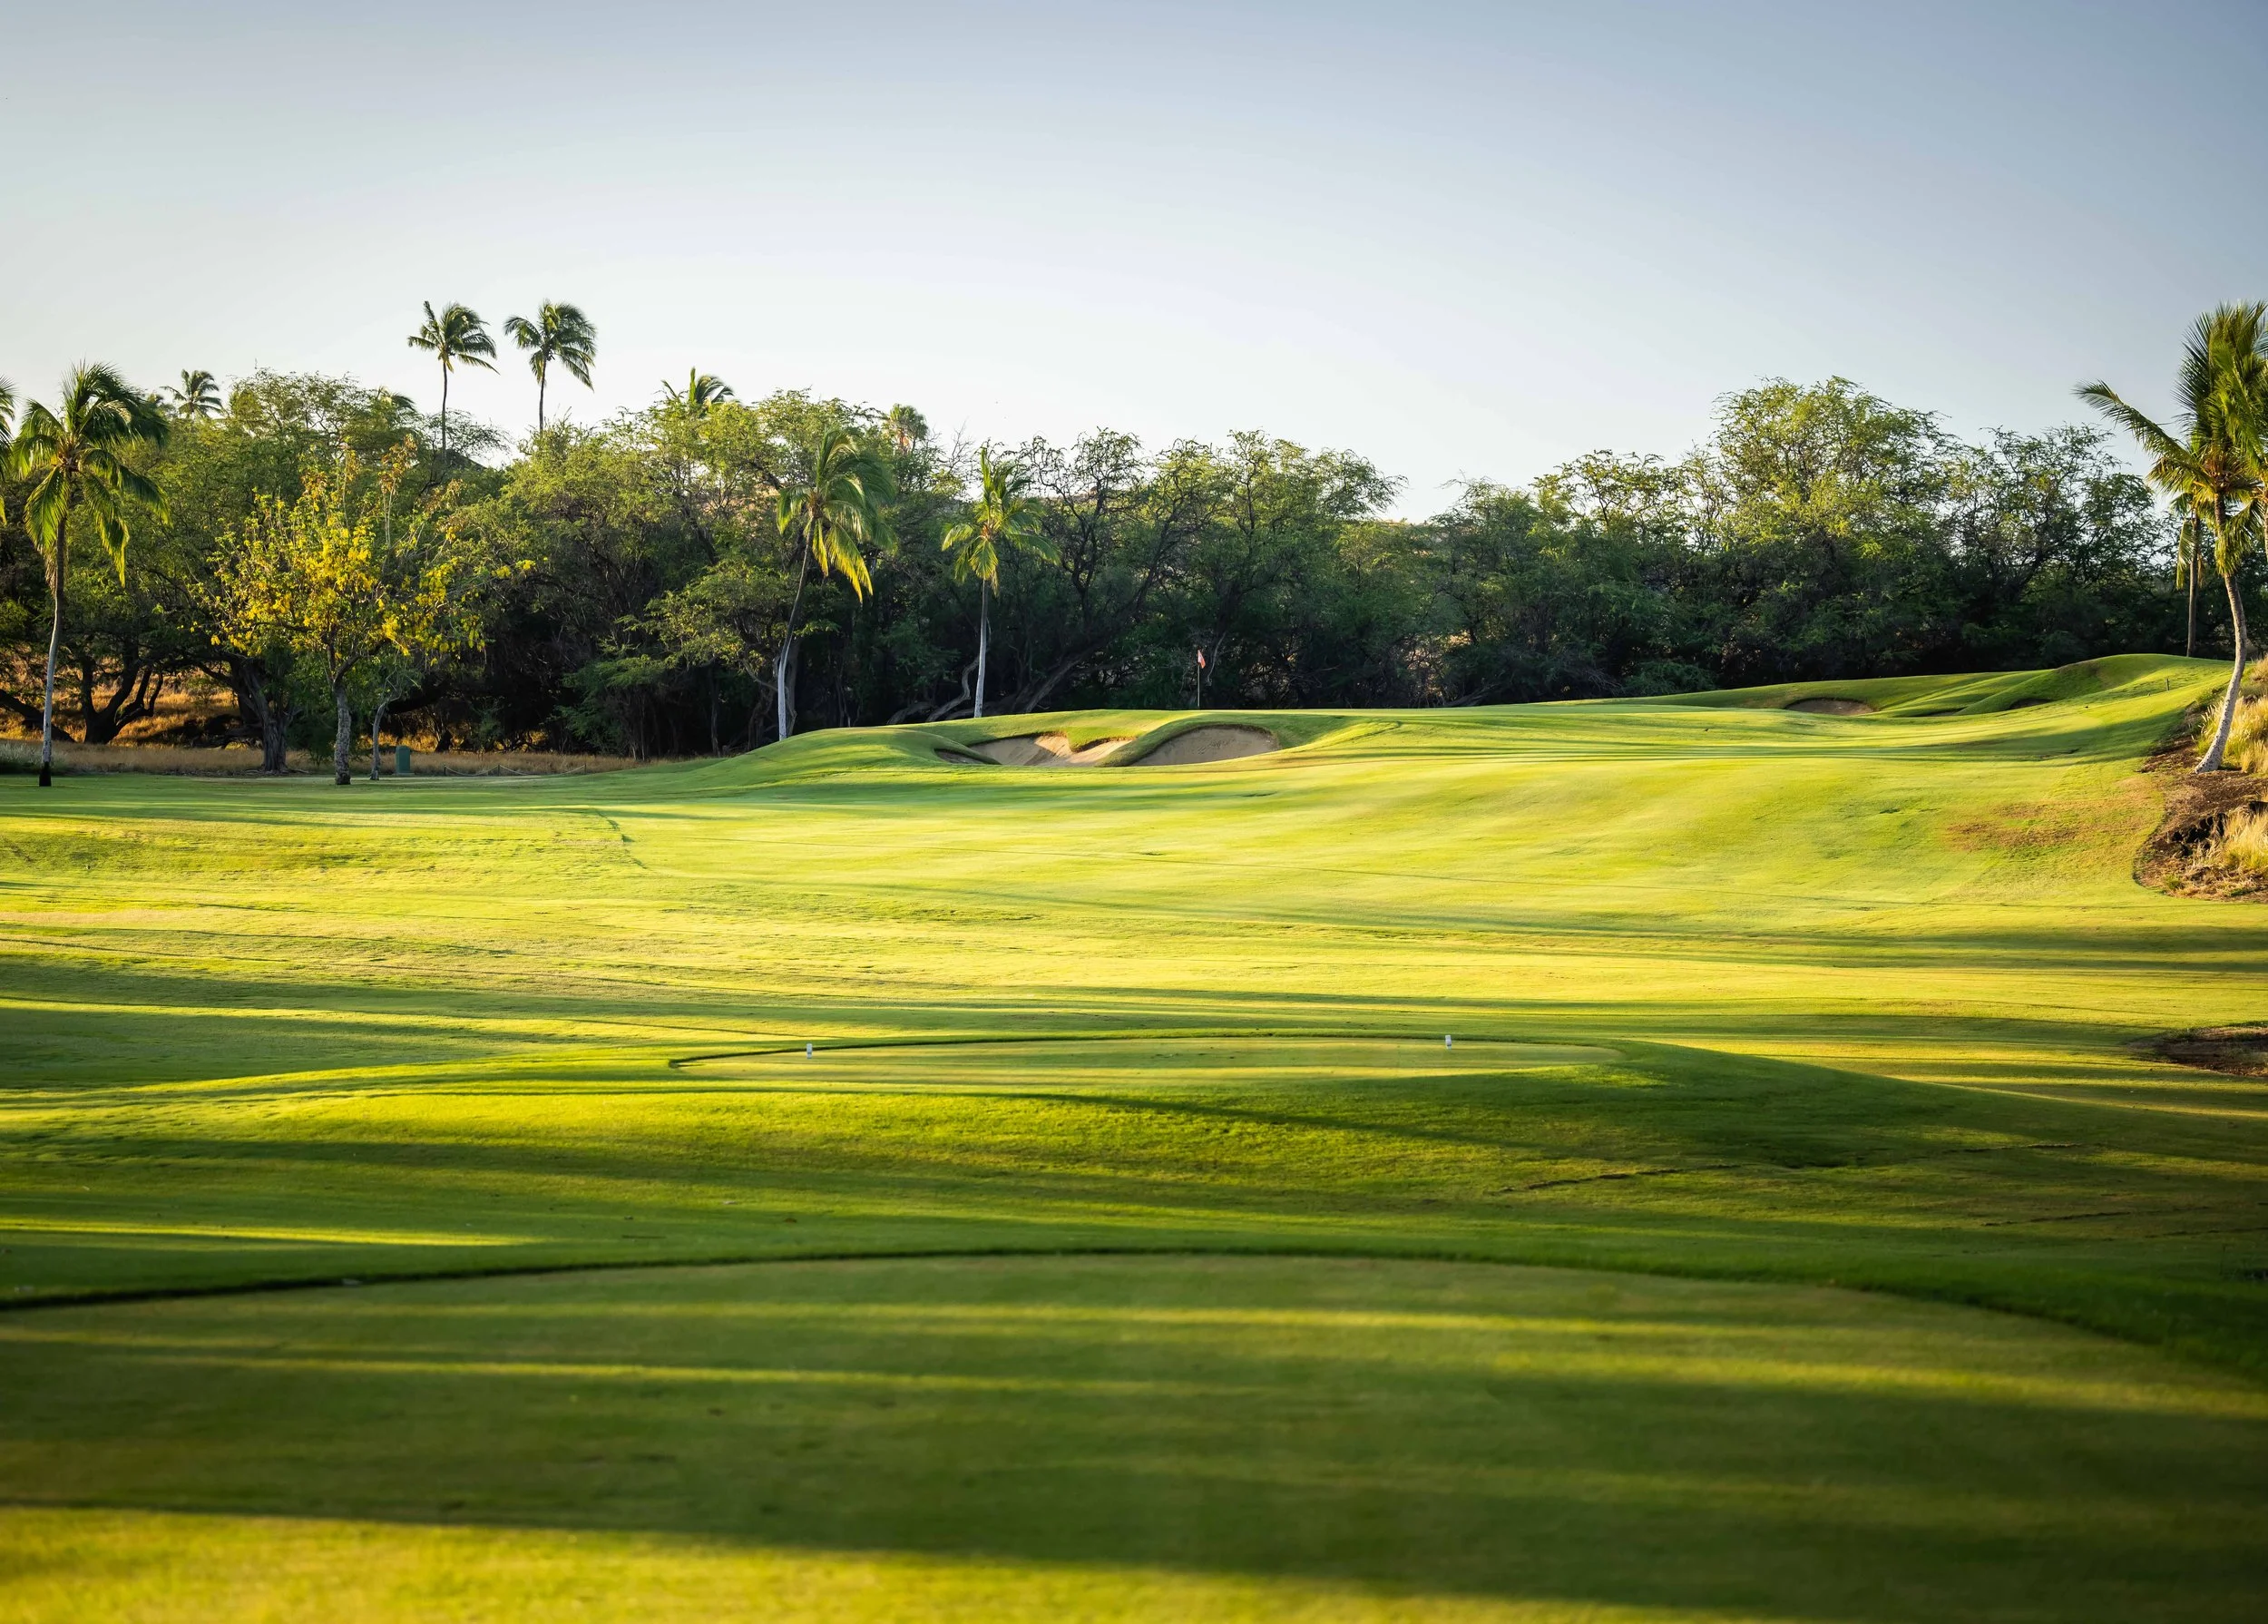
Hole #13 - Par 4 - 374 yards
The 13th is the shortest par 4 at Mauna Kea. Most players will face a golf hole around the 330 yard range. This means that you can keep the driver in the bag and still have a short wedge into the green. There is some room to the right from from the tee but anything left will send you into the jungle looking for golf balls. SPOILER: The ideal spot landing spot is in the middle of the fairway. With the green perched way above the approach shot, the 13th is another one of Mauna Kea’s repeated volcano greens. On an island made from a volcano, this feels appropriate.

Hole #14 - Par 4 - 425 yards
The 14th is a big sweeping dog leg left that gives you plenty of room to pick your angle into the green from the tee. I know that most golfers will just pound driver and hope for the best, but a good drive that sneaks around the left fairway bunker will leave you with a preferred look at the putting surface.

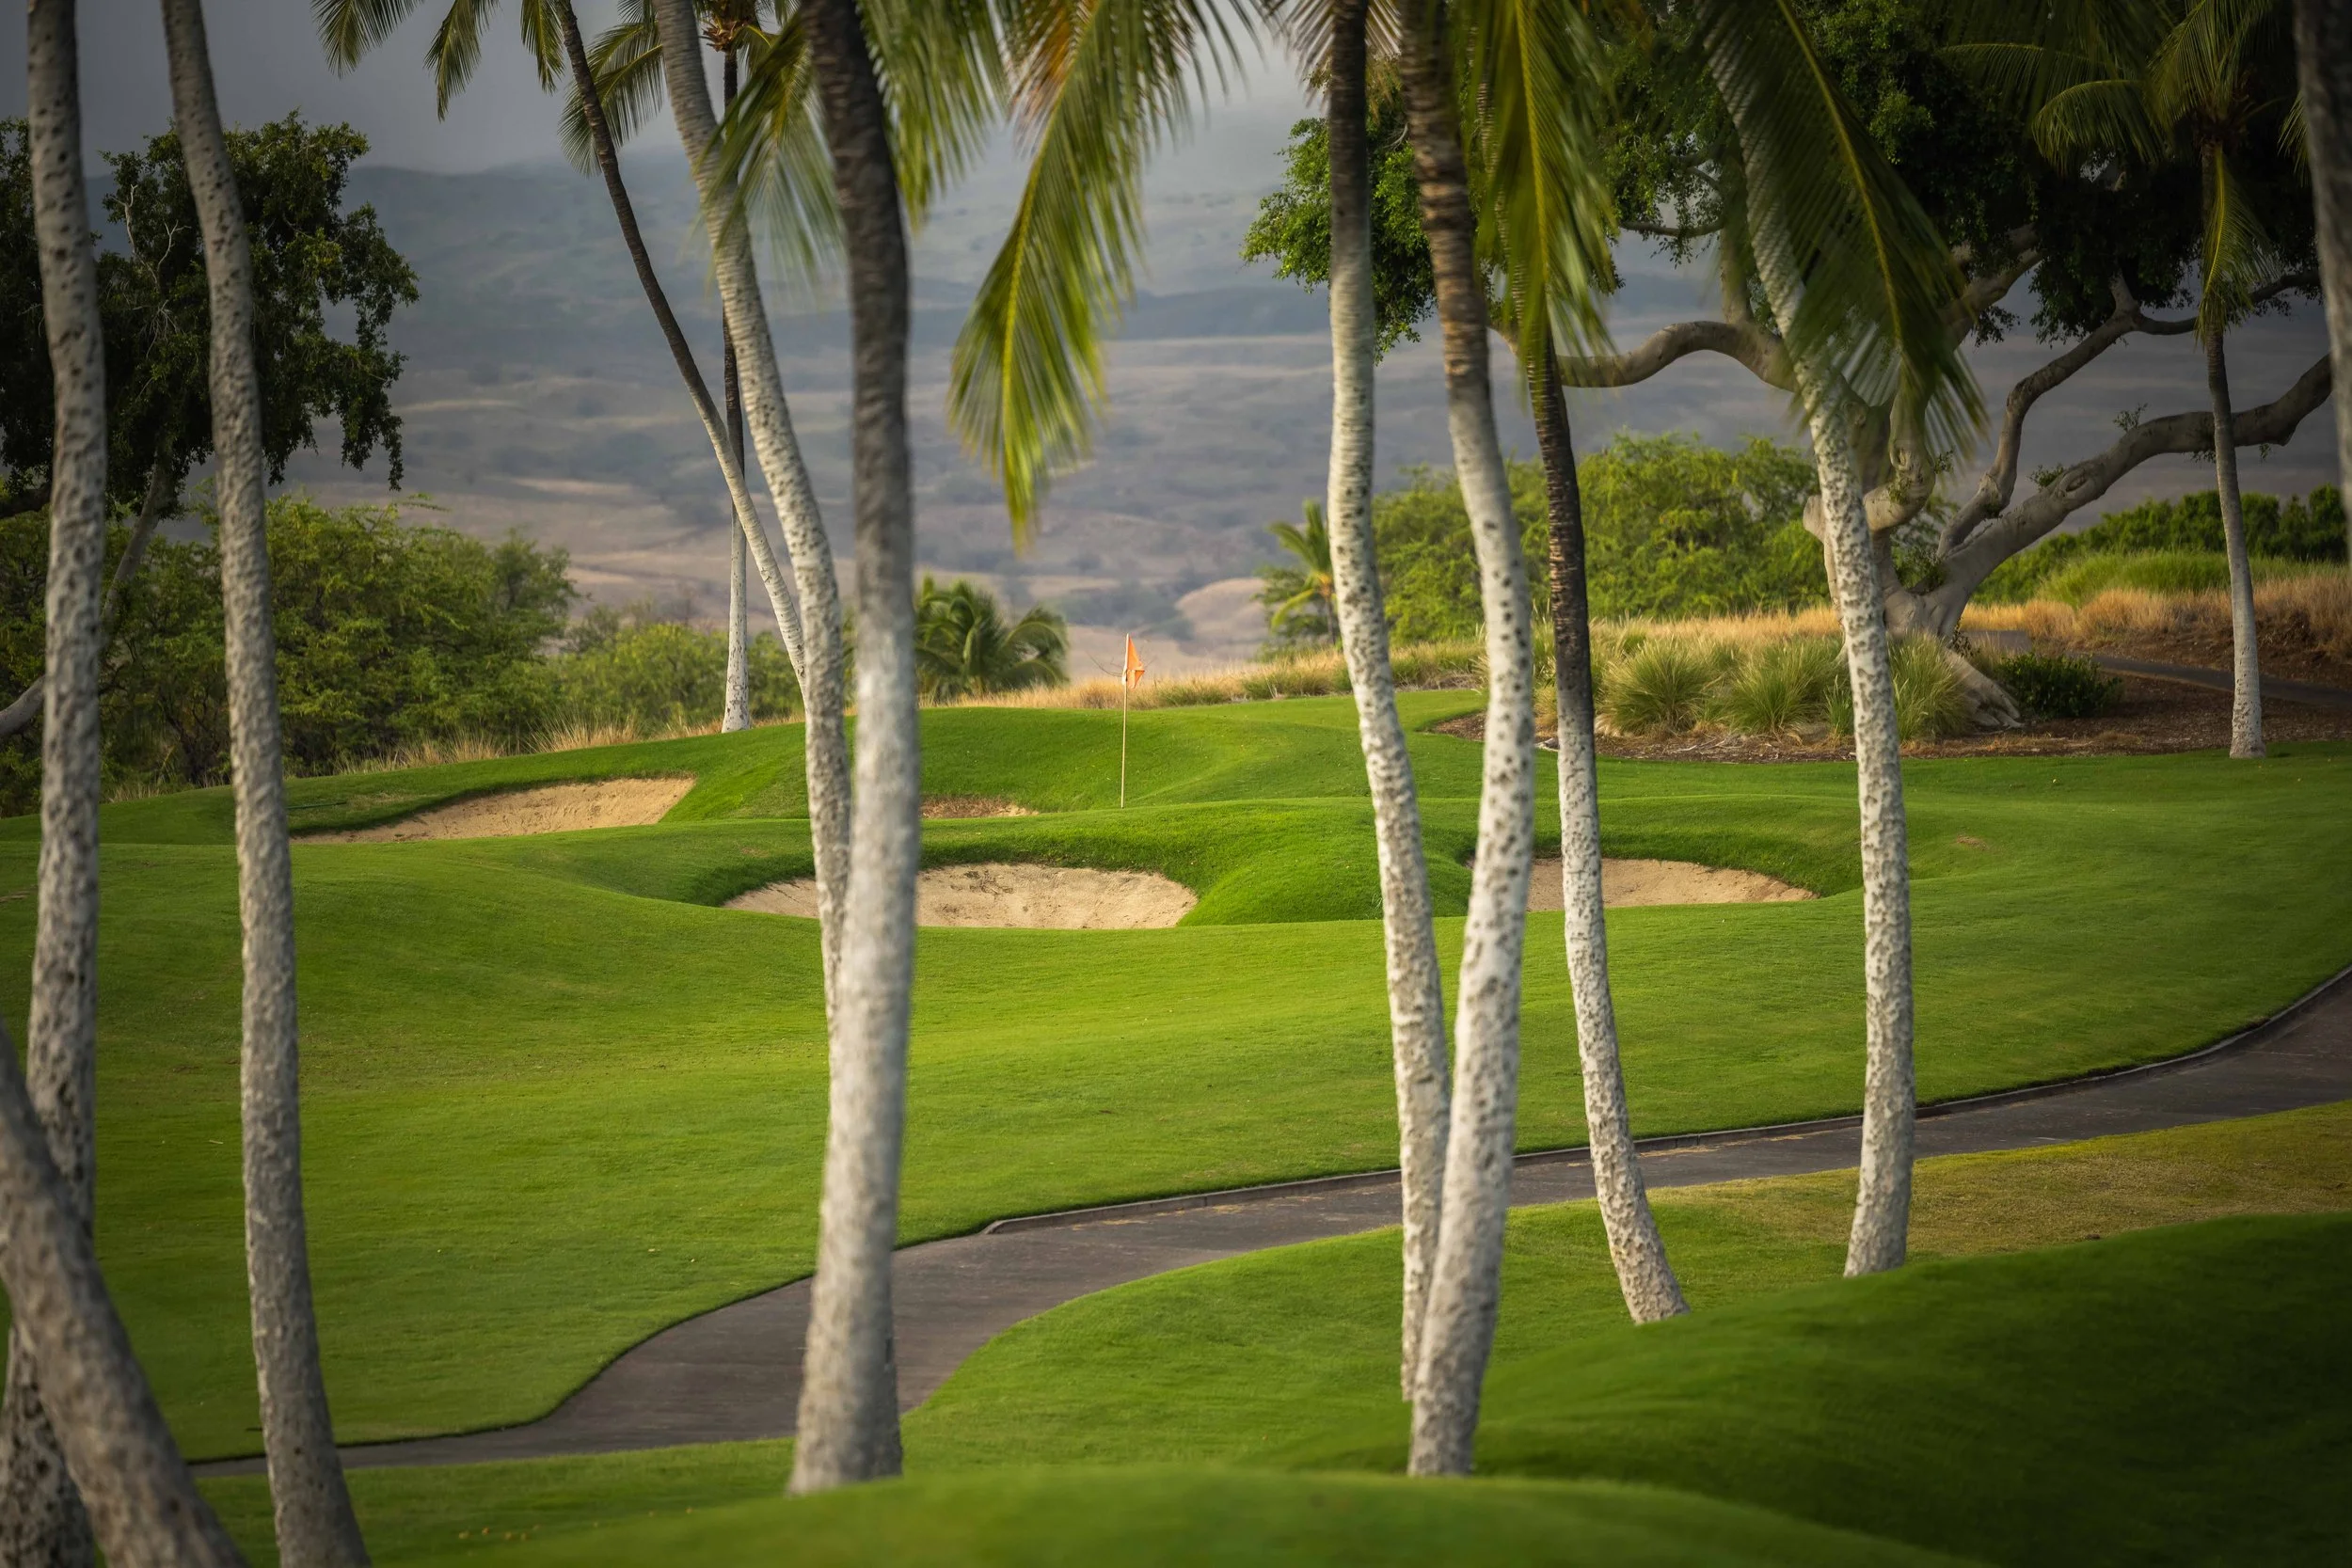
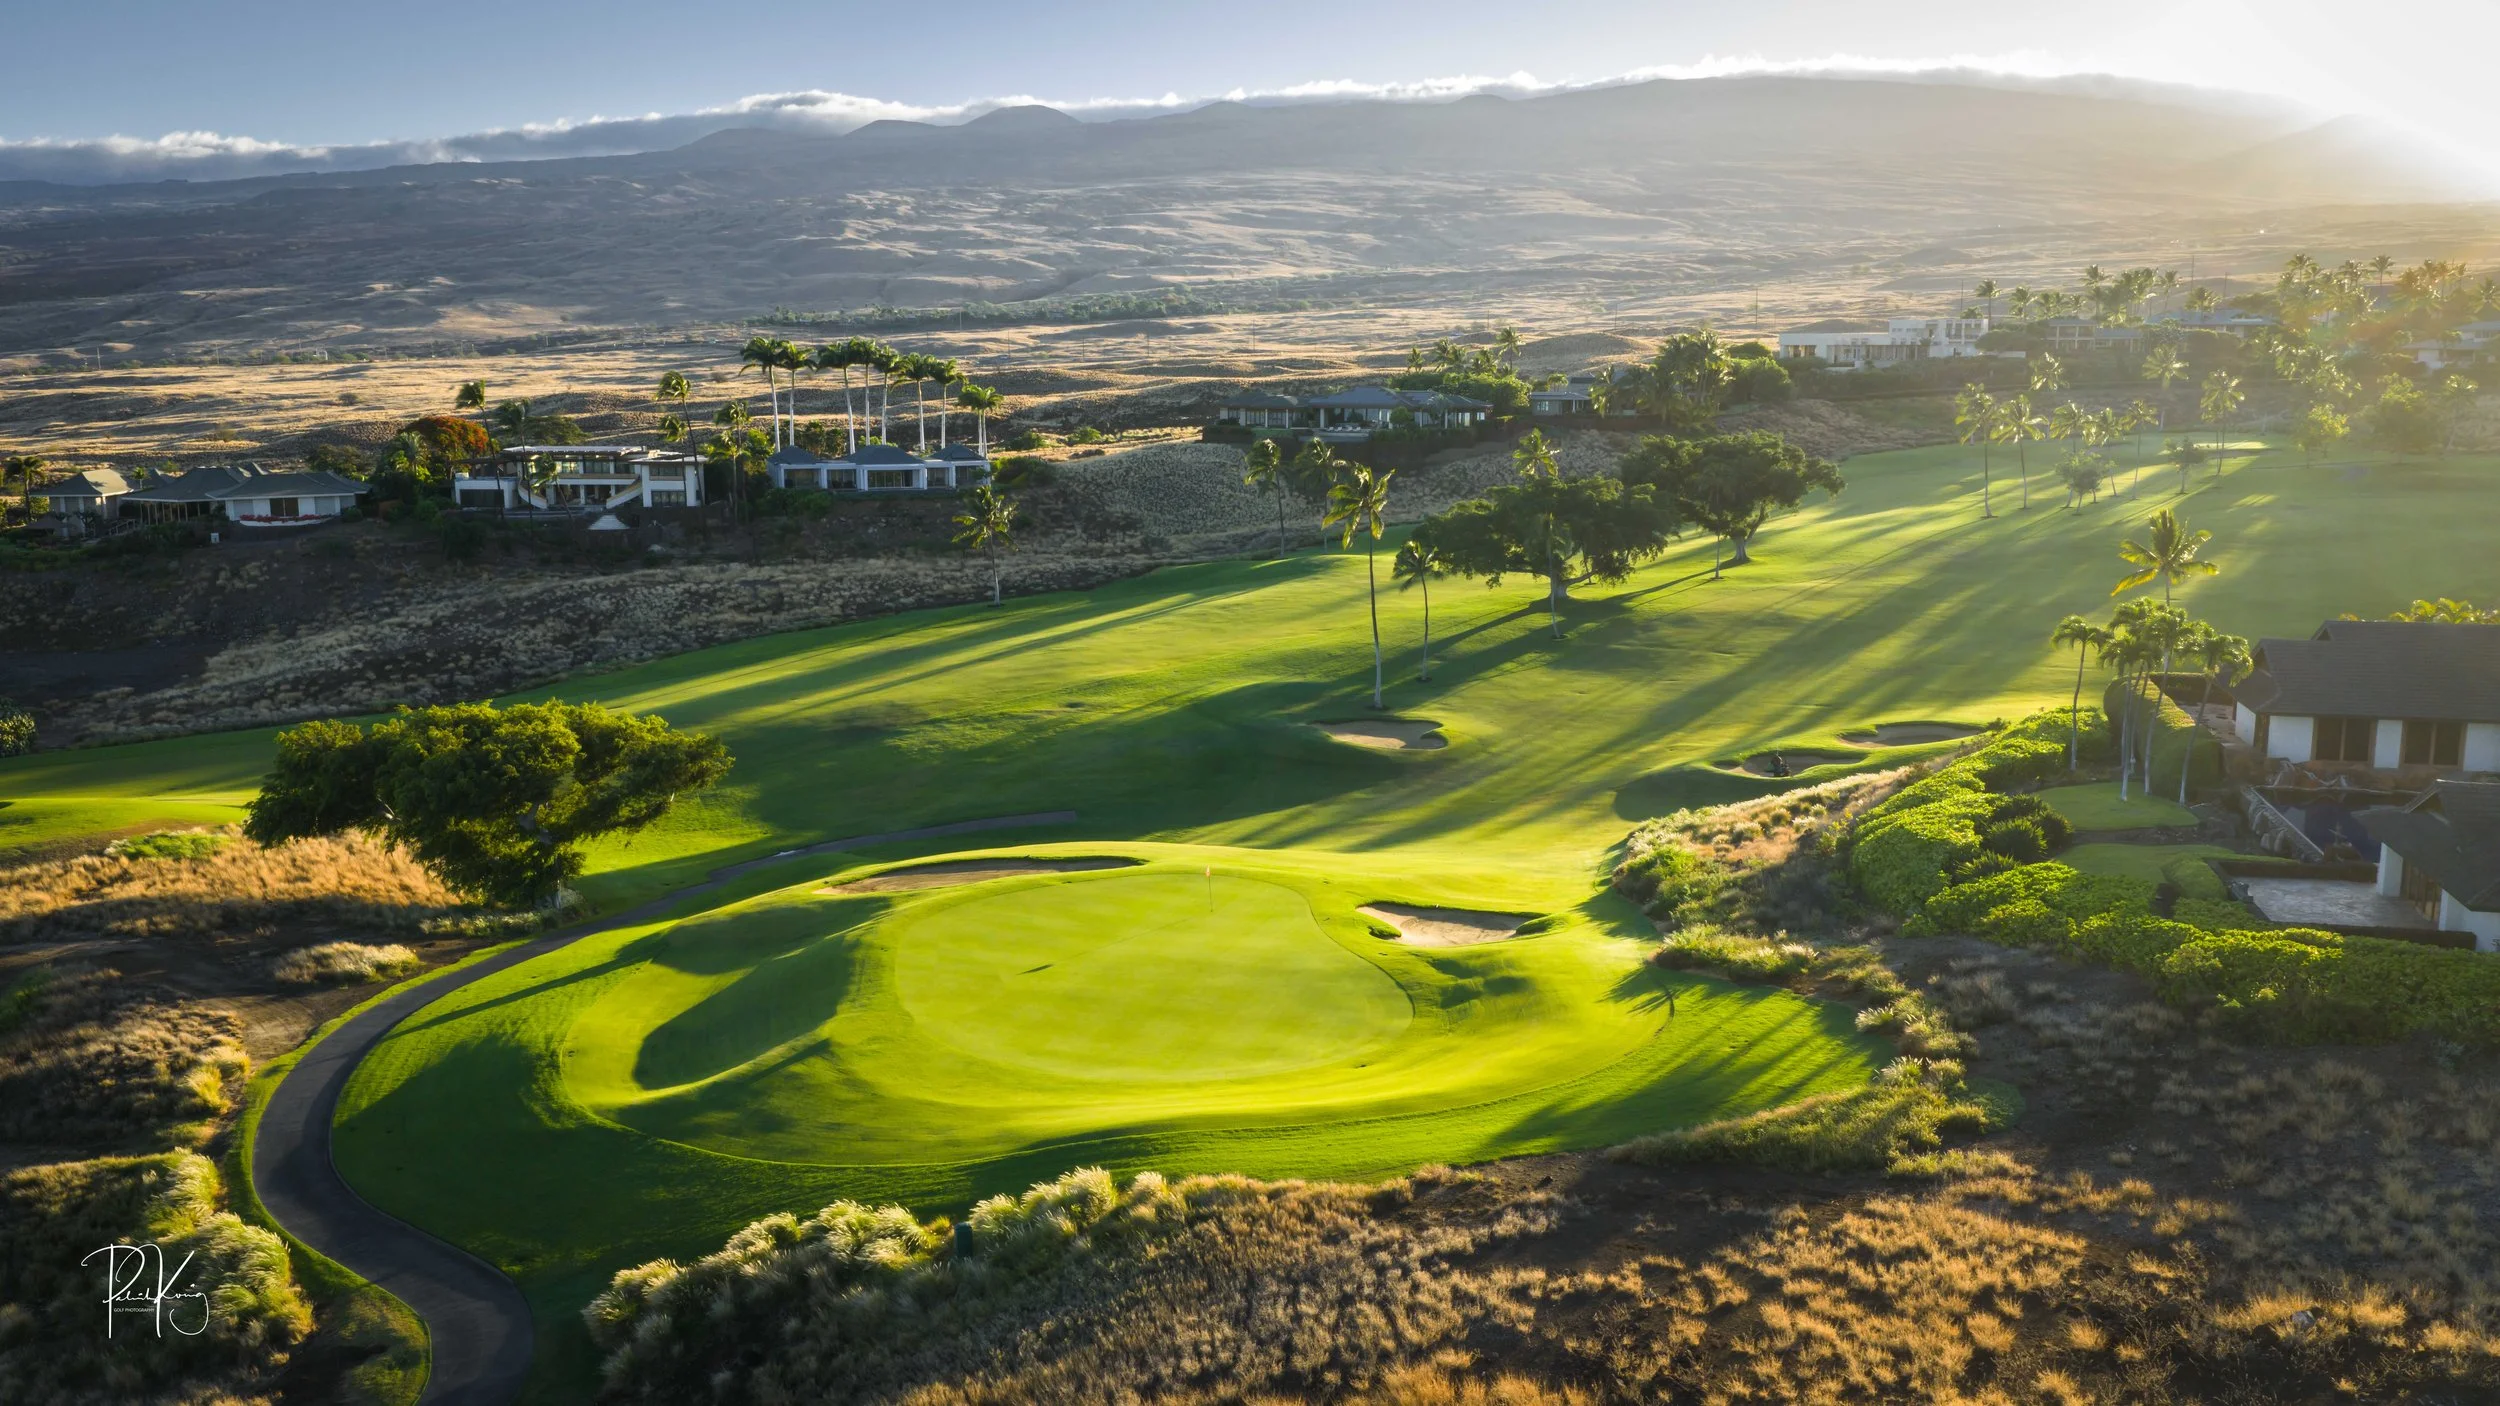
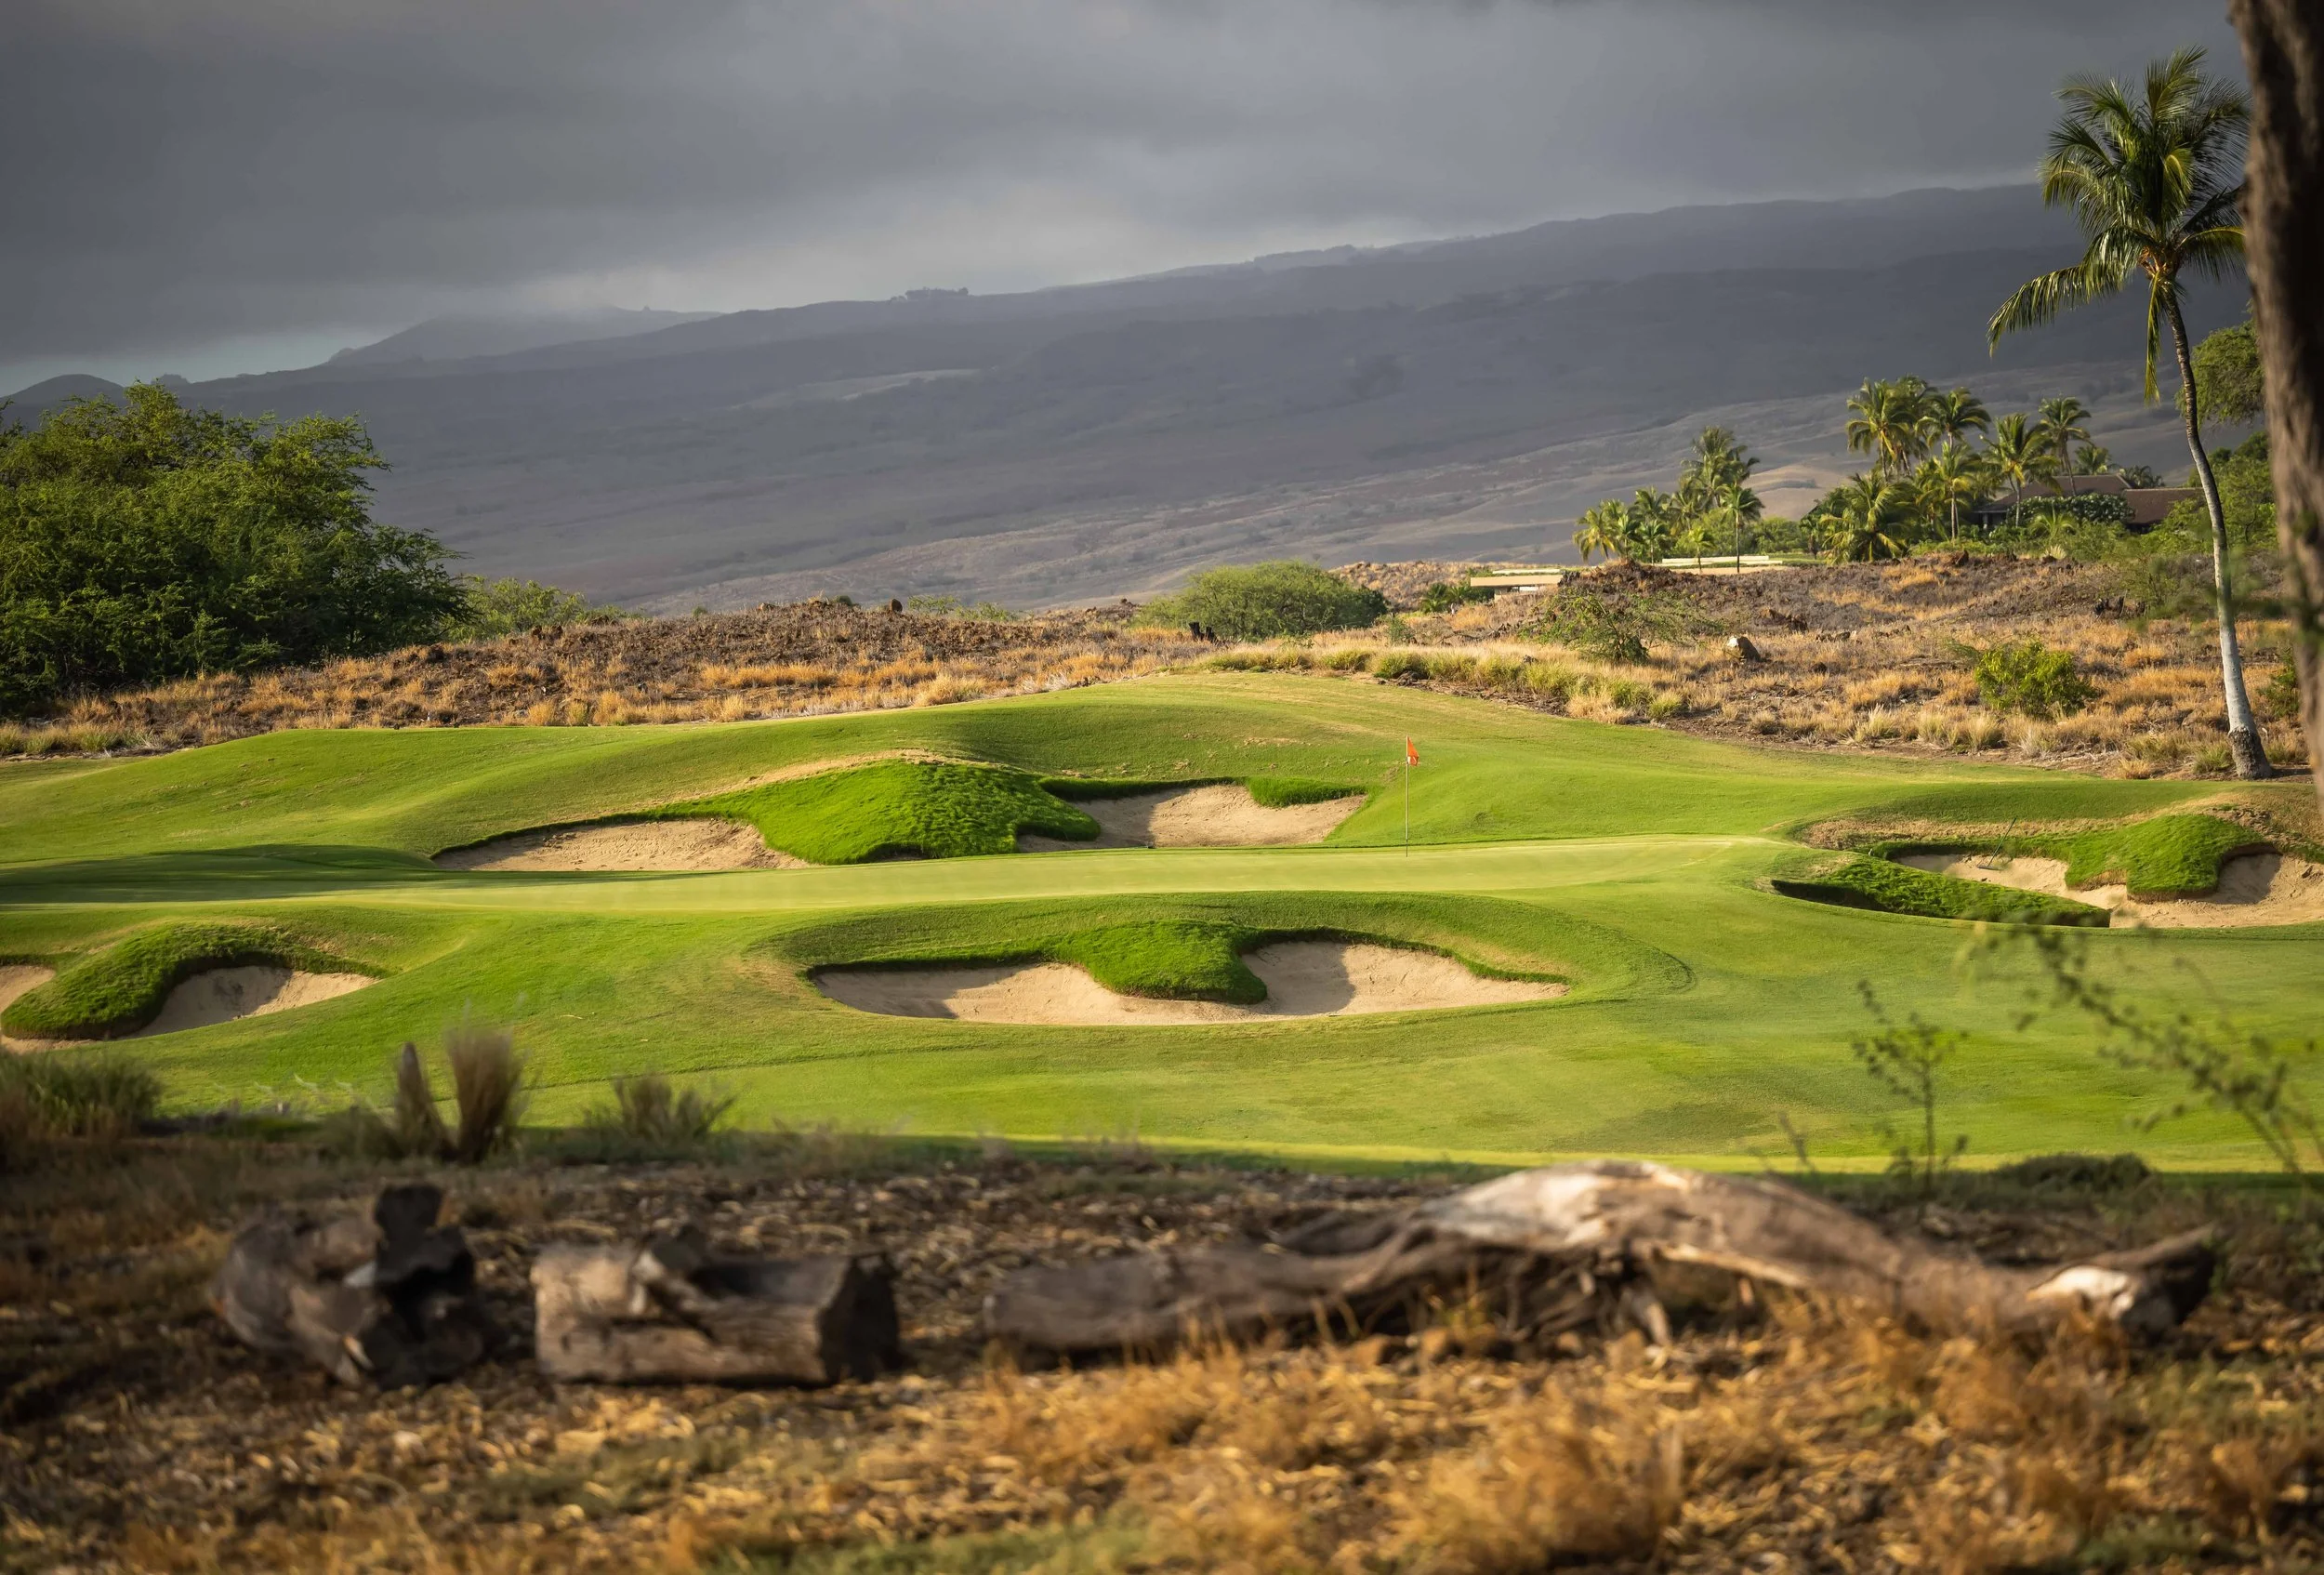
Hole #15 - Par 3 - 211 yards
Even at 211 yards, the 15th at Mauna Kea is the shortest par 3 on the property and is the least interesting of all four. Personally, I would have loved a definitively short par 3 with a unique green here on the 15th. I cannot confirm that this is the case, but often times, course architects will chase total distance instead of distance variety. This is most obvious on par 3’s as it is an easy way to gain or lose a good chunk of yardage. Mauna Kea misses a prime opportunity to create something special here.
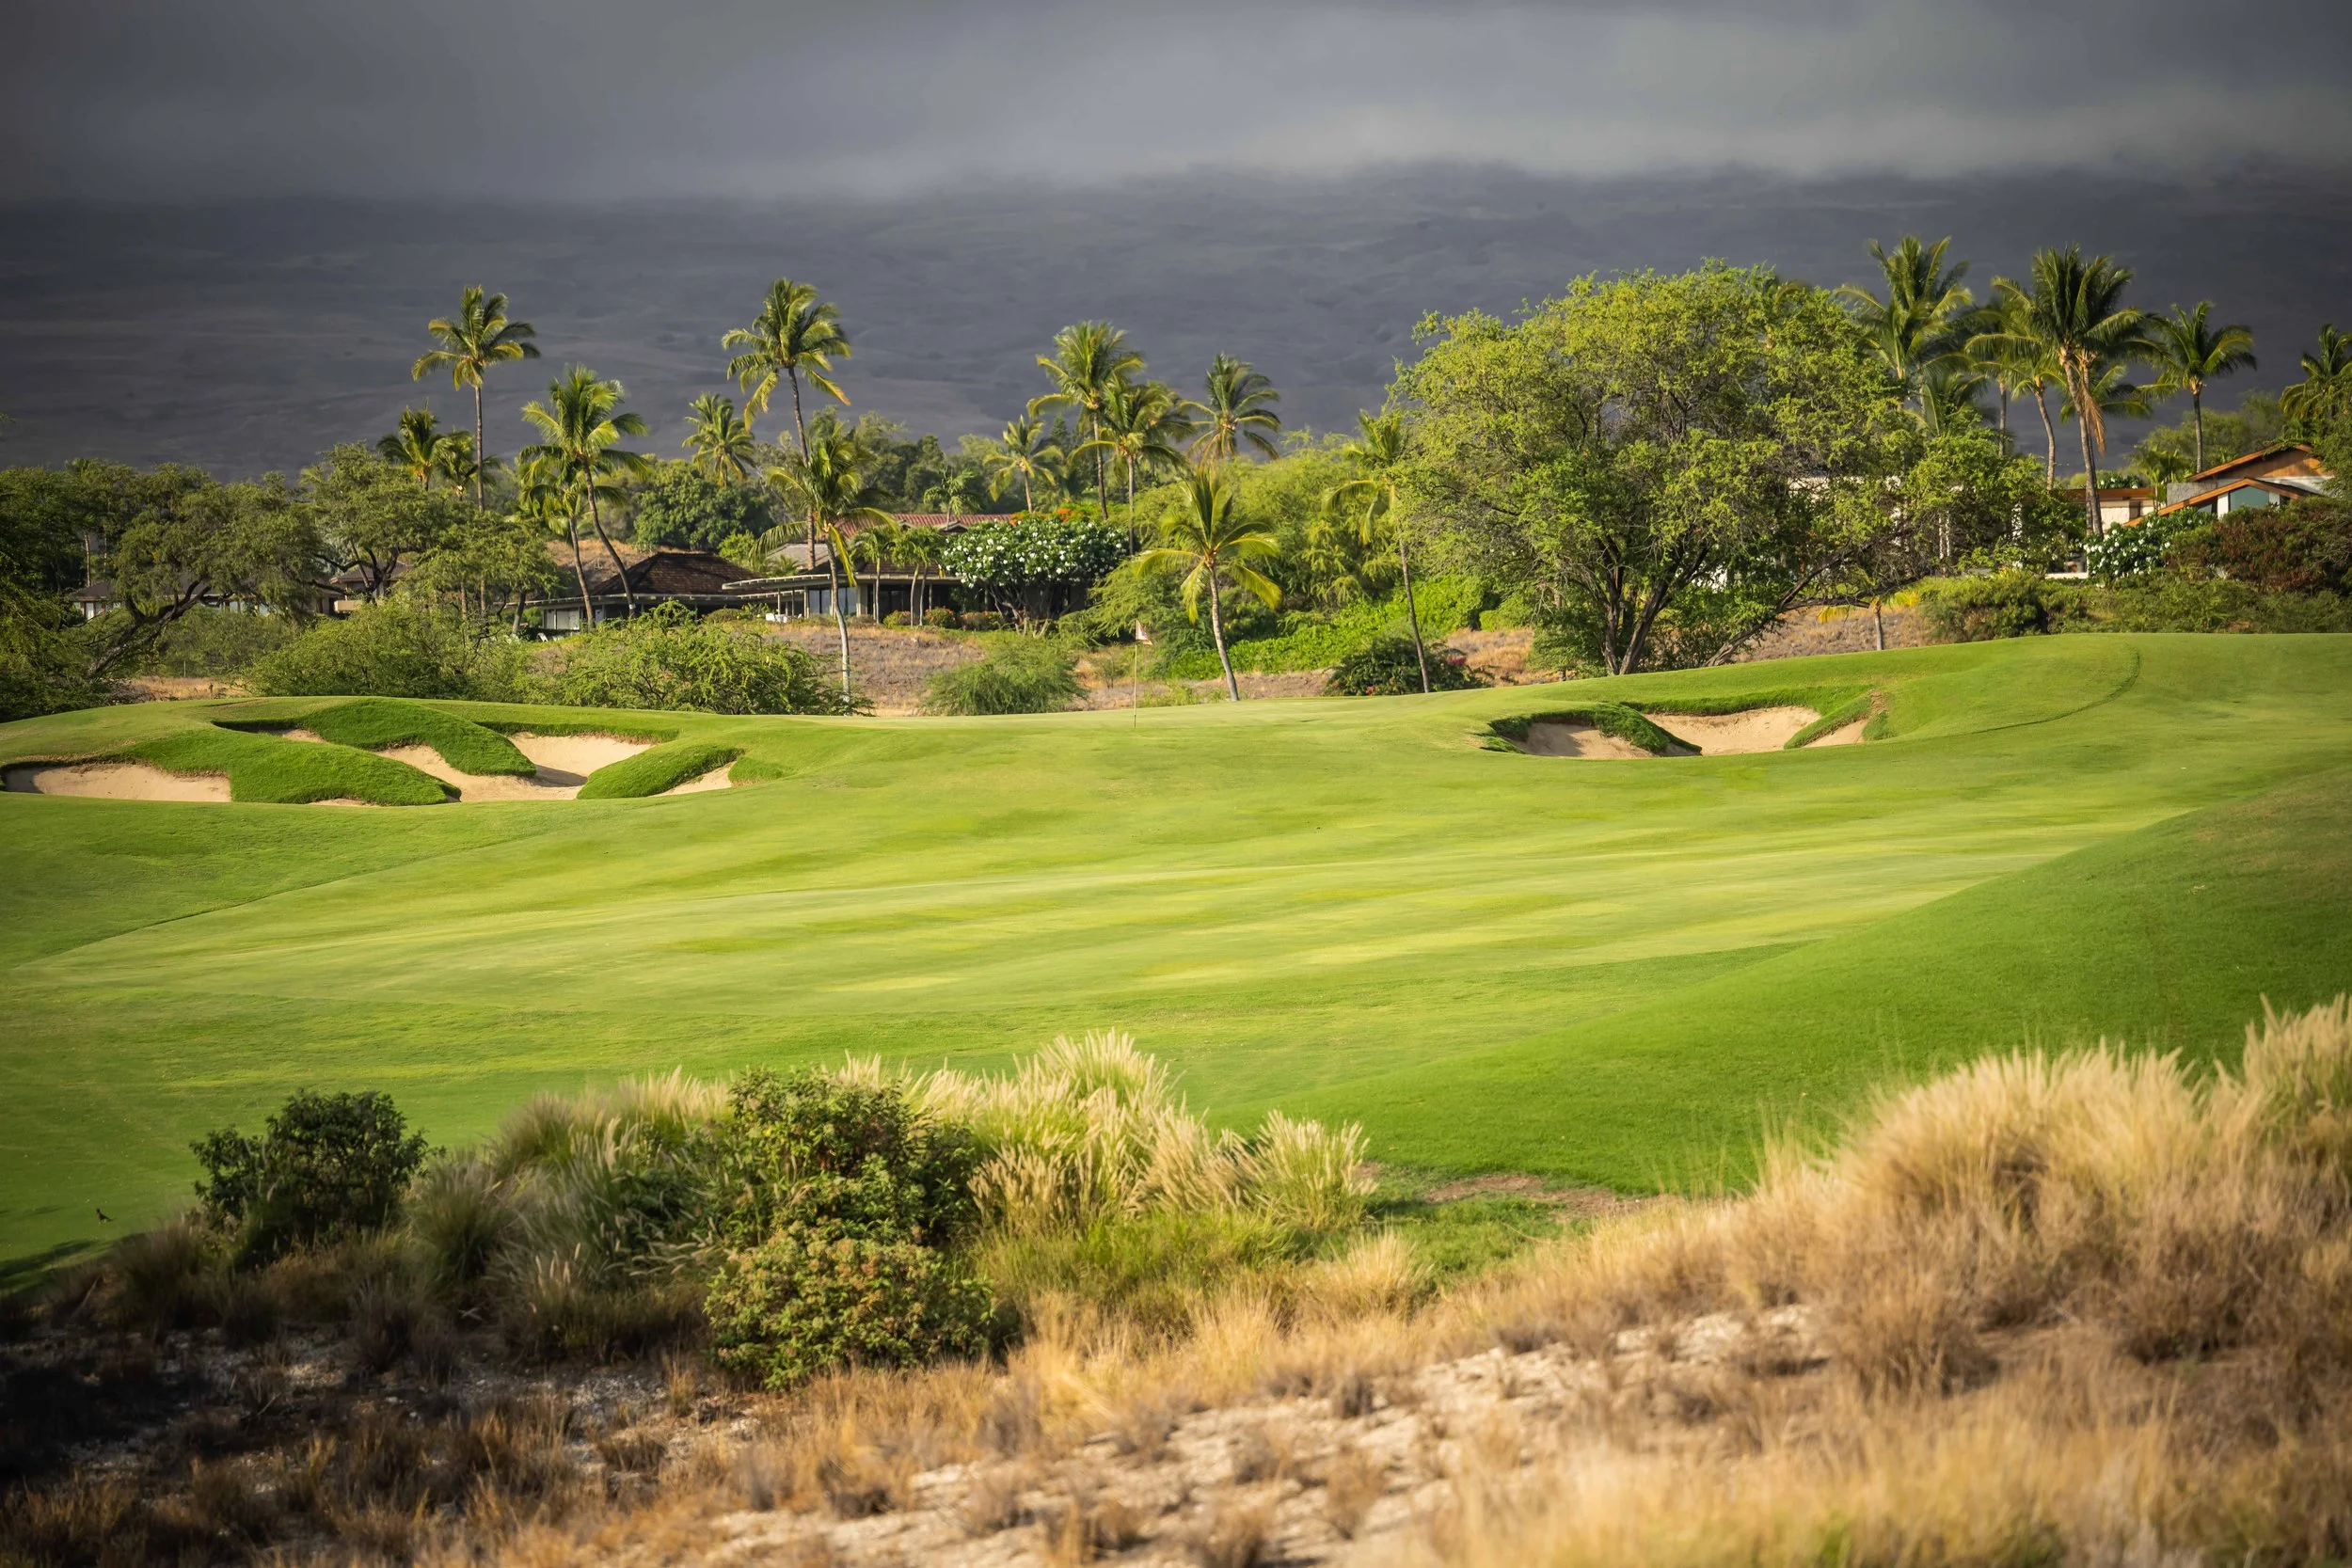
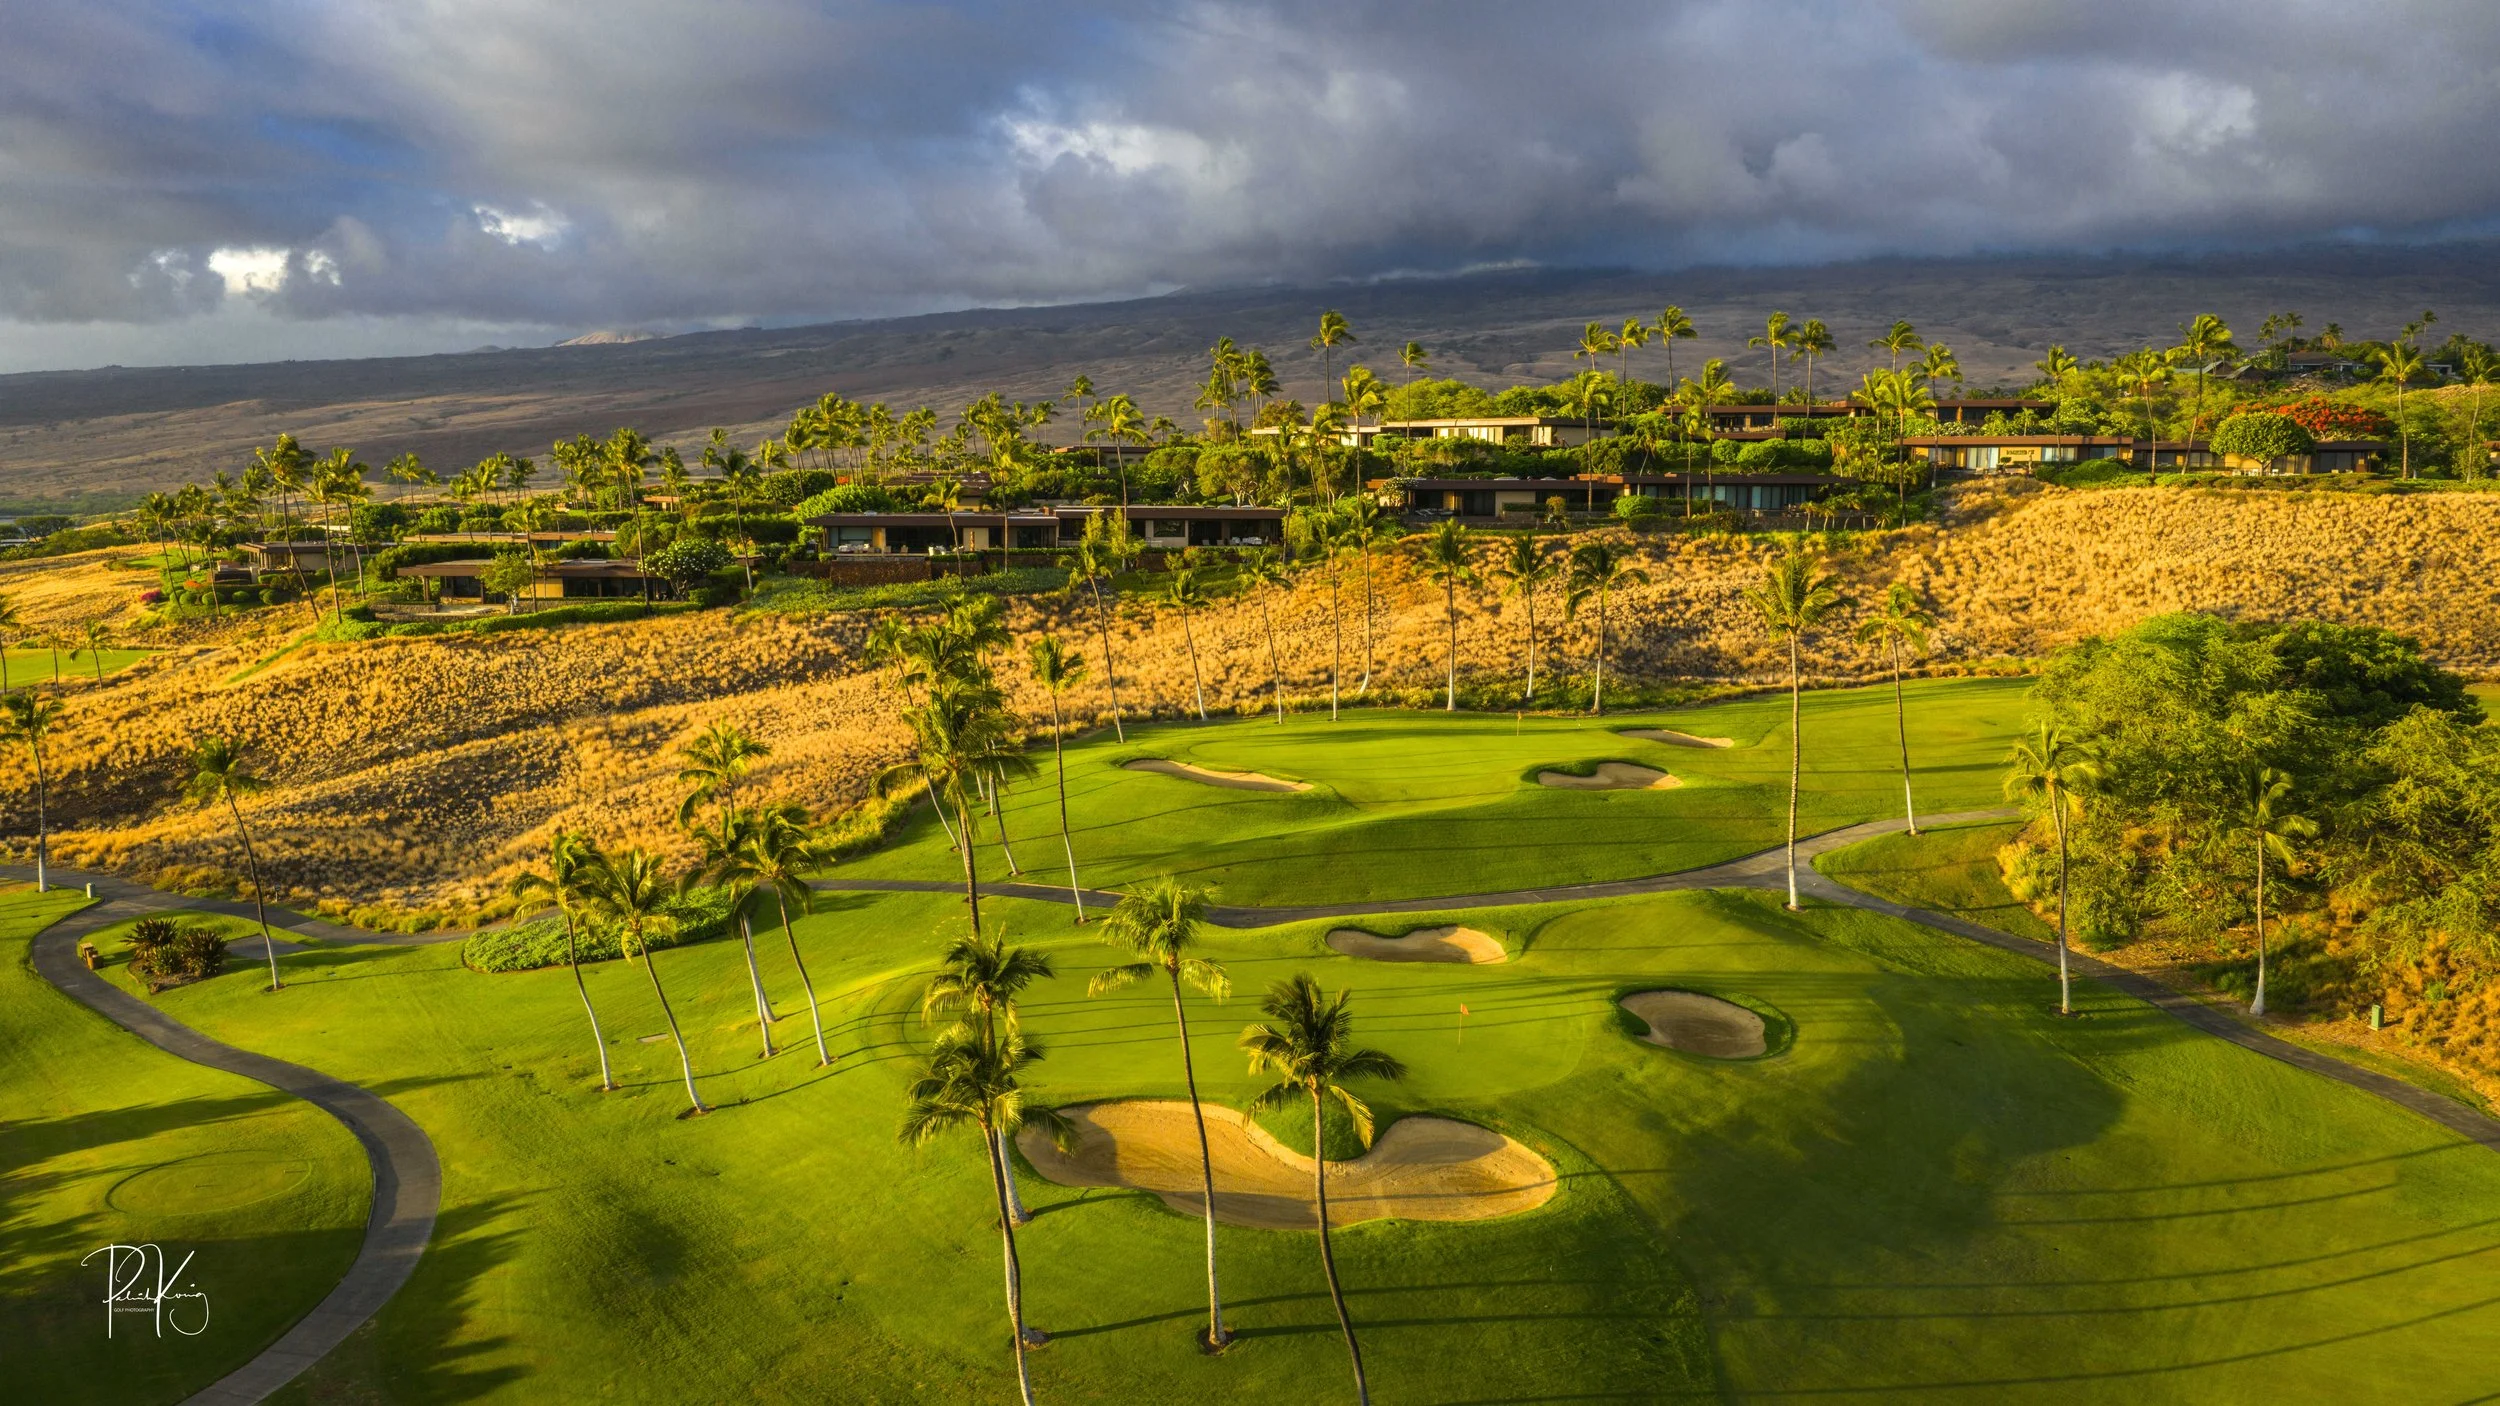
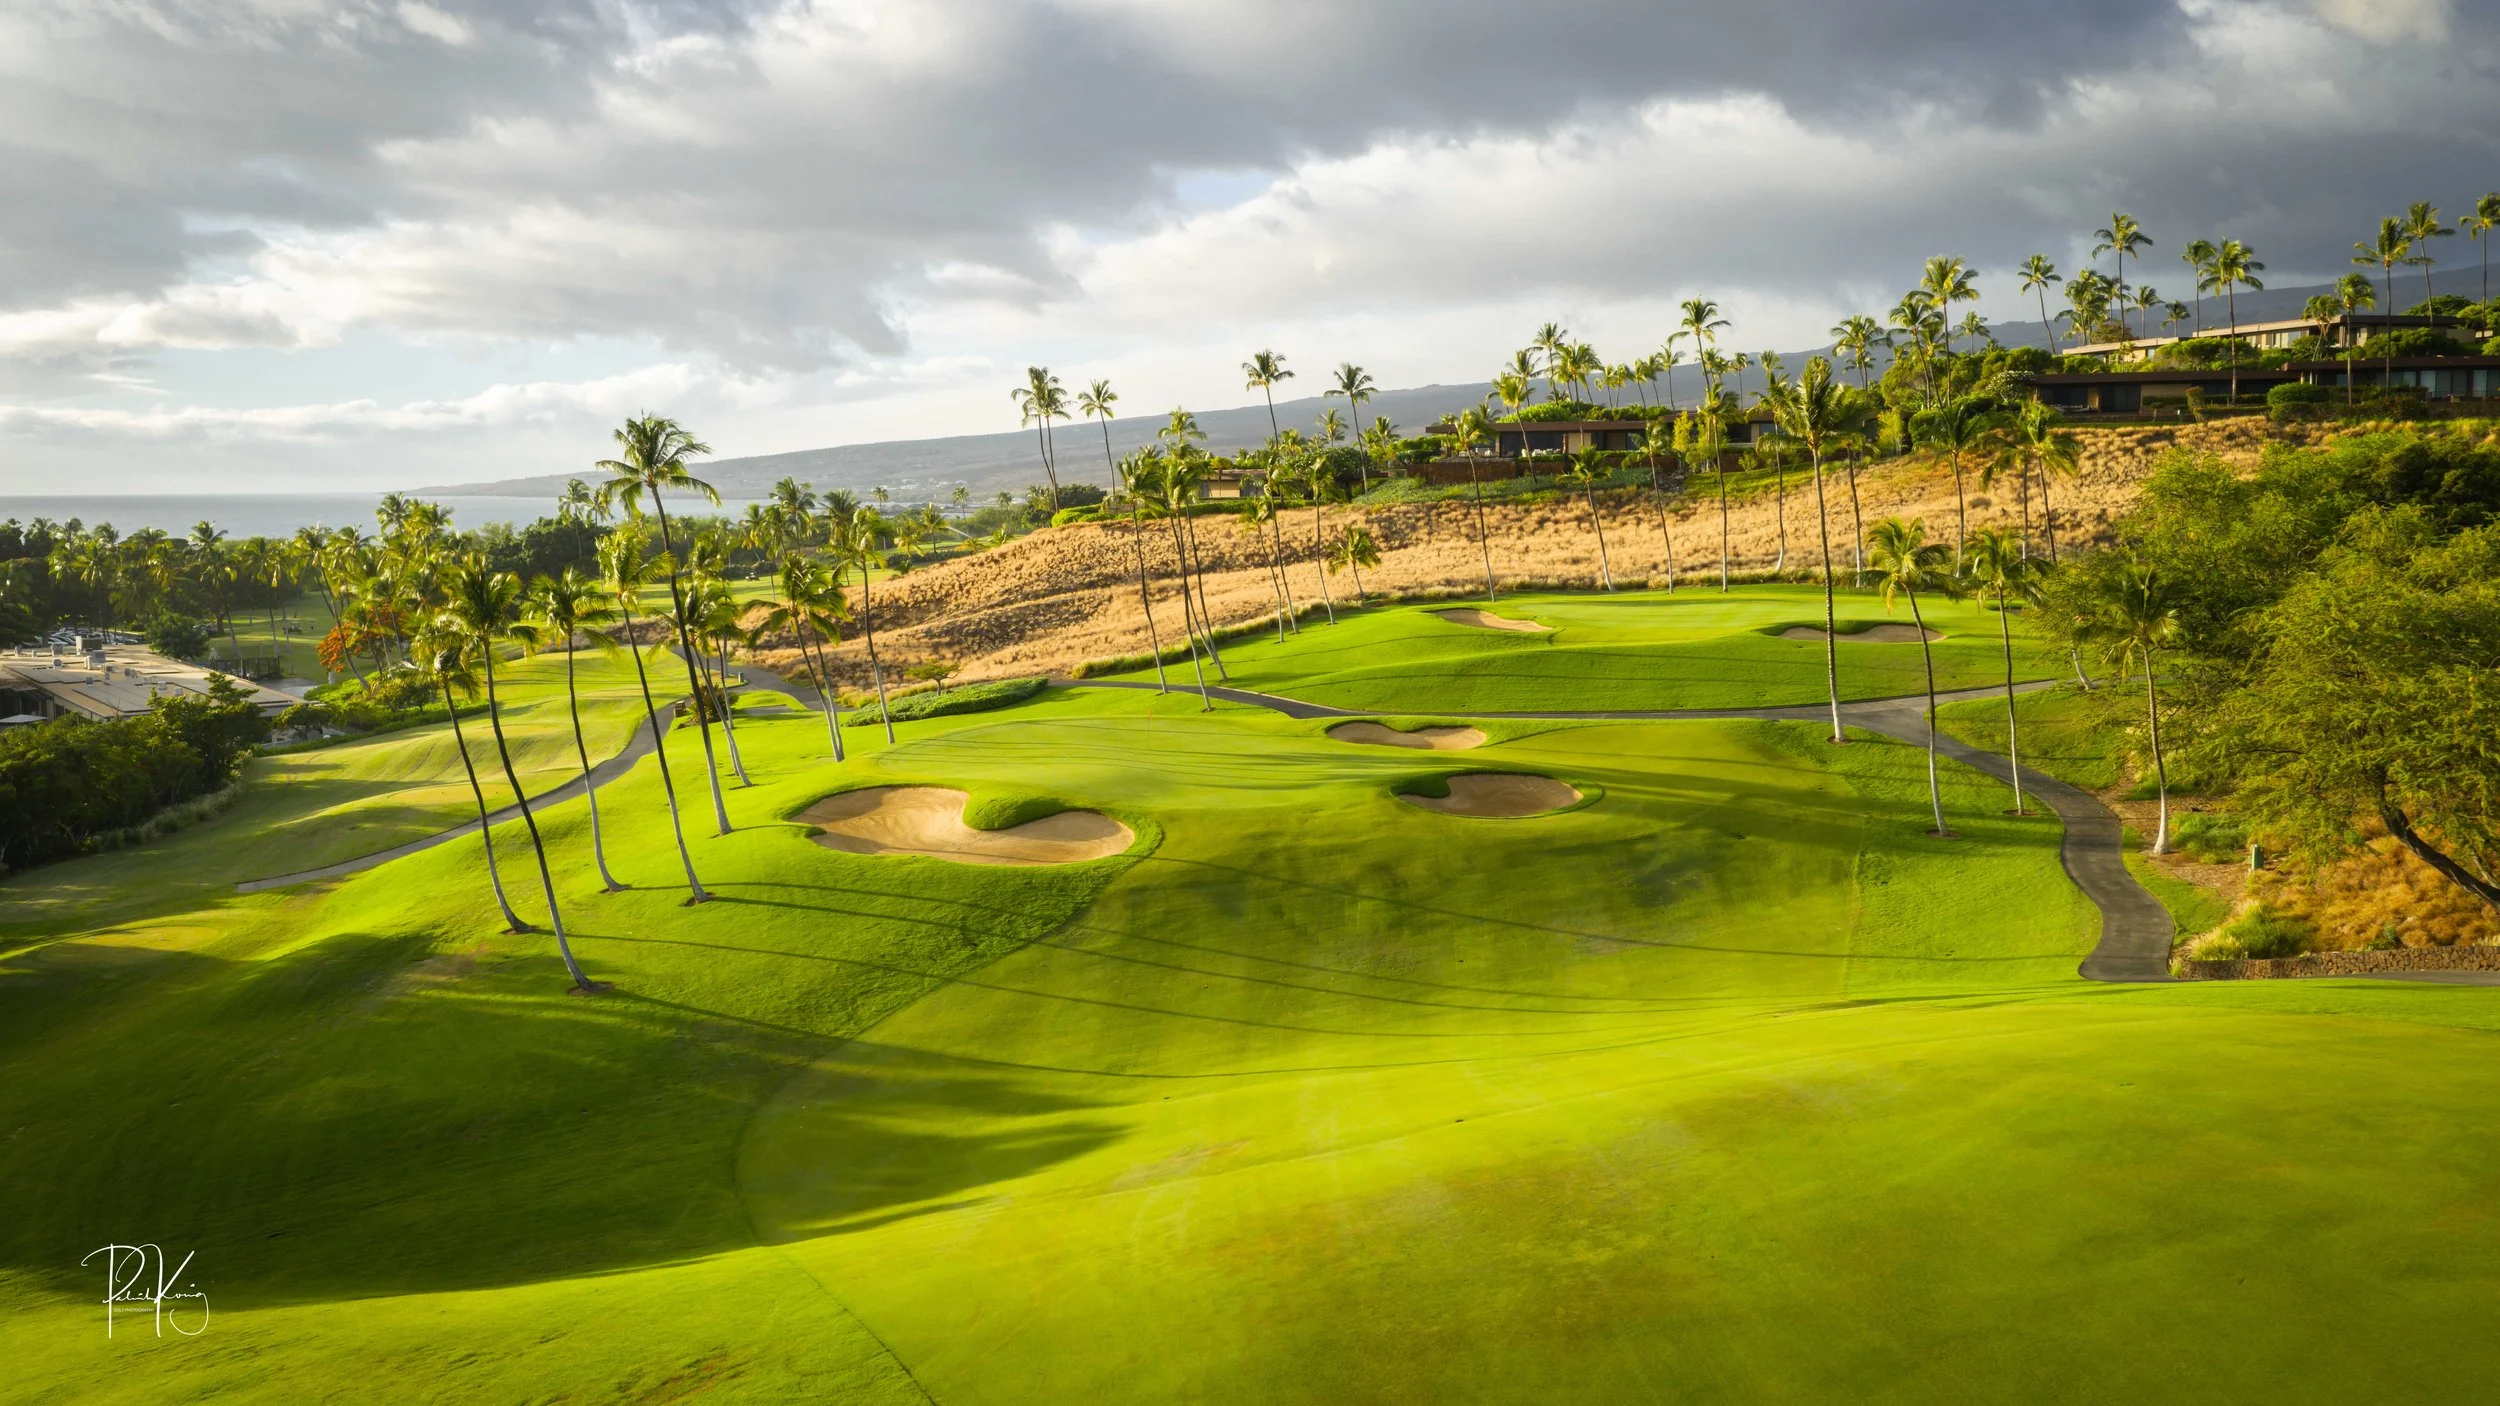
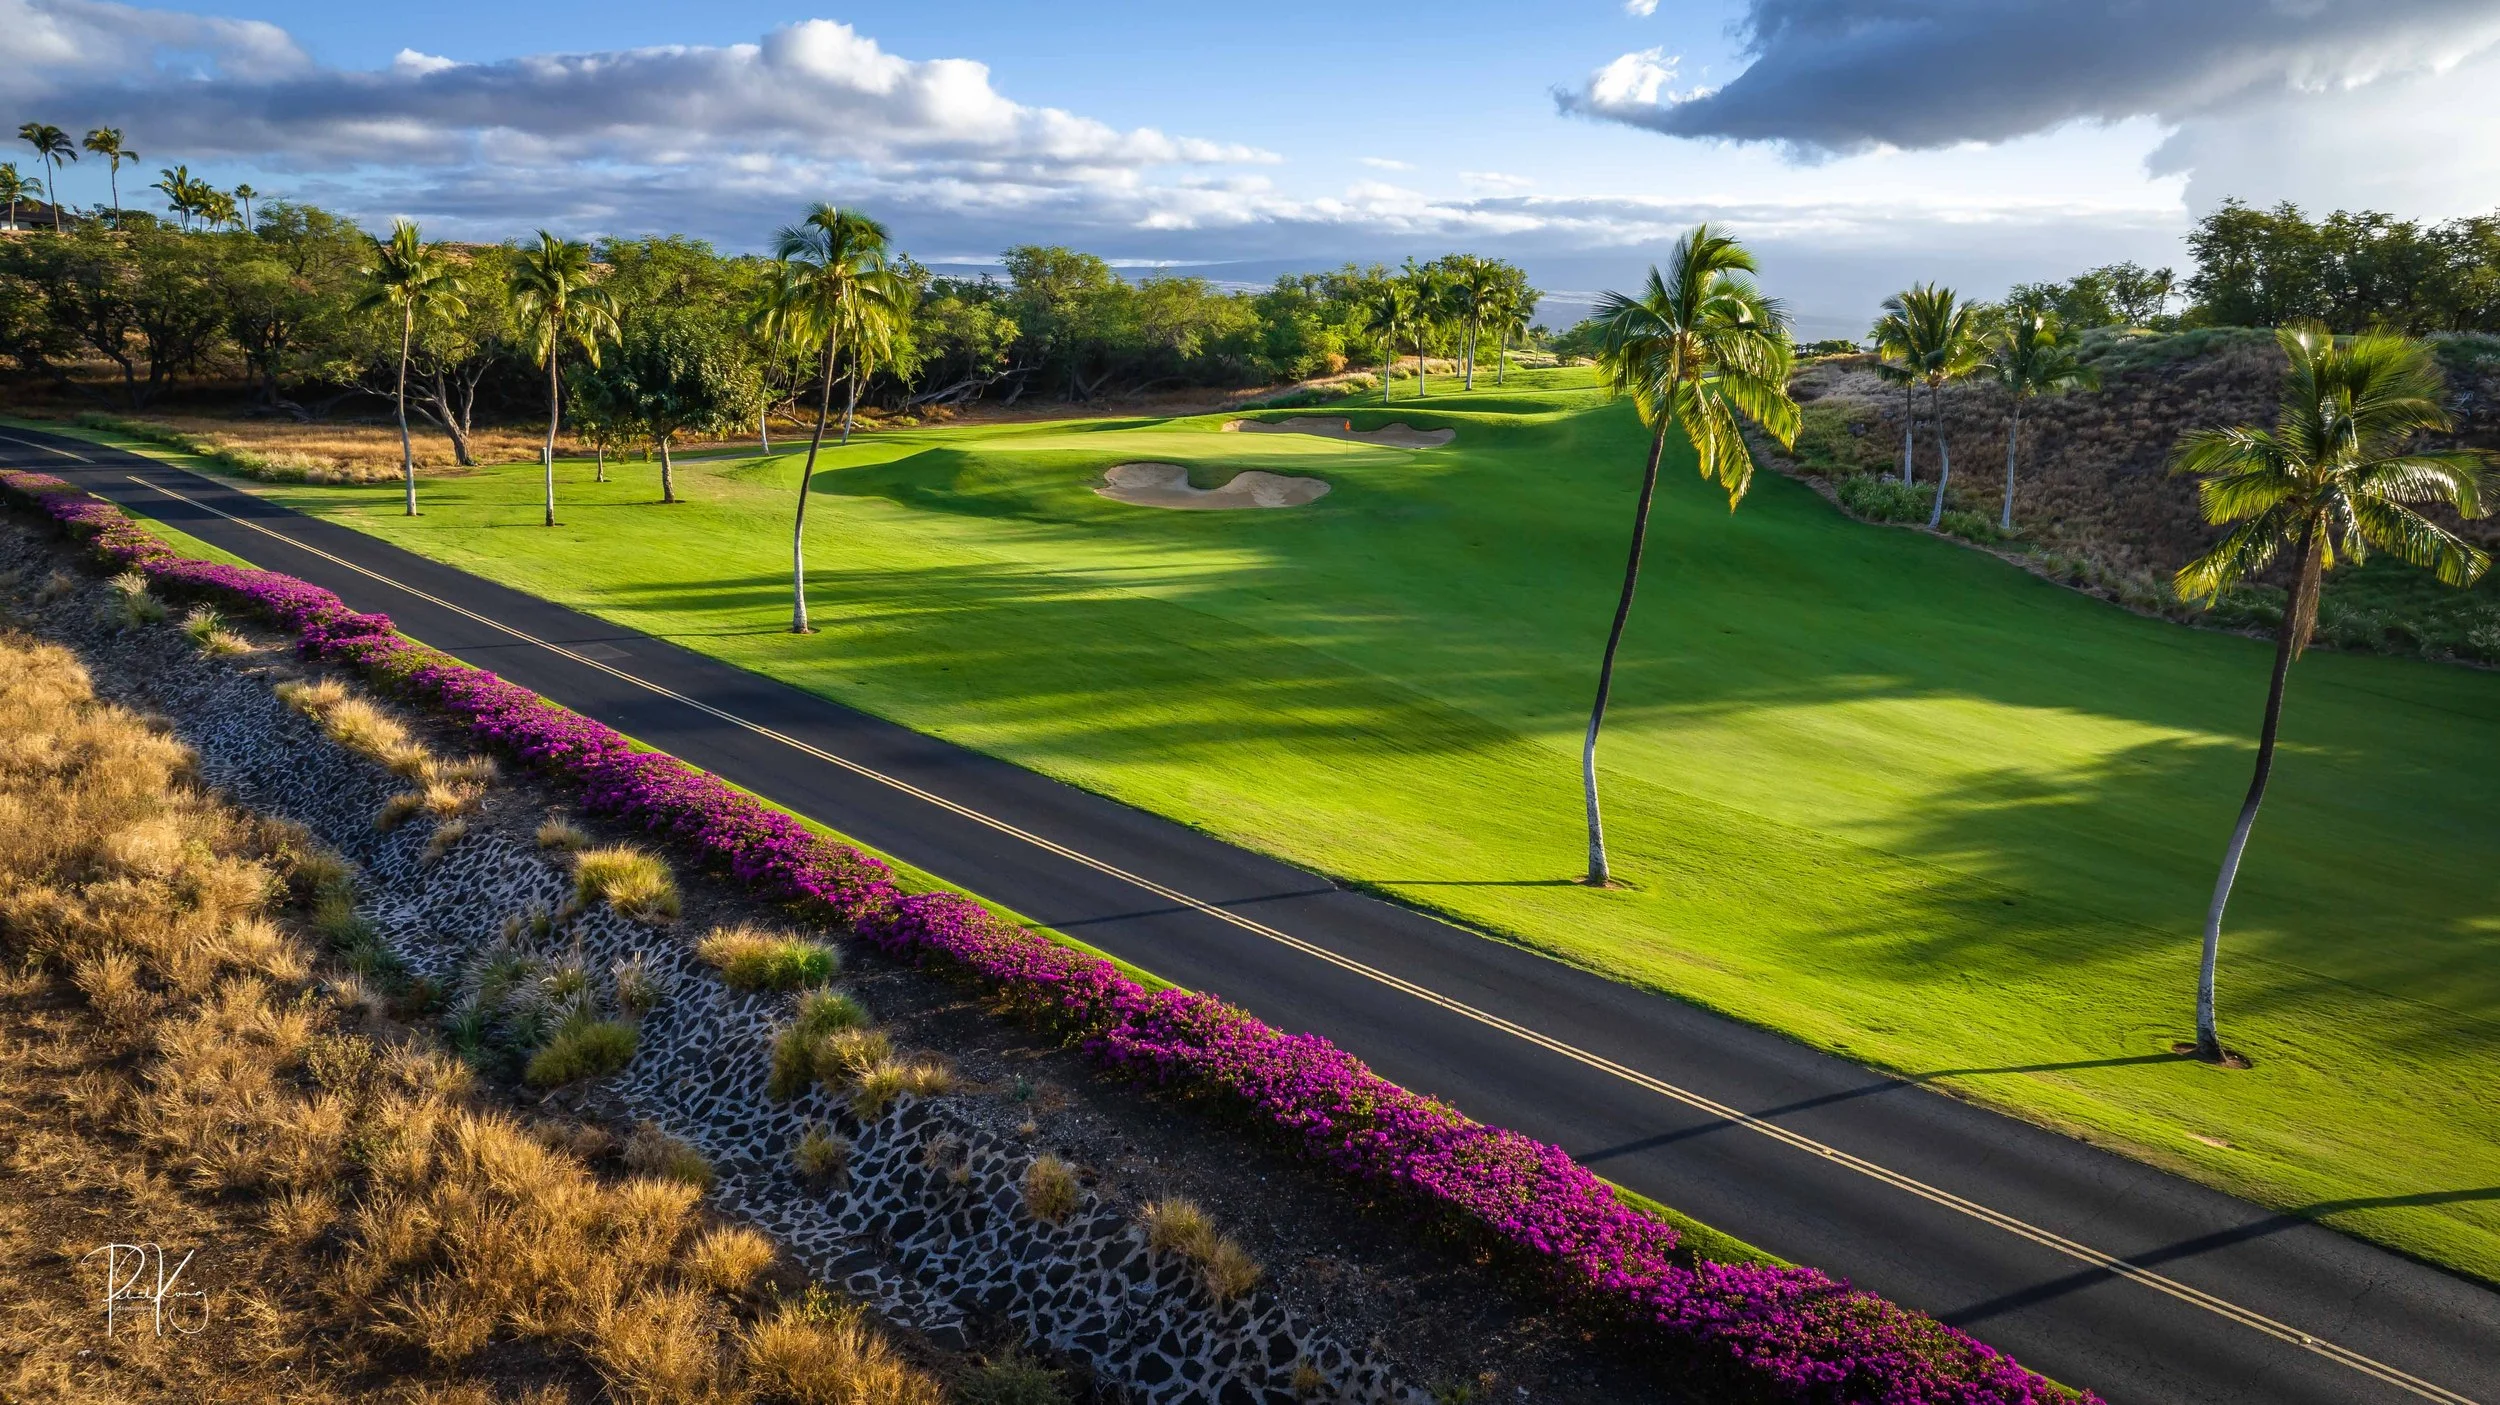
Hole #16 - Par 4 - 484 yards
The tee shot on the 16th hole is surrounded by trees that quickly fade away as you make your way towards the large fairway protected by two fairway bunkers. Your approach shot offers a fantastic view of the south end of the property and into the Pacific Ocean. For a golf hole that plays nearly 500 yards, the green is particularly small and well protected.

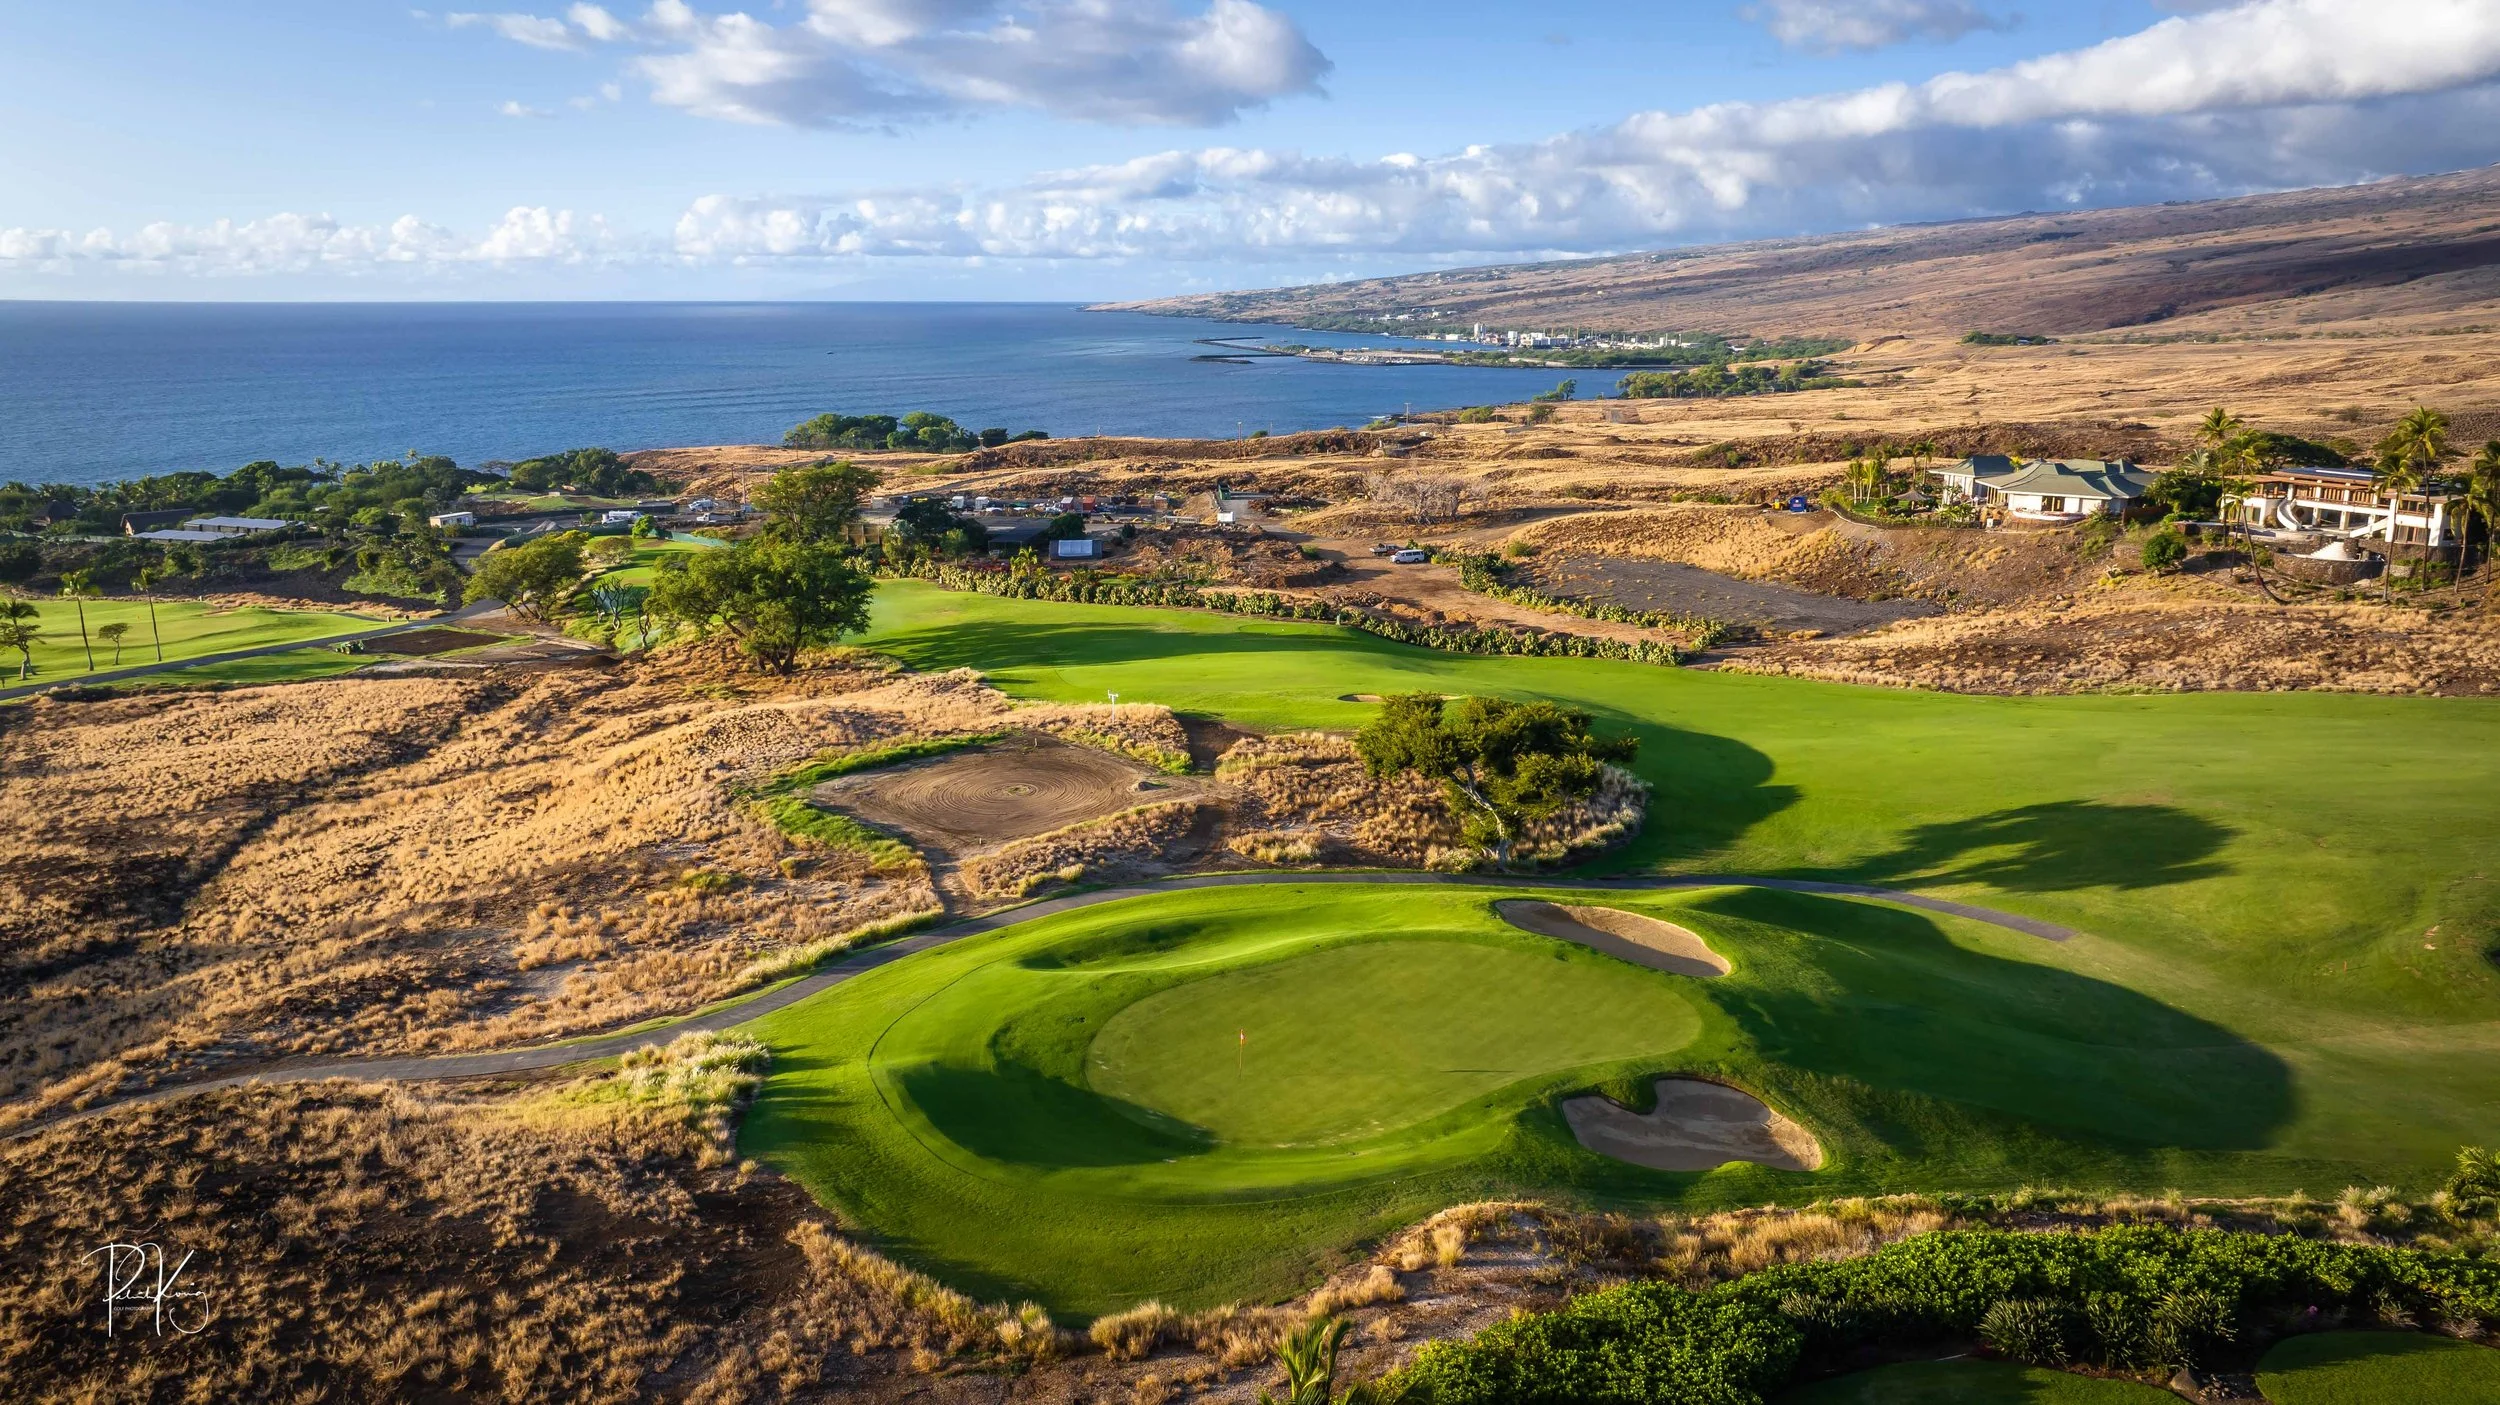
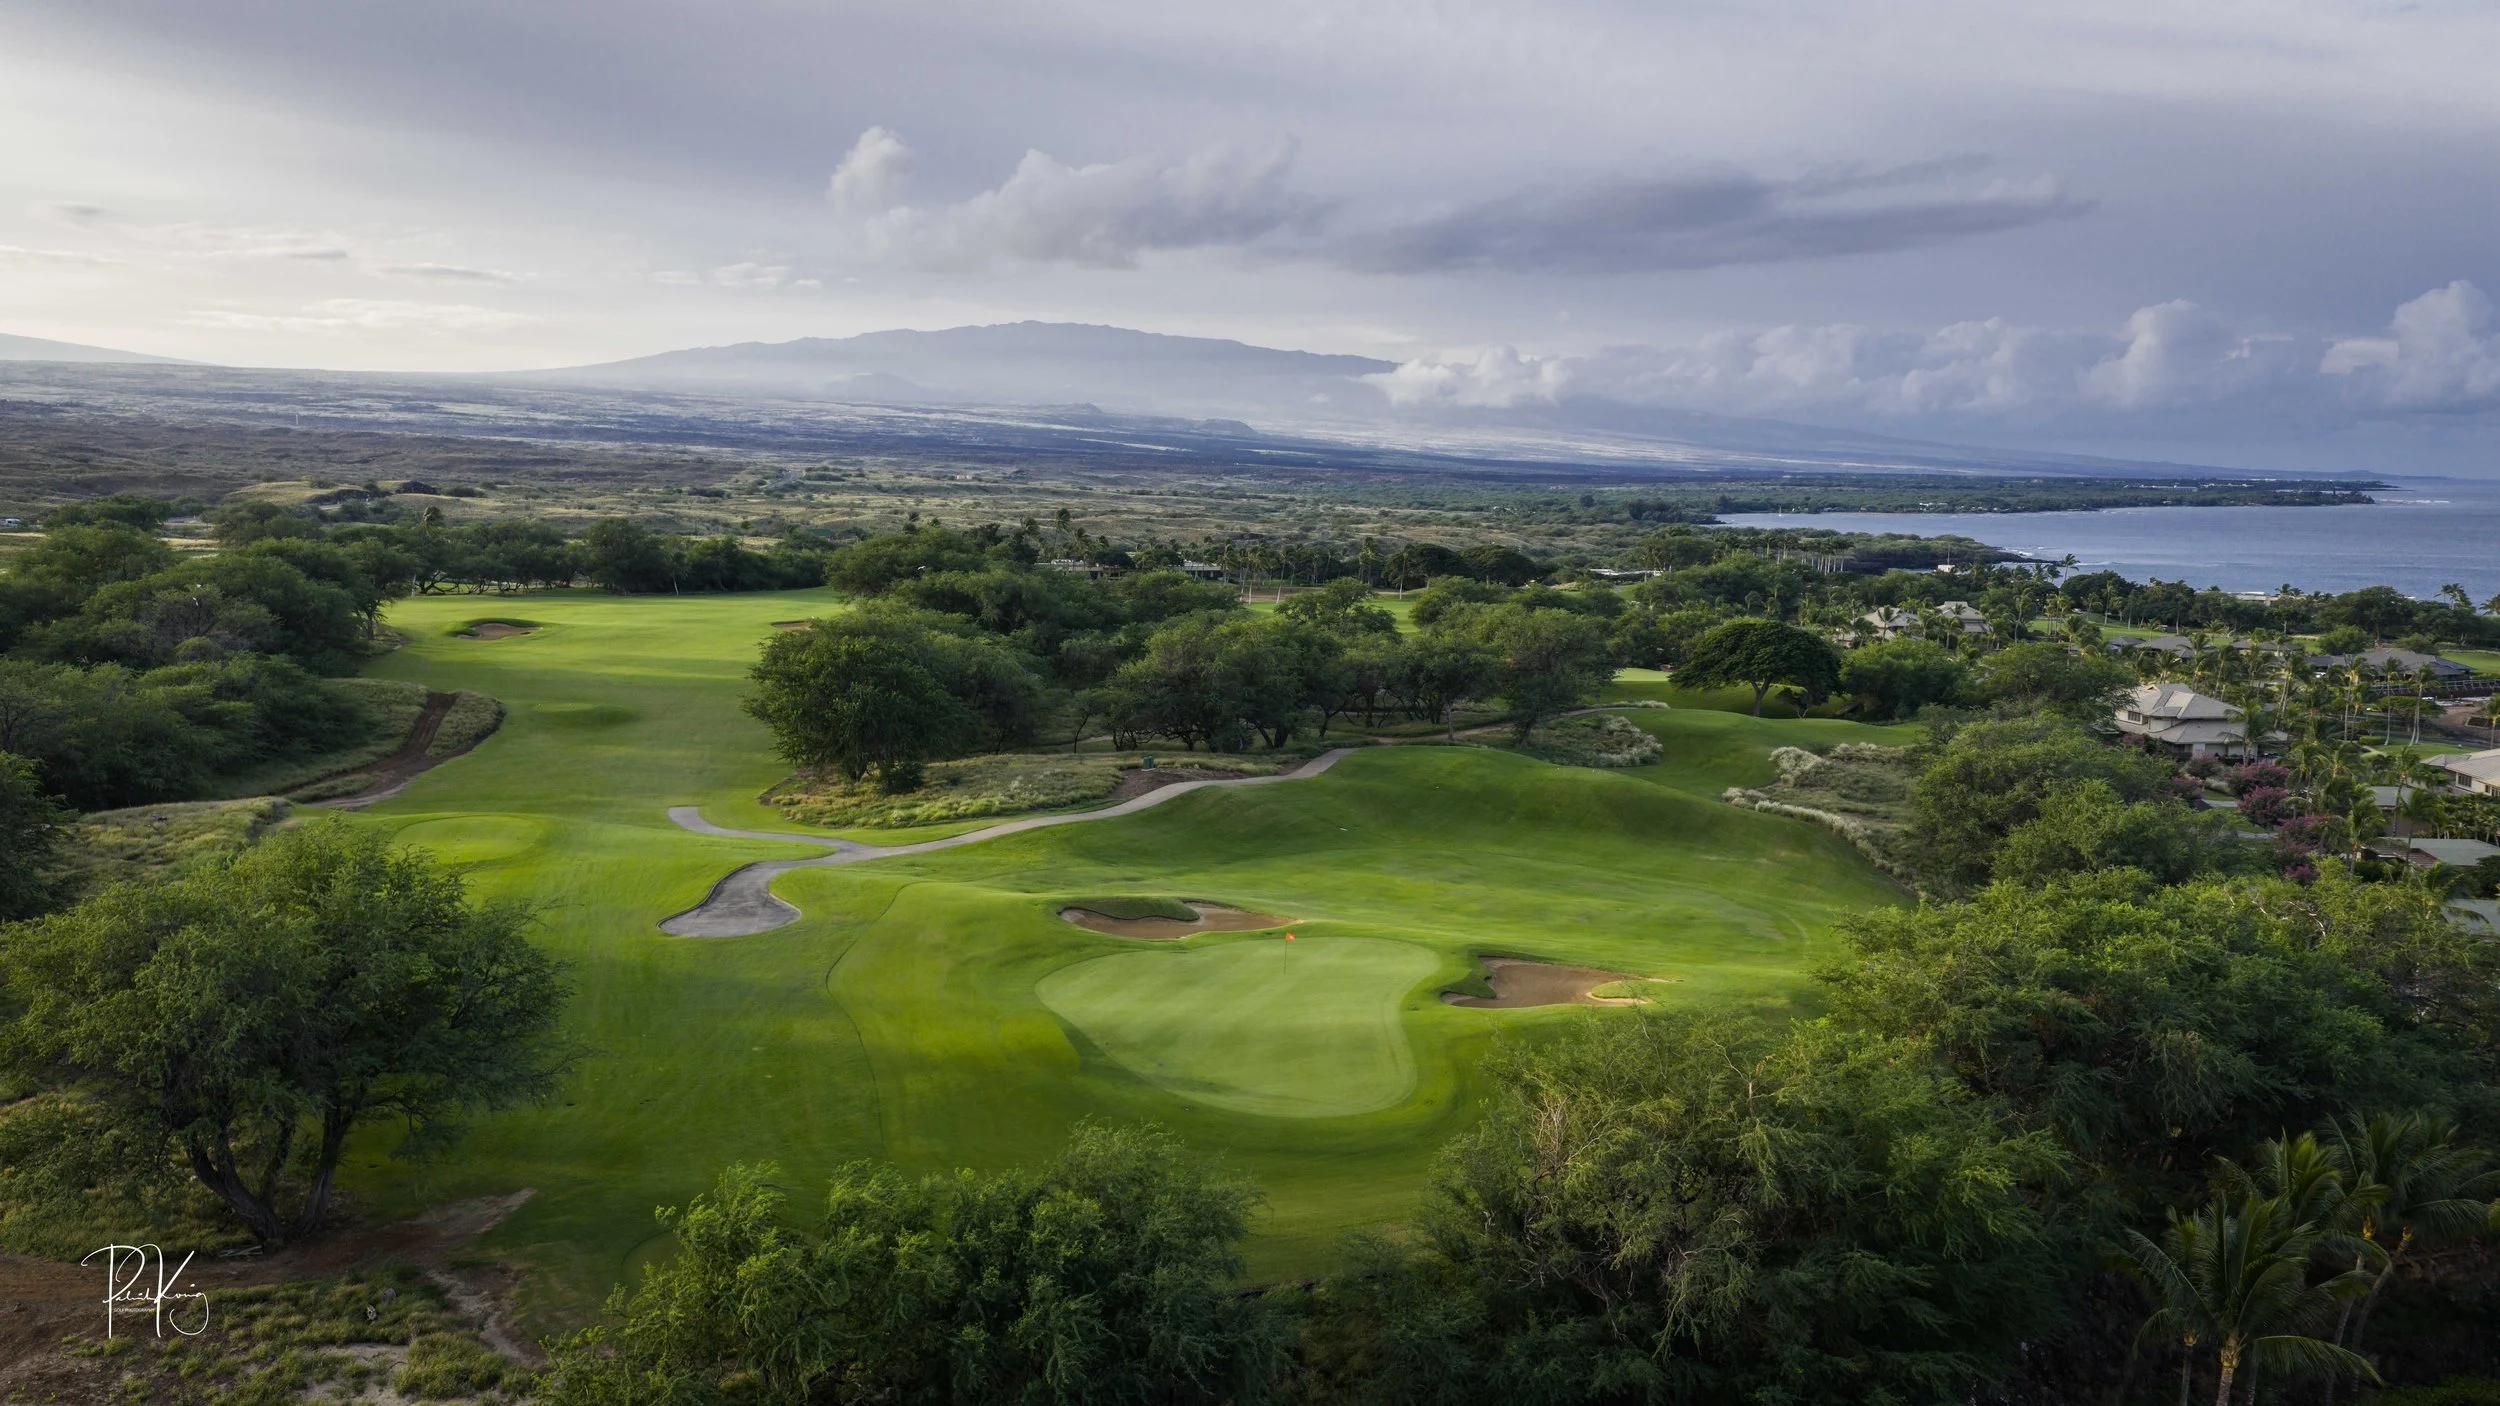
Hole #17 - Par 5 - 620 yards
The penultimate hole at Mauna Kea is a total beast. Unless you are planning to hit a 340 yard drive and then follow that up with a 280 yard 3 wood, you are going to need 3 shots to reach this monster. A good layup plays to the top of the hill before the valley in front of the green. A delicate touch is required for your approach shot on the 17th. A menagerie of bunkers protect a green that is set into the hillside.
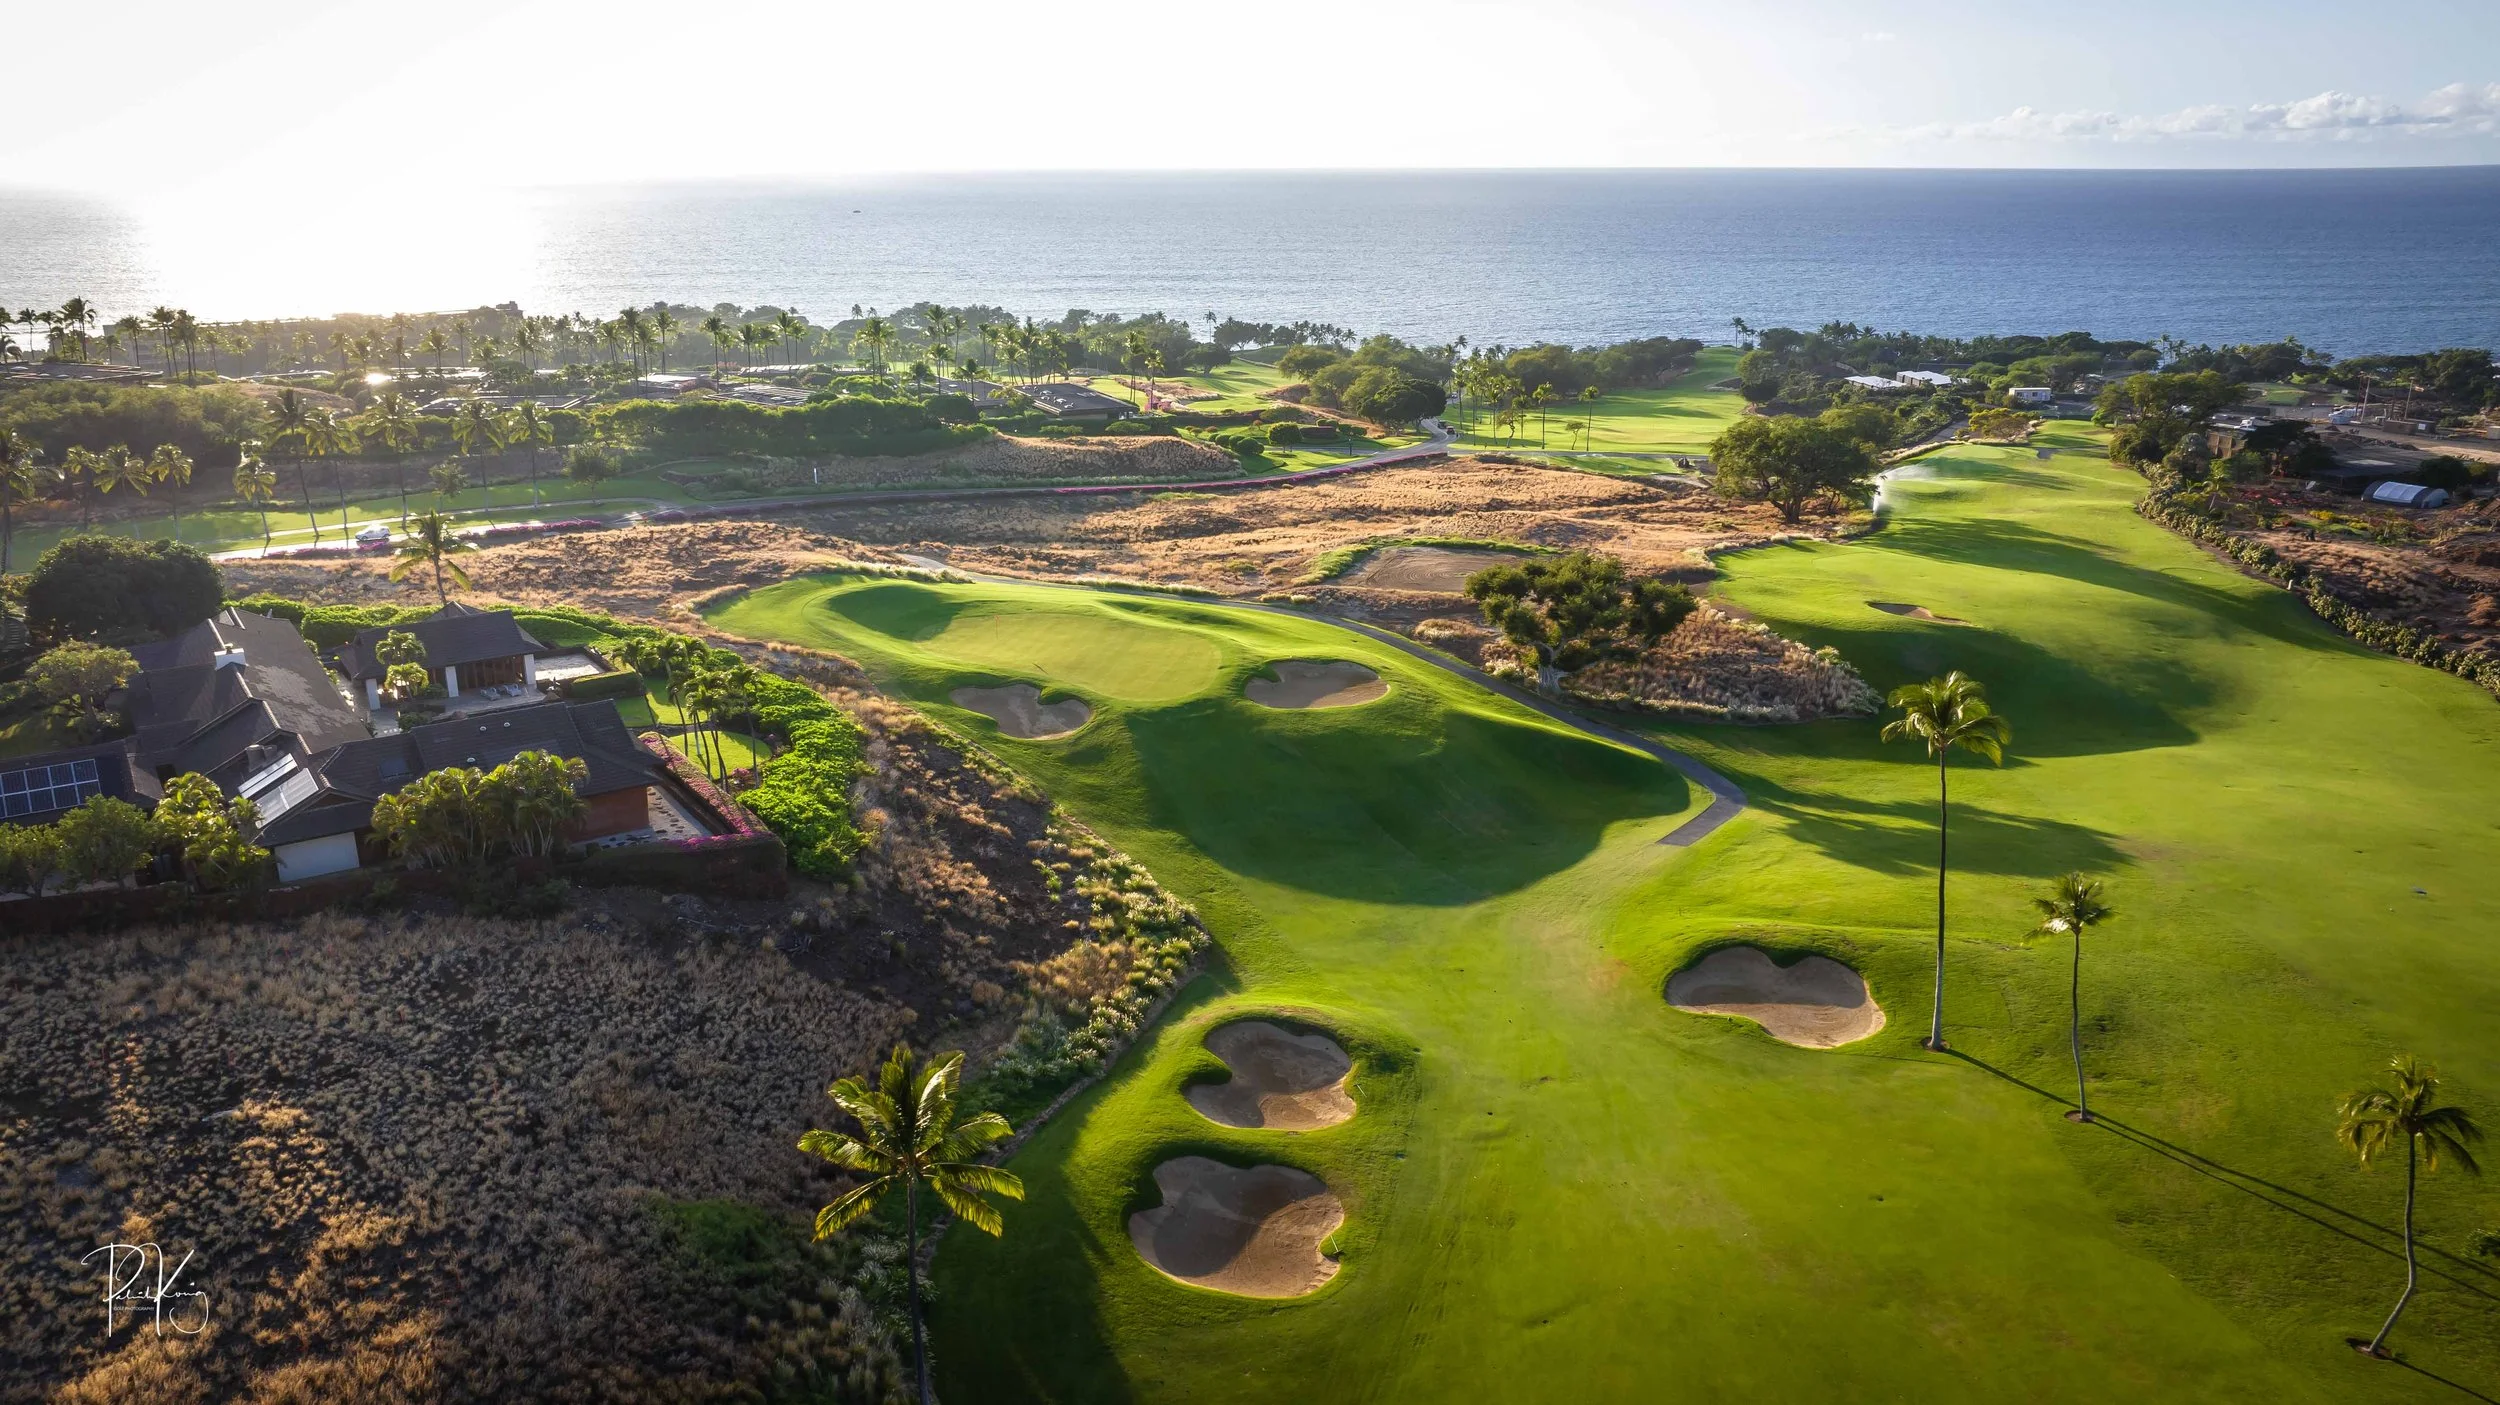
Hole #18 - Par 4 - 450 yards
Similar to the 9th hole which runs parallel the 18th, the finishing hole at Mauna kea plays a good deal shorter than the yardage on the scorecard indicates. This slight dogleg right does require a well placed drive with round wrecking trouble to the golfer’s left and right. The ideal line is to skirt your drive just to the left of the fairway bunker shown in the photograph below. Due to a large swale in front of the green, your approach shot is deceptively downhill and will take some careful consideration. The shot is filled with character and perhaps one of the most fun on the golf course. Several tiers on the green allow for some drama to unfold as your round in paradise comes to an end.